If you work with three-phase electric motors, you know how frustrating it can be when one suddenly stops working or doesn’t perform as it should. You might feel stuck, unsure where to start or what to check first.
That’s exactly why understanding 3 phase electric motor troubleshooting is crucial—it puts you back in control. Imagine quickly identifying the root cause, whether it’s a wiring issue, a faulty bearing, or a voltage problem, and fixing it without costly delays.
You’ll discover simple, step-by-step ways to diagnose and solve common motor problems. Keep reading, and you’ll gain the confidence to handle motor troubles like a pro, saving time, money, and stress.

Credit: waterwelljournal.com
Initial Visual Checks
Initial visual checks are the first step in troubleshooting a 3 phase electric motor. These checks help identify obvious problems quickly. They save time and guide further testing. A careful visual inspection reveals issues like loose wires, dirt buildup, or physical damage.
Start with safety to avoid accidents. Then, check all electrical connections. Next, test the shaft for smooth movement. Smell for burnt odors or see if there is discoloration. Finally, clear any dust or debris from cooling vents. These simple steps prepare the motor for detailed diagnosis.
Safety Precautions
Always turn off and lock out power before inspecting the motor. Use proper personal protective equipment like gloves and goggles. Avoid touching live parts to prevent electric shocks. Work in a dry area to reduce the risk of slips or falls. Follow all safety rules strictly.
Inspect Connections
Examine all terminal connections for tightness and corrosion. Loose or rusty connections cause poor electrical contact. Check for broken or frayed wires. Tighten any loose screws or terminals carefully. Good connections ensure proper motor function.
Check Shaft Movement
Manually rotate the motor shaft to feel for smoothness. The shaft should turn freely without noise or resistance. Stiffness or grinding sounds indicate bearing or mechanical problems. Any binding could cause motor failure or overheating.
Look For Burnt Smells Or Discoloration
Sniff near the motor for burnt or electrical odors. A burnt smell can signal overheating or electrical faults. Look for darkened spots or melted insulation on wires and windings. Discoloration often points to past overheating or short circuits.
Clear Cooling Vents
Inspect cooling vents and fans for dust, dirt, or debris. Blocked vents reduce airflow and cause overheating. Use compressed air or a brush to clean vents carefully. Proper cooling keeps the motor running efficiently and extends life.
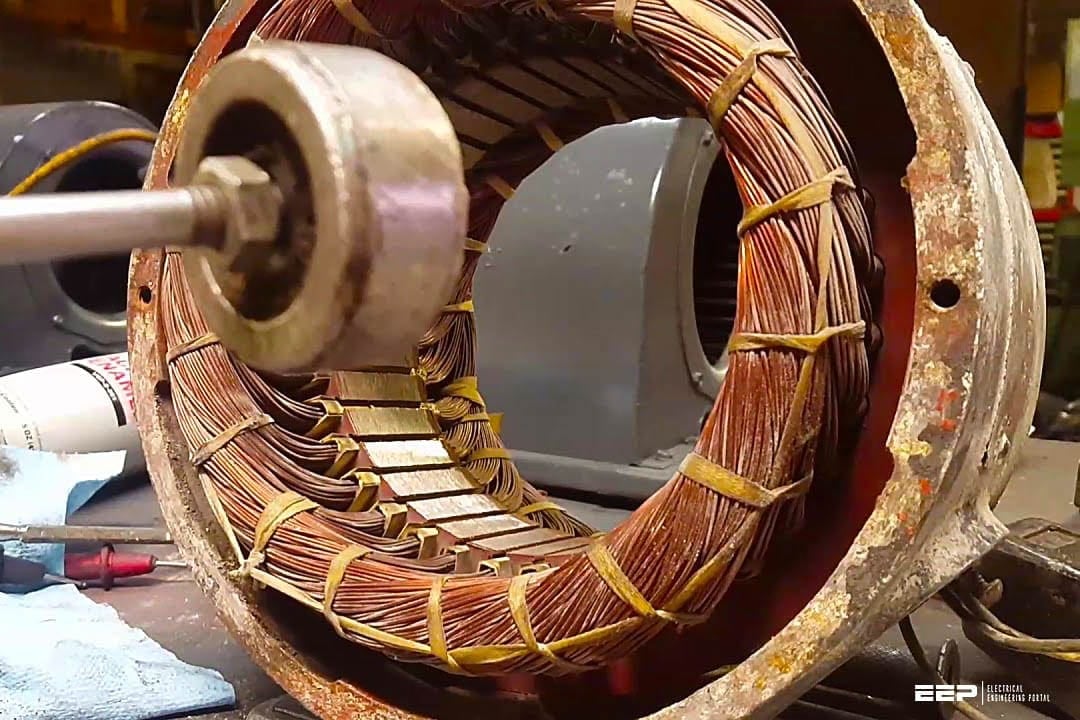
Credit: electrical-engineering-portal.com
Electrical Testing Steps
Electrical testing steps are crucial for troubleshooting a 3 phase electric motor. These steps help find electrical faults quickly. Testing ensures the motor gets the right voltage and the windings are in good condition.
Use a multimeter or insulation tester for accurate results. Follow the steps carefully to avoid damage or injury. Testing starts from the power source and moves to the motor windings.
Test Incoming Voltage
Measure the voltage at the motor terminals. Use a multimeter set to AC voltage. Compare the readings to the motor’s nameplate voltage. Voltage must be balanced across all three phases. Low or high voltage can cause motor failure.
Check Fuses And Breakers
Inspect all fuses and circuit breakers in the motor’s power supply. Replace any blown fuses. Reset tripped breakers carefully. Faulty fuses or breakers stop power flow and prevent motor operation. Ensure all connections are tight and clean.
Measure Winding Resistance
Use an ohmmeter to check winding resistance. Test between each pair of motor leads. Resistance should be nearly equal in all three windings. A very high or low reading signals winding damage. Record the values for future reference.
Insulation Resistance Testing
Use a megohmmeter for insulation resistance testing. Test each winding against the motor frame (ground). High resistance means good insulation. Low resistance shows insulation breakdown or moisture. This test prevents short circuits and electrical shocks.
Common Motor Issues
Three-phase electric motors are vital in many industries. They often face common issues that disrupt operations. Understanding these problems helps in quick repairs and reduces downtime. Here are some frequent motor issues and how to identify them.
Motor Hums But Does Not Start
This issue happens when the motor receives power but fails to turn. The humming sound means the motor is energized. Possible causes include a faulty start capacitor or a stuck rotor. Check the capacitor and motor bearings. Sometimes the motor winding may be damaged or the shaft is jammed. Use a multimeter to test electrical continuity.
Blown Fuses And Tripped Breakers
Fuses blowing or breakers tripping indicate electrical faults. Causes can be short circuits, overloads, or ground faults. Inspect wiring and connections for damage or loose contacts. Overloaded motors draw too much current and cause protection devices to trip. Confirm the motor is not running beyond its rated capacity.
Overheating Problems
Overheating can damage the motor permanently. It occurs due to poor ventilation, overloading, or blocked cooling fans. Dirt and debris on the motor surface also trap heat. Measure the motor temperature during operation. Ensure the cooling system works properly. Avoid running the motor above its designed load.
Voltage Imbalance Effects
Voltage imbalance means the three power phases are not equal. This causes uneven current flow and motor stress. Results include excessive heating and reduced motor life. Use a voltmeter to check voltage levels on each phase. Correct any supply issues or wiring faults. Balanced voltage keeps the motor running smoothly.
Mechanical Troubleshooting
Mechanical troubleshooting is key to fixing three-phase electric motor problems. It helps find issues that affect motor movement and performance. Checking mechanical parts reduces downtime and prevents bigger damage.
This process focuses on parts that move or support movement. Bearings, shafts, and loads are common areas to inspect. Simple tests reveal faults causing noise, vibration, or motor failure.
Bearing Inspection
Bearing issues often cause motor noise and overheating. Check bearings for wear, cracks, or corrosion. Rotate the shaft by hand to feel rough spots or resistance. Listen for grinding or clicking sounds. Replace damaged bearings immediately to avoid motor damage.
Load Binding Checks
Load binding happens when the motor’s connected load resists movement. Inspect the driven equipment for stuck parts or misalignment. Turn the load manually to check for smooth rotation. Remove or fix any blockages or tight spots. Binding increases motor strain and energy use.
Shaft Rotation Tests
Test the motor shaft rotation to confirm free movement. Rotate the shaft slowly and evenly by hand. It should move without jerks or stiffness. Check for shaft bending or imbalance. A faulty shaft affects motor efficiency and can cause vibrations.
Quick Fixes
Quick fixes help restore three-phase electric motor performance fast. These solutions address common issues without complex tools. Simple steps often save time and money. Focus on easy repairs first to avoid longer downtime.
Correcting Phase Sequence
Check motor rotation direction. Wrong phase sequence causes reverse spinning. Use a phase sequence tester to verify. Swap any two power leads to fix the sequence. This simple step prevents motor damage and operational errors.
Tightening Loose Connections
Loose wires cause voltage drops and overheating. Inspect all terminal connections carefully. Use a screwdriver to tighten screws and clamps. Secure connections improve current flow and motor efficiency. Regular checks prevent unexpected shutdowns.
Cleaning And Ventilation Tips
Dirt and dust block cooling vents. Clean vents with compressed air or soft brush. Clear airflow prevents motor overheating. Check fan blades for damage and debris. Good ventilation extends motor life and reliability.
Replacing Faulty Components
Identify worn parts like brushes, capacitors, or bearings. Replace damaged components promptly. Use parts matching motor specifications. Proper replacements restore motor function and avoid further issues. Keep spares for quick swaps during maintenance.
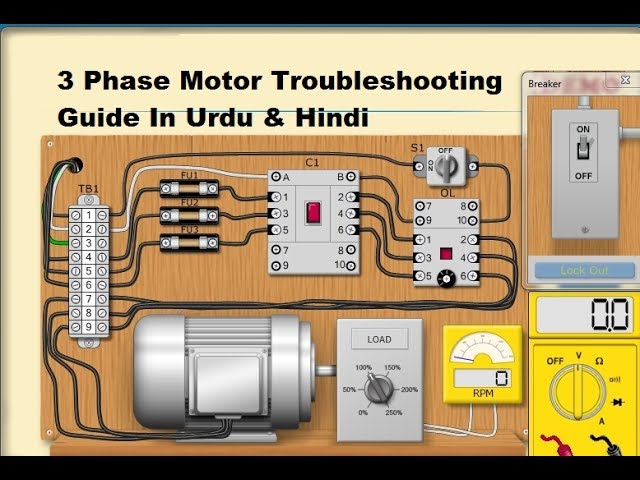
Credit: www.youtube.com
Preventive Maintenance Tips
Preventive maintenance is essential to keep a 3 phase electric motor running smoothly. Regular care reduces breakdowns and extends motor life. Simple steps can detect issues early and avoid costly repairs.
Regular Visual Inspections
Check the motor’s exterior often for dirt, rust, or damage. Look for burnt smells or discoloration. Ensure the shaft spins freely without noise or resistance. Clean vents and cooling fans to prevent overheating. Tighten loose bolts and connections to avoid vibration.
Routine Electrical Testing
Use a multimeter to measure voltage and current regularly. Compare readings with motor nameplate specs. Test insulation resistance to detect winding faults. Check control circuits like fuses and contactors for proper function. Identify imbalances or shorts early to prevent failure.
Lubrication Of Bearings
Apply the correct lubricant on motor bearings as per manufacturer guidelines. Avoid over or under lubrication. Proper lubrication reduces friction and wear. Schedule lubrication intervals based on motor load and operating hours. Well-lubricated bearings improve efficiency and prevent noise.
Monitoring Load Conditions
Keep track of the motor’s load during operation. Avoid running the motor above rated capacity. Monitor for unusual vibrations or temperature rises. Use load sensors or meters to detect overloads or imbalances. Balanced load conditions ensure stable performance and longer motor life.
Tools For Troubleshooting
Troubleshooting a 3 phase electric motor requires specific tools to identify and fix problems. The right tools help detect electrical faults, mechanical issues, and insulation failures. Using proper equipment makes diagnosis faster and more accurate. It also improves safety during inspection and repair.
Using A Multimeter
A multimeter measures voltage, current, and resistance in a motor circuit. It checks if the motor receives the correct voltage from the power supply. You can test winding resistance to find open or shorted coils. It also helps detect bad connections or blown fuses. A multimeter is a basic but essential tool for motor troubleshooting.
Employing A Megohmmeter
A megohmmeter measures insulation resistance between motor windings and ground. This test identifies insulation breakdown or moisture damage. Low insulation resistance can cause motor failure or electric shock. Regular testing with a megohmmeter extends motor life and prevents unexpected shutdowns. It is crucial for motors exposed to harsh environments.
Thermal Imaging Cameras
Thermal cameras detect hot spots on a motor without contact. Overheating parts like bearings, windings, or connections show up as bright areas. This helps locate problems before they cause damage. Thermal imaging is quick and safe, saving time and reducing downtime. It is useful for routine maintenance and troubleshooting.
Vibration Analysis Devices
Vibration analyzers measure motor vibrations to find mechanical faults. Excessive vibration may indicate misalignment, unbalanced rotor, or worn bearings. Early detection through vibration analysis prevents serious damage and costly repairs. These devices provide detailed data to guide maintenance decisions. They are vital for motors running under heavy loads.
When To Seek Professional Help
Knowing the right time to seek professional help is key in three-phase electric motor troubleshooting. Some issues need advanced skills and tools. Attempting fixes beyond your expertise can cause more damage or risk injury. Recognizing these moments saves time and money.
Complex Electrical Faults
Electrical problems like short circuits or ground faults need expert diagnosis. Professionals use specialized tools to test winding resistance and insulation. They can pinpoint hidden faults that simple checks miss. Avoid guessing with complicated electrical issues.
Severe Mechanical Damage
Signs of serious mechanical damage include noisy bearings or a seized shaft. These problems require skilled repair or part replacement. Experts can dismantle and inspect the motor safely. Trying to fix severe damage without training often worsens the problem.
Motor Rewinding Needs
When windings burn out or short, rewinding is necessary. This process demands precision and the right equipment. Professionals ensure correct coil placement and insulation. Poor rewinding can reduce motor life and performance drastically.
Safety Concerns
Electric motors operate at high voltage and current. Risk of electrical shock or injury is high without proper precautions. Professionals follow strict safety standards and use protective gear. Never ignore safety rules or attempt complex repairs alone.
Frequently Asked Questions
How To Diagnose A Bad 3-phase Motor?
Diagnose a bad 3-phase motor by visually inspecting for burns, odors, or noise. Check shaft rotation for smoothness. Test voltage with a multimeter against nameplate specs. Measure winding resistance and insulation using a megohmmeter. Inspect fuses, breakers, and connections for faults or looseness.
What Are The Common Problems Found In A 3-phase Motor?
Common problems in 3-phase motors include voltage imbalance, shorted windings, poor connections, overloads, bearing failures, and insulation breakdown. These issues cause overheating, vibration, and motor failure. Regular inspection and electrical testing help detect and prevent such faults effectively.
What Are The Three Most Common Causes Of Electrical Failure In Three-phase Motors?
The three most common causes of electrical failure in three-phase motors are voltage imbalance, shorted windings, and poor electrical connections. Voltage imbalance causes uneven current flow. Shorted windings create internal faults. Poor connections lead to increased resistance and overheating.
How To Tell If A 3 Phase Motor Is Shorted?
Test motor windings with a multimeter for continuity and resistance. Low or zero resistance indicates a short. Check insulation resistance using a megohmmeter; low values suggest winding shorts. Inspect for burnt smells or overheating. Verify proper voltage supply and look for tripped breakers or blown fuses.
What Are Common Signs Of 3 Phase Motor Failure?
Common signs include unusual noise, overheating, and motor not starting. Also check for burnt smells or vibration. These indicate possible electrical or mechanical issues.
Conclusion
Troubleshooting a 3 phase electric motor takes patience and careful steps. Start with simple visual and mechanical checks. Use a multimeter to test electrical parts and connections. Identify issues like voltage imbalance or winding damage early. Regular maintenance helps avoid unexpected motor failures.
Understanding basic troubleshooting saves time and repair costs. Keep safety as a top priority during all inspections. With these tips, you can keep your motor running smoothly and efficiently.
")


