Is your three-phase motor acting up or refusing to start? You’re not alone—these motors power countless machines, but when something goes wrong, it can halt your entire operation.
Knowing how to troubleshoot a three-phase motor quickly and effectively can save you hours of downtime and costly repairs. In this guide, you’ll discover simple, step-by-step checks you can perform yourself—from spotting common faults to testing electrical connections—using just basic tools.
Stick with me, and you’ll gain the confidence to identify problems early and keep your motor running smoothly. Let’s dive into the essential tips that will turn you into a three-phase motor troubleshooting pro.
Initial Motor Inspection
Before troubleshooting a 3 phase motor, start with an initial inspection. This step helps identify obvious issues fast. It saves time and prevents further damage. Focus on visible problems, mechanical condition, and motor specifications. These checks lay the foundation for accurate diagnosis and repair.
Visual Damage Check
Begin by examining the motor for visible damage. Look for cracks, dents, or corrosion on the housing. Check the wiring and terminals for loose or burnt connections. Inspect the junction box carefully. Signs of overheating or burning need immediate attention. Clean dirt or debris from the motor surface. This prevents overheating and ensures proper ventilation.
Manual Shaft Rotation
Turn the motor shaft by hand to check its movement. It should rotate smoothly without resistance. If the shaft feels stiff or stuck, bearings or internal parts may be damaged. Listen for grinding or unusual noises during rotation. These indicate mechanical failure. A stuck shaft can cause motor overheating and failure. Address mechanical issues before electrical testing.
Nameplate Data Verification
Locate the motor’s nameplate and read its data. Check the rated voltage, current, power, and frequency. Confirm these values match your power supply and control settings. Incorrect voltage or frequency can cause motor problems. Verify the motor’s phase and connection type as well. Using the correct settings prevents damage and improves performance.
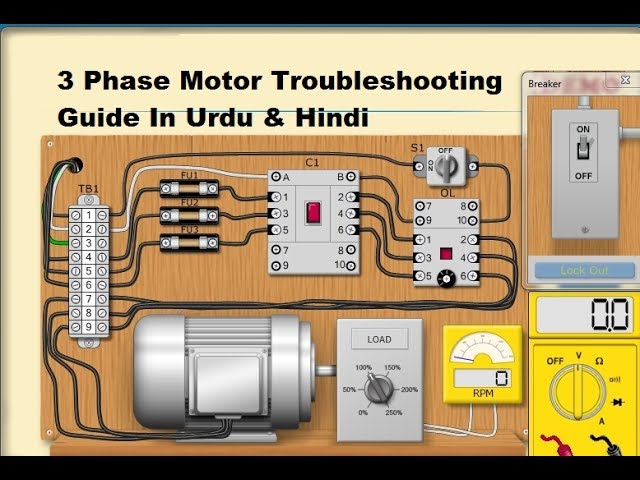
Credit: www.youtube.com
Power Supply Testing
Power supply testing is the first step in troubleshooting a three-phase motor. It helps verify if the motor receives the correct voltage and balanced phases. Incorrect voltage or unbalanced phases can cause motor failure or poor performance.
Testing the power supply requires simple tools like a multimeter or voltmeter. You must measure the voltage levels and compare them with the motor’s nameplate specifications. Consistent and balanced voltage ensures the motor operates smoothly and safely.
Voltage Measurement
Use a voltmeter to measure voltage between each pair of motor terminals. Measure line-to-line voltages: L1 to L2, L2 to L3, and L3 to L1. Each reading should match the voltage rating on the motor’s nameplate.
Record all voltage readings carefully. Large differences in voltage values can indicate wiring issues or supply problems. Voltage that is too high or too low can damage the motor windings and reduce motor life.
Phase Voltage Balance
Check if the voltage across all three phases is balanced. Voltage imbalance means one or more phases have different voltages. Calculate the percentage difference between the highest and lowest voltages.
Voltage imbalance should not exceed 3%. Higher imbalance can cause overheating and vibration. Correct phase voltage balance ensures even motor load and prevents damage.
Electrical Component Testing
Testing electrical components is vital for troubleshooting a 3 phase motor. It helps find faults that cause motor failure or poor performance. Proper testing ensures safety and saves time and money on repairs.
Use a multimeter or specialized tools to check motor parts. Focus on winding continuity, ground faults, and control devices. These tests reveal issues like shorts, open circuits, or damaged contacts.
Winding Continuity
Check each winding coil for continuity using a multimeter. Set the meter to the resistance mode. Place probes on winding terminals and watch for a low resistance reading. A high or infinite reading means a broken winding.
Measure resistance between phases too. All windings should have similar values. Large differences suggest a fault in one coil. Testing winding continuity detects breaks or disconnections early.
Ground Fault Detection
Ground faults occur when winding insulation fails and touches the motor frame. Use an insulation resistance tester or megohmmeter. Connect one lead to the winding and the other to the frame. A low resistance reading shows a ground fault.
Ground faults cause current leakage and can trip protection devices. Detecting them prevents motor damage and electrical hazards. Test insulation regularly for safe motor operation.
Contactor And Overload Inspection
Inspect the contactor for pitted or burnt contacts. Dirty contacts cause poor electrical flow and motor issues. Clean or replace damaged contacts as needed. Check coil resistance to ensure it energizes properly.
Overload relays protect motors from excessive current. Test relay settings and reset functions. Faulty overloads may not trip, risking motor burnout. Verify all control components work correctly for reliable motor control.
Common Motor Issues
Three-phase motors are reliable but can face several common problems. Identifying these issues early saves time and money. Troubleshooting starts by understanding typical faults that cause motor failure. This section highlights frequent motor problems and their signs.
Motor Won’t Start
The motor may fail to start due to power supply issues or wiring faults. Check if the motor receives the correct voltage on all three phases. Loose connections or blown fuses often stop the motor from running. Sometimes, the motor’s overload protector trips to prevent damage.
Inspect the start capacitor and control circuit for defects. Mechanical problems like a seized shaft can also block startup. Testing the motor windings with a multimeter helps find internal faults.
Circuit Breaker Trips
A circuit breaker trips to protect the motor and wiring from overload. This usually means the motor draws too much current. Common causes include short circuits, ground faults, or locked rotor conditions. Overloaded motors heat up and cause breakers to trip repeatedly.
Check for damaged windings or insulation failure. Inspect the motor for bearing wear or shaft misalignment, which increase current draw. Make sure the breaker rating matches the motor’s specifications.
Overheating And Humming Sounds
Overheating can damage the motor winding and insulation permanently. It often results from overloading, poor ventilation, or voltage imbalance. Humming sounds may indicate electrical or mechanical faults. Loose or damaged bearings can cause unusual noises.
Check the motor’s ambient temperature and ensure proper airflow. Measure the voltage across all phases for balance. Inspect the rotor for damage or misalignment. Early detection prevents costly repairs and downtime.
Fixes For Voltage Problems
Voltage problems often cause three-phase motor failures. These issues reduce motor efficiency and may cause damage. Correcting voltage issues quickly helps avoid costly repairs and downtime. Below are simple fixes for common voltage problems in three-phase motors.
Correcting Voltage Imbalance
Voltage imbalance happens when one phase voltage differs from others. This can overheat the motor and shorten its life. Start by measuring each phase voltage with a voltmeter. The difference should not exceed 1-2% of the rated voltage.
Check all connections for looseness or corrosion. Tighten and clean terminals as needed. Inspect the supply lines for damaged wires or poor contacts. Replace any faulty components.
Use an automatic voltage regulator if the supply voltage varies often. This keeps voltage stable and balanced. Regularly monitor voltage to catch imbalance early.
Addressing Low Or High Voltage
Low voltage causes the motor to draw more current, risking overheating. High voltage stresses insulation and can cause winding failure. Measure voltage at the motor terminals during operation.
If voltage is too low, check the supply transformer and wiring for issues. Look for loose connections or overloaded circuits. Contact your utility provider if the problem is outside your facility.
For high voltage, use a step-down transformer or voltage stabilizer. Ensure the motor nameplate voltage rating matches the supply voltage. Adjust overload protection settings to suit voltage changes.
Regular maintenance and voltage checks prevent motor damage from voltage extremes. Act quickly when voltage problems appear to keep motors running smoothly.
Resolving Mechanical Issues
Mechanical issues often cause three-phase motors to perform poorly or stop working. Resolving these problems restores smooth operation and extends motor life. This section covers common mechanical troubles and their fixes.
Bearing And Shaft Problems
Bearings support the motor shaft and allow it to spin freely. Worn or damaged bearings cause noise, vibration, and overheating. Check bearings for wear by spinning the shaft by hand. If it feels rough or stuck, replace the bearings.
Shaft misalignment can also cause motor failure. Inspect the shaft for bending or damage. Use a dial indicator to measure runout. Correct alignment by adjusting the motor or coupling position. Lubricate bearings regularly to prevent wear and overheating.
Removing Load Obstructions
Obstructions in the motor’s load can cause excessive strain and overheating. Check the driven equipment for jams or debris. Clear any blockages to restore smooth motion. Inspect belts, gears, and pulleys for wear or damage that may cause binding.
Ensure the load is properly balanced and not too heavy for the motor’s rating. Overloading can cause the motor to stall or overheat. Adjust or repair the load to match the motor capacity. Removing load obstructions improves motor efficiency and reliability.
Handling Electrical Faults
Handling electrical faults in a 3 phase motor requires careful attention to detail. Faults can cause motor failure and downtime. Quick identification and repair save time and money. Focus on common electrical issues to keep the motor running smoothly. This section covers key repairs for short circuits, ground faults, and damaged windings.
Short Circuit Repairs
Short circuits happen when wires or windings touch each other improperly. This causes excessive current flow and overheating. Start by disconnecting power and inspecting the motor windings. Use a multimeter to find the shorted areas. Remove damaged insulation and clean contacts. Replace any burnt wires or components. Test the motor after repairs to ensure normal operation.
Ground Fault Corrections
Ground faults occur when motor windings contact the frame or ground. This leads to leakage current and potential shock hazards. Check insulation resistance with a megohmmeter. Identify the fault location by isolating each winding. Repair or replace the faulty insulation. Verify that no current leaks to the ground before restarting the motor. Proper grounding and insulation prevent future faults.
Replacing Damaged Windings
Damaged windings reduce motor efficiency and cause failures. Signs include burnt smell, uneven heating, and unusual noise. Remove the motor frame carefully to access the windings. Measure resistance to confirm damage. Rewind the motor with new wire matching original specifications. Insulate the windings properly to avoid shorts. Test the motor fully before putting it back in service.

Credit: waterwelljournal.com
Preventive Maintenance Tips
Preventive maintenance is key to keeping your 3 phase motor running smoothly. Regular care helps spot problems early. This saves time and money on repairs. Simple steps can extend motor life and improve performance.
Regular Visual Checks
Look at the motor and surrounding parts often. Check for signs of wear, cracks, or dirt. Notice any loose wires or connections. Watch for unusual noise or vibrations. Early spotting of problems prevents bigger damage.
Scheduled Electrical Testing
Test the motor’s electrical parts at set times. Use a multimeter to check voltage and current balance. Measure insulation resistance to find hidden faults. Keep records of test results to track motor health. This helps detect issues before failure.
Lubrication And Cleaning
Keep bearings and moving parts well-lubricated. Use the right type and amount of lubricant. Clean the motor exterior to stop dust buildup. Dust blocks airflow and causes overheating. Proper cleaning keeps the motor cool and working well.
Credit: www.yumpu.com
Frequently Asked Questions
What Are The Common Problems Found In A 3-phase Motor?
Common problems in a 3-phase motor include voltage imbalance, winding short circuits, poor connections, bearing failures, and overheating.
How To Diagnose A Bad 3-phase Motor?
Diagnose a bad 3-phase motor by visually inspecting for damage and testing voltage balance with a multimeter. Check winding continuity and resistance for shorts or opens. Manually rotate the shaft to detect mechanical binding. Confirm proper connections and overload relay status to identify faults quickly.
What Are Common 3-phase Problems?
Common 3-phase problems include voltage imbalance, shorted windings, poor connections, ground faults, and motor overheating. These issues cause motor failure, tripping breakers, and reduced efficiency. Regular inspection and testing help identify and fix these faults quickly.
How To Test 3 Phase With A Multimeter?
Set the multimeter to AC voltage. Measure voltage between each pair of the three phases. Confirm readings match the motor’s rated voltage. Test continuity between each phase and ground to check for shorts. Ensure voltage balance and no open circuits for a healthy three-phase system.
What Are Common Causes Of 3 Phase Motor Failure?
Common causes include voltage imbalance, shorted turns, and poor connections. Internal winding damage also often leads to failure. Identifying these helps in quick troubleshooting.
Conclusion
Troubleshooting a 3 phase motor requires careful checks and patience. Start with simple visual and electrical tests. Always compare readings with the motor’s nameplate data. Look for signs of damage or loose connections first. Testing windings and power supply helps spot common issues fast.
Address problems like overheating, tripping breakers, or failure to start promptly. Regular maintenance reduces future faults and extends motor life. Understanding basic troubleshooting saves time and avoids costly repairs. Keep safety in mind during all inspections and tests. With practice, identifying faults becomes easier and more reliable.
")