Is your garage door opener acting up, leaving you frustrated and stuck? Don’t worry—you’re not alone, and help is just a scroll away.
When your Access Master garage door opener isn’t working as it should, it can disrupt your day and even raise security concerns. But here’s the good news: you don’t need to be a tech expert to fix it. With the right troubleshooting tips, you can quickly identify the issue and get your garage door back on track.
Stick around, because by the end of this guide, you’ll feel confident tackling common problems and saving yourself time, money, and stress. Let’s get your garage door opener running smoothly again!

Common Issues With Garage Door Openers
Garage door openers are essential for modern homes, offering convenience and security. But, like any device, they can run into problems over time. Regular troubleshooting helps address these issues and extends the life of your opener. Below, explore common problems and their possible causes.
Door Not Responding To Remote
This is a frequent issue with garage door openers. The remote may have a dead battery or be out of range. Check the battery and replace it if needed. Ensure nothing is blocking the signal between the remote and the opener. Sometimes, the remote loses its programming and needs to be re-synced with the opener.
Unusual Noises During Operation
Loud noises often indicate worn-out parts or lack of lubrication. Grinding sounds could mean the motor or chain needs attention. Squeaking may point to dry hinges, rollers, or tracks. Apply lubricant to metal parts and inspect for any visible damage. Replace worn components to prevent further issues.
Door Reverses Before Closing
This happens when the safety sensors detect an obstruction. Clean the sensors and ensure they’re properly aligned. Dust or dirt on the lenses may interfere with their function. Adjust the sensors if they’re not facing each other correctly. Test the door to confirm it’s working smoothly.
Slow Or Uneven Movement
A slow-moving door may have issues with the springs or tracks. Uneven movement could mean the tracks are misaligned or debris is causing friction. Inspect the tracks for bends or obstructions. Tighten loose hardware and clean the tracks thoroughly. If the springs seem worn, consult a professional for replacement.
Garage door openers sometimes malfunction due to power or connection issues. Troubleshooting these problems ensures your door operates efficiently. Start by checking the power supply and connections. Resolving these basic issues can often fix your garage door opener.
Inspecting Power Supply
Ensure your garage door opener is plugged into a working outlet. Test the outlet using another device to confirm it’s active. If the outlet works, inspect the opener’s power cord for damage. Replace the cord if you see fraying or cuts. A secure power source is essential for proper operation.
Testing Remote Batteries
Weak batteries in your remote control can cause communication issues. Remove the battery cover and check the battery type. Replace old batteries with new ones of the same type. Test the remote after replacing batteries to verify functionality. Proper battery power ensures smooth remote use.
Examining Wiring And Connections
Inspect the wiring connected to the garage door opener. Look for loose or disconnected wires. Tighten any loose connections to restore proper functioning. Check for signs of wear, corrosion, or damage on the wires. Replace damaged wiring to prevent electrical issues. Secure connections help avoid operational interruptions.
Sensor Problems And Adjustments
Sensors are vital for the safe operation of your garage door opener. They detect obstacles and prevent the door from closing on objects or people. When sensors are misaligned, dirty, or obstructed, your garage door may not function correctly. Resolving sensor issues is often straightforward and requires only a few steps.
Cleaning And Aligning Sensors
Dust and dirt can block the sensors, causing faulty readings. Use a soft, clean cloth to gently wipe the sensor lenses. Avoid using harsh chemicals, as they can damage the sensors. After cleaning, check if the sensors are facing each other. Misaligned sensors can interrupt the connection, causing the door to malfunction. Adjust the sensors so the indicator lights on both sensors are steady.
Resolving Obstruction Issues
Objects placed near the sensors may block their signal. Check for toys, tools, or debris around the base of the garage door. Remove anything that could interfere with the sensor’s beam. Ensure the area is clear on both sides of the door. Even small items can disrupt the connection and stop the door from closing.
Testing Sensor Functionality
After cleaning and clearing the area, test the sensors. Close the garage door and observe if it operates smoothly. Wave an object in front of the sensors during operation. The door should stop or reverse immediately if the sensors are working. If the door doesn’t respond, recheck the alignment and connections.
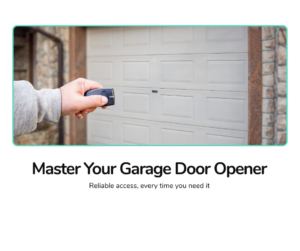
Remote And Keypad Troubleshooting
Access Master garage door openers offer convenience and security. But issues with the remote or keypad can disrupt your routine. Troubleshooting these problems is often simple and can save time. This guide will help you address common remote and keypad issues.
Reprogramming The Remote
A non-responsive remote is a common problem. Start by checking the battery. Replace it if it’s old or weak. Next, reprogram the remote to the garage door opener. Locate the “Learn” button on the opener. Press and hold it until the indicator light flashes. Now, press the button on your remote. The light will flash again, confirming the connection. Test the remote to ensure it works.
Fixing Keypad Malfunctions
If the keypad stops working, check the battery first. Replace it if necessary. Then, clean the keypad to remove dirt or debris. Reprogram the keypad using the “Learn” button on the opener. Press and release the button, then enter your desired code on the keypad. Press and hold the “Enter” button until the light flashes. Test the keypad to confirm it’s operational.
Addressing Interference Problems
Interference can disrupt the remote or keypad signal. Check for nearby electronic devices. Wireless routers or baby monitors can cause interference. Move these devices away from the garage door opener. Ensure the opener’s antenna is straight and unobstructed. This improves signal strength and reduces interference issues.
Track And Hardware Maintenance
Your garage door opener relies heavily on the smooth operation of its track and hardware. Neglecting these parts can lead to unnecessary wear and tear, frustrating noises, or worse, a malfunctioning door. With a little hands-on attention, you can ensure your system stays reliable and efficient for years.
Lubricating Moving Parts
Have you ever noticed your garage door making loud screeching noises? That’s often a sign of dry or neglected moving parts. Apply a high-quality garage door lubricant on hinges, rollers, and springs to reduce friction and noise. Avoid using WD-40 as it’s not designed for long-term lubrication; instead, opt for silicone-based sprays or lithium grease.
A quick tip: Wipe away any old grease or dirt before adding fresh lubricant. This prevents buildup and ensures smoother operation. Make it a habit to lubricate these parts every six months to keep your system running like new.
Tightening Loose Hardware
Loose screws and bolts can cause the door to wobble or shift during operation. Grab a wrench or screwdriver and inspect all the nuts, bolts, and brackets securing the tracks. Tighten anything that feels loose, but don’t overtighten—this can strip the threads.
If you’ve noticed your garage door vibrating excessively, loose hardware might be the culprit. By fixing these minor issues promptly, you can avoid more expensive repairs in the future. Quick fixes like this can save you time, money, and headaches.
Inspecting Tracks For Damage
Tracks guide your garage door smoothly up and down, but dents or bends can throw off alignment. Inspect your tracks closely for any visible damage. If you spot a minor dent, you can often fix it yourself with a rubber mallet. For larger issues, you might need professional help.
Clean the tracks regularly with a damp cloth to remove dirt and debris. Dirt buildup can block the rollers, making the door sluggish or uneven. Ask yourself: When was the last time you checked your tracks? If it’s been months—or never—it’s time to take action.
Track and hardware maintenance isn’t complicated, but it’s crucial for keeping your garage door opener running smoothly. Tackle these tasks regularly, and you’ll enjoy a quieter, more reliable system without costly repairs.
Resetting The Garage Door Opener
Resetting your garage door opener might sound like a daunting task, but it’s simpler than you think. Whether your opener is acting up or you’ve misplaced your remote, a reset can often resolve the issue. Let’s break it down step-by-step so you can get your Access Master garage door opener back on track quickly and easily.
Locating The Reset Button
The first step is to locate the reset button on your garage door opener. Typically, this button is found on the motor unit mounted to your garage ceiling. Look for a small, usually red, button labeled “Learn” or “Reset.”
If you’re unsure, check your owner’s manual for the exact location. Don’t have the manual? No problem. Most Access Master models have the button near the antenna wire or the LED indicator light on the motor housing.
Take a moment to ensure the garage door is completely closed before proceeding. Safety first!
Performing A System Reset
Once you’ve found the reset button, press and hold it for about 10-30 seconds. You’ll notice the LED light near the button either blinking or turning off completely. That’s your signal that the system has been reset.
If the light doesn’t respond, double-check that you’re holding the correct button. Sometimes, dirt or wear can make the button harder to press, so apply steady pressure.
After the reset, your opener will clear all stored settings, including remote controls and keypad codes. It’s like starting with a clean slate.
Reconfiguring Settings After Reset
Now comes the fun part—setting everything back up. Start by reprogramming your remote. Press the same reset button briefly (don’t hold it this time) until the LED light flashes. Then, press the button on your remote that you want to sync.
Need to add a keypad code? Follow the instructions in your manual to enter a new code. Usually, you’ll press the reset button again and input your desired code on the keypad within 30 seconds.
Test your opener to ensure everything is working smoothly. The garage door should respond to your remote and keypad as expected. If something feels off, repeat the steps and double-check the connections.
Have you ever had to reset your garage door opener? Was it easier than you thought? Share your tips or questions in the comments below—we’d love to hear from you!
When To Call A Professional
Garage door openers make life more convenient, but troubleshooting them can sometimes feel overwhelming. While many issues are simple to fix, there are times when calling a professional is not just smart—it’s necessary. Let’s dive into key situations where expert help can save you time, effort, and even prevent costly mistakes.
Identifying Complex Electrical Issues
Electrical problems often go beyond basic DIY fixes. If your garage door opener refuses to power on, even after checking the outlet and circuit breaker, it could signal deeper wiring issues. Attempting to fix these without proper tools or knowledge can lead to further damage or safety hazards.
Professionals have specialized equipment to pinpoint electrical faults quickly. They can identify issues like a burnt circuit board or faulty connections that might be invisible to you. Don’t risk guessing—get expert assistance to ensure your opener works safely and reliably.
Signs Of Motor Failure
A struggling motor often shows clear signs, like unusual noises or slow operation. If your garage door jerks while opening or makes grinding sounds, the motor could be failing. Ignoring these signals can lead to complete breakdown.
Replacing or repairing a garage door motor isn’t a straightforward task. It involves handling heavy components and precise alignment. Professionals ensure the motor is fixed or replaced correctly to prevent further issues with your opener system.
Problems Beyond Basic Troubleshooting
Sometimes, no matter how many online guides you follow, the problem persists. If your garage door opener randomly reverses, fails to close fully, or behaves erratically, the issue could be with sensors, programming, or even structural components.
Professionals have experience diagnosing complex problems that aren’t covered in user manuals. They can assess whether your opener’s sensors need calibration, if the door’s alignment is off, or if wear-and-tear is causing mechanical failures.
Ask yourself: Is it worth hours of frustration trying to fix something you’re not sure about? Calling a professional can give you peace of mind—and get your garage door opener working smoothly again.
Conclusion
Troubleshooting your garage door opener doesn’t have to be overwhelming. Follow the steps carefully to identify and fix common issues. Regular maintenance can prevent many problems from occurring. Always check the manual for specific guidance related to your model. If issues persist, seeking professional help is a safe choice.
A well-functioning garage door opener ensures convenience and security for your home. Stay patient and work through solutions methodically. With the right approach, most problems can be resolved quickly and efficiently.


