Is your Blendtec blender acting up? Don’t worry—you’re not alone.
Whether it’s refusing to turn on, making strange noises, or leaving your smoothies chunky, these hiccups can be frustrating. But here’s the good news: most Blendtec issues are easier to fix than you might think. By the time you finish reading this guide, you’ll feel confident in getting your blender back to peak performance.
So, if you’re ready to stop stressing and start blending again, let’s dive into the simple steps to troubleshoot your Blendtec like a pro.
Common Blender Problems
Blenders are essential kitchen tools for smoothies, soups, and sauces. Yet, even reliable brands like Blendtec can face issues. Knowing common problems helps troubleshoot quickly and avoid frustration.
This guide covers frequent issues and simple solutions for your Blendtec blender.
If your Blendtec doesn’t power on, check the power source first. Ensure the blender is plugged securely into a working outlet. Examine the power cord for visible damage. A tripped circuit breaker could also be the problem. Reset it if necessary. Lastly, inspect the power button for dirt or debris that might block contact.
Blenders stopping mid-use may overheat or face motor strain. Overheating often happens with prolonged use. Allow the blender to cool before restarting. Large food chunks can strain the motor. Cut ingredients into smaller pieces to prevent this issue.
Non-spinning blades can signal jar assembly problems. Secure the jar tightly on the base. Inspect the blade assembly for blockages. Food particles or debris may need cleaning. If the issue persists, the blade assembly might require replacement.
Blender Makes Loud Noise
Unusual noise can indicate loose parts or worn bearings. Check if the jar is properly seated on the base. Examine the blades for damage or wear. Replace worn-out blades to restore smooth operation. Loose screws in the base can also cause noise. Tighten them if needed.
Leaking Blender Jar
Leaking jars often have damaged seals or loose lids. Inspect the jar’s rubber gasket for cracks or wear. Replace it if necessary. Ensure the lid is secured tightly before blending. Avoid overfilling the jar, as it can lead to spills.
Blender Won’t Turn On
Have you ever faced the frustration of your Blendtec blender refusing to turn on? It’s a common issue that can disrupt your meal prep plans. Don’t worry—you can usually troubleshoot the problem without needing professional repair. Let’s dive into the practical steps to get your blender up and running again.
Power Connection Issues
The first thing to check is whether your blender is properly connected to a power source. Sometimes, the simplest issues are the easiest to overlook.
- Ensure the power cord is securely plugged into a functioning outlet. Test the outlet by plugging in another device to confirm it works.
- Inspect the power cord for damage. If you see frayed wires or visible cuts, it may need replacing.
- Use a different outlet if the current one seems faulty. A loose socket can interrupt power flow.
Did you ever realize how much a quick inspection can save you time and stress? It’s worth double-checking these basics before moving on.
Resetting The Motor Base
If the blender still doesn’t turn on, resetting the motor base can often solve the issue. Sometimes, the motor shuts off to protect itself from damage due to power surges or prolonged use.
- Unplug the blender for at least 10 minutes. This allows the internal system to reset.
- After waiting, plug it back in and press the power button to test.
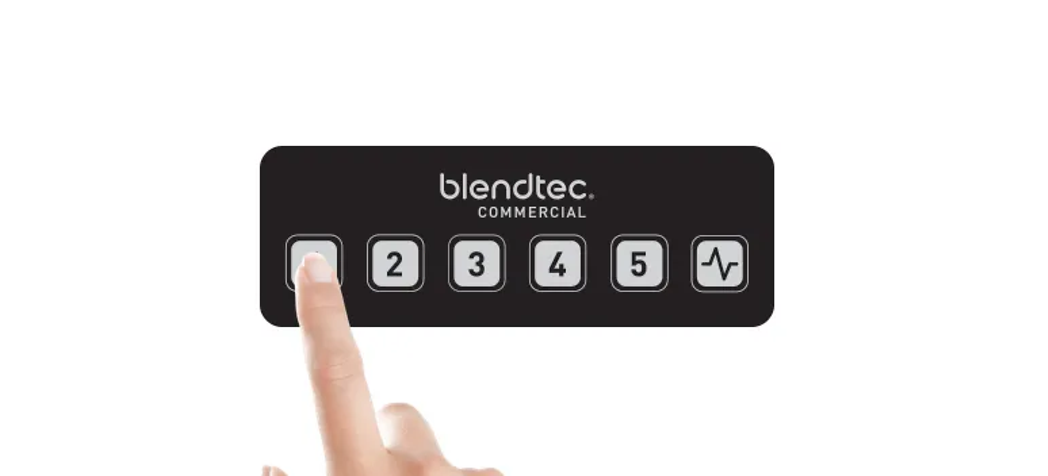
- If it still doesn’t work, try pressing other buttons to ensure the control panel isn’t stuck.
Resetting might feel like a minor step, but it can be the secret to reviving your blender’s functionality.
Checking For Overheating
Blenders, especially high-performance ones like Blendtec, are designed to shut off when they overheat. This is a safety feature to prevent damage.
- Think back—were you blending thick ingredients or running the blender for an extended time? These actions can cause overheating.
- Let the blender rest for at least 30 minutes. This cooling period helps the motor stabilize.
- Once cooled, try turning it on again. If it starts, consider blending in shorter intervals next time.
Overheating isn’t just about the blender—it’s also about how you use it. Could adjusting your blending habits prevent this issue in the future?
By tackling these common troubleshooting steps, you’re likely to solve the problem of your Blendtec not turning on. If none of these solutions work, it might be time to contact customer support for further assistance.
Unusual Noises During Operation
Is your Blendtec blender making strange noises during operation? It’s not just annoying; those unusual sounds could point to underlying issues that need attention. The good news is, with a bit of troubleshooting, you can often resolve the problem yourself and get your blender running smoothly again.
Inspecting The Blade Assembly
Loud or grinding noises can sometimes come from the blade assembly. Turn off and unplug your blender before inspecting the blades.
Check if the blades spin freely. If they feel stiff or stuck, debris might be lodged in the assembly. Carefully clean around the blades using a small brush or a damp cloth.
If the noise persists after cleaning, the blade assembly might be worn out. Consider replacing it with a new one from Blendtec’s parts store.
Securing The Jar Properly
An improperly seated jar can cause rattling or shaking noises. Double-check that the jar is securely attached to the base before blending.
Make sure the jar is not tilted or misaligned. A simple adjustment can often solve the issue. Listen for a click or feel for a snug fit as you place the jar on the base.
If the jar still wobbles, inspect the rubber gasket on the base. A worn-out gasket can cause instability and should be replaced promptly.
Addressing Motor Malfunctions
If the noise seems to come from the motor, it might be overworked or overheating. Are you blending heavy ingredients like frozen fruit or nut butter? Try reducing the load and blending in smaller batches.
Does the motor emit a burning smell along with the noise? This could indicate overheating. Let the blender cool down for 20-30 minutes before using it again.
If the motor continues to make unusual noises even with light use, it’s best to contact Blendtec customer support. They can guide you on whether a repair or replacement is necessary.
Unusual noises don’t have to mean the end of your Blendtec blender’s life. By addressing these areas step-by-step, you can often fix the issue without professional help. What’s the oddest noise you’ve heard from your blender? Share your experience in the comments below!
Blender Stops Mid-cycle
Has your Blendtec blender ever stopped mid-cycle, leaving your smoothie half-blended and your breakfast routine in chaos? It can be frustrating, especially when you’re in a rush or entertaining guests. But don’t worry—this is often a fixable issue, and understanding the root cause can save you time and money.
Checking For Overloading
One common reason a Blendtec blender stops mid-cycle is overloading. Are you packing the jar to the brim with ingredients? That might be the culprit. Your blender has a motor that works hard, but too much pressure can trigger it to shut off as a safety measure.
Try reducing the amount of ingredients in your jar. If you’re blending frozen fruits, add a bit of liquid to lighten the load. A good rule of thumb: fill only up to two-thirds of the jar for smooth operation. Have you been overloading your blender without realizing it?
Testing The Power Supply
Sometimes, the problem isn’t with the blender but with the power source. A loose plug or an unreliable outlet can interrupt the power flow. Does your blender stop when you wiggle the cord or bump the counter?
Ensure the blender is firmly plugged into a working outlet. Test it by plugging in another appliance to confirm the outlet works. If the blender still stops mid-cycle, try using a different power socket to rule out electrical issues. Could the power supply be the weak link in your setup?
Examining The Safety Sensors
Blendtec blenders are equipped with safety sensors to prevent overheating or misuse. If the jar isn’t properly secured or the motor gets too hot, the blender will shut off mid-cycle. This feature protects the machine but can feel inconvenient in the moment.
Check if the jar is properly seated on the base before starting. If the motor feels warm to the touch, let it cool down for 10–15 minutes before using it again. Have you noticed your blender stopping after back-to-back cycles? That’s likely the safety sensor kicking in.
Troubleshooting a Blendtec blender that stops mid-cycle doesn’t have to feel overwhelming. By addressing overloading, power supply issues, and safety sensors, you can keep your blender running smoothly. Which of these fixes will you try first?
Blades Not Spinning
Picture this: You’re about to whip up a refreshing smoothie, but your Blendtec blender refuses to cooperate. The blades aren’t spinning, and frustration starts setting in. Don’t worry—this is a common issue that can often be fixed with a few simple steps. Let’s troubleshoot the problem, so you can get back to blending with ease.
Clearing Food Jams
Food jams are one of the most common culprits behind blades not spinning. When ingredients like frozen fruit or thick nut butter get stuck, the blades may struggle to move. Start by turning off and unplugging your blender for safety.
Carefully remove the jar and check for any stuck food around the blades. Use a spatula or spoon to clear out the obstruction. If the jam is stubborn, rinse the jar under warm water to loosen it up. Once cleared, test the blades again to see if they spin smoothly.
Next time, try layering your ingredients properly—liquids first, softer items in the middle, and harder ingredients on top. This reduces the risk of jams and makes blending more efficient.
Inspecting The Drive Socket
The drive socket connects your blender’s motor to the blades. If it’s worn out or damaged, the blades won’t spin effectively. Take a closer look at the socket—it should sit firmly in place without cracks or excessive wear.
If the socket looks damaged, consider replacing it. Many Blendtec models allow for easy socket replacement, and you can find compatible parts online. Follow your blender’s manual for guidance on how to swap it out.
Regular inspection of the drive socket can prevent future issues. Make it a habit to check after heavy use or if you hear unusual noises during blending.
Tightening Loose Components
Loose parts can disrupt the connection between the motor and the blades. Check the jar’s base and blade assembly for any loose screws or fittings. Tighten them using a screwdriver or the tools provided with your blender.
Also, inspect the jar itself. If it’s not sitting securely on the base, the motor may struggle to engage. Adjust the jar placement and ensure it clicks into position properly.
Small adjustments can make a big difference. If you’re dealing with recurring issues, double-check all components before jumping to conclusions about bigger repairs.
Have you ever encountered a tricky food jam or a worn drive socket? These small challenges can turn into big headaches if left unchecked. By tackling these straightforward fixes, you’ll keep your Blendtec running smoothly and enjoy hassle-free blending every time.

Credit: www.youtube.com
Blender Leaking During Use
A leaking blender can disrupt your kitchen routine. Blendtec blenders are durable, but leaks may still occur. Understanding the causes can help you fix the issue quickly. Below are key areas to inspect and address if your Blendtec blender leaks during use.
Inspecting The Jar Seal
The jar seal prevents liquids from escaping during blending. Over time, it can wear out or shift. Check the seal under the blade assembly for damage. Look for cracks, tears, or debris stuck around it. Clean the seal with warm water and mild soap to remove buildup. A clean and intact seal ensures a tight fit.
Replacing Worn Gaskets
Gaskets create a secure seal between the jar and the base. A worn-out gasket can lead to leaks. Remove the gasket carefully and inspect for signs of wear. Cracks, hardening, or thinning indicate it needs replacement. Use a compatible Blendtec gasket for the best fit. Install it snugly to prevent future leaks.
Ensuring Proper Assembly
Assembly errors can cause leaks during blending. Double-check that all parts are connected properly. The jar should sit firmly on the base. Ensure the lid is secure and the vented area faces upward. Misaligned components can allow liquids to escape. Proper assembly ensures smooth and leak-free operation.
Error Codes On Display
Blendtec blenders are reliable kitchen tools, but sometimes, they display unexpected error codes. These messages can feel intimidating, especially if you’re in the middle of preparing a meal or smoothie. Understanding what these codes mean and how to fix them can save time and frustration. Let’s break it down.
Decoding Common Error Messages
Error codes usually point to specific problems with your Blendtec blender. For example, you might see an “E01” code, which typically indicates overheating. Another common one is “E04,” signaling a motor overload due to blending overly thick or heavy ingredients.
Take a moment to assess what you were blending when the code appeared. Was your blender running for an extended period? Did you add frozen fruit or ice without enough liquid? These factors often trigger errors.
Keep your user manual handy—it lists detailed explanations for each code. If you’ve misplaced it, Blendtec’s website offers downloadable versions. Knowing the meaning behind an error code gives you clarity and confidence in troubleshooting.
Steps To Reset The System
Sometimes, a simple reset is all your blender needs to get back to working. First, unplug the blender from the power outlet. This step is important to ensure safety while troubleshooting.
Wait about 10–15 minutes to allow the system to cool down. This helps clear any overheating issues. Once the waiting period is over, plug the blender back in and press the power button.
If the error persists, try pressing and holding the power button for 5 seconds to initiate a deeper system reset. This often clears stubborn error codes. Make sure you remove excess ingredients from the jar to prevent further overload.
When To Contact Support
Sometimes, troubleshooting at home doesn’t resolve the issue. If your blender repeatedly shows the same error code or fails to power on after resetting, it’s time to reach out to Blendtec support.
Gather helpful information before contacting them. Note the error code, your blender’s model number, and details about what you were blending when the issue occurred. These details make the process smoother for both you and the support team.
Blendtec’s customer service team is known for being responsive. You can contact them via phone, email, or their online chat feature. Don’t hesitate to ask about warranty coverage if your blender is still under protection. Fixing the issue might cost you nothing.
Error codes don’t have to be a roadblock. With the right approach, you can tackle them quickly and get back to blending your favorite recipes. Which error code has been the trickiest for you to solve? Share your experience in the comments below—you might help others facing the same challenge!

Credit: www.blendtec.com
Maintenance Tips For Longevity
Proper maintenance can significantly extend the life of your Blendtec blender. Regular care ensures smooth operation and prevents unnecessary wear. By following a few simple steps, you can keep your blender performing at its best for years to come.
Cleaning After Every Use
Always clean your Blendtec blender immediately after use. Rinse the jar with warm water to remove residue. Use a drop of dish soap and fill the jar halfway with warm water. Run the blender on a cleaning cycle or a low speed for 30 seconds. Rinse thoroughly and dry with a clean cloth.
Don’t forget to wipe the base with a damp cloth. Avoid submerging the base in water to prevent damage to electronic components. Regular cleaning prevents build-up and keeps your blender hygienic.
Inspecting Components Regularly
Check the blender jar for cracks or wear. Inspect the blade for signs of dullness or damage. A worn blade can reduce blending efficiency. Examine the lid and seals to ensure they fit snugly and aren’t damaged.
Pay attention to the motor base. Look for any loose screws or unusual sounds during operation. Regular checks help identify issues early and prevent costly repairs.
Storing The Blender Safely
Always store your Blendtec blender in a dry and cool place. Avoid exposing it to direct sunlight or excessive humidity. Place the blender on a stable surface to prevent accidental falls.
Ensure the cord is neatly stored to avoid tangling or damage. Keeping the blender in a safe location protects it from wear and tear caused by improper storage.

Credit: www.partstown.com
Conclusion
Troubleshooting your Blendtec blender doesn’t have to be overwhelming. Simple steps can solve most issues. Regular cleaning and proper use can prevent many problems. Always check the manual for guidance before trying fixes. If issues persist, contacting customer support is a good option.
Taking care of your blender ensures it lasts longer and performs well. Keep these tips in mind for smooth blending every time. With a little effort, you can keep your Blendtec running efficiently. A well-maintained blender means fewer interruptions and better results in the kitchen.


