Browning trail cameras are popular for wildlife enthusiasts and hunters. They capture high-quality images and videos.
But like any tech, they can have issues. Understanding Browning trail camera troubleshooting can save time and frustration. Common problems include battery life, blurry images, and connectivity issues. This guide helps you identify and fix these problems. Knowing how to troubleshoot ensures your camera works efficiently.
Whether you are a beginner or experienced user, these tips will help. Let’s dive into the details and get your trail camera back in action.
Common Issues
Browning Trail Cameras are reliable tools for wildlife enthusiasts. Sometimes, they face common issues that can disrupt their performance. Understanding these problems and how to fix them can save time and frustration. Let’s explore the most frequent issues.
Battery Problems
Battery problems are common with Browning Trail Cameras. Ensure you use high-quality batteries. Rechargeable batteries can lose power quickly in cold weather. It’s better to use lithium batteries as they last longer.
| Battery Type | Performance |
|---|---|
| Alkaline | Short lifespan |
| Rechargeable | Low performance in cold weather |
| Lithium | Best performance |
Check the battery contacts for dirt or corrosion. Clean them with a soft cloth. If the camera still won’t power on, try a different set of batteries. Make sure they are inserted correctly, following the polarity marks.
Sd Card Errors
SD card errors can also disrupt your trail camera. Ensure the SD card is compatible with the camera. Browning Trail Cameras usually support cards up to 32GB.
- Format the SD card before use.
- Check for any physical damage.
- Ensure the card is inserted correctly.
If the camera displays an error message, try a different SD card. Always format the card in the camera itself. Avoid formatting it on a computer, as this can cause compatibility issues.
Keep the SD card contacts clean. If dirt or moisture is present, clean it gently with a soft cloth. Do not use excessive force.

Credit: www.manualslib.com
Camera Not Turning On
Is your Browning trail camera not turning on? This can be frustrating. There are a few common issues that could be causing this problem. Let’s go through some basic troubleshooting steps to get your camera working again.
Power Supply Check
First, check the power supply. Your trail camera needs a stable power source. Here are some steps to follow:
- Ensure the batteries are inserted correctly.
- Check the battery compartment for corrosion.
- Use new, high-quality batteries.
If you use an external power source, verify it is connected properly. Sometimes, a loose connection can cause the camera to not turn on.
Internal Fuse Inspection
Next, inspect the internal fuse. The fuse protects your camera from power surges. Follow these steps:
- Open the camera casing carefully.
- Locate the internal fuse near the battery compartment.
- Check if the fuse is blown. A blown fuse will look blackened or broken.
If the fuse is blown, replace it with a new one. Make sure the new fuse matches the camera’s specifications. This should resolve the issue of the camera not turning on.
By following these steps, you can troubleshoot why your Browning trail camera is not turning on. Regular maintenance can prevent many of these problems.
Poor Image Quality
Poor image quality on a Browning trail camera can be frustrating. Clear, sharp images are essential for monitoring wildlife activity. Understanding the common issues can help fix the problem.
Blurry Photos
Blurry photos can result from various factors. First, check the lens for dirt or smudges. Clean it with a soft cloth. Ensure the camera is securely mounted. Movement can cause blur. Adjust the focus settings if available. Set the camera to a higher resolution for better detail.
Night Vision Issues
Night vision issues often stem from incorrect settings or equipment problems. Ensure the infrared (IR) flash is not blocked. Check if the IR filter is functioning properly. Poor battery performance can affect night vision. Use fresh, high-quality batteries. Adjust the camera’s position to avoid glare from reflective surfaces.
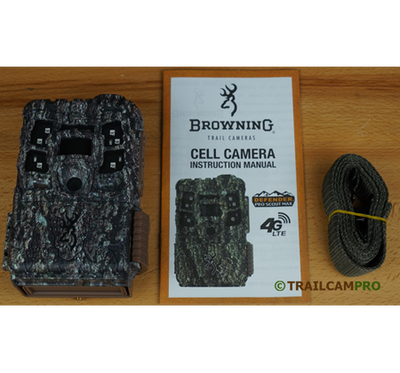
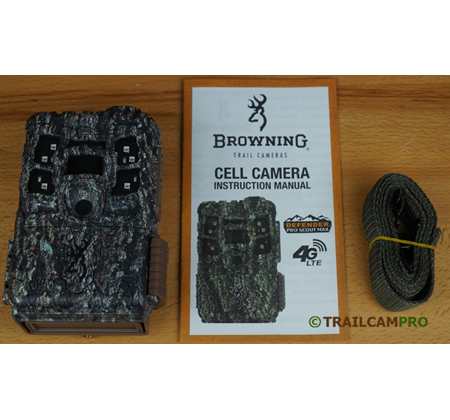
Credit: www.trailcampro.com
Connectivity Problems
Connectivity problems can disrupt the performance of your Browning trail camera. These issues can arise due to several factors, impacting the device’s ability to send and receive data. In this section, we will explore common connectivity problems and their solutions.
Wireless Setup
Ensure your Browning trail camera is properly configured for wireless use. First, check that the camera’s wireless settings match those of your network. Double-check the SSID and password. Incorrect details can prevent the camera from connecting.
Next, update the camera’s firmware. Outdated firmware can cause connectivity issues. Visit the Browning website for the latest firmware updates. Follow the instructions to install them correctly.
Finally, ensure the camera is within range of your Wi-Fi router. Distance can affect signal strength. Place the camera closer to the router if necessary.
Signal Interference
Signal interference can also cause connectivity problems. Identify potential sources of interference. Devices such as microwaves, cordless phones, and other electronics can disrupt the signal.
Try relocating your Wi-Fi router or the camera to reduce interference. Placing the router in a central location can help. Avoid placing it near metal objects or thick walls.
Another solution is to change the Wi-Fi channel. Routers often use crowded channels by default. Access your router’s settings and switch to a less congested channel.
If these steps do not resolve the issue, consider using a Wi-Fi extender. This device can boost the signal, improving connectivity for your trail camera.
Trigger Mechanism Issues
Having issues with the trigger mechanism on your Browning Trail Camera can be frustrating. The trigger mechanism is vital for capturing movement and ensuring you don’t miss any action. Understanding common problems and solutions can save you time and effort.
Sensitivity Adjustments
The sensitivity of your trail camera’s trigger mechanism plays a crucial role in its performance. If the sensitivity is too high, it may trigger with slight movements like leaves blowing. If too low, it might miss important activity.
- High Sensitivity: Recommended for areas with minimal movement.
- Low Sensitivity: Ideal for active areas to avoid false triggers.
Adjusting the sensitivity settings can help optimize the camera’s performance. Refer to your user manual for specific instructions on how to change these settings.
False Triggers
False triggers can fill your memory card with unwanted images and drain battery life. Common causes of false triggers include:
| Cause | Solution |
|---|---|
| Moving Vegetation | Clear the area around the camera. Trim branches and grass. |
| Heat Sources | Ensure the camera is not facing direct sunlight or heat vents. |
| Insects | Use insect repellent or place the camera in a protective housing. |
Taking these steps can significantly reduce false triggers and improve the efficiency of your trail camera.
Credit: www.trailcampro.com
Software And Firmware Updates
Updating the software and firmware of your Browning Trail Camera is crucial. It ensures optimal performance and access to the latest features. Keeping your camera updated can fix bugs and improve functionality.
Update Process
To start, visit the official Browning website. Locate the support or downloads section. Find your camera model and download the latest firmware file. Ensure the file is saved to a formatted SD card. Insert the SD card into your camera. Turn on the camera and follow the on-screen instructions. The update process usually takes a few minutes. Do not turn off the camera during the update.
Compatibility Checks
Before updating, check the firmware version on your camera. Compare it with the version available on the website. Ensure the update is compatible with your camera model. Read the instructions provided with the firmware file. Make sure your SD card is compatible and properly formatted. Using incompatible files can damage your camera. Always back up important data before updating.
Maintenance Tips
Maintaining your Browning Trail Camera ensures it functions well over time. Regular upkeep prevents many common issues. This guide provides simple maintenance tips to keep your camera in top shape.
Cleaning Lenses
Dirty lenses can ruin your photos. Use a soft, lint-free cloth to clean the lens. Avoid using harsh chemicals. They can damage the lens coating. Gently wipe the lens in circular motions. This removes dust and fingerprints.
If needed, use a lens cleaning solution. Apply it to the cloth, not directly on the lens. This prevents liquid from seeping into the camera. Regular cleaning keeps your photos clear and detailed.
Weatherproofing
Your trail camera faces various weather conditions. Ensure the camera is weatherproofed. Check the seals around the camera’s casing. They should be intact and free from cracks.
Use silicone grease on the seals. This keeps them flexible and prevents cracking. Store the camera in a dry place when not in use. Moisture can damage the internal components.
Consider using a protective housing. This offers extra protection against harsh weather. Regularly inspect the camera for signs of wear. Prompt repairs can extend the camera’s lifespan.
When To Seek Professional Help
Sometimes, troubleshooting your Browning trail camera can be a daunting task. Despite your best efforts, you might not get the camera working. This is the time to seek professional help. Knowing when to contact an expert can save you time and frustration.
Warranty Information
First, check if your Browning trail camera is still under warranty. The warranty usually covers defects in materials and workmanship. Review the warranty terms to understand what is covered. If your issue falls under the warranty, contact Browning customer support. They can guide you on the next steps.
Authorized Service Centers
If your camera is out of warranty, you might need an authorized service center. These centers have professionals trained to fix Browning trail cameras. They use genuine parts, ensuring your camera functions like new. Find a list of authorized service centers on the Browning website. Always choose an authorized service center for reliable repairs.
Frequently Asked Questions
How Do I Reset My Browning Trail Camera?
To reset your Browning Trail Camera, remove the batteries for 10 seconds. Reinstall them and turn the camera on.
Why Is My Browning Trail Camera Not Taking Pictures?
Ensure the SD card is properly inserted and formatted. Check battery life and settings. Verify the camera’s position.
What Does “sd Card Lock” Mean On My Browning Camera?
“SD Card Lock” means the SD card is write-protected. Slide the switch on the card to unlock it.
How Do I Update My Browning Trail Camera Firmware?
Download the firmware from Browning’s website. Transfer it to an SD card. Insert the card into the camera and follow instructions.
Why Is My Browning Trail Camera Not Turning On?
Check the batteries. Ensure they are correctly installed and fully charged. Try using a different set of batteries.
Conclusion
Troubleshooting your Browning trail camera can be straightforward. Follow the tips shared. Check batteries, SD cards, and settings. Clean the lens regularly. Ensure firmware is updated. These steps help maintain camera performance. Remember, patience and regular checks are key. Happy wildlife watching!
")