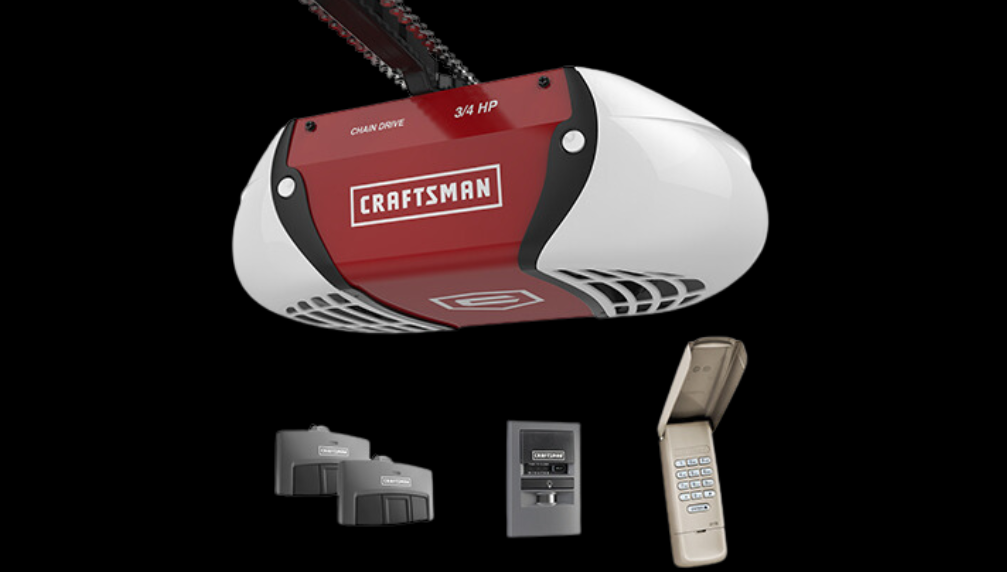
Struggling with your Craftsman door opener? You’re not alone.
A malfunctioning garage door opener can be a frustrating problem, especially when it disrupts your daily routine. The good news is, many common issues can be fixed without calling a professional. Whether your remote isn’t working, the door won’t close, or the motor seems dead, this guide is here to help.
By the end of this post, you’ll know exactly how to troubleshoot the most frequent problems and get your garage door back on track. Ready to save time, money, and frustration? Let’s dive in!
Common Issues With Craftsman Door Openers
Craftsman door openers are reliable, but like any machine, they can run into issues. Troubleshooting these problems can feel overwhelming, especially if you’re unsure where to begin. The good news? Most common issues are simple to identify and fix, even if you’re not a tech expert.
1. Door Doesn’t Open Or Close
One of the most frequent complaints is the door refusing to move. Start by checking the batteries in your remote control. Weak or dead batteries could be the root cause.
If the remote works but the door still doesn’t move, inspect the power source. Is the opener plugged in securely? A tripped breaker or loose plug could disrupt the system.
Sometimes, the issue lies with the safety sensors. Look for any obstructions or misaligned sensors near the bottom of the door. Even a cobweb or dust can trigger this problem. Clean the sensors and ensure they’re facing each other correctly.
2. Strange Noises During Operation
Loud grinding or squeaking sounds can be annoying and indicate a problem. Often, this happens because the tracks or rollers need lubrication. Apply a silicone-based lubricant to reduce friction and noise.
Check for loose hardware. Bolts, screws, or brackets can loosen over time, causing vibrations and noises. Tighten everything carefully, but don’t overtighten as that could cause further damage.
Worn-out parts like the chain or belt may also be to blame. If you notice excessive wear, consider replacing them to avoid bigger issues down the line.
3. Remote Control Not Working
When the remote fails, it’s easy to assume the worst, but the fix is often straightforward. Start by reprogramming the remote to the opener system. Consult your Craftsman manual for step-by-step instructions.
If reprogramming doesn’t work, check the batteries. Even new batteries can sometimes be faulty, so try replacing them again to rule this out.
Lastly, ensure there’s no interference between the remote and the opener. Electronic devices like Wi-Fi routers or even LED lights can disrupt the signal. Move these devices further away from the opener if possible.
4. Door Reverses Before Closing
This issue often points to a problem with the door’s travel limits. The opener might think it’s hitting an obstacle when it’s not. Adjust the up and down travel settings using the controls on the opener unit.
Another cause could be dirty or misaligned safety sensors. Double-check that nothing is blocking the sensors and clean them thoroughly.
Additionally, inspect the tracks for debris. Even small obstructions like leaves or screws can cause the door to reverse unexpectedly.
5. Keypad Entry Not Responding
Keypads are incredibly convenient—when they work. If yours isn’t responding, verify that the battery is still functioning. Over time, keypad batteries can drain, especially in extreme weather.
Next, check whether the keypad needs to be reprogrammed. Craftsman keypads often lose their connection if the power has been interrupted.
If all else fails, inspect the wiring inside the keypad. Loose or damaged wires could be interrupting the signal. If you’re not comfortable opening the keypad, consider consulting a professional.
Have you encountered any of these issues with your Craftsman door opener? Which troubleshooting tip are you trying first? Let us know in the comments—your experience could help someone else!
Remote Control Problems
Remote control problems are a common issue with Craftsman door openers. The remote allows you to open and close the garage door easily. When it stops working, it disrupts your routine and can be frustrating. Understanding the causes can help you fix the issue quickly.
Unresponsive Remote
An unresponsive remote is one of the most frequent problems. Check if the button on the remote is stuck or damaged. Inspect the signal light on the remote. If it doesn’t blink, the issue may be with the power source or the remote itself. Ensure the remote is within range of the opener. Physical barriers like walls or metal objects may block the signal.
If the remote is still unresponsive, check the door opener’s receiver. Dirt or debris on the receiver can affect signal detection. Clean the area around the receiver to ensure it works properly.
Battery Replacement Tips
Dead batteries can cause the remote to stop working. Replace the batteries if the remote stops responding. Use the correct battery type for your Craftsman remote. Check the user manual to confirm the battery size and type.
Always remove the old batteries carefully. Clean the battery compartment with a dry cloth before inserting new batteries. Place the batteries in the correct orientation, as shown in the compartment. Test the remote after replacing the batteries to ensure it works.
Reprogramming The Remote
If the remote still doesn’t work, it may need reprogramming. Locate the “Learn” button on the garage door opener. Press and hold the button until the indicator light begins to blink. Release the button and press the desired button on the remote.
The indicator light on the opener should stop blinking, showing successful programming. Test the remote by pressing the programmed button. If it doesn’t work, repeat the process carefully. Ensure the remote and opener are compatible before reprogramming.
Door Not Opening Or Closing
Is your Craftsman garage door not opening or closing? This issue can disrupt your day and leave your garage vulnerable. Several common problems could be causing this malfunction. Understanding these issues can help you troubleshoot effectively. Let’s explore the most frequent causes and their fixes.
Obstruction In The Track
Obstructions in the garage door track can prevent smooth operation. Dirt, debris, or small objects may block the path of the door. Inspect the track carefully for any visible blockages. Use a cloth or soft brush to clean the tracks thoroughly. Avoid using abrasive tools to prevent damage. Regular cleaning helps to keep the track clear and functional.
Sensor Alignment Issues
Garage doors rely on sensors to detect obstacles. Misaligned sensors can stop the door from closing. Check the sensors located near the bottom of the door frame. Ensure both sensors face each other directly and are at the same height. Wipe the sensor lenses with a soft cloth to remove dust. Test the door after adjustment to confirm proper alignment.
Manual Lock Engaged
The manual lock feature is designed to secure the door. If engaged, the door won’t open even if the motor runs. Inspect the door handle or locking mechanism for the manual lock. Turn it to the unlocked position. Once unlocked, test the door to ensure it operates normally.

Motor Not Running
The motor is the heart of your Craftsman garage door opener. If it stops running, your door won’t open or close. Several issues can cause this problem, but most are easy to diagnose. Let’s explore the most common reasons why the motor might not be running.
Power Supply Check
A faulty power supply is often the main issue. Start by checking the power outlet. Ensure the opener is plugged in securely. Test the outlet using another device, like a lamp or phone charger. If the outlet works, the issue may lie with the opener’s internal components.
Inspect the circuit breaker to see if it has tripped. Reset it if necessary. If power is still unavailable, there may be a wiring issue or a blown fuse. An electrician might be needed for further inspection.
Overheated Motor
The motor can overheat if it operates too frequently in a short time. Craftsman openers have a built-in safety mechanism that shuts down the motor to prevent damage. Wait 15-30 minutes for the motor to cool before trying again.
Ensure the door isn’t stuck or blocked. A jammed door can overwork the motor. Regular maintenance helps avoid overheating and prolongs the motor’s life.
Wiring Connection Issues
Loose or damaged wiring can stop the motor from running. Inspect the wires connecting the motor to the control board. Look for frayed, broken, or disconnected wires. Tighten any loose connections using a screwdriver.
If the wires appear damaged, replace them carefully. Always disconnect power before working with electrical components. Faulty wiring may require professional assistance to ensure safety.
Noisy Operation
Is your Craftsman garage door opener making more noise than usual? That rattling, screeching, or grinding sound isn’t just annoying—it might be a sign that something needs your attention. A noisy door opener can disrupt the peace in your home and even point to underlying problems that could worsen over time. The good news? Fixing it is often straightforward, and you don’t need to be a pro to tackle it. Let’s dive into a few specific solutions.
Lubricating Moving Parts
Dry or rusty moving parts are a common cause of loud operation. The metal-on-metal friction produces those unpleasant squeaks and grinds.
Grab a silicone-based lubricant or garage door grease—not WD-40, as it’s too thin for this job. Apply it generously to the chain, tracks, and hinges. Avoid overloading it; a thin layer works wonders.
Check for stuck or stiff areas while applying the lubricant. You’ll often find spots that need extra attention. A well-lubricated system runs quieter and lasts longer.
Tightening Loose Components
Loose bolts, screws, or brackets can cause vibrations and rattling noises. Over time, constant use shakes them out of place.
Use a wrench or screwdriver to tighten the fasteners on the motor unit, tracks, and garage door itself. Pay special attention to the mounting brackets securing the opener to the ceiling.
If parts feel wobbly even after tightening, check for wear or damage. Replace compromised pieces instead of forcing them to fit. Loose components can quickly escalate into bigger problems.
Replacing Worn-out Rollers
Rollers guide your garage door along its tracks. When they wear out, they squeal and vibrate during operation.
Inspect the rollers for signs of wear, such as cracks or flat spots. Nylon rollers are quieter than metal ones and worth considering if you need replacements.
Replacing rollers may seem intimidating, but it’s manageable with a bit of patience and the right tools. Always follow the manual instructions or consult a professional if you’re unsure. A smooth-rolling door makes a noticeable difference in noise reduction.
Does your garage door sound quieter already? Sometimes, small fixes can make a huge difference. Which of these steps will you try first?
Flashing Lights On The Opener
Flashing lights on your Craftsman door opener often signal a problem. These lights act as error indicators, helping you identify specific issues. They may flash in different patterns based on the error. Understanding these signals can save time and prevent unnecessary repairs. Let’s break down common troubleshooting steps for flashing lights.
Error Code Interpretation
The flashing light pattern is your opener’s way of communicating errors. Count the flashes and note the sequence. For example, two flashes could mean a motor issue. Four flashes might indicate a safety sensor problem. Refer to your Craftsman manual for exact error codes. If you don’t have the manual, it’s available on the Craftsman website.
Resetting The System
Resetting the system can often clear minor glitches. Start by unplugging the opener from the power source. Wait for 30 seconds before plugging it back in. Press and hold the “Learn” button on the opener for 6 seconds. This resets the system and clears stored codes. Test the opener to see if the problem persists.
Checking Safety Sensors
Safety sensors are a common cause of flashing lights. Inspect the sensors near the bottom of the garage door tracks. Ensure they are aligned and not obstructed. Clean the sensor lenses with a soft cloth to remove dirt. Check the wiring for loose connections or damage. Realign the sensors if the indicator lights are off or blinking.
Wall Control Panel Not Working
The wall control panel of your Craftsman garage door opener plays a crucial role in its operation. When it stops working, it can be frustrating, especially if you’re unsure of what’s causing the issue. The good news is, troubleshooting the wall control panel is straightforward and doesn’t require advanced technical skills. Let’s walk through some key steps to identify and fix the problem.
Inspecting The Wiring
Start by checking the wiring connected to the wall control panel. Loose or damaged wires are often the culprit behind a malfunctioning panel.
Carefully remove the panel cover to access the wiring. Look for frayed or disconnected wires. Tighten any loose connections and ensure the wires are securely attached to the terminals.
If you notice any visible damage, like exposed copper or cuts in the wire insulation, it’s time to replace them. Use an affordable wire stripper and electrical tape to make repairs if needed.
Testing The Control Panel
If the wiring looks fine, your next step is testing the wall control panel itself. You can easily check if it’s the panel that’s faulty or something else in the system.
Unplug your garage door opener and disconnect the wall control panel. Using a multimeter, test the panel’s terminals to see if it’s sending signals when buttons are pressed.
No signal? That’s a strong indication the panel isn’t functioning. Before jumping to replace it, double-check the wiring and ensure the multimeter is set correctly.
Replacing The Panel If Needed
If testing confirms the panel isn’t working, replacing it might be your best option. Luckily, Craftsman wall control panels are widely available and affordable.
When purchasing a replacement, ensure it’s compatible with your garage door opener model. Check your opener’s manual or look for the model number to avoid buying the wrong part.
Installing the new panel is simple. Follow the instructions provided in the packaging, connect the wires as they were before, and secure the panel in place. Test the opener to confirm everything is working smoothly.
Have you ever felt stuck trying to fix your garage door opener? Troubleshooting the wall control panel might seem intimidating at first, but breaking it down into steps makes it manageable. Which of these tips helped you the most? Let us know in the comments!
Tips For Regular Maintenance
Maintaining your Craftsman garage door opener doesn’t have to be overwhelming. Regular maintenance not only extends its life but also ensures it operates safely and smoothly. With just a bit of effort, you can avoid costly repairs and frustrating breakdowns. Let’s dive into some practical tips to keep your door opener in top-notch condition.
Cleaning The Tracks
Dirty tracks can cause your garage door to stick or make grinding noises. Dust, debris, and grease build-up often go unnoticed but can disrupt the smooth movement of the door.
Use a damp cloth to wipe down the tracks every few months. Avoid using heavy-duty cleaners; mild soap and water work just fine. Once clean, apply a silicone-based lubricant to keep everything running smoothly.
Next time you’re cleaning your garage, check the tracks. You might be surprised at how much dirt they collect over time.
Inspecting Bolts And Hinges
Loose bolts and worn hinges can lead to noisy operation or even structural damage. Tighten any loose bolts using a wrench and check the hinges for signs of rust or wear.
Replace any rusted or damaged hinges immediately. Keeping these components sturdy ensures the door operates safely and efficiently.
Consider this: a quick inspection takes less than 10 minutes, but it can save you hours of headache later. So, grab your tools and give those bolts and hinges a quick check.
Testing The Safety Features
Your Craftsman door opener is equipped with safety sensors to prevent accidents, but do you know if they’re working properly? Testing them is easy and essential.
Place an object, like a broomstick, in the door’s path. Try closing the door—if the sensors are working, the door should reverse before hitting the object. If it doesn’t, you need to adjust or replace the sensors.
Don’t overlook this step. Faulty sensors can put your family’s safety at risk. Take a few minutes to test them—it’s worth the peace of mind.
Conclusion
Troubleshooting your Craftsman door opener doesn’t have to be stressful. Simple checks like power supply, remote batteries, and sensors often solve issues. Regular maintenance helps prevent future problems and extends the opener’s life. Always refer to your user manual for specific guidance.
If issues persist, contacting a professional ensures safety and proper repairs. A well-functioning door opener adds convenience and security to your home. Keep your system in good shape to avoid unnecessary hassles. With these tips, you can confidently address common problems and maintain smooth operation.
")


