If you rely on your Dexcom continuous glucose monitor, you know how important it is to have accurate, real-time readings to manage your blood sugar effectively. But what happens when your Dexcom sensor stops connecting, shows question marks, or gives inconsistent data?
These issues can be frustrating and even stressful, especially when you need reliable information the most. The good news is that many common Dexcom problems have simple solutions you can try right now. You’ll discover easy troubleshooting tips to fix signal loss, sensor failures, and inaccurate readings—helping you get your Dexcom back on track quickly and with confidence.
Keep reading to take control of your Dexcom and avoid interruptions in your diabetes management.
Sensor Connection Issues
Sensor connection issues with Dexcom devices can disrupt your glucose monitoring. These problems may cause missed readings or loss of data. Resolving connection problems quickly helps keep your diabetes management on track.
Simple steps often fix sensor connection errors. Try these easy methods to restore your Dexcom sensor’s link to your receiver or smartphone.
Bluetooth Toggle
Turn Bluetooth off on your phone or receiver. Wait 10 seconds, then turn it back on. This refreshes the connection and often resolves sensor link issues.
App Restart
Close the Dexcom app completely. Make sure it is not running in the background. Open the app again to re-establish connection with the sensor.
Phone Restart
Switch off your phone for at least 30 seconds. Power it back on to clear temporary glitches. Restarting can fix stubborn connection problems.
Battery Check
Check your phone or receiver battery level. Low power can weaken Bluetooth signals. Charge your device fully to improve sensor communication.
Credit: expressionmed.com
Sensor And Transmitter Failures
Sensor and transmitter failures are common issues that users face with Dexcom devices. These failures can cause inaccurate readings or loss of data. Understanding how to handle these problems helps maintain reliable glucose monitoring.
Most sensor failures happen during the warmup period or due to connection problems. Transmitter issues often arise from pairing errors or hardware faults. Quick fixes can restore proper function without replacing parts.
Warmup Wait Time
Each new sensor needs a warmup period before it works correctly. This time usually lasts about two hours. During warmup, the device may show no data or error messages. Patience is key. Waiting for the warmup to finish often resolves sensor failure alerts.
Re-pairing Devices
Sometimes the transmitter and receiver lose connection. Re-pairing the devices can fix this problem. Start by turning off Bluetooth on your receiver or phone. Turn it back on and follow the Dexcom app instructions to re-pair. Enter the correct transmitter code carefully. This step often restores the link and clears errors.
Contacting Support
If sensor or transmitter failures persist, contact Dexcom support. They can diagnose issues and arrange replacements if needed. Have your device information ready for faster help. Support teams provide clear guidance and can solve many problems remotely.
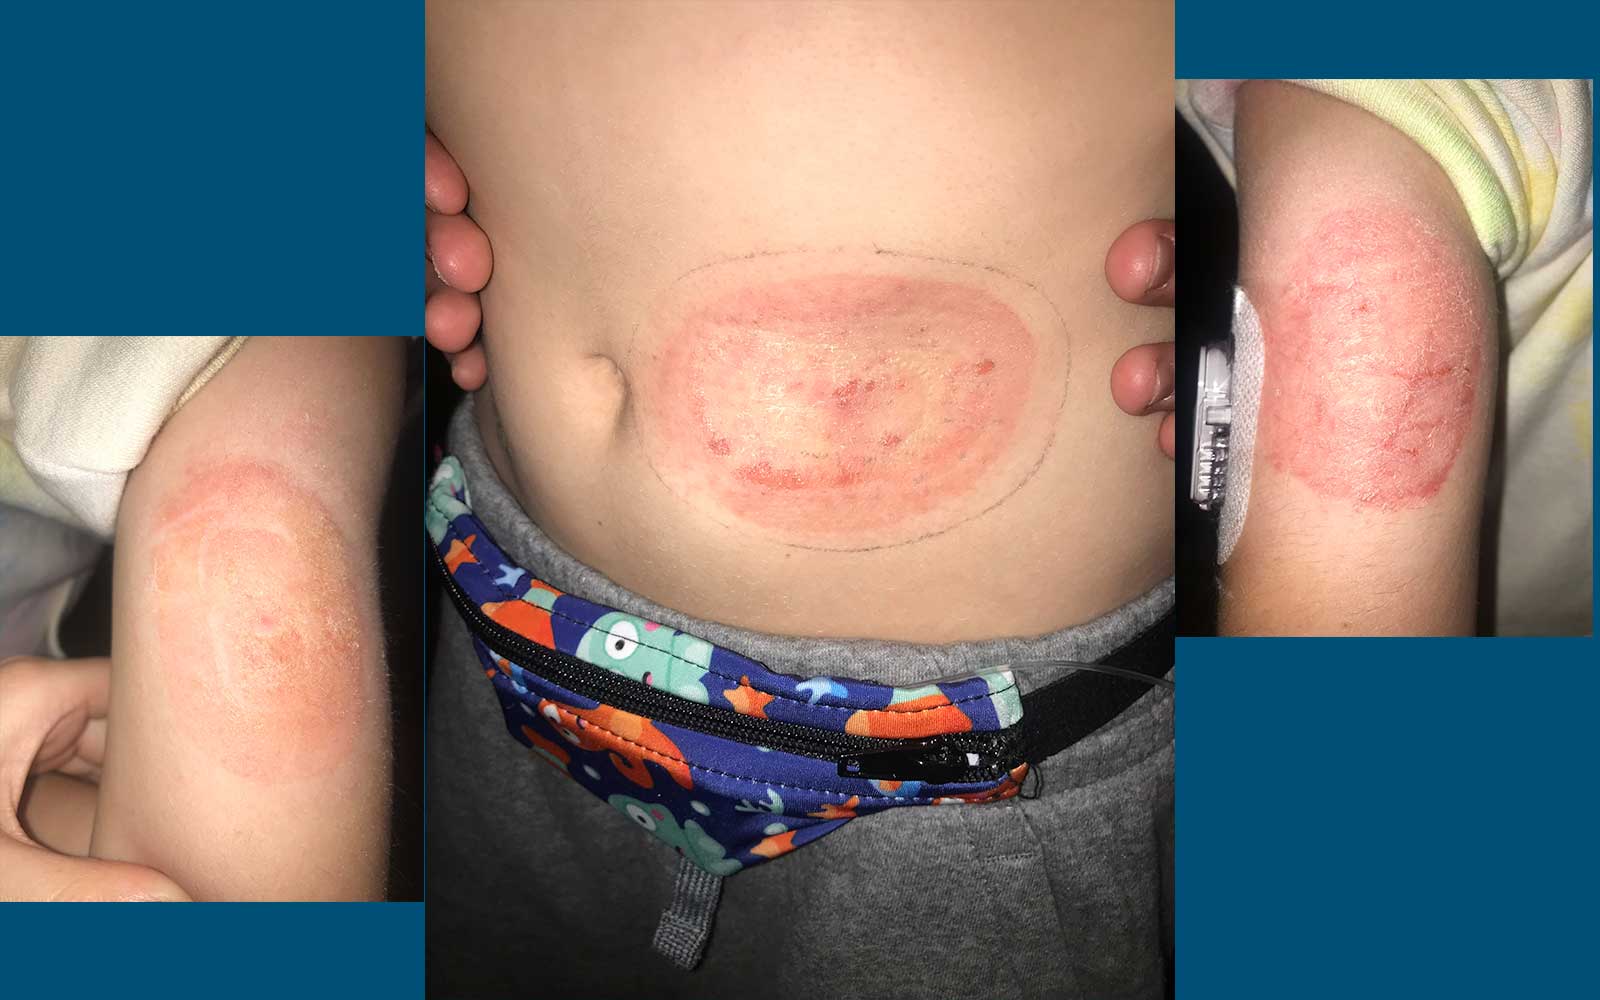
Adhesion And Sensor Detachment
Sensor detachment is a common challenge for Dexcom users. Poor adhesion can cause the sensor to fall off early. This interrupts glucose monitoring and affects accuracy. Keeping the sensor attached securely helps maintain consistent readings. Simple steps improve adhesion and reduce sensor loss. The following tips focus on preparing the skin, securing the sensor, and choosing the best sites for placement.
Skin Cleaning Tips
Clean the skin well before applying the sensor. Use an alcohol wipe to remove oils and dirt. Let the skin dry completely to ensure strong adhesion. Avoid lotions or creams on the area. These can weaken the adhesive and cause peeling. Shave any hair if needed to create a smooth surface. Dry, clean skin helps the sensor stick firmly for longer periods.
Using Overpatches
Overpatches add extra support to keep the sensor in place. Dexcom provides overlay tapes that fit perfectly over the sensor. Third-party adhesive patches also work well. Choose skin-friendly products to avoid irritation. Apply the overpatch carefully without wrinkles or bubbles. Replace the patch if it loosens or gets wet. Overpatches extend the life of the sensor and reduce detachment risks.
Alternative Placement Sites
The abdomen is the most common site, but other areas work too. Try the upper arm or thigh for better comfort or less movement. Avoid places with high friction or bending. Test new sites with caution to check sensor performance. Rotating sites helps prevent skin irritation. Choose a spot with enough tissue and low sweat to keep the sensor secure.
Credit: skingrip.com
Inaccurate Glucose Readings
Inaccurate glucose readings can cause confusion and affect diabetes management. Dexcom sensors sometimes show numbers that do not match your actual blood sugar. This can happen due to several reasons, such as sensor placement, calibration errors, or device issues. Taking steps to troubleshoot these inaccuracies helps keep your data reliable. Understanding how to correct these readings improves confidence in your Dexcom system.
Calibration Steps
Calibrating your Dexcom sensor helps improve reading accuracy. Use a blood glucose meter to get a precise value. Enter this number into your Dexcom device as a calibration point. Perform calibration during stable glucose levels, not during rapid changes. Avoid calibrating when your glucose is too high or too low. Follow the device prompts carefully for correct calibration timing. Regular calibration can reduce errors and improve sensor performance.
Comparing With Meter
Check your Dexcom readings against a traditional glucose meter often. This comparison helps identify any large differences or sensor errors. Use the same finger for blood glucose testing each time. Record both Dexcom and meter readings to track consistency. If readings differ significantly, consider recalibrating or replacing the sensor. Comparing values keeps your glucose management accurate and safe.
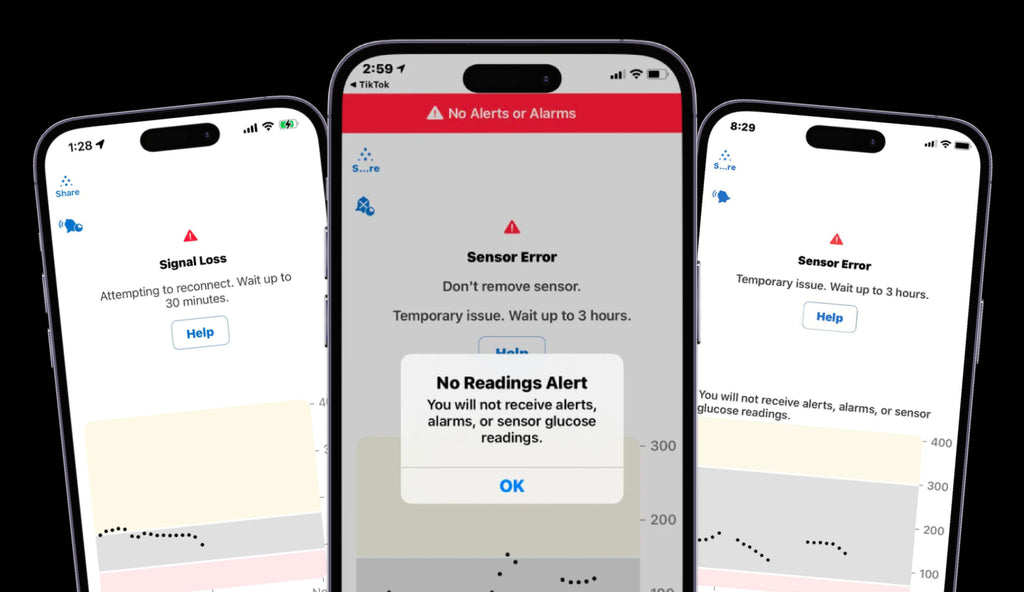
Persistent Question Marks (???)
Seeing persistent question marks (???) on your Dexcom device can be confusing. These symbols often indicate a problem with the sensor’s data transmission. It means the device is unable to read or display your glucose levels properly. Understanding the causes and how to fix this issue helps maintain accurate monitoring.
Causes And Meaning
Question marks appear when the Dexcom sensor loses signal. It may happen due to poor sensor placement or weak transmitter connection. The sensor could also be damaged or expired. Sometimes, interference from other devices blocks the Bluetooth signal. Low battery on your receiver or smartphone may also cause this issue. These question marks mean your glucose data is unavailable or unreliable.
Troubleshooting Steps
Start by checking the sensor site for any damage or lifting. Clean the skin and reattach the sensor if needed. Restart the Dexcom app and your device to refresh the connection. Make sure Bluetooth is turned on and working properly. Replace the transmitter battery if low. If the problem continues, re-pair the sensor and transmitter in the app. Contact Dexcom support for help if these steps don’t work.

Credit: www.dexcom.com
Resetting The Dexcom System
Resetting the Dexcom system can solve many common sensor issues. A reset helps refresh the connection between the sensor and your device. This process often clears errors and improves accuracy. Resetting is simple and does not require special tools. Follow the steps carefully to avoid data loss. Two main ways to reset include restarting the sensor and entering the correct code. Both methods can restore proper function quickly.
Sensor Restart
Restarting the sensor begins a new session for your Dexcom system. First, remove the sensor transmitter from the receiver or phone app. Wait a few seconds, then reinsert or reconnect it. This action helps clear temporary glitches in the sensor’s signal. The sensor will go through a warm-up period before it starts sending readings again. Make sure your transmitter battery is working before restarting. A sensor restart often fixes no reading or connection errors.
Code Entry
Entering the correct sensor code is vital for accurate glucose readings. Each new sensor comes with a unique code found on the sensor packaging. Open the Dexcom app or receiver and locate the code entry screen. Type the code exactly as shown, including letters and numbers. This step pairs the sensor with your device and calibrates the system. Using the wrong code can cause errors and false alerts. Always double-check the code to ensure it matches your sensor.
Additional Support Resources
Finding quick help for Dexcom troubleshooting is important. Additional support resources offer practical ways to solve common issues. These resources guide users through problems step-by-step. They help maintain accurate glucose monitoring without stress.
Explore virtual sessions, customer service, and helpful videos below. Each resource is designed to assist with Dexcom device challenges. Easy access to support can improve your experience and confidence.
Virtual Training Sessions
Virtual training sessions provide live guidance on using Dexcom devices. Experts show how to set up and troubleshoot sensors. These sessions cover common problems and solutions. They help users feel more comfortable with their devices. Joining a session allows asking questions in real-time. This training is useful for new and experienced users alike.
Customer Service Contacts
Dexcom customer service is ready to assist with technical issues. Reach out by phone or email for personalized help. Representatives can guide through sensor failures and app problems. They also offer advice on device replacements. Contacting support ensures you get accurate information fast. Keep customer service contacts saved for emergencies.
Helpful Videos
Helpful videos demonstrate how to fix common Dexcom problems. Visual guides make troubleshooting easier to understand. Topics include sensor placement, app setup, and error messages. Watching videos helps users follow steps correctly. Many videos are available on Dexcom’s official channels. These resources support users at their own pace.
Frequently Asked Questions
Why Is My Dexcom Sensor Not Connecting?
Your Dexcom sensor may not connect due to Bluetooth issues, incorrect pairing, low battery, or sensor failure. Restart your device and app, check sensor insertion, and ensure proper code entry. Clean skin before application and use adhesive patches to secure the sensor.
Contact Dexcom support if problems persist.
Why Would A Dexcom Stop Working?
A Dexcom may stop working due to sensor or transmitter failure, signal loss, low battery, poor adhesion, or incorrect pairing. Restart devices, check Bluetooth, clean skin before sensor application, and ensure proper insertion. Contact Dexcom support if issues persist for replacements or further help.
What Are Common Dexcom Issues?
Common Dexcom issues include signal loss, inaccurate readings, sensor failures, adhesion problems, and transmitter pairing errors. Users often face sensor detachment and display errors. Most problems resolve by restarting devices, checking Bluetooth, cleaning skin before insertion, or contacting Dexcom support for assistance.
How Do I Reset My Dexcom?
To reset your Dexcom, remove and reinsert the sensor, then enter the sensor code. Restart the Dexcom app or device if needed. Ensure Bluetooth is on and your device is charged. Contact Dexcom Support if issues persist.
Why Is My Dexcom Sensor Not Connecting?
The sensor may lose connection due to Bluetooth issues or low battery. Restart your phone and toggle Bluetooth to fix this. Also, ensure the sensor and transmitter codes are entered correctly.
Conclusion
Dexcom troubleshooting can feel frustrating but often has simple solutions. Check connections, restart devices, and clean skin before sensor placement. Use overlay tapes to keep sensors secure and avoid signal loss. Compare readings with your glucose meter to spot inaccuracies.
Reach out to Dexcom support for help or replacement parts. Staying calm and patient helps maintain your glucose monitoring smoothly. Small steps make a big difference in keeping your Dexcom working well.
")


