3D printing can be exciting yet challenging. The Ender 3 is a popular choice.
But it can sometimes have issues. Ender 3 troubleshooting is essential for smooth printing. Problems can range from bed leveling to filament jams. Knowing how to fix these issues saves time and frustration. In this guide, you will find solutions to common Ender 3 problems.
Whether you’re a beginner or experienced, these tips will help. Keep your Ender 3 running efficiently and enjoy hassle-free printing. Let’s dive into the troubleshooting steps and improve your 3D printing experience.
Introduction To Ender 3 Troubleshooting
The Ender 3 is a popular 3D printer known for its affordability and reliability. Like all machines, it can encounter issues. Understanding how to troubleshoot common problems is essential for keeping your printer running smoothly. This guide will help you identify and fix common issues.
Common Issues Overview
Several issues can affect the performance of your Ender 3. Identifying the problem is the first step. Here are some common issues:
- Bed Leveling Problems: Uneven prints or first layer issues.
- Extruder Jams: Filament not feeding properly.
- Layer Shifting: Misaligned layers in your print.
- Temperature Fluctuations: Inconsistent heating during the print.
- Stringing: Thin strings of filament between parts.
Importance Of Quick Fixes
Quick fixes are crucial for maintaining the quality of your prints. They save time and prevent small issues from becoming larger problems. Here are some benefits of quick fixes:
- Minimize Downtime: Keeping your printer operational.
- Reduce Waste: Less filament wasted on failed prints.
- Improve Print Quality: Consistent and reliable prints.
- Save Money: Prevent costly repairs or replacements.
Addressing issues promptly ensures a smooth printing experience. Regular maintenance and quick fixes will keep your Ender 3 in top condition.
Bed Leveling Problems
Bed leveling problems are common with the Ender 3 printer. An unlevel bed can cause many printing issues. Prints may not stick to the bed. Or, the nozzle could drag on the print. This guide will help you identify and fix bed leveling problems.
Symptoms Of Bed Leveling Issues
Uneven prints are a clear sign. The first layer may look squished or not stick. You might hear the nozzle scraping the bed. Prints can warp or come loose during printing. These issues suggest the bed is not level.
Steps To Fix Bed Leveling
First, preheat the bed and nozzle. This ensures they are at printing temperature. Next, use a piece of paper to check the distance between the nozzle and bed. Place the paper under the nozzle. Adjust the bed screws until the paper moves with slight resistance.
Repeat this process at all four corners of the bed. Check the center of the bed, too. Make small adjustments and recheck. Use the paper method until the bed feels level.
Finally, print a test object. A simple square can show if the bed is level. Check the first layer for even thickness. Adjust if needed. Repeat the process until the print looks good.
Filament Feeding Issues
One of the common problems with the Ender 3 is filament feeding issues. You might face filament jams, uneven feeding, or even complete blockages. These issues can affect print quality and reliability. This section will help you identify and fix these problems.
Identifying Filament Jams
Filament jams can occur for several reasons. The most common cause is a clogged nozzle. Here’s how you can identify a filament jam:
- Check if the extruder is making a clicking sound.
- Look for uneven layers or gaps in your prints.
- Inspect the filament for signs of grinding or stripping.
If you notice any of these signs, you likely have a filament jam.
Fixing Filament Feeding Problems
Once you identify a filament jam, you need to fix it. Follow these steps:
- Heat the nozzle to the printing temperature.
- Manually push the filament through the nozzle.
- If the filament doesn’t move, remove it and cut off the melted end.
- Reinsert the filament and try pushing it through again.
If these steps don’t work, you may need to clean the nozzle:
- Remove the nozzle from the printer.
- Soak it in acetone or a specialized cleaning solution.
- Use a small wire or needle to clear any remaining blockage.
Reinstall the nozzle and resume printing. Regular maintenance can prevent most filament feeding issues.

Credit: www.reddit.com
Print Quality Problems
Even with the reliable Ender 3, print quality issues can occur. These problems can be frustrating but are usually easy to fix. Below, we will explore common issues and ways to improve print quality.
Common Print Quality Issues
Several factors can affect the print quality on your Ender 3. Here are some of the most common issues:
- Layer Shifting: Layers appear misaligned, causing a noticeable shift.
- Stringing: Fine threads of filament between parts of the print.
- Warping: Edges of the print lift away from the bed.
- Under-Extrusion: Not enough filament is extruded, causing gaps.
- Over-Extrusion: Too much filament is extruded, creating blobs.
Improving Print Quality
Here are some tips to improve print quality:
| Issue | Solution |
|---|---|
| Layer Shifting | Check belt tension and motor alignment. |
| Stringing | Adjust retraction settings in your slicer software. |
| Warping | Use a heated bed and ensure proper bed adhesion. |
| Under-Extrusion | Check nozzle for clogs and ensure correct filament diameter. |
| Over-Extrusion | Calibrate your extruder steps per mm. |
Regular maintenance is crucial. Keep your printer clean and check for loose parts. Calibrate your bed frequently. A level bed ensures better adhesion and reduces warping. Update your firmware to the latest version for improved performance and bug fixes.
Using high-quality filament can also make a significant difference. Cheap filament might save money but can cause more problems. Always store filament in a dry place to avoid moisture, which can affect print quality.
Print speed is another factor. Slowing down your print speed can improve quality. Experiment with different speeds to find the best balance between speed and quality.
Lastly, monitor your prints. Catching issues early can save time and material. Use a webcam or be present during the initial layers to ensure everything starts smoothly.
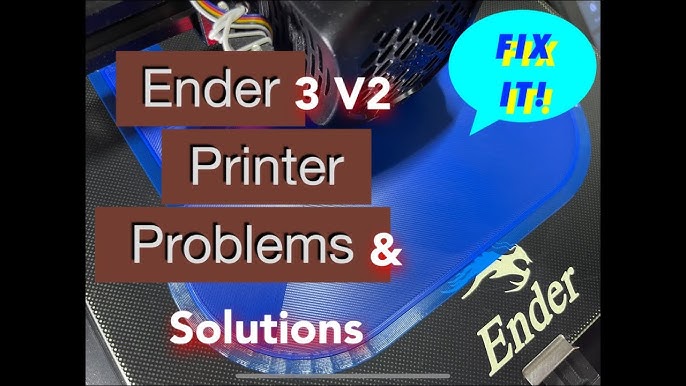
Nozzle Clogs And Blockages
Dealing with nozzle clogs and blockages on your Ender 3 can be frustrating. These issues can halt your printing process and affect the quality of your prints. Understanding the signs and learning how to clear a clogged nozzle can save you time and effort.
Signs Of Nozzle Clogs
Identifying nozzle clogs early is crucial. Here are some common signs:
- Under-extrusion: The printer produces thin or inconsistent layers.
- No filament: No filament comes out of the nozzle.
- Clicking sounds: The extruder makes clicking or grinding noises.
- Filament jams: The filament gets stuck in the nozzle.
Clearing A Clogged Nozzle
Clearing a clogged nozzle can be simple if you follow these steps:
- Heat the nozzle: Set the nozzle temperature to the filament’s melting point.
- Use a needle: Insert a thin needle into the nozzle to clear debris.
- Cold pull: Heat the nozzle, then pull the filament out while it’s soft.
- Disassemble the nozzle: Remove the nozzle and soak it in acetone to dissolve any remaining plastic.
Keeping your Ender 3 nozzle clean ensures smooth printing. Regular maintenance can prevent most clogs and blockages.
Credit: www.youtube.com
Extruder Motor Troubles
Experiencing issues with the Ender 3 extruder motor can be frustrating. The extruder motor is crucial for feeding filament into the hotend. When it malfunctions, prints can fail. Let’s explore common extruder motor problems and their solutions.
Recognizing Extruder Motor Issues
The extruder motor may start clicking. This sound indicates it can’t push the filament. Sometimes, the filament doesn’t feed at all. The motor might also overheat, causing it to stop working.
Watch for uneven filament flow. This can lead to under-extrusion. Prints will have gaps or weak layers. The motor might also vibrate. This makes it hard for the printer to move the filament smoothly.
Solutions For Extruder Motor Problems
Check the filament first. Ensure it’s not tangled or too thick. Next, inspect the extruder gear. It should grip the filament firmly. Clean the gear if it’s dirty.
Adjust the extruder tension. The tension should not be too tight or too loose. Also, examine the motor connections. Loose wires can cause the motor to fail. Secure all connections firmly.
Test the motor driver. Swap it with another axis driver. If the problem moves, the driver might be faulty. Replace the motor driver if needed. Ensure the motor has enough cooling. Use a fan to prevent overheating.
Temperature Fluctuations
Temperature fluctuations can affect the quality of your prints on the Ender 3. These fluctuations can cause a variety of issues, including poor adhesion and inconsistent layers. Understanding the causes and solutions is key to stabilizing your printer’s performance.
Causes Of Temperature Issues
Several factors can lead to temperature fluctuations on your Ender 3. Here are some common causes:
- Faulty Thermistor: A damaged thermistor can give incorrect temperature readings.
- Power Supply Problems: An unstable power supply can cause temperature changes.
- Poor Insulation: Inadequate insulation can lead to heat loss.
- Firmware Bugs: Outdated firmware may have bugs affecting temperature control.
Stabilizing Printer Temperature
To achieve stable temperatures on your Ender 3, try these solutions:
- Check the Thermistor: Ensure the thermistor is securely connected and not damaged.
- Upgrade the Power Supply: A reliable power supply can help maintain stable temperatures.
- Improve Insulation: Use insulation materials around the hotend and bed to reduce heat loss.
- Update Firmware: Install the latest firmware to fix any bugs related to temperature control.
- Calibrate PID Settings: Proper PID tuning can stabilize temperature fluctuations.
Here’s a quick table summarizing the key points:
| Issue | Solution |
|---|---|
| Faulty Thermistor | Check and replace if needed |
| Power Supply Problems | Upgrade to a stable power source |
| Poor Insulation | Improve insulation around hotend and bed |
| Firmware Bugs | Update to the latest firmware |
| Unstable PID Settings | Calibrate PID settings |
By addressing these common issues, you can ensure your Ender 3 maintains stable temperatures, resulting in higher quality prints.
Credit: www.reddit.com
Firmware And Software Glitches
Facing firmware and software glitches can be frustrating for Ender 3 users. These issues can lead to print failures, poor quality prints, or even damage to the printer. Understanding how to identify and fix these problems is crucial for maintaining your Ender 3’s performance.
Identifying Firmware Issues
Firmware issues can cause a variety of problems in your Ender 3. Some common signs include:
- Printer not responding to commands
- Unexpected behavior during printing
- Display showing errors or freezing
- Inconsistent temperature readings
Check for any error messages on the display. These can provide clues about the issue. Also, note if the printer behaves erratically or if specific functions fail to work properly. These are often signs of firmware glitches.
Updating And Fixing Software Problems
Updating the firmware can resolve many issues. Follow these steps to update your Ender 3 firmware:
- Download the latest firmware from the manufacturer’s website.
- Extract the downloaded files to a formatted SD card.
- Insert the SD card into the printer’s card slot.
- Turn on the printer and wait for the firmware to update.
After updating, check if the issues persist. If they do, consider these troubleshooting tips:
- Ensure the firmware version is compatible with your printer model.
- Reflash the firmware if issues continue.
- Reset the printer to factory settings.
Software problems can also arise from slicer settings or outdated software. Always use the latest version of your slicing software. Incorrect settings in the slicer can cause print failures. Double-check your settings for accuracy.
| Problem | Possible Solution |
|---|---|
| Printer not starting | Check power supply and connections |
| Display errors | Reflash firmware |
| Poor print quality | Check slicer settings |
Conclusion And Maintenance Tips
Maintaining your Ender 3 printer can help prevent many common issues. Regular care ensures better performance and a longer lifespan for your machine. In this section, you’ll find simple maintenance practices and final troubleshooting advice.
Regular Maintenance Practices
Regular maintenance keeps your Ender 3 printer in top shape. Clean the nozzle to avoid clogs. Use a soft brush to remove any debris. Check the bed level often. An uneven bed can cause print failures. Tighten all screws and belts. Loose parts can lead to poor print quality.
Lubricate the moving parts. This prevents wear and tear. Inspect the wiring for any damage. Replace any worn-out parts. Regular updates to firmware can also improve performance.
Final Troubleshooting Advice
Always check the basics first. Ensure the power supply is stable. Verify that the filament is feeding correctly. If prints fail, look at the first layer. Often, issues start there. Adjust the bed level and nozzle height. Check for any software errors. Reinstall or update your slicer software if needed.
Examine the printer’s hardware. Look for any loose or broken parts. Replace or fix them as necessary. Keep a log of any issues and solutions. This helps in identifying patterns. Consult online forums and guides. They offer valuable insights from other users. With these tips, your Ender 3 will run smoothly.
Frequently Asked Questions
How Do I Fix Ender 3 Bed Leveling Issues?
Level the bed manually with paper. Adjust knobs until there’s slight resistance. Repeat for all corners.
Why Is My Ender 3 Not Extruding Filament?
Check nozzle for clogs. Ensure filament is loaded properly. Verify extruder tension is correct.
What Causes Ender 3 Print Adhesion Problems?
Clean the bed with isopropyl alcohol. Use glue stick or hairspray. Adjust bed temperature.
How To Resolve Ender 3 Layer Shifting?
Check belt tension. Ensure pulleys are tight. Reduce print speed. Stabilize the printer base.
Why Are My Ender 3 Prints Stringy?
Lower the print temperature. Increase retraction settings. Clean the nozzle. Check filament quality.
Conclusion
Troubleshooting your Ender 3 can seem daunting, but it’s manageable. Start with basic checks. Look for simple fixes. Clean and maintain your printer regularly. Replace faulty parts when necessary. Use the community for support and advice. Keep learning and experimenting.
Patience and practice lead to success. Happy printing!


