If you own a Harley-Davidson, you know how thrilling it is to hit the open road. But what happens when your bike starts acting up?
Don’t let frustrating problems ruin your ride. This Harley Davidson Troubleshooting Guide is designed to help you quickly identify and fix common issues. Whether your engine won’t start, the electronics act strange, or you’re seeing trouble codes on your display, you’ll find clear, step-by-step advice here.
By understanding your bike better, you save time, money, and avoid unnecessary trips to the mechanic. Keep reading to take control of your Harley’s health and get back on the road with confidence.
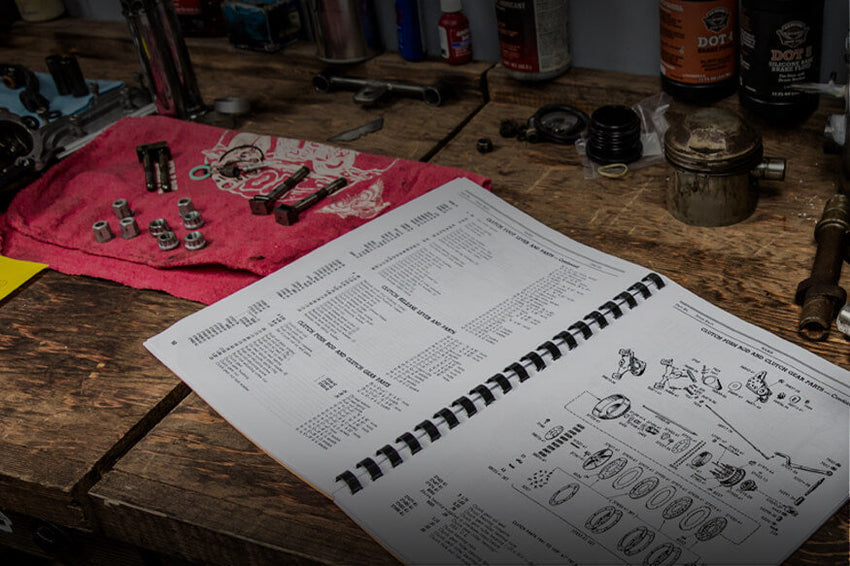
Credit: www.lowbrowcustoms.com
Common Harley Issues
Harley Davidson motorcycles are known for their power and style. Yet, like all machines, they face common issues. Understanding these problems helps keep your bike running smoothly.
This guide covers frequent troubles owners face. It explains causes and basic fixes. Knowing these saves time and money on repairs.
Engine Won’t Start
One common problem is the engine not starting. This can happen due to a dead battery or faulty spark plugs. Check if the kill switch is on or if the side stand is down. These safety features stop the engine from starting. Sometimes, clogged fuel injectors block fuel flow. Clean or replace them for better performance.
Electrical Problems
Electrical issues often cause dashboard lights to flicker or fail. Loose wiring or corroded connectors may be the reason. Battery terminals should be clean and tight. Faulty switches and blown fuses also disrupt electrical flow. Regular inspection prevents sudden failures while riding.
Fuel System Troubles
The fuel system can create problems like poor acceleration or stalling. Dirty fuel filters restrict flow and cause rough running. Fuel pumps might fail, stopping fuel delivery altogether. Using fresh gasoline and cleaning the system keeps the engine healthy. Watch out for leaks in fuel lines that reduce pressure.
Charging System Failures
Charging system issues drain the battery quickly. A bad stator or regulator can stop the battery from charging. This leads to dim lights and weak starts. Testing these parts with a multimeter helps find faults. Replacing damaged components ensures the bike charges correctly.
Reading Trouble Codes
Reading trouble codes is a key step in diagnosing Harley Davidson issues. These codes reveal what the bike’s computer detects as problems. Understanding these codes saves time and money on repairs. It helps you know the exact fault instead of guessing. This guide explains how to access, read, and use trouble codes effectively.
Accessing Diagnostic Mode
To read trouble codes, first enter the diagnostic mode on your Harley. Turn the ignition off. Press and hold the odometer reset button. While holding it, turn the ignition on. Wait until “DIAG” appears on the screen. Release the reset button. Use the trip button to scroll through the stored codes.
Interpreting Error Codes
Each code corresponds to a specific issue in your motorcycle. Codes usually start with a letter followed by numbers, like P1234. The letter shows the system affected, such as engine or ABS. The numbers point to the exact fault. Refer to your Harley’s manual or online resources to decode these numbers. Knowing what each code means helps you fix the problem correctly.
Using Diagnostic Tools
Diagnostic tools make reading and clearing trouble codes easier. A scan tool connects to your Harley’s diagnostic port. It reads codes and shows live data from sensors. Some tools can reset codes after repairs. Choose a tool compatible with Harley Davidson models. This helps maintain your bike and prevents recurring issues.
Checking The Stator
The stator is a key part of your Harley Davidson’s charging system. It creates the electrical power needed to run the bike and charge the battery. Checking the stator helps find issues that stop your bike from running well. A bad stator can cause weak spark, dim lights, or a dead battery. Testing the stator is simple with the right tools and steps.
Start by inspecting the stator’s windings and connectors. Dirt, corrosion, or damage can cause failure. Use a multimeter to measure resistance and check for shorts. This process helps spot problems before they worsen. Understanding stator issues saves time and money on repairs.
Testing Resistance Between Windings
Use a digital multimeter set to the ohms (Ω) scale. Locate the three stator wires, usually yellow. Test resistance by placing probes between each pair of wires. First, test wire one to wire two. Then wire one to wire three. Finally, test wire two to wire three.
The resistance should be close on all three tests. Look for differences or infinite readings. A very high or low resistance means the stator is damaged. Record your readings for future reference. This step confirms if the stator windings are healthy or not.
Identifying Stator Failures
Common stator failures include open circuits and shorts to ground. Open circuits happen when the wire breaks inside the stator. Shorts to ground occur when the winding touches the metal parts. Both problems stop the stator from making electricity.
Check for burnt smells or discoloration on the stator. These signs show overheating or damage. Also, test for continuity between each wire and the stator body. Any connection means a short to ground. Replacing the stator is needed if failures appear. Fixing the stator early avoids bigger electrical issues.
Fuel And Ignition Checks
Fuel and ignition systems play a key role in your Harley Davidson’s performance. Problems in these areas often cause starting failures or rough running. Regular checks keep your bike running smooth and reliable. This section covers simple ways to inspect fuel and ignition parts. Follow these steps to spot issues early and avoid costly repairs.
Inspecting Fuel Pump And Injectors
Check the fuel pump for proper operation. Listen for a humming sound when you turn the key on. No sound may mean a faulty pump or blown fuse. Inspect fuel injectors for dirt or clogs. Dirty injectors reduce fuel flow and cause poor engine response. Clean or replace injectors if needed. Fuel lines should be free of cracks or leaks. Replace damaged hoses to maintain fuel pressure.
Verifying Spark Plugs And Coils
Remove spark plugs and check their condition. Look for worn electrodes or heavy deposits. Replace plugs if they appear damaged or fouled. Test spark plugs by checking for a strong blue spark. Weak or no spark points to ignition coil or wiring problems. Inspect ignition coils for cracks or corrosion. Use a multimeter to test coil resistance. Replace faulty coils to restore proper ignition.
Examining Safety Switches
Safety switches prevent the engine from starting in unsafe conditions. Check the kill switch on the handlebar for proper function. It should move freely and click into place. Inspect the side stand switch to ensure it detects the stand position correctly. Faulty switches may stop the engine from starting or cause stalling. Clean switch contacts and replace broken switches as needed. Proper safety switch operation is essential for a safe ride.
Battery And Charging System
The battery and charging system are vital for your Harley Davidson’s performance. They provide the power needed to start and run the engine smoothly. A weak battery or faulty charging system can cause starting problems or unexpected shutdowns. Regular checks help keep your bike reliable and ready to ride.
Inspecting Connections
Check all battery terminals for tightness and cleanliness. Loose or corroded connections reduce power flow. Use a wire brush to remove corrosion. Ensure cables are not damaged or frayed. Secure connections prevent voltage drops and starting issues.
Testing Regulator And Rectifier
The regulator and rectifier control voltage from the stator to the battery. Use a multimeter to test their output. Measure voltage at the battery while the engine runs. It should be between 13.5 and 14.8 volts. Lower or higher readings indicate a faulty regulator or rectifier. Replace parts showing abnormal readings.
Maintaining Charging Circuit
Keep the charging circuit clean and dry. Inspect the stator wires for wear or damage. Check fuses and replace any blown ones. Avoid riding in heavy rain without protection. Regular maintenance prevents charging failures and extends battery life.

Credit: www.amazon.com
Troubleshooting Safety Features
Harley Davidson motorcycles have built-in safety features to protect riders. These features sometimes cause starting or running issues. Understanding how to troubleshoot these safety parts saves time and frustration.
This section covers two key safety features: the kill switch and the side stand safety switch. Both can affect your bike’s operation if they fail or get stuck.
Kill Switch Issues
The kill switch stops the engine quickly in emergencies. If it is stuck or damaged, the engine may not start or may cut off suddenly.
Check the kill switch by toggling it several times. Clean any dirt or debris around the switch. Use a multimeter to test for continuity if you have one.
Replace the kill switch if the bike still won’t start and the switch shows no continuity. A faulty kill switch prevents the ignition system from working.
Side Stand Safety Switch
The side stand safety switch stops the engine from running if the stand is down and the bike is in gear. This prevents accidents.
Sometimes the switch gets stuck or dirty, causing the bike not to start or to stall. Check if the switch moves freely and is clean.
Use a multimeter to check the switch’s electrical function. Replace the switch if it fails to open or close properly. This ensures your bike only runs when safe.
Maintenance Tips
Proper maintenance keeps your Harley Davidson running smoothly and safely. Regular care prevents breakdowns and costly repairs. Simple steps extend your bike’s life and improve performance. Focus on inspections, cleaning, and software updates to stay ahead of issues.
Regular Inspections
Check your Harley often for loose bolts and worn parts. Inspect tires for proper pressure and tread depth. Look at brake pads and fluid levels regularly. Early detection of problems avoids bigger damage. Make a checklist to follow before each ride.
Cleaning And Lubrication
Keep your motorcycle clean to prevent rust and dirt buildup. Use mild soap and water for washing. Dry it thoroughly to avoid moisture damage. Lubricate the chain, cables, and moving parts often. Proper lubrication reduces friction and wear on components.
Updating Software And Firmware
Modern Harley models rely on software for optimal performance. Check for updates on the official Harley Davidson website. Update the ECM and other modules to fix bugs and improve functions. Staying current helps your bike run efficiently and safely.
Resources And Manuals
Having the right resources and manuals is essential for troubleshooting Harley Davidson motorcycles. These tools provide clear instructions and detailed diagrams. They guide riders through complex repairs and maintenance tasks. Access to accurate information saves time and prevents costly mistakes. It also boosts confidence when handling technical issues on your bike.
Accessing Service Manuals
Official service manuals offer step-by-step repair procedures. Harley Davidson provides digital and printed versions. Digital manuals are easy to download and search. Printed manuals remain useful for hands-on work without screens. These manuals include wiring diagrams, torque specs, and parts lists. They cover common problems and advanced repairs for various Harley models. Use the exact manual matching your motorcycle’s year and model for best results.
Utilizing Online Repair Guides
Online repair guides offer quick solutions for many Harley issues. Forums and blogs often share user experiences and fixes. Video tutorials demonstrate repairs visually, making complex tasks clearer. Many websites host free and paid guides tailored to Harley motorcycles. They often cover troubleshooting electrical, engine, and brake problems. Regularly updated guides keep pace with new Harley technologies and models.
Finding Expert Help
Sometimes professional advice is necessary to solve tough problems. Certified Harley Davidson mechanics bring deep knowledge and experience. Many local dealers offer diagnostic services and repairs. Online communities and social media groups connect you with experts worldwide. Experts can explain error codes and recommend parts or repairs. Combining expert help with manuals and guides ensures accurate troubleshooting.
Credit: www.lowbrowcustoms.com
Frequently Asked Questions
How To Read Harley-davidson Trouble Codes?
Hold the trip reset button and turn the ignition on to enter diagnostic mode. Use the trip button to scroll through Harley-Davidson trouble codes on the speedometer display.
How Do You Know If Your Stator Is Bad On A Harley?
A bad Harley stator causes dim or no headlight, battery not charging, or engine stalling. Test resistance between three stator wires for irregular readings.
Why Is My Harley Turning Over But Not Starting?
Your Harley may turn over but not start due to faulty fuel pump, clogged injectors, bad spark plugs, or a defective kill or safety switch. Check fuel flow, ignition components, and safety switches to resolve starting issues quickly. Regular maintenance prevents these problems.
How To Do Diagnostics Check On Harley-davidson?
Turn off the ignition. Hold the odometer reset button. Turn ignition on until “DIAG” shows. Use trip reset to read codes.
What Are Common Harley Davidson Starting Problems?
Harley Davidson often has issues with the battery, spark plugs, or fuel system. Checking these parts first can save time. Faulty switches also block the engine from starting.
Conclusion
Troubleshooting your Harley Davidson can save you time and money. Use this guide to identify common problems fast. Check key parts like the fuel system, spark plugs, and switches regularly. Follow simple steps to read error codes and understand what they mean.
Keep your bike in good shape with routine care and attention. Stay calm and patient while diagnosing issues. Your Harley will run smoother with proper troubleshooting. Enjoy the ride and confidence that comes with knowing your bike well.
")


