Hearing aids are your lifeline to clearer sounds and better conversations. But what happens when they suddenly stop working or don’t perform like they used to?
If you’ve ever felt frustrated because your hearing aid isn’t doing its job, you’re not alone—and the good news is, many common problems have simple fixes you can try right at home. This Hearing Aid Troubleshooting Guide will walk you through easy steps to identify and solve issues quickly, so you don’t miss a moment of life’s important sounds.
Keep reading to regain control over your hearing and enjoy peace of mind knowing help is just a few steps away.
Credit: www.hear.com
Common Hearing Aid Issues
Hearing aids can sometimes face problems that affect their performance. Knowing common issues helps in quick fixes and better use. This guide covers frequent hearing aid troubles and easy ways to handle them. Understanding these issues can save time and avoid frustration.
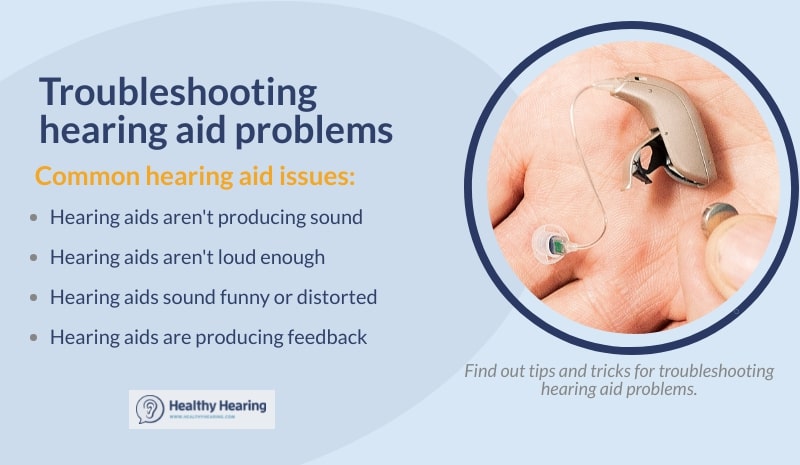
No Sound Or Weak Sound
No sound or very low sound is a common problem. Check if the hearing aid is turned on. Earwax or dirt may block the sound outlet. Clean the device gently to clear the blockage. Make sure the volume is set correctly. Sometimes the microphone or speaker may need repair.
Feedback And Whistling
Feedback causes a high-pitched whistling noise. It happens when sound leaks from the ear canal. Poor fit or loose parts often cause this issue. Try adjusting the hearing aid for a snug fit. Replace old or damaged ear molds. Keep the device away from phones or metal objects.
Intermittent Sound
Intermittent sound means the hearing aid works on and off. Loose battery connections are a common cause. Check the battery door to ensure it is closed tightly. Moisture inside the device can also cause this. Dry the hearing aid using a drying kit or store it in a dry place. Repair may be needed if the problem continues.
Battery And Power Problems
Batteries often cause hearing aid problems. Dead or weak batteries reduce sound quality. Replace batteries regularly and keep spares handy. Rechargeable hearing aids need proper charging time. Avoid overcharging or letting the battery fully drain. Clean battery contacts to ensure good power flow.
Basic Troubleshooting Steps
Basic troubleshooting steps help fix common hearing aid problems fast. These steps keep your device working well every day. Follow simple checks before visiting a professional. Many issues come from small, fixable causes. Understanding these basics saves time and effort.
Check And Replace Batteries
Start by checking the battery power. Weak batteries cause no sound or poor quality. Open the battery compartment and remove the old battery. Insert a new one with the correct size and type. Rechargeable hearing aids need full charging before use. Always carry spare batteries for emergencies.
Clean Microphones And Speakers
Dirt and wax block sound from microphones and speakers. Use a soft brush or cloth to clean these parts gently. Avoid sharp tools that may cause damage. Regular cleaning improves sound clarity. Check for blocked openings and clear them carefully.
Inspect For Moisture And Damage
Moisture harms hearing aids and stops them from working. Remove the device and dry it with a soft cloth. Use a hearing aid dehumidifier if available. Look for cracks or broken parts on the device. Damaged parts need professional repair to avoid further issues.
Verify Volume And Program Settings
Ensure volume levels are set correctly. Too low or too high volume affects hearing quality. Check if the device is on the right program for your environment. Adjust settings using your remote or app if available. Reset to default settings if sound is still poor.
Resetting Your Hearing Aid
Resetting your hearing aid can solve many common problems fast. A reset clears temporary glitches and restores normal function. Different reset methods fit different device issues. Learn which reset to try for your hearing aid type.
Simple Power Cycle
Turning your hearing aid off and on again often fixes minor bugs. Battery models switch off by opening the battery door. Close the door to power the device back on.
Rechargeable models reset by placing them in the charging case. Remove after a few seconds to restart the hearing aid. This quick step refreshes the system without losing settings.
Hard Reset For Unresponsive Devices
A hard reset helps if your hearing aid is frozen or not responding. It usually fixes errors without erasing your custom settings.
- Find the button on your hearing aid. This may be a rocker or multi-function button.
- Press and hold the button for several seconds until you see a light or indicator.
- Release the button and put the device in the charger.
- Wait a few minutes while it resets and charges.
Factory Reset Options
A factory reset erases all settings and data. This step clears deep problems but removes personal adjustments.
Only an audiologist or hearing professional should perform a factory reset. They use special software to reset your device safely.
If other resets fail, contact your hearing care provider. They can update software or reset your aid for best performance.

Credit: www.teacherspayteachers.com
Fixing Connectivity Problems
Connectivity problems can disrupt the use of your hearing aids. These issues often affect sound quality and device performance. Fixing these problems helps maintain clear and consistent hearing support. The guide below explains simple steps to restore connectivity.
Re-pair Bluetooth Devices
Start by turning off your hearing aids and Bluetooth on your phone. Wait a few seconds, then turn both back on. Go to your phone’s Bluetooth settings and forget the hearing aid device. Search for available devices again and select your hearing aids to re-pair. This process can fix common connection errors.
Ensure your devices are close during pairing. Keep other Bluetooth devices off to avoid interference. Re-pairing often solves issues with dropped or weak connections.
Check Wireless Connections Between Aids
Wireless hearing aids communicate with each other for better sound balance. Check if both aids are powered on and fully charged. Remove any objects that might block signals, like hats or glasses.
Reset the wireless connection by turning off both aids. Wait 10 seconds, then turn them back on. Listen for a pairing tone or check your hearing aid app to confirm connection. This simple step restores syncing between devices.
If problems continue, consult your audiologist to check for firmware updates or device repairs.
Handling Earwax Buildup
Earwax buildup is a common cause of hearing aid problems. It can block sound and reduce device performance. Regular care helps keep hearing aids working well. Understanding how to handle earwax is important for all users. This section explains simple steps to clean and prevent earwax issues.
Cleaning Wax Guards And Filters
Wax guards and filters protect hearing aids from earwax. Over time, they can become clogged. Remove the wax guard gently using the tool provided with your hearing aid. Check the filter for buildup and replace it if dirty or damaged. Clean these parts regularly to avoid sound blockage. Use only tools made for hearing aids to prevent damage.
Preventing Future Blockages
Keep your ears clean to reduce wax buildup on your hearing aid. Avoid using cotton swabs inside the ear canal. Use a soft cloth to wipe your hearing aids daily. Store hearing aids in a dry place overnight to prevent moisture. Regular checkups with an audiologist can help maintain your device. Following these steps lowers the chance of earwax blocking your hearing aids.
Addressing Physical Fit Issues
Physical fit problems can cause discomfort and reduce hearing aid performance. A proper fit keeps the device secure and sound clear. Small issues with parts like domes, molds, or tubing often cause troubles. Regular checks help spot these problems early. Adjustments or replacements can improve comfort and sound quality quickly.
Check Domes And Molds
Domes and molds must fit snugly in your ear canal. Loose or damaged domes cause whistling or feedback sounds. Look for cracks, tears, or hardening that affect comfort. Clean domes regularly to prevent earwax buildup. Replace domes if they no longer fit well or appear worn out. Custom molds may need reshaping by a hearing professional for a better fit.
Inspect Tubing For Bte Models
Tubing connects the hearing aid to the ear mold in Behind-The-Ear (BTE) devices. Check for cracks, stiffness, or blockages in the tubing. Old tubing can harden and cause sound issues. Remove and clean tubing regularly with a blower or soft cloth. Replace tubing if it shows signs of damage or discoloration. Proper tubing ensures clear sound and prevents discomfort.
When To Seek Professional Help
Knowing when to seek professional help is key in maintaining your hearing aids. Some problems cannot be fixed with simple troubleshooting. Experts have the tools and knowledge for complex issues. Acting early can prevent further damage and ensure your hearing aids work well.
Persistent Sound Problems
Sound issues that don’t improve after basic fixes need expert care. Problems like constant static, distortion, or no sound at all require attention. An audiologist can check for internal damage or blockages. They can also clean or adjust the device properly.
Device Repairs And Reprogramming
Physical damage or malfunctioning parts call for professional repairs. Cracked shells, broken buttons, or loose wiring must be fixed carefully. Experts can reprogram your hearing aids to match your hearing needs. This ensures better sound quality and comfort.
Software Updates And Advanced Resets
Hearing aids with digital components need regular software updates. Professionals have the right software to update your device safely. Advanced resets, like factory resets, erase all settings and require expert handling. These steps often solve complex glitches and improve performance.
Credit: www.healthyhearing.com
Frequently Asked Questions
What Are Three Ways In Which A Hearing Aid Can Malfunction?
Hearing aids can malfunction due to dead batteries, earwax blocking sound, or internal electronic faults. Regular cleaning and battery checks prevent issues.
What Are The Four Most Common Hearing Problems?
The four most common hearing problems are conductive, sensorineural, mixed hearing loss, and auditory neuropathy spectrum disorder.
How Do I Reboot My Hearing Aid?
To reboot your hearing aid, open and close the battery door for battery models. For rechargeable ones, place and remove it from the charger. For unresponsive devices, press and hold the reset button, then recharge briefly. Contact an audiologist for a factory reset or advanced help.
Why Is My Left Hearing Aid Not Working?
Check and replace the battery if low. Clean earwax or debris from the device. Restart the hearing aid and ensure wireless connection is active.
How Do I Reset My Hearing Aid If It Stops Working?
To reset a battery hearing aid, open the battery door to turn it off, then close it to turn it on. For rechargeable models, place the aid in its charging case, wait a few seconds, then remove it to restart.
Conclusion
Troubleshooting hearing aids can seem tricky but is often simple. Check batteries, clean earwax, and adjust settings first. Resetting your device may fix many common issues quickly. Persistent problems need help from a hearing specialist. Regular care keeps your hearing aids working well.
Stay patient and follow these steps for better hearing.
")


