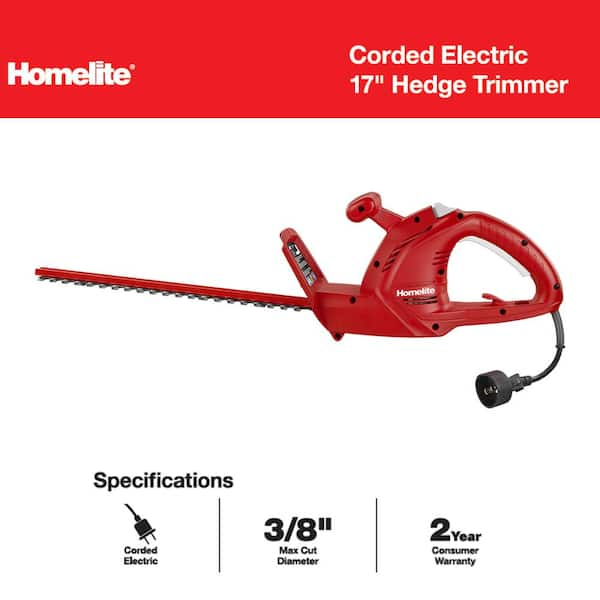
Are you tired of battling with your Homelite trimmer instead of your garden? You’re not alone.
Many homeowners face frustrating issues with their trimmers that can turn a simple yard task into a time-consuming ordeal. Whether it’s a stubborn start, uneven cutting, or a mysterious sound, these problems can leave you scratching your head in confusion.
But don’t worry—help is at hand! By understanding a few common troubleshooting tips, you can transform your gardening experience from a headache into a breeze. This guide is designed to address your concerns directly and provide clear, practical solutions. Dive in to discover how you can get your Homelite trimmer back in action and keep your garden looking pristine with ease.
Common Issues
Experiencing sputtering or a jammed trimmer head? These are typical problems with Homelite trimmers. Addressing clogged lines and faulty spark plugs can ensure smooth operation.
When you’re out in the yard ready to tackle the overgrown grass, nothing is more frustrating than a Homelite trimmer that won’t cooperate. Whether it’s refusing to start, performing poorly, or the trimmer line is giving you grief, these common issues can turn a simple task into a headache. Understanding these problems and knowing how to fix them can save you time and energy. Let’s dig into some typical issues you might face with your Homelite trimmer and how to troubleshoot them effectively.
Engine Won’t Start
The engine’s refusal to start is a frequent complaint. First, check the fuel. Old or stale fuel can prevent the engine from starting. Make sure you have fresh gasoline in the tank. Next, inspect the spark plug. A dirty or damaged spark plug can be the culprit. Remove it and look for any signs of wear or carbon buildup. If necessary, clean it or replace it with a new one. Finally, consider the air filter. A clogged air filter can restrict airflow and prevent starting. Remove the filter and clean it. If it’s too dirty, replace it entirely.
Poor Engine Performance
If your trimmer starts but runs poorly, it might be frustrating, especially when you’re on a tight schedule. Start by checking the carburetor. It might need adjustment if the engine is sputtering or running unevenly. Look at the exhaust port. Carbon deposits can block the exhaust, leading to poor performance. Clean the port to ensure smooth operation. Lastly, don’t ignore the fuel mixture. An incorrect oil-to-gas ratio can affect performance. Make sure you’re using the proper mix according to the manufacturer’s instructions.
Trimmer Line Problems
Trimmer line issues can be surprisingly annoying. If the line keeps breaking, it might be the wrong type for your trimmer. Ensure you’re using the recommended line thickness and type. If the line is not feeding correctly, check the spool. It might be improperly wound or jammed. Rewind the line neatly and ensure it’s not twisted. For frequent line wear, consider your technique. Avoid hitting hard surfaces, which can wear down the line quickly. Are you using the trimmer correctly, maintaining a safe distance from hard objects? By tackling these common issues head-on, you can keep your Homelite trimmer in top shape. Have you encountered any of these problems before? Share your experiences and solutions in the comments below!

Engine Starting Solutions
Homelite trimmer troubleshooting helps fix engine starting issues efficiently. Identify common problems like clogged filters or faulty spark plugs. Follow simple steps to ensure smooth operation and maintain your garden effortlessly.
Starting a Homelite trimmer can sometimes feel like a challenge, especially when the engine refuses to cooperate. But don’t worry; with a bit of troubleshooting, you can get your trimmer humming again. Whether you’re tackling an overgrown garden or just maintaining a neat lawn, understanding the basic engine starting solutions will save you time and frustration. Let’s dive into some practical steps you can take to ensure your trimmer starts smoothly every time.
Check Fuel And Oil Levels
Your trimmer’s engine relies heavily on the right mix of fuel and oil. If you’ve ever tried starting your trimmer only to hear silence, it might be due to insufficient fuel or oil. Ensure that your trimmer has enough fresh fuel in the tank. Old fuel can lose its effectiveness, causing starting issues. Imagine trying to start your car with an empty tank—it just wouldn’t work. Similarly, check the oil levels. Low oil can affect engine performance. Keep a regular check on these levels, and you’ll likely find your trimmer starts with less fuss.
Inspect Spark Plug
The spark plug is small but mighty. It plays a crucial role in igniting the engine. A dirty or faulty spark plug can prevent your trimmer from starting. Remove the spark plug and inspect it for any signs of wear or carbon buildup. Cleaning or replacing the spark plug can make a world of difference. You wouldn’t ignore a flickering light bulb, so treat your spark plug with the same attention. A clean spark plug ensures a strong spark, which is essential for a smooth start.
Air Filter Maintenance
Imagine trying to breathe through a dirty cloth—it’s tough, right? Your trimmer’s engine feels the same way if its air filter is clogged. A clean air filter is vital for efficient engine performance. Check the filter regularly and clean it as needed. If it’s excessively dirty, consider replacing it. This simple step can prevent the engine from choking and help maintain its health. Ask yourself, when was the last time you checked your trimmer’s air filter? Regular maintenance can transform your start-up troubles into a routine start-up success. By tackling these three areas, you’ll find your Homelite trimmer ready to tackle any lawn with ease. Happy trimming!
Improving Engine Performance
Improving the engine performance of your Homelite trimmer can make all the difference in its efficiency and longevity. Ever found yourself mid-task with a sputtering trimmer? It’s frustrating, right? Understanding the key components that affect engine performance can save you time and effort, ensuring your trimmer runs smoothly. Let’s dive into some actionable insights that can help you enhance the performance of your trimmer engine.
Carburetor Adjustments
The carburetor plays a crucial role in mixing fuel and air for combustion. If the mixture isn’t right, your trimmer might struggle to perform. Have you ever noticed your engine revving too high or too low? This could be due to improper carburetor settings.
- Locate the adjustment screws on your carburetor. Typically, you’ll find two or three.
- Turn the screws slowly to fine-tune the fuel-air mixture. Listen to the engine—does it sound smoother?
- Remember, small adjustments can make a big difference. Test the trimmer after each tweak.
Exhaust System Cleaning
A clogged exhaust can choke your engine, reducing its power. When was the last time you checked your trimmer’s exhaust system? A simple cleaning can significantly improve performance.
- Remove the exhaust cover and inspect for any blockages or carbon build-up.
- Use a brush or compressed air to clear away debris. Be gentle to avoid damaging components.
- Reassemble and test the engine. Notice the difference in power output?
Fuel Mixture Tips
The right fuel mixture is like giving your trimmer a healthy diet. Using incorrect ratios can lead to engine problems. Have you ever had your trimmer stall unexpectedly? It might be due to a poor fuel mix.
- Check your trimmer manual for the recommended fuel-to-oil ratio. It’s usually around 50:1 for many models.
- Always use fresh fuel. Old fuel can degrade and affect performance.
- Store your fuel in a cool, dry place to maintain its quality. How do you store yours?
Improving engine performance isn’t just about fixing problems; it’s about preventing them. What steps will you take to ensure your Homelite trimmer runs at its best? Dive into these practices and give your trimmer the care it deserves.
Resolving Trimmer Line Issues
Dealing with trimmer line issues can be frustrating, especially when you’re in the middle of tidying up your lawn. Homelite trimmers are designed for durability, but like any tool, they may encounter line problems. Resolving these issues can save you time, effort, and the cost of unnecessary repairs. Let’s dive into some practical solutions to common trimmer line problems.
Proper Line Installation
Improper line installation can lead to inefficient cutting and frequent line breaks. Start by checking the direction of the arrow on the spool, which indicates how to wind the line. Ensure the line is wound tightly and evenly to prevent it from tangling or jamming.
Did you know that an improperly wound line can also cause the trimmer to vibrate excessively? This not only affects performance but can also strain your hands. Double-checking your line installation can make your trimming session smoother and more comfortable.
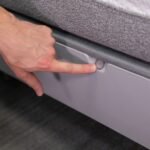
Spool Replacement
Replacing the spool can seem daunting, but it’s a straightforward process that can resolve several line issues. Begin by removing the cap on the trimmer head and pulling out the old spool. Replace it with a new one that matches your trimmer’s specifications.
Have you ever struggled with a spool that just doesn’t fit? This often happens when incompatible spools are used. Always keep a spare compatible spool handy to avoid downtime during your yard work.
Line Size And Type
Using the correct line size and type is crucial for optimal trimmer performance. Homelite trimmers typically require a specific diameter line, often noted in the user manual. A line that is too thin might break easily, while a thicker line might not feed properly.
Consider the type of vegetation you’re trimming. A thicker, more robust line is ideal for tougher weeds, while a standard line works for regular grass. Have you checked your trimmer line size recently? It might be time for an upgrade to match your gardening needs.
By addressing these common trimmer line issues, you’re not just maintaining your Homelite trimmer; you’re enhancing its performance. What line problem have you encountered, and how did you solve it? Share your experiences and tips to help others in the comments below!
Regular Maintenance Tips
Homelite trimmers often need regular maintenance to work efficiently. Clean the air filter to prevent blockages. Check the spark plug for wear and replace if necessary for smooth operation.
Regular maintenance is crucial for keeping your Homelite trimmer in peak condition. By consistently caring for your equipment, you extend its lifespan and ensure it performs efficiently. Let’s delve into some practical maintenance tips to keep your trimmer running smoothly.
Routine Cleaning
Cleaning your Homelite trimmer after each use is vital. Dirt and grass clippings can build up, affecting performance. Use a soft brush or cloth to wipe away debris from the trimmer head and guard. Don’t forget about the air filter. A clogged air filter can suffocate your engine, leading to poor operation. Check and clean it regularly, and replace it when necessary. Consider your own habits. If you mow damp grass often, you might need to clean your trimmer more frequently.
Storing Properly
Proper storage is key to maintaining your trimmer’s condition. Keep it in a dry, cool place to prevent rust and corrosion. Before storing, empty the fuel tank to avoid fuel degradation. This simple step can save you from starting troubles later. Hang your trimmer on the wall if possible. This keeps it off the ground, reducing the risk of accidental damage.
Scheduled Inspections
Regular inspections help catch small issues before they become costly repairs. Set a monthly reminder to check your trimmer’s key components. Look for worn or damaged parts, like the spark plug and fuel lines. Replacing these parts promptly can prevent bigger problems. Ask yourself: When was the last time you inspected your trimmer? Regular checks ensure you’re always ready for a quick trim when the grass starts growing. By adopting these maintenance habits, you’re not just caring for your Homelite trimmer; you’re also investing in a tool that will serve you well for years.
When To Seek Professional Help
Experiencing frequent issues with your Homelite trimmer? It’s wise to consult a professional when DIY fixes fail. Persistent problems like engine stalling or power loss might need expert attention to ensure safe and efficient operation.
When your Homelite trimmer starts acting up, it can be frustrating. You’ve tried the usual fixes, yet the problem persists. It’s crucial to know when it’s time to call in a professional. This can save you time, money, and prevent further damage to your machine. Let’s dive into some specific scenarios where seeking expert help is the best course of action.
Persistent Problems
If you’ve attempted all the basic troubleshooting steps but your trimmer is still not working, it’s time for professional intervention. Persistent problems like engine failure or continuous stalling can indicate deeper issues. Think about it—how many hours have you spent trying to fix something that keeps failing? Sometimes, stubborn problems are a sign that there’s something more serious at play. Getting a professional to assess persistent issues can help pinpoint the root cause and provide a lasting solution.
Complex Repairs
Some repairs are simply too complex for a DIY approach. Imagine trying to fix a complicated carburetor issue or rewiring electrical components. These tasks require specific expertise and tools that a professional possesses. Attempting complex repairs without the right skills can lead to more damage. Remember the time you tried fixing a minor issue and ended up worsening it? Save yourself the headache and potential costs by letting an expert handle it.
Warranty Considerations
Is your Homelite trimmer still under warranty? It’s crucial to check before attempting any repairs. Making unauthorized fixes might void your warranty, leaving you with avoidable expenses. Professionals authorized by the manufacturer can conduct repairs without jeopardizing your warranty coverage. Think of it this way: a warranty is like a safety net. Why risk losing it when help is available? Always consider warranty terms before deciding on a repair path. In the end, knowing when to seek professional help with your Homelite trimmer ensures you maintain its performance and longevity. Have you faced any trimmer troubles that required expert intervention? Share your experiences below!
Frequently Asked Questions
Why Won’t My Homelite Trimmer Start?
Check the fuel level first. Then, inspect the spark plug for damage. Replace if needed.
How Can I Fix A Trimmer Line That Won’t Feed?
Ensure the spool is wound correctly. Check for tangled lines. Adjust or replace the spool as necessary.
What Causes My Trimmer To Overheat?
Blocked air vents can cause overheating. Clean debris from vents. Ensure proper airflow.
Why Does My Trimmer Vibrate Excessively?
Loose parts often cause vibration. Tighten screws and bolts. Inspect for damaged components.
How Do I Replace The Trimmer Line?
Turn off the trimmer. Remove the spool cover. Wind new line onto the spool. Reassemble carefully.
Conclusion
Troubleshooting your Homelite trimmer doesn’t need to be complicated. Follow the steps above for common issues. Regular maintenance prevents most problems. Keep blades sharp and clean for best performance. Check fuel and spark plug when the trimmer won’t start. Always wear safety gear while working.
Consult the manual for specific trimmer models. This guide helps you keep your trimmer running smoothly. Save time and money with simple checks and fixes. Happy trimming!
")