Have you ever found yourself frustrated with your Honeywell humidifier not working as it should? You’re not alone.
Whether it’s a lack of mist, strange noises, or pesky leaks, these issues can leave you feeling overwhelmed. But don’t worry—you’re about to discover simple solutions that can transform your humidifier woes into a smooth, hassle-free experience. Imagine the relief when your humidifier runs perfectly, filling your space with the ideal level of moisture.
Dive in as we unravel common problems and their easy fixes, ensuring you get the most out of your Honeywell humidifier. Your comfort is just a few steps away!
Common Issues
Honeywell humidifiers are fantastic devices for maintaining the right humidity levels in your home. But like any appliance, they can face issues from time to time. Understanding these common problems is crucial for ensuring your humidifier operates smoothly and efficiently. Whether you’re dealing with no mist production, power issues, water leaks, or strange noises, troubleshooting these problems can save you time and frustration.
No Mist Production
Is your Honeywell humidifier failing to produce mist? This issue can often be traced back to a clogged filter or an empty water tank. Before assuming the worst, check if the water tank is filled and the filter is clean. Sometimes, mineral deposits can obstruct mist production. Regular cleaning is essential to prevent this buildup. If your device still doesn’t work, consider adjusting the humidity settings. Have you ever thought about the impact your home’s temperature has on mist production?
Unit Not Powering On
If your humidifier won’t turn on, start by checking the power source. Is the unit plugged in properly? Power issues often stem from loose connections or faulty outlets. Inspect the power cord for any damage. If everything seems intact, try resetting the device. Sometimes a simple reset can bring your humidifier back to life. Have you ever wondered if your outlet is providing enough power?
Water Leaks
Water leaks can be frustrating, but they’re not uncommon. First, inspect the water tank for cracks or improper sealing. A misaligned tank can cause water to leak. Make sure the tank cap is secured tightly. Regularly checking for wear and tear can help prevent future leaks. Have you ever considered how the placement of your humidifier affects its performance?
Strange Noises
Does your humidifier make odd sounds? Strange noises often indicate a mechanical issue or an obstruction. Ensure that there are no foreign objects inside the unit. Sometimes, debris can get trapped and cause noise. Lubricating moving parts can also help. Have you ever stopped to listen to the subtle sounds your appliances make?
By addressing these common issues, you can maintain your Honeywell humidifier’s performance and extend its lifespan. Regular maintenance not only resolves problems but also enhances the quality of air in your home.
Credit: www.reddit.com
Basic Maintenance Tips
Maintaining your Honeywell humidifier ensures it functions well. Regular upkeep prevents issues and prolongs its life. Follow these basic tips to keep your humidifier running smoothly.
Regular Cleaning
Cleaning your humidifier regularly keeps it efficient. Buildup of minerals can affect its performance. Use a soft cloth to wipe surfaces weekly. This prevents mold growth and keeps the air fresh.
Filter Replacement
Filters play a crucial role in purifying the air. Change them every month for optimal performance. Dirty filters reduce efficiency and affect air quality. Check the user manual for proper replacement instructions.
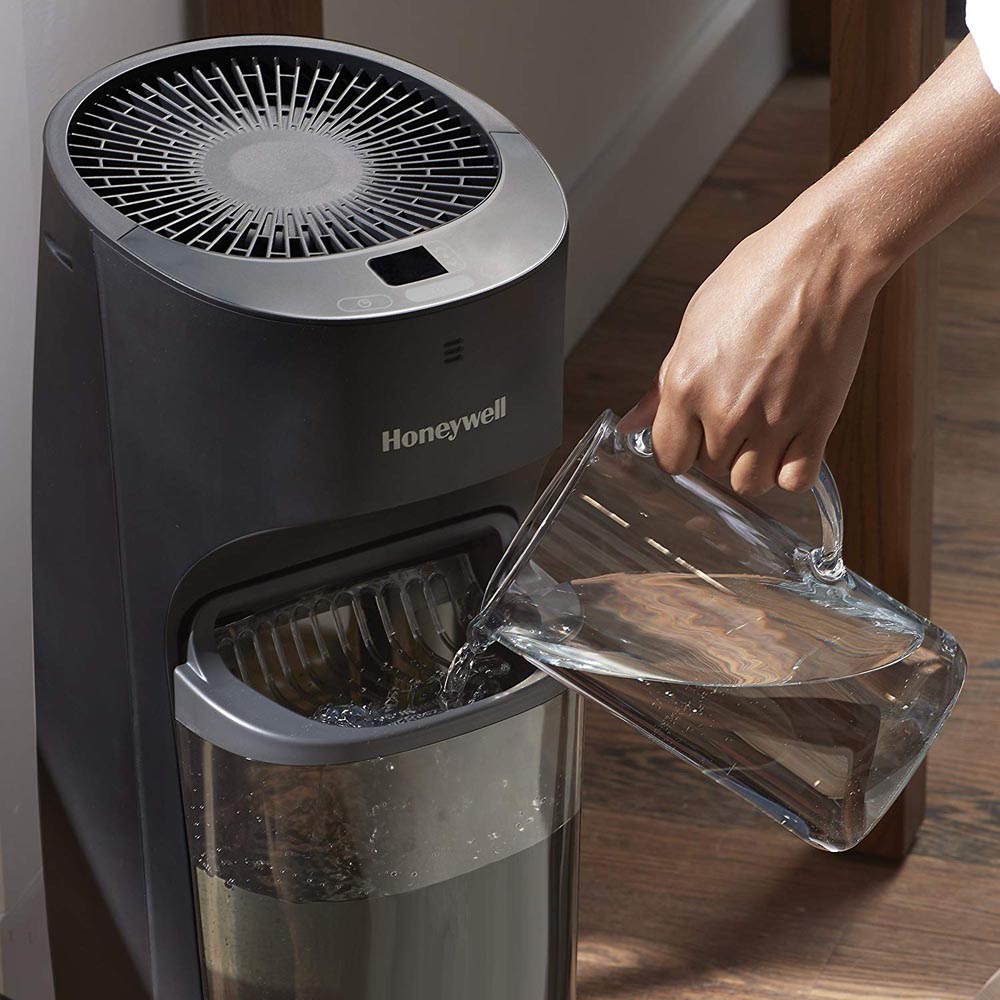
Water Tank Care
The water tank should be emptied daily. Stagnant water can breed bacteria. Rinse the tank with warm water to remove residue. Dry thoroughly before refilling to ensure clean air circulation.
Quick Fixes For No Mist
Experiencing no mist from your Honeywell humidifier? Check water level and ensure the filter is clean. A proper assembly and regular maintenance can quickly resolve mist issues, enhancing your home’s comfort.
Is your Honeywell humidifier not producing mist, leaving your air dry and uncomfortable? You’re not alone. Many users face this issue, but the good news is that you can often resolve it with a few quick fixes. Let’s dive into some practical steps you can take to get your humidifier back on track.Check Water Levels
A common reason for no mist is insufficient water in the tank. Ensure the water tank is filled up to the recommended level. It’s surprising how often we overlook this simple step. Once, I spent an entire afternoon tinkering with my humidifier, only to find the tank was almost empty. Check the water gauge or mark on the tank, and refill it if necessary.Inspect The Nebulizer
The nebulizer is the component responsible for converting water into mist. Over time, it can become clogged with mineral deposits, especially if you use hard water. Gently remove and inspect the nebulizer for any buildup. Use a soft brush or a cloth dampened with vinegar to clean it. Regular maintenance can prevent this problem from recurring.Verify Power Supply
Sometimes, the issue is as simple as a loose plug or a tripped circuit. Ensure your humidifier is plugged in securely and that the outlet is functioning. Try plugging another device into the same outlet to confirm. If your humidifier has a power switch, make sure it is turned on. You wouldn’t want to spend time troubleshooting only to discover the power was off. Are these steps helping you restore your humidifier’s function? If not, there might be a deeper issue, but these quick fixes can often save the day. Remember, regular maintenance is key to keeping your appliance running smoothly. What other tips have you found effective in troubleshooting your humidifier? Share your thoughts in the comments!Solving Power Issues
Experiencing power issues with your Honeywell humidifier can be frustrating. Understanding the basics can help. This guide breaks down the main areas to check. It can help you get your device running smoothly again.
Examine Power Cord
Start by checking the power cord. Ensure it is not damaged. Look for any visible cuts or fraying. A damaged cord can prevent the humidifier from turning on. If you spot any damage, replace the cord immediately. Using a damaged cord can be unsafe.
Test Electrical Outlet
Next, test the electrical outlet. Plug another device into the same outlet. This helps to confirm if the outlet is working. If the other device does not work, try a different outlet. Sometimes, the problem may be a faulty outlet or a tripped circuit breaker.
Inspect The Control Panel
The control panel is another key area to check. Ensure all settings are correct. Sometimes, incorrect settings can prevent the humidifier from powering on. Check for any error messages displayed. These messages can provide clues about what might be wrong.
Addressing Water Leaks
Honeywell humidifier troubleshooting helps identify water leaks effectively. Check hoses and seals for cracks or loose connections. Regular maintenance ensures optimal performance and prevents leaks.
Water leaks from your Honeywell humidifier can be frustrating. They not only waste water but can also lead to potential damage to your home. Addressing these leaks promptly is crucial to maintain both the efficiency of your humidifier and the safety of your living space. Let’s dive into some practical steps you can take to tackle this issue effectively.Ensure Proper Assembly
Start by checking if your humidifier is assembled correctly. A small misalignment can cause water to leak. Make sure all parts fit snugly together and are in their designated slots. Refer to your user manual for guidance on assembly. It’s a handy resource that often contains diagrams for proper setup. If you’ve misplaced it, many manuals are available online with a quick search.Check For Cracks
Inspect the water tank and base for any visible cracks. Even minor cracks can cause leaks over time. You might be surprised how often a tiny, almost invisible crack can cause significant leakage. If you discover any cracks, consider replacing the damaged parts. Repair kits are available, but sometimes a replacement is more reliable and cost-effective.Inspect Seals And Gaskets
Seals and gaskets are critical for preventing leaks. Over time, they can wear out or become misaligned. Carefully examine these components to ensure they’re intact and properly seated. If you notice any wear or damage, replacing the seals and gaskets can be a simple fix. It’s a small investment that can save you from larger issues down the road. Have you checked for these issues before? Addressing water leaks promptly can prevent bigger headaches. By following these straightforward steps, you’re taking action to ensure your humidifier operates smoothly and your home remains safe from water damage.Reducing Unusual Noises
Addressing unusual noises in Honeywell humidifiers ensures smooth operation and peace at home. Regular maintenance checks help identify and fix common issues like misaligned components or loose parts. Keeping your humidifier clean and well-adjusted reduces disruptions and enhances comfort.
Reducing unusual noises in your Honeywell humidifier can be a simple task if you know where to start. It’s not uncommon for these devices to produce unexpected sounds, especially after prolonged use. These noises can disrupt your peace and raise concerns about your humidifier’s functionality. But don’t worry, there are practical steps you can take to resolve this issue without needing professional help.Tighten Loose Parts
A common cause of noise in humidifiers is loose parts. Have you ever moved your humidifier and noticed a rattling sound? This could be due to components coming loose after repeated use or handling. Grab a screwdriver and inspect the unit for any screws or parts that might need tightening. This simple action could silence that annoying rattle and ensure your humidifier runs smoothly.Adjust Placement
The location of your humidifier plays a crucial role in the noise it produces. Is your humidifier on a surface that amplifies vibrations? If so, try placing it on a stable, flat surface or use a rubber mat to absorb sound. Remember, a wobbling humidifier is a noisy humidifier. Adjusting its placement might just be the quick fix you need to keep it quiet and efficient.Clean Internal Components
Dust and mineral buildup can lead to strange noises. When was the last time you cleaned your humidifier’s internal components? A regular cleaning routine can prevent particles from interfering with the fan and other moving parts. Disassemble the unit according to the manual, clean each part thoroughly, and reassemble. This not only reduces noise but also prolongs your humidifier’s lifespan. Have you tried these solutions and found success? Or is your humidifier still giving you grief? Sometimes, the smallest adjustments make the biggest difference. Dive into these steps and reclaim your quiet space.When To Seek Professional Help
Honeywell humidifiers are reliable devices for home comfort. But some problems need professional help. Knowing when to call an expert saves time and stress.
Persistent Problems
Some issues don’t disappear easily. Noisy operation may indicate internal issues. Water leakage can mean a broken seal or part. These require expert attention. DIY fixes might worsen the problem. Professionals have the right tools and knowledge.
Warranty Considerations
Your humidifier may still be under warranty. Check the warranty terms for repair coverage. Professional repairs might be free if covered. Attempting self-repair can void the warranty. Always consult the warranty before making decisions.

Credit: www.youtube.com
Preventive Measures
Ensuring your Honeywell humidifier runs smoothly involves preventive measures. These steps can save you time and reduce stress. By maintaining your humidifier, you extend its lifespan. Plus, you enjoy consistent air quality in your home.
Optimal Humidity Settings
Set your humidifier to the right humidity level. Ideal settings range from 30% to 50%. This prevents mold and keeps your air healthy. Too much humidity can lead to discomfort. Too little can dry out your skin and throat.
Routine Inspections
Inspect your humidifier regularly. Check for dust and debris. Clean the water tank to prevent bacteria growth. Look for leaks or unusual noises. Routine checks keep your humidifier efficient. They help catch problems early. This avoids costly repairs.
Credit: www.honeywellstore.com
Conclusion
Troubleshooting your Honeywell humidifier can be simple and effective. Start by checking the power connection. Ensure the water tank is full and correctly positioned. Clean filters regularly to prevent clogs. Adjust settings to match your needs. If problems persist, consult the user manual.
You might find a quick fix there. Regular maintenance can extend your humidifier’s life. Keep it running smoothly with these simple steps. A little care goes a long way. Enjoy a comfortable, humidified home atmosphere. Stay proactive and avoid common issues.
Your air quality will thank you.
")


