Is your Honeywell thermostat refusing to cool your home when you need it most? You’re not alone.
Nothing’s more frustrating than dealing with a thermostat that’s acting up, especially during those sweltering summer days. The good news? You don’t have to be a tech expert to figure out what’s going wrong. With just a little guidance, you can troubleshoot the issue and get your thermostat—and your comfort—back on track.
You’ll discover simple, step-by-step solutions to tackle the most common cooling problems. Stick around, because the fix might be easier than you think!
Common Reasons For Cooling Issues
Is your Honeywell thermostat not cooling as expected? Understanding the possible reasons can help solve the problem quickly. Many factors can affect your thermostat’s cooling performance. Below are common causes and how to address them.
1. Incorrect Thermostat Settings
Ensure the thermostat is set to “Cool” mode. Double-check that the temperature is set lower than the current room temperature. Incorrect settings can prevent the cooling system from activating.
2. Power Supply Issues
A faulty power connection can disrupt thermostat functionality. Check if the thermostat display is blank. Replace batteries or ensure the circuit breaker hasn’t tripped. Power issues often stop cooling systems from working.
3. Dirty Air Filters
Clogged air filters can restrict airflow and reduce cooling efficiency. Inspect and replace filters regularly to keep the system running smoothly. Clean filters help maintain proper air circulation.
4. Blocked Or Closed Vents
Blocked vents can disrupt airflow in your home. Ensure vents are open and unobstructed. Furniture, curtains, or debris can block air distribution, causing cooling issues.
5. Low Refrigerant Levels
Low refrigerant levels can cause the air conditioner to underperform. Contact a professional technician to check and refill refrigerant. A leak may require immediate attention to prevent further damage.
6. Faulty Thermostat Sensors
Thermostat sensors control the cooling cycle by monitoring room temperature. A malfunctioning sensor can cause the system to misread temperatures. Calibrating or replacing the sensor can fix this issue.
7. Dirty Or Frozen Evaporator Coils
Dirt on evaporator coils can reduce cooling efficiency. Frozen coils can stop cooling entirely. Clean the coils regularly and ensure proper airflow to avoid freezing.
8. Improper Thermostat Placement
Placing the thermostat near heat sources or in direct sunlight can affect readings. Relocate the thermostat to a neutral area for accurate temperature control. Placement plays a vital role in proper cooling performance.

Checking Thermostat Settings
Honeywell thermostats are known for their reliability, but issues can arise. If your thermostat isn’t cooling, checking its settings is crucial. Incorrect settings can prevent the system from functioning as expected. This guide will help you review and adjust your thermostat settings to restore cooling.
Correcting Temperature Settings
Start by verifying the thermostat temperature setting. Ensure it is set lower than the current room temperature. A higher setting won’t activate the cooling system. Use the up or down arrows to adjust the temperature. Confirm that the desired temperature is displayed correctly on the screen.
Double-check the thermostat’s schedule settings. Some Honeywell models operate on programmed schedules. The cooling may not activate if the current schedule doesn’t match your preferences. Update the schedule to prioritize cooling during hot hours.
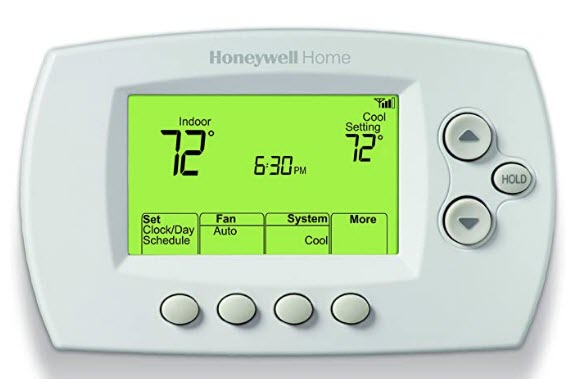
Switching To Cooling Mode
Ensure your thermostat is set to cooling mode. Many Honeywell thermostats have modes like “heat,” “cool,” and “off.” If the mode is set to “heat” or “off,” the air conditioning won’t function. Use the mode button to select “cool.”
Verify the fan setting as well. Select “auto” or “on” depending on your preference. “Auto” ensures the fan runs only during cooling cycles, while “on” keeps it running continuously. A proper mode and fan setting combination ensures efficient cooling.
Inspecting Power Supply
When your Honeywell thermostat isn’t cooling, one of the first things to check is the power supply. A thermostat can’t function properly without consistent power, and this is often an overlooked issue. By systematically inspecting the power supply, you can quickly rule out or resolve a common cause of the problem.
Checking Batteries
Start by checking the thermostat’s batteries. Many Honeywell thermostats rely on batteries for operation, and low or dead batteries can cause the cooling system to stop working. If your thermostat screen is blank or unresponsive, that’s a strong indicator the batteries might need replacing.
Remove the thermostat cover to access the battery compartment. Replace the old batteries with fresh ones, ensuring you match the positive and negative ends correctly. Once replaced, check if the screen powers on and the cooling starts working again. Simple fixes like this can sometimes save you a service call.
Verifying Circuit Breakers
If the batteries aren’t the issue, the next step is to check your home’s circuit breakers. Power outages or electrical surges can trip the breaker connected to your HVAC system. This could cut off power to the thermostat, leaving you without cooling.
Locate your breaker panel and look for the switch labeled for your heating or cooling system. If it’s in the middle or “off” position, flip it back to “on.” After resetting, give the thermostat a moment to reboot and check if the cooling function returns. This quick check can often solve the mystery behind an unresponsive thermostat.
Have you ever forgotten to check these simple steps, only to discover they were the root cause? It’s a reminder that small details matter when troubleshooting. Take a moment to rule these out before moving on to more complex fixes.

Examining Wiring Connections
Wiring connections play a key role in thermostat performance. If your Honeywell thermostat isn’t cooling, faulty wiring might be the culprit. Checking the wiring ensures that the thermostat communicates with your HVAC system properly. Small issues like loose or incorrect connections can disrupt your cooling system’s functionality. Let’s explore how to identify and fix wiring issues step by step.
Identifying Loose Wires
Loose wires are a common cause of cooling problems. Start by turning off the power to your HVAC system. This prevents electrical accidents while inspecting the wiring. Remove the thermostat cover to access the wiring terminals. Carefully examine each wire to see if it’s loose or disconnected. A wire may also appear frayed or damaged.
Look for wires that are hanging out of their terminals. Gently tug each wire to check if it’s secure. Pay close attention to the R, C, Y, and G terminals. These are essential for cooling. If you notice any loose wires, they will need to be tightened or reconnected.
Fixing Incorrect Wiring
Incorrect wiring can prevent the thermostat from cooling effectively. Cross-check the wiring setup with your thermostat manual. Each wire should match its designated terminal. For example, the Y wire typically connects to the Y terminal for cooling. Verify that no wires are swapped or misaligned.
If the wiring doesn’t match the manual, you’ll need to correct it. Loosen the screws on the incorrect terminals. Reinsert the wires into their proper slots. Tighten the screws to secure the connections. Ensure no wires are touching each other to avoid short circuits.
After fixing the connections, restore power to the system. Check if the cooling function works properly. If the issue persists, consulting a professional may be necessary.
Resetting The Thermostat
A Honeywell thermostat not cooling can be frustrating, especially when the temperature climbs. Sometimes, resetting the thermostat can solve the issue. Resetting clears minor glitches and restores the system to normal functionality. But how do you know when to reset and what steps are involved? Let’s break it down.
Steps To Perform A Reset
Resetting a Honeywell thermostat is easier than you think. Here’s a straightforward guide:
- Locate the reset button on your thermostat. If your model doesn’t have one, check the user manual for alternate reset instructions.
- Press and hold the reset button for 5-10 seconds. Some models may require you to press combinations of buttons instead.
- Release the button and wait for the thermostat to restart. You should see the display refresh and return to its default settings.
If your thermostat isn’t responding after a reset, double-check the power source. Is the unit properly connected to your HVAC system? Sometimes, loose wiring or dead batteries can interfere with the reset process.
Resetting worked wonders for me when my thermostat stopped cooling last summer. A quick button press saved me from a sweltering living room. Could the same fix work for your thermostat?
When To Consider A Factory Reset
Factory resets aren’t always necessary. They’re a deeper solution reserved for more stubborn issues. But how do you know if it’s time?
If your thermostat continues to misbehave after a standard reset, or if settings seem stuck, a factory reset might be your best option. This wipes all custom settings and restores the device to its original state.
To perform a factory reset:
- Check the user manual for specific instructions, as steps vary by model.
- Typically, you’ll need to access the menu and select a reset option labeled “Factory Reset” or similar.
- Confirm the reset and wait for the thermostat to reboot.
It’s worth noting that factory resets remove schedules and preferences you’ve programmed. Before diving in, ask yourself: is it worth losing those settings, or can a simpler reset do the trick?
Have you tried all other troubleshooting steps and still can’t get your thermostat to cool? Then a factory reset could be the game-changer you need.
Testing The Hvac System
If your Honeywell thermostat isn’t cooling, the issue might not be the thermostat itself. Often, the problem lies within your HVAC system. Let’s dig into two critical areas to test: air filters and refrigerant levels.
Inspecting Air Filters
Clogged air filters are one of the most common culprits when your system isn’t cooling. Dirty filters block airflow, forcing your HVAC system to work harder and reducing its cooling efficiency. This can even cause your system to overheat and shut down.
Take a few minutes to inspect your air filter. Remove it and hold it up to the light—if you can barely see through it, it’s time for a replacement. Most filters should be replaced every 1-3 months, depending on usage and household conditions. Do you have pets? Then you might need to replace them more frequently.
Replacing a filter is simple and inexpensive. Plus, it can instantly improve your cooling system’s performance. Why not check it today and see if this quick fix solves your issue?
Evaluating Refrigerant Levels
Low refrigerant levels can cripple your HVAC system’s ability to cool your home. Your system relies on refrigerant to absorb and transfer heat. Without enough refrigerant, the cooling process breaks down.
Signs of low refrigerant include warm air blowing from vents or ice forming on your unit’s coils. If you notice these, it’s time to act. Unfortunately, adding refrigerant isn’t a DIY job—this requires a licensed HVAC technician.
A professional can not only recharge the system but also check for leaks. After all, refrigerant doesn’t just “run out” like gas in your car. If it’s low, there’s likely a leak somewhere, and ignoring it could lead to bigger problems down the road.
Have you noticed any of these signs? If yes, don’t wait. Call in an expert to evaluate your refrigerant levels and restore your cooling system’s efficiency.
When To Call A Professional
Honeywell thermostats are reliable, but cooling issues can arise unexpectedly. Sometimes, basic troubleshooting steps may not resolve the problem. Knowing when to call a professional ensures your system gets proper care. Below are key indicators and tips for finding trustworthy HVAC support.
Signs Of Serious Issues
If your thermostat shows an error code, it may signal deeper problems. Persistent cooling failures even after resetting the thermostat need expert attention. Unusual noises or smells from the HVAC system often point to mechanical issues. If the thermostat display is blank or unresponsive, electrical faults could be present. A professional can identify these problems and fix them safely.
Finding Reliable Hvac Support
Conclusion
Troubleshooting a Honeywell thermostat not cooling can feel frustrating. Start by checking basic settings and power sources. Ensure the thermostat is on cooling mode and the temperature is set correctly. Clean or replace filters and inspect wiring connections if needed.
Regular maintenance can prevent many issues. If problems persist, contacting a professional may be the best option. A properly working thermostat ensures comfort and efficiency. Stay proactive to keep your cooling system running smoothly.
")


