For Ionchill Ice Maker troubleshooting, ensure the machine is plugged in and the water reservoir is filled. Check for ice blockages and reset the unit.The Ionchill Ice Maker is a convenient appliance for producing ice quickly and efficiently. Occasionally, it may face issues that disrupt its performance. Common problems include power supply issues, low water levels, or ice blockages. Simple troubleshooting steps can often resolve these problems.
Ensuring the machine is properly connected, the reservoir is adequately filled, and the ice-making components are clear can help maintain optimal functionality. Regular maintenance and timely problem-solving can extend the lifespan of your Ionchill Ice Maker and ensure it continues to meet your ice-making needs efficiently.
Common Issues
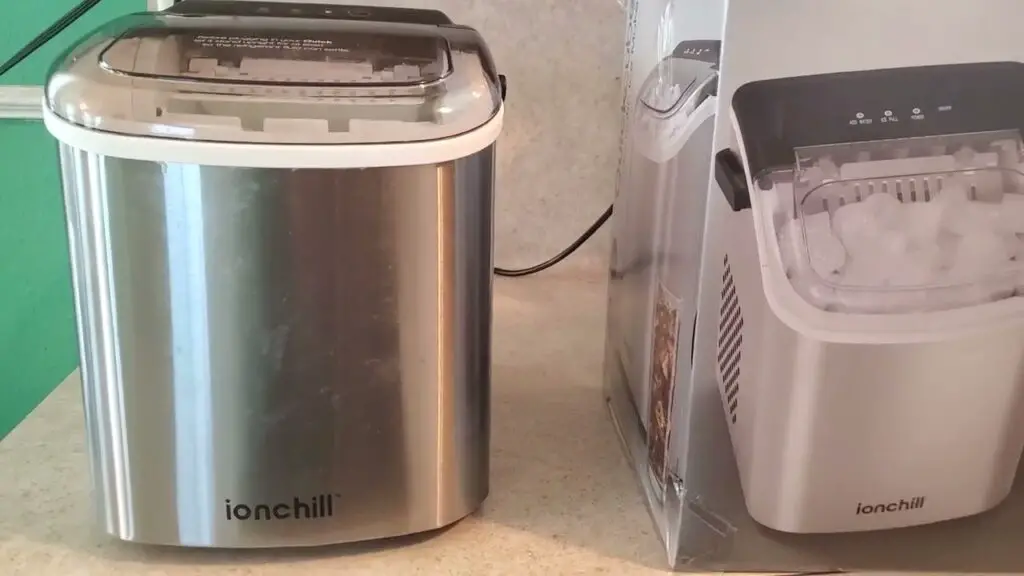
Ionchill Ice Makers are known for their efficiency and reliability. Yet, even the best appliances can face problems. Understanding common issues can help you fix them quickly.
No Ice Production
If your Ionchill Ice Maker isn’t making ice, it could be due to several reasons. Check the following:
- Power Supply: Ensure the ice maker is plugged in and the power switch is on.
- Water Supply: Verify that the water line is connected and the valve is open.
- Filter: A clogged filter can block water flow. Clean or replace the filter.
- Temperature Settings: The freezer temperature should be set between 0°F and 5°F.
Address these points to restore ice production.
Slow Ice Making
Is your Ionchill Ice Maker producing ice too slowly? This issue can be annoying. Check these factors:
- Room Temperature: High ambient temperatures can slow ice production.
- Freezer Load: Overloading the freezer affects the ice maker’s efficiency.
- Water Pressure: Low water pressure can result in slow ice making. Ensure it is between 40-120 psi.
- Ice Bin Position: If the ice bin is not correctly placed, it can disrupt the ice-making process.
Optimizing these factors can speed up ice production.
Basic Checks
Experiencing issues with your Ionchill Ice Maker? Start with Basic Checks. These simple steps can often resolve common problems quickly.
Power Supply
First, ensure your ice maker is connected to a reliable power source. Check if the power cord is plugged into a working outlet. Inspect the cord for any signs of damage. If you find any frayed or broken wires, replace the power cord immediately.
If the cord looks fine, verify that the outlet is functioning correctly. Plug another device into the same outlet. If the device does not work, the outlet might be faulty. You may need to reset the circuit breaker or consult an electrician.
Also, check if the ice maker’s power switch is turned on. Some models have a dedicated power button or switch that can be accidentally turned off.
Water Connection
Next, confirm that your ice maker has a proper water connection. Ensure the water supply line is securely attached to the ice maker. Look for any kinks or bends in the line that might restrict water flow.
Examine the water inlet valve. This valve controls the flow of water into the ice maker. Ensure it is fully open. If it is partially closed, open it completely. Inspect for any visible leaks around the valve and the connection points.
Additionally, check the water filter. A clogged filter can impede water flow. Replace the filter if it appears dirty or hasn’t been changed in a while.
| Check | Action |
|---|---|
| Power Cord | Inspect for damage and ensure proper connection |
| Outlet | Verify functionality with another device |
| Power Switch | Ensure it is turned on |
| Water Line | Check for secure attachment and no kinks |
| Inlet Valve | Ensure it is fully open |
| Water Filter | Replace if dirty or old |
By performing these basic checks, you can quickly identify and resolve common issues with your Ionchill Ice Maker.
Cleaning Tips
Keeping your Ice Maker clean ensures it functions efficiently. Regular cleaning helps avoid malfunctions and extends the lifespan of your appliance. Follow these cleaning tips to keep your ice maker in top condition.
Interior Cleaning
First, unplug the ice maker from the power source. Remove all ice and water from the unit. Use a soft cloth and warm, soapy water to wipe down the interior. Avoid using harsh chemicals or abrasive materials.
Rinse the interior with clean water. Dry it thoroughly with a clean towel. Make sure all parts are completely dry before plugging the unit back in. This prevents mold and bacteria from growing inside the ice maker.
Filter Maintenance
The filter in your Ionchill Ice Maker plays a crucial role. It ensures the ice produced is clean and safe to consume. Regular filter maintenance is essential for optimal performance.
- Check the filter monthly for any signs of dirt or blockage.
- Replace the filter every six months or as recommended by the manufacturer.
- Ensure the new filter is securely fitted to avoid leaks and contamination.
Refer to the user manual for specific instructions on filter replacement. Keeping the filter clean ensures better ice quality and prevents potential damage to the machine.
| Cleaning Task | Frequency |
|---|---|
| Interior Cleaning | Monthly |
| Filter Maintenance | Every 6 months |
Temperature Settings
Understanding the temperature settings of your Ionchill Ice Maker is crucial. Proper settings ensure your machine works efficiently and produces ice quickly. Let’s explore the optimal settings and how to adjust the controls for your Ionchill Ice Maker.
Optimal Settings
The optimal temperature setting for your Ionchill Ice Maker is between 0°F and 5°F. This range ensures the ice forms properly without freezing the internal components.
| Temperature Range | Result |
|---|---|
| Below 0°F | Possible freezing of components |
| 0°F – 5°F | Optimal ice production |
| Above 5°F | Slow ice production |
Adjusting Controls
Adjusting the controls of your Ionchill Ice Maker is simple. Follow these steps to set the temperature correctly:
- Locate the control panel on your Ionchill Ice Maker.
- Press the temperature button to access the settings.
- Use the arrow buttons to increase or decrease the temperature.
- Set the temperature between 0°F and 5°F.
- Press the confirm button to save your settings.
If you notice inconsistent ice production, check the temperature settings. Ensure they are within the optimal range. Adjust as necessary to maintain efficiency.
For additional support, refer to your Ionchill Ice Maker’s user manual. Proper settings can extend the life of your machine and improve ice quality.
Component Inspections
Regular inspections of your Ionchill Ice Maker components ensure optimal performance. Checking each part can prevent issues and extend the lifespan of your ice maker.
Ice Tray
The ice tray is crucial for forming ice cubes. If your ice maker isn’t producing ice, inspect the tray for cracks or blockages.
- Remove the tray and check for visible damage.
- Ensure the tray is properly seated in its slot.
- Clear any ice buildup with warm water.
Water Inlet Valve
The water inlet valve controls water flow into the ice maker. A malfunctioning valve can hinder ice production.
- Disconnect the ice maker from power.
- Locate the water inlet valve at the back of the unit.
- Inspect the valve for signs of wear or damage.
- Ensure the water supply line is securely connected.
- Replace the valve if it appears faulty.
If issues persist, consult the Ionchill manual or contact customer support for further assistance.
Advanced Troubleshooting
Advanced troubleshooting for the Ionchill Ice Maker can help resolve complex issues. This guide covers error codes, software updates, and more.
Error Codes
Error codes help identify specific issues with your Ionchill Ice Maker. Here is a list of common error codes and their meanings:
| Error Code | Description | Solution |
|---|---|---|
| E01 | Water supply issue | Check the water inlet valve and ensure it’s open. |
| E02 | Ice-making process error | Reset the machine and ensure it’s level. |
| E03 | Temperature sensor fault | Inspect the sensor and replace if necessary. |
Software Updates
Keeping your Ionchill Ice Maker’s software updated ensures optimal performance. Follow these steps to update the software:
- Check the current software version on the control panel.
- Visit the Ionchill website to download the latest update.
- Transfer the update to a USB drive.
- Insert the USB drive into the ice maker’s USB port.
- Follow on-screen instructions to complete the update.
Regularly updating the software can fix bugs and add new features.
Preventive Measures
Ensuring your Ionchill Ice Maker works efficiently involves regular preventive measures. Consistent care and proper usage can extend the life of your device. Here are some key preventive measures you can take:
Regular Maintenance
Regular maintenance is essential for keeping your Ionchill Ice Maker in top shape. Follow these tips:
- Clean the ice maker every month.
- Check the water filter and replace it every six months.
- Inspect the ice bin and remove any debris.
Ensure the machine is unplugged before cleaning. Use a soft cloth and mild detergent. Avoid harsh chemicals as they can damage the machine.
| Task | Frequency |
|---|---|
| Cleaning | Monthly |
| Filter Replacement | Every 6 Months |
| Debris Removal | Monthly |
Proper Usage
Using the Ionchill Ice Maker correctly helps prevent issues. Follow these usage tips:
- Use only clean, potable water.
- Avoid overfilling the water reservoir.
- Place the ice maker on a flat, stable surface.
Do not place the ice maker near heat sources. Ensure there is adequate ventilation around the machine. This prevents overheating and ensures efficient operation.
By following these preventive measures, you can enjoy hassle-free ice making. Remember, proper care and usage are key to a long-lasting Ionchill Ice Maker.
When To Seek Help
Sometimes, fixing your Ionchill Ice Maker needs expert help. Knowing when to seek help can save you time and stress. Below are the key indicators and steps to ensure you get the right assistance.
Identifying Major Problems
If your ice maker is not making ice at all, it may have a major issue. Check for strange noises, as they can indicate a mechanical problem.
Water leaks from the ice maker are another sign. Leaks can cause bigger problems if not fixed quickly.
Unusual smells from the machine can also be a warning. These smells might mean there is mold or another serious issue.
Contacting Support
If you have identified a major problem, contact Ionchill support. You can call them or send an email for assistance.
Before contacting support, gather all necessary information. This includes your model number, serial number, and a description of the problem.
Many issues can be resolved by following troubleshooting steps provided by support. Always check the Ionchill website for helpful guides and FAQs.
Frequently Asked Questions
How Do I Reset An Ice Maker?
To reset an ice maker, first unplug the refrigerator. Locate the reset button on the ice maker. Press and hold the button for 10 seconds. Plug the refrigerator back in and wait for the ice maker to restart.
Why Is The Power Light Blinking On My Ionchill Ice Maker?
The power light blinks on your Ionchill ice maker due to a malfunction or low water level. Check the water reservoir and reset the machine. If the issue persists, consult the user manual or contact customer support for assistance.
Why Is My Portable Ice Maker Not Working?
Your portable ice maker might not work due to power issues, clogged water lines, or faulty sensors. Check for blockages, ensure it’s plugged in, and reset the machine.
Why Would My Ice Maker Stop Making Ice?
Your ice maker might stop making ice due to a clogged water filter, a faulty water inlet valve, or temperature issues. Ensure the ice maker is on and the water supply is connected. Check for any ice blockages and replace the filter if necessary.
Why Is My Ionchill Ice Maker Not Working?
Ensure the power cord is plugged in, and check the fuse or circuit breaker.
Conclusion
Troubleshooting your Ionchill Ice Maker can be simple with the right guidance. Regular maintenance ensures optimal performance. Address common issues quickly to enjoy uninterrupted ice supply. Follow the steps outlined, and you’ll have a fully functional ice maker in no time.
Keep your Ionchill running smoothly for years to come.
")


