Is your Kenmore 600 Series dryer acting up? You’re not alone, and you’ve come to the right place for solutions.
The frustration of dealing with a malfunctioning dryer can disrupt your day and leave you feeling helpless. But don’t worry—help is at hand. By understanding common issues and knowing how to fix them, you can save time and avoid costly repairs.
Imagine the satisfaction of solving the problem yourself and getting your dryer back to peak performance without breaking the bank. You’ll discover practical troubleshooting tips that are easy to follow, so you can get back to enjoying freshly dried laundry in no time. Let’s dive in and tackle those dryer dilemmas head-on!
Common Dryer Issues
Your Kenmore 600 Series Dryer is a reliable workhorse, but like any appliance, it can run into some hiccups. Knowing how to troubleshoot common dryer issues can save you time and money. This section will guide you through typical problems, giving you practical tips to get your dryer back on track. Have you ever stared at your dryer, wondering why it won’t start? Or perhaps felt the frustration of damp clothes after a full cycle? Let’s dive into these common challenges.
Dryer Not Starting
Is your dryer refusing to start? First, check the power source. Make sure it’s plugged in and the circuit breaker hasn’t tripped.
Inspect the door switch. If the door isn’t securely closed, the dryer won’t start. Sometimes, a simple click is all it takes.
If the start button seems unresponsive, it might be a faulty start switch. Replacing it can often solve the issue. Have you checked if the child lock feature is engaged? You’d be surprised how often that sneaky button causes trouble.
No Heat Or Insufficient Heat
Are clothes coming out as damp as when they went in? Check the heating element. A malfunction can prevent your dryer from producing enough heat.
Consider the thermostat. If it’s not working correctly, the dryer may not heat up properly. A simple test can tell you if it’s the culprit.
Also, look at the vent. Blockages can restrict airflow, leading to poor drying performance. Cleaning the vent might be all your dryer needs to get back to its old self.
Drum Not Spinning
Is the drum stubbornly staying still? Look at the belt. A broken belt can halt the drum’s movement entirely. Replacing it is often straightforward.
Check the motor. If it’s struggling or seized, the drum won’t spin. Sometimes, a professional’s touch is required here.
What about the drum rollers? Worn-out rollers can cause the drum to stick or wobble. Inspect them for wear and tear, and consider replacing if necessary.
Unusual Noises
Is your dryer sounding like a haunted house? Loose items in the drum can cause loud banging. Check for forgotten objects before panicking.
Inspect the blower wheel. A damaged or misaligned wheel can create odd noises. Adjusting or replacing it can silence the racket.
Don’t forget to examine the bearings. Worn-out bearings can produce squeaks and rattles. A little maintenance can restore peace to your laundry room.
Remember, tackling these common issues can often be done with basic tools and a bit of patience. Have you ever fixed your dryer with just a screwdriver and some determination? Share your own experiences in the comments below. Your insights might be the missing piece for someone else’s troubleshooting puzzle!
Checking Power Supply
Experiencing issues with your Kenmore 600 Series Dryer? Start with the power supply. A faulty power connection can halt your dryer’s functions. Examine the power source to avoid unnecessary repairs.
Inspecting Power Cord
Begin with the power cord. Ensure it’s securely plugged into the outlet. Check for any visible damage on the cord. Look for frays or exposed wires. A damaged cord needs immediate replacement. Avoid using the dryer until this is fixed. Safety is crucial.
Verifying Circuit Breaker
Next, inspect the circuit breaker. A tripped breaker can disrupt power. Locate your home’s electrical panel. Find the dryer’s dedicated breaker. Make sure it’s in the “on” position. Reset it if necessary. This simple step can restore power.
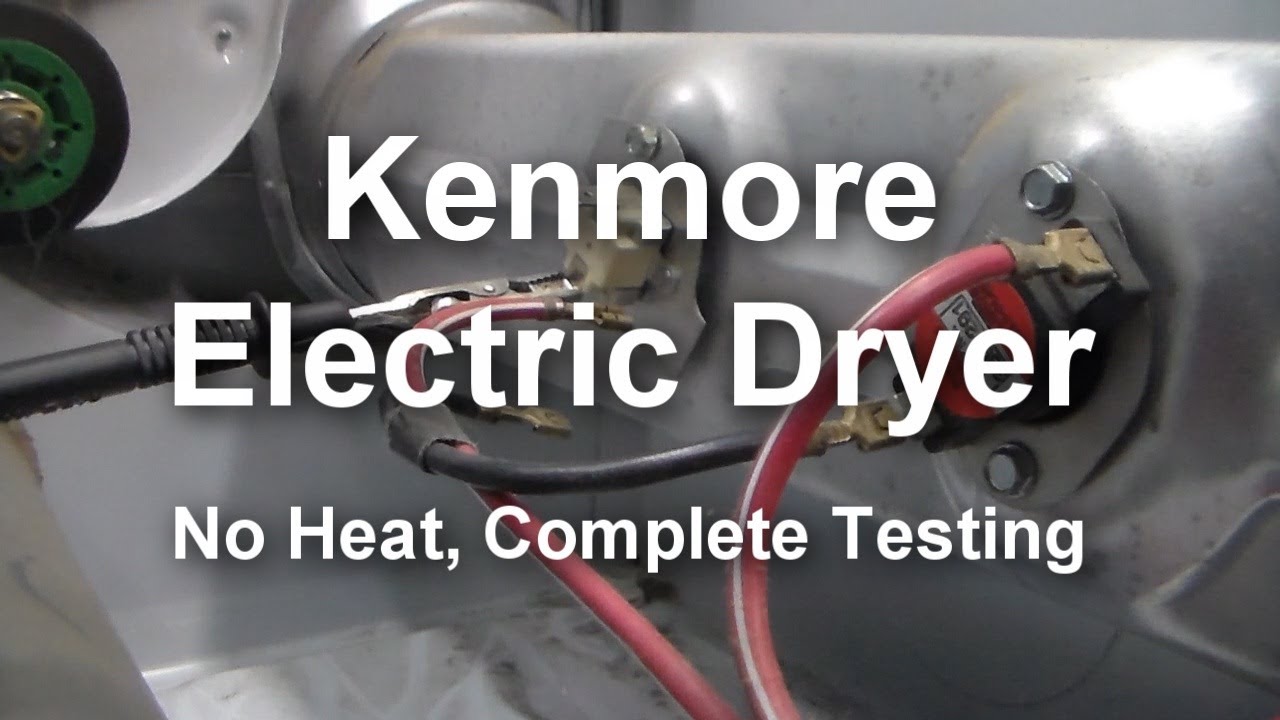
Thermal Fuse Assessment
The thermal fuse is crucial for the Kenmore 600 Series Dryer. It prevents overheating. A blown thermal fuse may cause the dryer to stop working. Assessing the thermal fuse is essential for troubleshooting. This guide provides a step-by-step process for evaluating the fuse.
Locating The Thermal Fuse
The thermal fuse is inside the dryer’s back panel. First, unplug the dryer for safety. Next, remove the screws on the back panel. Find the thermal fuse near the blower housing. It’s a small, white or silver component. Check your user manual if needed.
Testing Fuse Continuity
Use a multimeter to test the fuse. Set the multimeter to the continuity setting. Disconnect the wires from the thermal fuse. Place the multimeter probes on the fuse terminals. The multimeter should beep if the fuse is good. No sound means the fuse is blown. Replace the thermal fuse if needed. It ensures the dryer operates safely.

Credit: www.reddit.com
Heating Element Inspection
Inspecting the heating element is crucial for Kenmore 600 Series Dryer troubleshooting. Check for visible damage or wear. Replace the element if necessary to restore efficient drying performance.
A well-functioning dryer is essential for keeping your laundry routine smooth and efficient. However, if your Kenmore 600 Series Dryer isn’t heating up properly, the heating element might be the culprit. Inspecting the heating element is a crucial step in troubleshooting your dryer issues. Don’t let a minor glitch disrupt your day-to-day life. Here’s how you can check if the heating element is functioning as it should.Accessing The Heating Element
To access the heating element, you need to first unplug the dryer for safety. Next, remove the back panel of the dryer using a screwdriver. This will expose the internal components, including the heating element housed within the dryer assembly. Once inside, locate the heating element. It usually resembles a coil or wire embedded in a metal frame. Handle it gently to avoid any damage. Do you have a multimeter? If so, you can use it to test the element for continuity, indicating whether it’s working or not.Signs Of A Faulty Element
A common sign of a faulty heating element is your dryer not getting hot enough. You might notice that clothes take longer to dry or don’t dry at all. Additionally, if the dryer trips the circuit breaker, it could be due to a malfunctioning heating element. Check for visible damage such as breaks or burns on the coil. If you spot any, it’s likely time to replace the element. Sometimes, the issue might be a more subtle fault, detectable only with a continuity test. Have you experienced any of these signs with your dryer? If so, inspecting the heating element could be a practical first step. Remember, addressing the issue early can save you time and stress.Belt And Motor Examination
Examining the belt and motor in a Kenmore 600 Series dryer helps solve common problems. Check for wear or damage to the belt. Ensure the motor runs smoothly without unusual noises.
When your Kenmore 600 Series dryer stops working efficiently, examining the belt and motor can be a game-changer. These components are essential for the dryer’s operation. Checking them might save you a service call and get your dryer back in action quickly. Before you start, ensure your dryer is unplugged to avoid any accidents. Let’s dive into the belt and motor examination to troubleshoot your dryer issues effectively.Checking Drive Belt Condition
The drive belt is a crucial part of your dryer’s operation. If the belt is worn or broken, your dryer drum won’t spin. To check it, you’ll need to open the dryer’s cabinet. Locate the belt around the drum and check for any signs of wear or breakage. A belt in good condition should be taut and free of cracks. If it seems loose, frayed, or broken, replacement is necessary. Have you considered how a simple belt replacement could extend your dryer’s life?Assessing Motor Functionality
The motor is another critical component. It powers the drum’s rotation and without it, your dryer will sit idle. Listen for unusual sounds like humming or grinding, which might indicate motor issues. Check if the motor is overheating. A simple touch test after running the dryer for a few minutes can reveal if it’s running too hot. Ensure the motor’s cooling vents are clear of dust and lint. Have you ever thought that a bit of cleaning could prevent future motor problems? Troubleshooting these components might seem daunting, but with a little patience, you can tackle these issues. Remember, a well-maintained dryer not only saves time but also energy costs. Taking the time to regularly inspect these parts can keep your appliance running smoothly for years to come.Ventilation And Airflow
Kenmore 600 Series Dryer issues often involve ventilation problems. Blocked vents restrict airflow, leading to overheating and inefficient drying. Regularly cleaning the vents ensures optimal performance and prevents potential damage.
Efficient ventilation and airflow are crucial for the optimal performance of your Kenmore 600 Series Dryer. Poor airflow can lead to longer drying times and even pose a fire hazard. Regular maintenance of the ventilation system ensures that your dryer operates safely and efficiently.Clearing Lint Build-up
One of the first steps you can take is clearing the lint trap. You might be surprised at how much lint can accumulate even after just a few loads. Make it a habit to clean the lint screen before or after each use. Don’t forget the vent itself. Use a long brush or vacuum attachment to reach deep inside the vent. You’ll be amazed at how much hidden lint can be lurking there, affecting performance. Check the exhaust hose as well. Disconnect it periodically to remove any lint build-up. A clear path for air is essential for proper drying.Ensuring Proper Ventilation
Are your dryer vents properly installed? An improperly vented dryer can cause moisture to build up in your laundry area. Make sure the vent hose is straight and not kinked. Consider the length of the vent. A shorter vent is always better. Long vents can cause more lint to accumulate and reduce airflow. Is your dryer located in a cramped space? Ensure there’s enough room around the dryer for air to circulate. A well-ventilated space helps your dryer function more efficiently. Have you ever noticed clothes taking longer to dry? It might be a sign that your dryer isn’t getting enough airflow. Addressing ventilation issues can save you time and energy in the long run. What other routine checks do you perform to keep your dryer running smoothly? Share your tips and tricks in the comments. Your insights might just help someone else with their dryer woes!Addressing Noise Problems
Troubleshooting the Kenmore 600 Series Dryer can help address noise problems effectively. Common noise issues may stem from worn-out drum rollers or a loose blower wheel. Regular maintenance and part replacement ensure smooth and quiet operation.
Dealing with noise problems in your Kenmore 600 Series dryer can be frustrating, especially when the unexpected clatter interrupts your day. But, addressing these issues doesn’t need to be a daunting task. With a little guidance, you can often resolve noise problems on your own, saving both time and money. Let’s dive into some key steps to help you tackle those unsettling sounds.Identifying Source Of Noise
Pinpointing the source of the noise is crucial. Start by listening closely to your dryer while it’s running. Is the noise a consistent hum, or is it more of an erratic banging? Open the dryer door and check for any loose items like coins or buttons trapped in the drum. Sometimes, something as simple as a forgotten pen or a stray coin can be the culprit. If the noise persists, consider the location. A noise at the front could indicate a different issue than one coming from the back.Lubricating Moving Parts
Once you’ve identified the source, the next step is to ensure the moving parts are well-lubricated. Over time, parts like rollers and bearings can dry out, leading to squeaking or grinding noises. Unplug the dryer and safely access the internal components. A quick spray of a suitable lubricant on the drum rollers or bearings can work wonders. Remember, using the right type of lubricant is important—avoid anything that might degrade plastic or rubber components. Could a simple lubrication be the fix you need? Taking the time to care for these parts can extend the life of your dryer and keep it running smoothly. Don’t overlook this easy maintenance step—it might just be the solution you’ve been searching for. By approaching these noise issues with a clear plan and a bit of elbow grease, you can enjoy the peace and quiet of a smoothly running Kenmore 600 Series dryer once more. Have you ever had a noise issue that turned out to be something unexpected? Share your experience in the comments below!Control Panel And Settings
Having trouble with your Kenmore 600 Series Dryer? You might find the solution on the control panel. Many dryer issues stem from incorrect settings or a simple need for a reset. Let’s dive into how you can easily troubleshoot these common problems and get your dryer back in working order.
Resetting The Control Panel
Sometimes, the dryer just needs a little nudge to get back on track. Resetting the control panel can be a quick fix. Start by unplugging the dryer from the power source for a few minutes. This can clear any minor glitches.
Plug it back in and see if your control panel behaves differently. You’d be surprised how often this simple reset resolves issues. It’s like giving your dryer a fresh start.
Think of it as rebooting your computer when it freezes. Have you ever tried resetting your dryer before calling for help?
Verifying Correct Settings
Another common issue is incorrect settings. Check the control panel to ensure you have selected the right cycle for your load. Using the wrong setting can prevent your dryer from functioning properly.
For example, choosing a delicate cycle for heavy towels might leave them damp. Make sure the temperature and cycle match the fabric type.
It’s easy to overlook these details, but they can make a huge difference. Are you confident about the settings you choose each time you use your dryer?
By focusing on the control panel and settings, you can troubleshoot many dryer issues on your own. It’s empowering to solve these problems without the need for professional help. Give it a try and see how a little attention to detail can make your dryer run smoothly again.
Professional Help
Need assistance with your Kenmore 600 Series Dryer? Troubleshooting guides often help identify common issues like poor heating or unusual noises. Professional advice ensures efficient repairs, keeping your dryer running smoothly.
When your Kenmore 600 Series Dryer acts up and basic troubleshooting doesn’t solve the problem, it might be time to call in the professionals. A skilled technician can diagnose and fix issues that might be beyond your expertise. Professional help can save you time, stress, and possibly prevent further damage to your dryer. But how do you know when it’s the right time to reach out?When To Contact A Technician
Not every dryer malfunction demands professional intervention. However, certain signs indicate it’s time to get expert help. If your dryer is making unusual noises like grinding or squealing, it could point to a mechanical problem. Is the dryer drum not spinning at all? This might be due to a faulty belt or motor. Sometimes, the dryer may not heat up, leading to damp clothes. While this could be due to a simple vent blockage, it might also be a more complex heating element issue. Attempting to fix electrical components without proper knowledge can be risky. That’s when a technician’s expertise becomes invaluable.Preparing For A Service Call
Before calling in a technician, gather some key information. Note down any error codes displayed, as these can provide clues to the issue. Consider keeping a log of the symptoms, such as when the problem started and whether it occurs consistently or intermittently. This information can speed up the diagnostic process. Clear the area around your dryer to ensure the technician has easy access. Remove any items that might obstruct their work. If possible, have your dryer’s manual on hand. It can provide model-specific details that might be necessary during the repair. Lastly, think about what questions you might want to ask. Are you curious about maintenance tips to prevent future issues? Do you want to know if it’s time to consider a replacement rather than another repair? A service call is not just a repair session—it’s an opportunity to learn more about maintaining your appliance effectively. Engaging with your appliance’s needs can lead to a longer lifespan and better performance. So, are you ready to make that call?
Credit: theadoutlet.com
Credit: www.youtube.com
Frequently Asked Questions
Why Is My Kenmore 600 Series Dryer Not Heating?
A clogged vent or faulty thermostat can stop heating. Check both. Clean the vent. Replace parts if needed.
How Do I Reset My Kenmore 600 Series Dryer?
Unplug the dryer for five minutes. Plug it back in. This simple reset can solve minor glitches.
What Causes My Kenmore Dryer To Make Noise?
Loose parts or worn-out bearings often cause noise. Inspect the drum and motor. Tighten or replace parts.
Why Does My Dryer Take Too Long To Dry Clothes?
Blocked vents or a full lint trap slow drying. Clean vents and lint trap. Improve airflow for faster drying.
How Do I Fix A Kenmore Dryer That Won’t Start?
Check the power cord and circuit breaker. Ensure the door is closed. Replace faulty door switch or thermal fuse.
Conclusion
Troubleshooting your Kenmore 600 Series Dryer doesn’t have to be difficult. Start by checking basic components like the power source and lint filter. Examine the settings and ensure proper adjustments. Listen for unusual noises or vibrations. Clean internal parts regularly to prevent issues.
Seek professional help if problems persist. Regular maintenance ensures smooth operation and longevity. Remember, consistent care keeps your dryer efficient. With these tips, you can address common issues easily. Keep your dryer running smoothly and enjoy hassle-free laundry days.
")


