Is your KitchenAid refrigerator acting up and leaving you frustrated? Whether it’s a mysterious noise, a sudden cooling problem, or an unexpected leak, dealing with appliance issues can be overwhelming.
But don’t worry—you’re not alone, and you don’t need to feel stuck. In this guide, we’ll walk you through simple troubleshooting steps to help you identify and fix common problems with your KitchenAid refrigerator. By the time you’re done reading, you’ll feel more confident and in control of the situation.
Ready to save time, money, and stress? Let’s get started!
Credit: www.kitchenaid.com
Common Refrigerator Issues
Your KitchenAid refrigerator is one of the most vital appliances in your home. When it stops working as it should, it can throw your entire routine into chaos. Understanding common problems and how to troubleshoot them can save you time, money, and frustration.
Refrigerator Not Cooling
A refrigerator that’s not cooling can quickly turn into a nightmare. Start by checking if the temperature settings are correct—sometimes they get changed accidentally. Make sure the vents inside aren’t blocked by food items, as proper airflow is crucial for cooling.
If the problem persists, inspect the condenser coils at the back or bottom of the fridge. Dust and debris can build up, making the system work harder and less efficiently. Cleaning these coils can often resolve the issue.
Freezer Not Freezing
A freezer that fails to freeze defeats its purpose entirely. Check if the freezer door is closing properly. A loose seal can let warm air in, compromising the cooling.
Inspect the evaporator fan as well—it circulates cold air through the freezer. If you hear no sound from the fan or notice frost buildup, the fan may need replacing. This is a common fix for freezers that underperform.
Water Dispenser Not Working
A non-functioning water dispenser can be a minor inconvenience or a major frustration. First, check if the water supply line is connected and turned on. Sometimes, the issue is as simple as a kinked or clogged water line.
Additionally, inspect the water filter. If it’s overdue for a replacement, it might block water flow. Replacing the filter often restores normal operation.
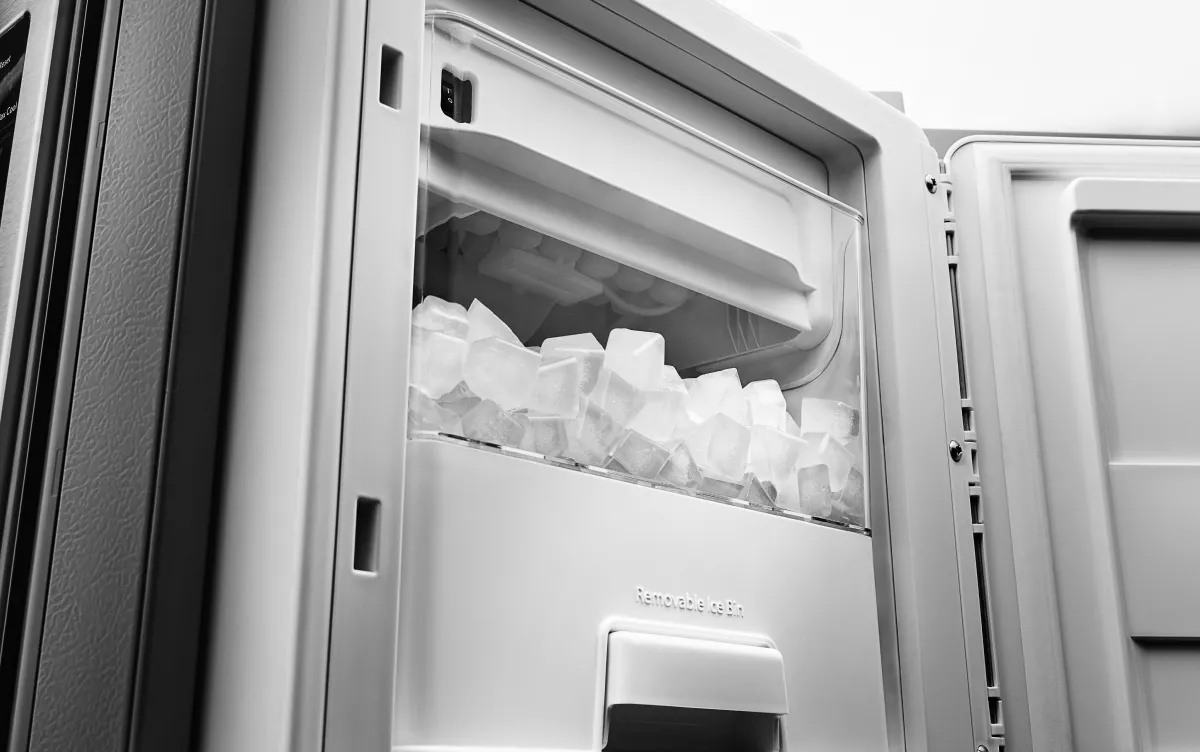
Ice Maker Problems
Is your ice maker refusing to make ice? Begin by checking the ice maker’s power switch—it might be accidentally turned off. Ensure the ice tray is properly aligned and not jammed with old ice cubes.
If no ice is forming, examine the water inlet valve. A clogged or faulty valve can stop water from flowing into the ice maker. Cleaning or replacing this valve can often solve the problem.
Unusual Noises
Unusual noises coming from your refrigerator can be unsettling. If you hear rattling, ensure the fridge is level and not wobbling on uneven flooring. Vibrations often cause such noises.
A loud humming noise could point to an issue with the compressor or condenser fan. While some sounds are normal, persistent loud noises may require a technician’s help. Don’t ignore these signs—they usually indicate something that needs attention before it worsens.
KitchenAid refrigerators are built to last, but even the best appliances can face occasional hiccups. Tackling these common issues with simple checks can often restore functionality without professional help. Which of these problems have you encountered before, and how did you resolve them? Share your experience—it could help someone else!

Credit: www.kitchenaid.com
Basic Maintenance Tips
Your KitchenAid refrigerator is a vital part of your daily routine. To keep it running smoothly, basic maintenance is key. These simple steps can save you from costly repairs and ensure your fridge stays in top shape. Let’s dive into actionable tips that you can easily follow.
Cleaning The Coils
Dirty coils can make your refrigerator work harder than it should. Check the coils behind or beneath your fridge—they’re often magnets for dust and debris. Use a vacuum or a coil brush to clean them every six months. You’ll notice improved cooling and lower energy bills.
Checking Door Seals
Have you ever felt cold air escaping when you open your fridge? Weak door seals could be the culprit. Close the door on a dollar bill—if you can pull it out easily, the seals may need cleaning or replacement. A quick wipe with warm soapy water can remove grime and restore the seal’s grip.
Adjusting Temperature Settings
Is your food freezing or spoiling too quickly? Your temperature settings might need tweaking. Aim for 37°F for the fridge and 0°F for the freezer. Use a fridge thermometer to verify the temperature and adjust the dial accordingly for optimal performance.
Defrosting The Freezer
Frost buildup can reduce your freezer’s efficiency. If you notice thick layers of ice, it’s time to defrost. Unplug the fridge, transfer food to a cooler, and let the ice melt naturally. Once done, wipe the interior dry and plug it back in. Your freezer will thank you with better performance.
Maintaining your KitchenAid refrigerator doesn’t have to be overwhelming. Have you tried any of these tips before? If not, give them a shot and see the difference for yourself!
Troubleshooting Steps For Cooling Problems
A KitchenAid refrigerator that isn’t cooling properly can be frustrating, especially when your food starts to spoil. The good news? Many cooling problems can be resolved with a few simple troubleshooting steps. Let’s walk through some common fixes to help get your fridge back to optimal performance.
Inspecting The Thermostat
The thermostat controls the temperature inside your fridge. Start by checking if it’s set to the recommended level, usually between 37°F and 40°F for the fridge and 0°F for the freezer. Sometimes, accidental bumps can change the setting without you realizing it.
If the thermostat is set correctly but the fridge still isn’t cooling, try turning it down slightly and wait a few hours to see if there’s an improvement. A faulty thermostat may also need replacement. Before assuming the worst, confirm it’s not just a simple adjustment issue.
Checking Airflow Blockages
Blocked airflow can prevent your fridge from cooling evenly. Check to see if items in your fridge are pressed against the vents. Overloading your refrigerator can block vents, restricting cold air circulation.
Make sure there’s space around the vents inside the fridge and freezer compartments. A good rule is to leave at least an inch of clearance for proper airflow. Also, clean any visible dust or debris from the vents to keep air moving freely.
Testing The Evaporator Fan
The evaporator fan helps circulate cold air throughout your fridge. If it’s not working, you may notice uneven cooling or warm spots. Open the freezer door and listen for a humming sound—this indicates the fan is running.
If the fan isn’t working, check for visible obstructions like ice buildup or debris. In some cases, a faulty fan motor might need to be replaced. Don’t hesitate to consult your fridge’s manual for guidance before attempting repairs.
Resetting The Compressor
The compressor is the heart of your refrigerator’s cooling system. If your fridge isn’t cooling, a simple reset might solve the issue. To reset, unplug the refrigerator from the power outlet, wait five minutes, and then plug it back in.
After plugging it in, listen for the compressor to kick back on. If it doesn’t, there could be a bigger issue requiring professional help. However, this quick reset often resolves minor glitches in the cooling system.
Have you tried any of these steps yet? It’s always satisfying when a simple fix gets your fridge running smoothly again. Don’t let cooling problems stress you out—tackle them one step at a time!
Fixing Ice Maker Issues
Is your KitchenAid refrigerator’s ice maker acting up? Maybe it’s stopped making ice altogether, or the cubes it produces are smaller than usual. Before you panic or call for repair, there are a few troubleshooting steps you can tackle yourself to get things back on track.
Inspecting The Water Supply Line
The water supply line is the lifeline of your ice maker. A kinked or clogged line can cut off the flow of water, leaving you with no ice. Start by pulling your refrigerator away from the wall and locating the water supply line at the back.
Check for any bends, twists, or visible damage. If the line looks fine, disconnect it (be sure to turn off the water first) and inspect for clogs. Run water through the line to ensure it’s clear before reconnecting. Don’t forget to double-check that the water valve is fully open.
Clearing Ice Blockages
Sometimes the problem isn’t the water supply but a build-up of ice inside the ice maker. This can happen if the freezer temperature is set too low or if water has dripped and frozen in the wrong place. Open the ice maker compartment and look for any visible blockages.
Carefully remove any clumps of ice with a plastic utensil (avoid metal tools to prevent damage). If the ice maker tray is stuck, let it thaw for a few minutes or use a hairdryer on a low setting to melt the blockage. Once cleared, restart the ice maker and monitor its performance.
Replacing The Ice Maker Assembly
If you’ve tried everything and your ice maker still isn’t working, the issue might be with the ice maker assembly itself. Signs of a faulty assembly include clicking noises, no water filling the tray, or consistent failure to produce ice. Replacing the entire unit might be the best solution.
You can order a replacement ice maker assembly compatible with your KitchenAid refrigerator model. Installation is usually straightforward, involving a few screws and reconnecting the wiring harness. Always unplug the refrigerator before attempting this to avoid electrical hazards.
Have you ever fixed your ice maker yourself? It can feel empowering to solve these small issues without professional help. Plus, it saves you time and money!
Addressing Water Dispenser Malfunctions
Water dispenser malfunctions in your KitchenAid refrigerator can disrupt daily routines. Resolving the issue quickly ensures convenience and prevents further complications. Common causes include clogged filters, low water pressure, or faulty dispenser switches. Understanding these problems helps you identify and fix them efficiently.
Testing The Water Filter
A clogged water filter often blocks water flow to the dispenser. Start by checking the filter for any debris or buildup. Locate the filter in your refrigerator and remove it. Inspect it carefully for damage or dirt. Replace the filter if it’s been used for more than six months. Ensure the new filter is compatible with your refrigerator model.
If the filter looks clean and recently replaced, reinstall it securely. A loose or improperly placed filter can hinder the water flow. Test the dispenser after reinstalling to see if the issue persists.
Examining The Water Pressure
Low water pressure can prevent the dispenser from working correctly. Check the water supply line connected to your refrigerator. Ensure it isn’t kinked, blocked, or leaking. Straighten any bent sections to improve water flow.
To test the pressure, disconnect the water line and run water into a container. Weak flow indicates a pressure issue. You may need to contact your water provider or inspect your home’s plumbing system. Adequate pressure is essential for optimal dispenser performance.
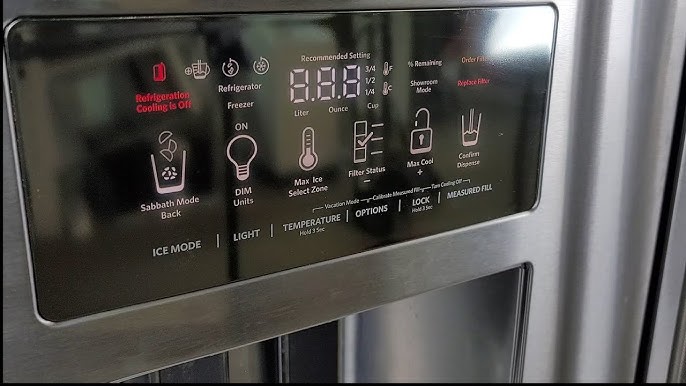
Checking The Dispenser Switch
A faulty dispenser switch can stop the flow of water altogether. Locate the switch in the control panel of your refrigerator. Press it gently to check if it feels stuck or damaged. If the switch doesn’t respond, it may require replacement.
Use a multimeter to test the continuity of the switch. No continuity indicates a defective switch. Replace the switch by following your refrigerator’s user manual instructions. Once replaced, test the dispenser to confirm the problem is resolved.
Dealing With Noise Problems
KitchenAid refrigerators are known for their reliability, but noise issues can arise. Unusual sounds may indicate something needs attention. Addressing these noises early can prevent bigger problems. In this section, we explore common noise issues and how to fix them.
Identifying The Noise Source
Start by pinpointing where the noise comes from. Open the fridge door and listen carefully. Is the noise louder inside or outside the appliance? Common culprits include the fan, compressor, or water lines. Different sounds, like humming, rattling, or buzzing, can suggest different issues. Knowing the source helps you decide the next steps.
Fixing Vibrations
Vibrations often occur due to improper leveling or loose parts. Check if the fridge is standing firmly on the floor. Use a level tool to ensure it isn’t tilted. Tighten any loose screws or panels that could cause rattling. Adding small rubber pads beneath the fridge feet can also reduce vibration noise.
Replacing The Fan Motor
A faulty fan motor can create loud buzzing or grinding noises. Locate the fan at the back or inside the freezer compartment. Disconnect the fridge from power before inspecting the motor. If the fan blades are obstructed or the motor looks damaged, replacement is necessary. Replace the motor using the model-specific instructions in your manual. This simple fix can restore a quieter operation.
When To Call A Professional
Your KitchenAid refrigerator is a vital part of your daily life. When it starts acting up, the temptation to fix it yourself can be strong. But knowing when to call a professional can save you time, money, and unnecessary frustration.
Recognizing Advanced Issues
Some problems go beyond basic troubleshooting. If your fridge isn’t cooling properly despite adjusting the temperature, the issue might involve a faulty compressor or refrigerant leak. These require specialized tools and expertise.
Unusual noises, like persistent clicking or loud humming, often signal problems with internal components like the motor or fan. These parts are tricky to diagnose and replace on your own.
Electrical issues, such as flickering lights or power surges, are also red flags. Attempting to fix wiring errors can lead to further damage or even safety hazards.
Avoiding Diy Risks
DIY repairs can seem appealing, but they often carry hidden risks. You might accidentally void your warranty by tampering with the wrong part. Some fixes require specific tools that most households don’t have.
There’s also the risk of injury. Mishandling sharp components or electrical parts can result in serious accidents. Is it worth the gamble?
Even small mistakes, like improperly sealing a door gasket, can lead to bigger issues, like food spoilage or increased energy bills. Would you want to take that chance?
Choosing A Certified Technician
When it’s time to call for help, choose a technician certified to handle KitchenAid appliances. They’ll have the training and experience to diagnose problems quickly and accurately.
Ask for recommendations from friends or family who have had similar issues. Online reviews can also give you insights into reliability and customer service.
Don’t hesitate to ask the technician questions about their process or pricing. A good professional will be transparent and willing to explain their approach.
Credit: www.youtube.com
Conclusion
Fixing a KitchenAid refrigerator can feel challenging, but it’s manageable. Start with basic checks like power, temperature, and seals. Addressing common issues early can save time and money. For complex problems, seeking professional help is best. Regular maintenance prevents future breakdowns and extends the appliance’s life.
Always follow the user manual for proper care and troubleshooting tips. A well-maintained refrigerator ensures food stays fresh and safe. Remember, small efforts today can prevent bigger issues tomorrow. Stay proactive and keep your KitchenAid running smoothly.
")


