Is your KitchenAid ice dispenser acting up and leaving you without that perfect ice cube? You’re not alone, and the good news is that many common problems have simple solutions you can try yourself.
Whether your dispenser won’t release ice, makes strange noises, or seems completely stuck, this guide will help you troubleshoot and fix the issue quickly. By following easy steps tailored for your KitchenAid refrigerator, you’ll save time, avoid unnecessary service calls, and get back to enjoying chilled drinks in no time.
Keep reading to discover practical tips and clear instructions designed just for you and your ice dispenser troubles.
Common Ice Dispenser Issues
Common ice dispenser issues can disrupt your daily routine. Ice dispensers often stop working due to simple problems. Identifying these issues helps fix the dispenser quickly. Understanding the common problems saves time and effort.
Dispenser Not Dispensing Ice
The dispenser may fail to release ice if the paddle does not activate. Check if the glass presses the paddle firmly. The control panel should be set to ice dispensing mode. Sometimes, the dispenser motor or switch might be faulty. A power reset can also help restore function.
Ice Maker Not Making Ice
Ice production stops if the water supply is blocked or turned off. Ensure the water line is connected and the valve is open. Temperature settings inside the freezer must be cold enough. The ice maker’s power switch should be turned on. A reset of the ice maker often restarts the ice cycle.
Ice Jam And Blockage
Ice can get stuck in the dispenser chute, causing jams. Remove any ice buildup gently from the chute area. Avoid using sharp tools to clear blockages. Regularly check for ice clumps inside the dispenser. Defrosting the freezer can help prevent ice jams.
Leaking Ice Or Water
Leaks occur if the water line connection is loose or damaged. Inspect the water line for cracks or kinks. The dispenser’s drip tray may be full or misaligned. Internal seals or gaskets could wear out, causing leaks. Timely maintenance avoids water damage and messes.
Credit: www.youtube.com
Basic Checks Before Reset
Before resetting your KitchenAid ice dispenser, perform some basic checks. These checks help identify simple problems. Fixing these issues may restore dispenser function without a reset. Follow these steps carefully to save time and effort.
Power Supply And Switch
Check if the refrigerator is plugged in securely. Make sure the power outlet works by testing another device. Confirm the ice maker’s power switch is turned on. A switch set to off disables ice production and dispensing.
Water Line And Valve
Ensure the water line connects properly to the fridge. Look for kinks or bends that block water flow. Verify the water valve is fully open to allow water in. Without water, the ice maker cannot produce ice.
Dispenser Lock Status
Check if the dispenser lock is active. A locked dispenser prevents ice and water from coming out. Locate the lock button or switch on the control panel. Turn off the lock to enable dispenser use again.
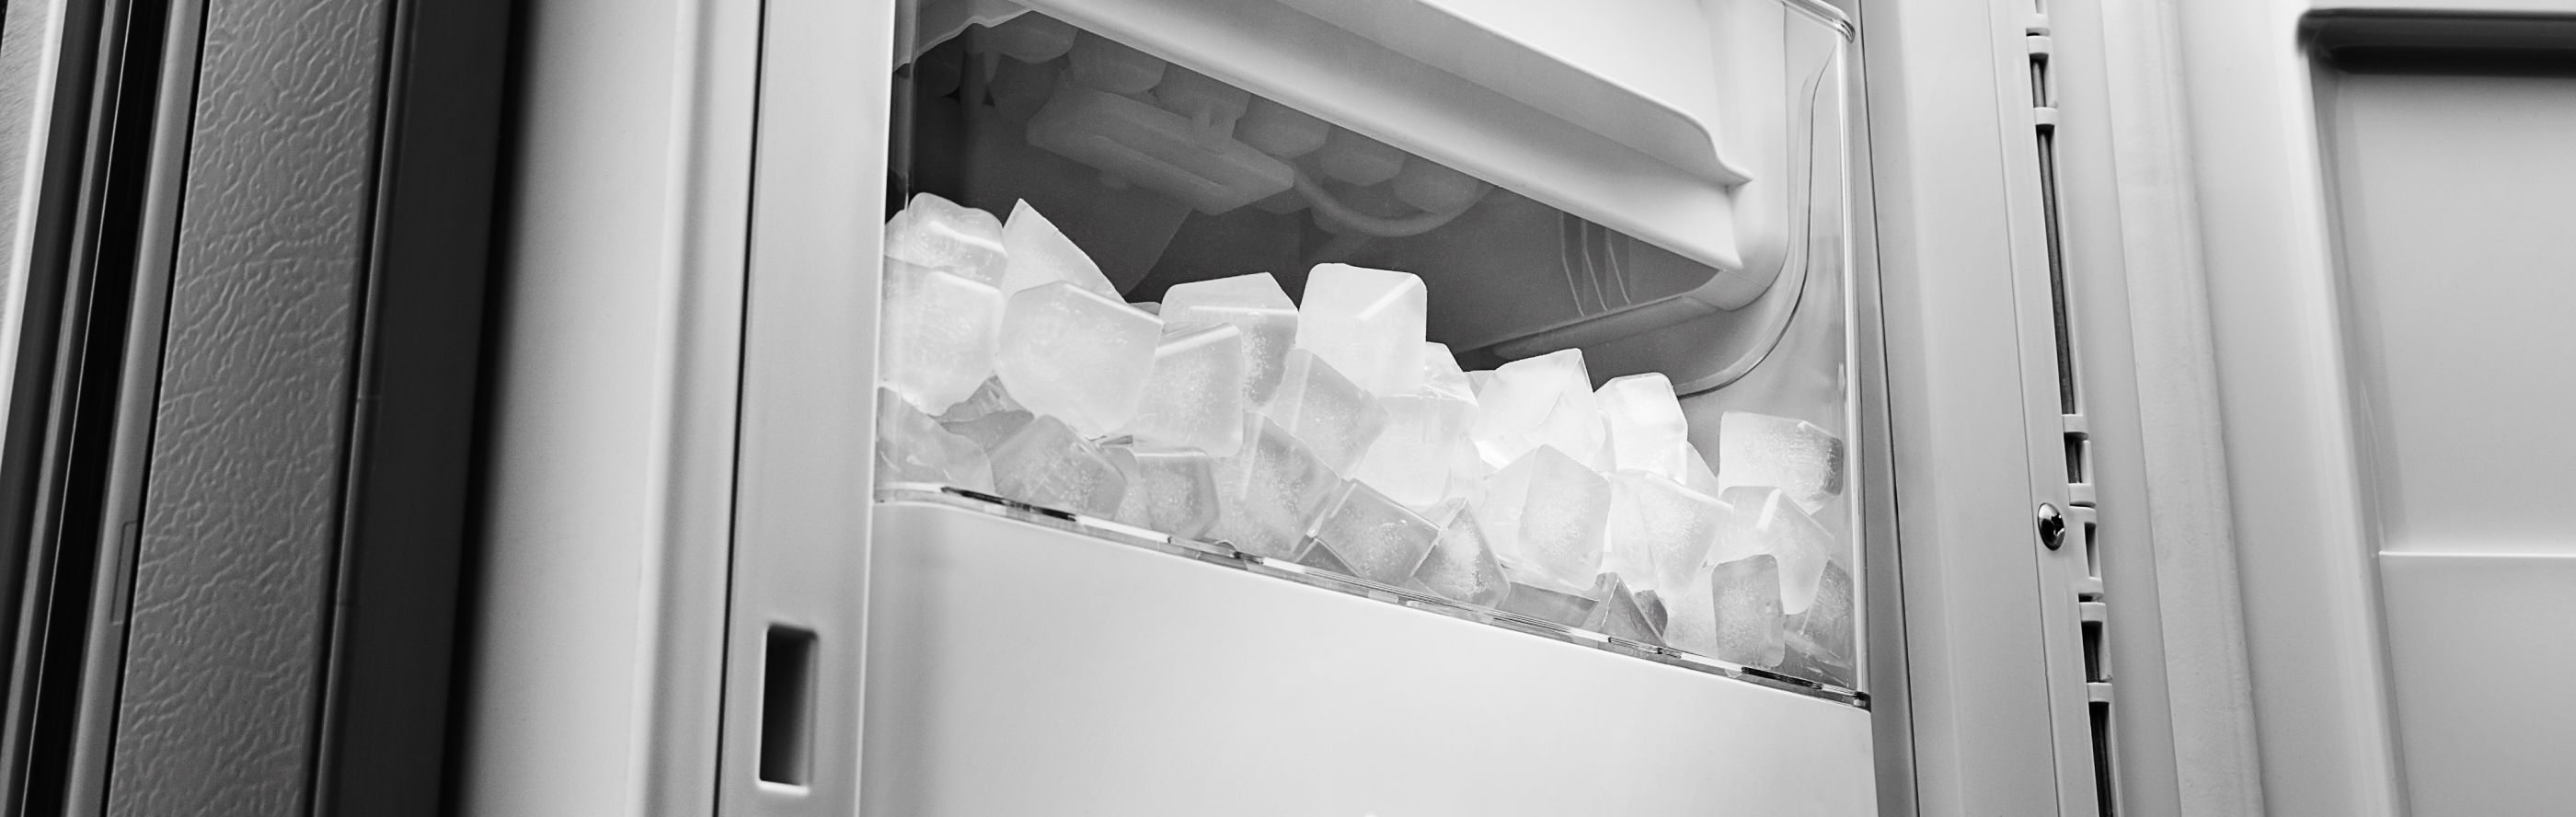
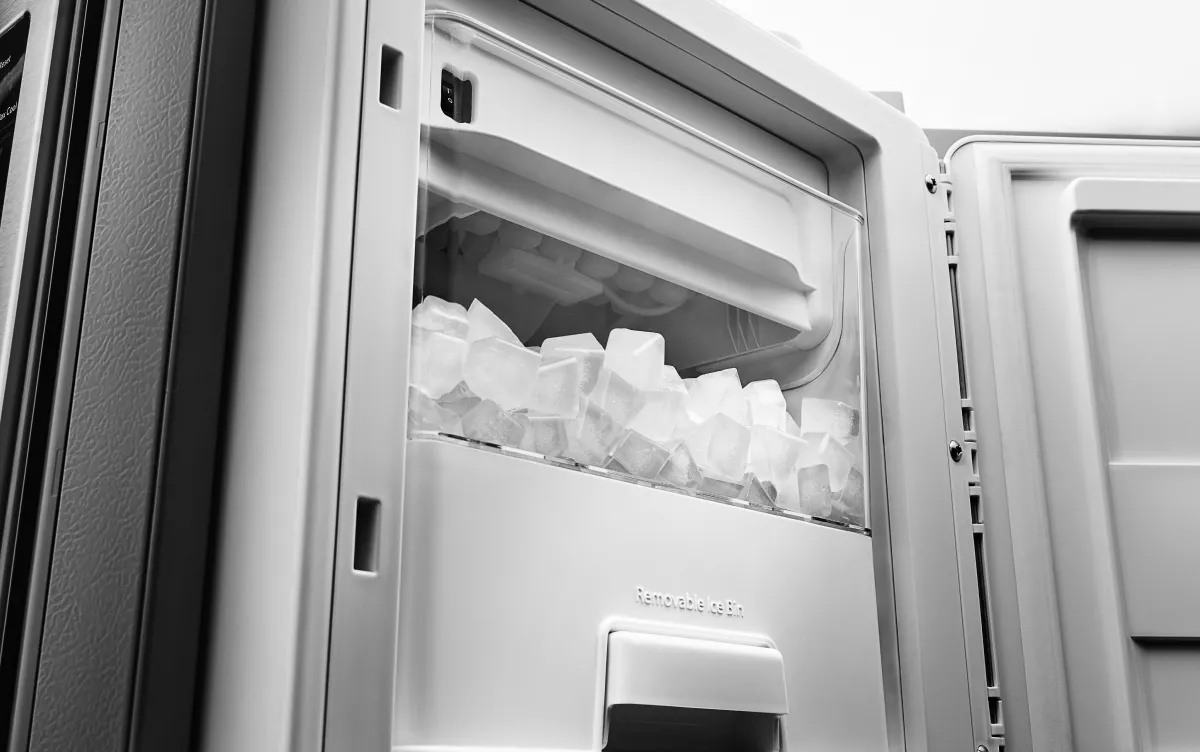
Ice Bucket And Chute Clearance
Inspect the ice bucket for jams or full capacity. Remove excess ice to avoid blockage. Make sure the chute is clear of ice clumps or debris. A blocked chute stops ice from dispensing properly.
Resetting The Ice Dispenser
Resetting the ice dispenser on your KitchenAid refrigerator often fixes common issues. This process helps clear errors and restarts the ice maker. Simple resets can solve problems like the dispenser not working or ice jamming.
Below are three easy reset methods. Each method targets different types of issues. Follow these steps carefully to restore your ice dispenser’s function.
Push-button Reset Method
Start by locating the reset button on the ice maker. It is usually a small button or switch inside the freezer. Place a towel under the ice maker to catch any falling ice or water. Press and hold the reset button for about 10 seconds. You will see the bail arm move as the ice maker cycles. This action dumps old ice and refills the tray. Wait for the cycle to finish before testing the dispenser again.
Power Cycle Reset Steps
Turn off the ice maker power switch or unplug the refrigerator. Leave it off for about five minutes to clear the system. Plug the refrigerator back in or turn the switch on. This power cycle resets the control board and stops any frozen errors. Check if the ice dispenser works after the reset.
Using The Ice Maker Reset Button
Find the dedicated ice maker reset button, often located near the ice bin or inside the freezer. Press and hold this button for 5 to 10 seconds. The ice maker will start a reset sequence. It may eject ice or make noises during this process. Let the reset complete fully. Test the dispenser to confirm the problem is fixed.
Credit: www.kitchenaid.com
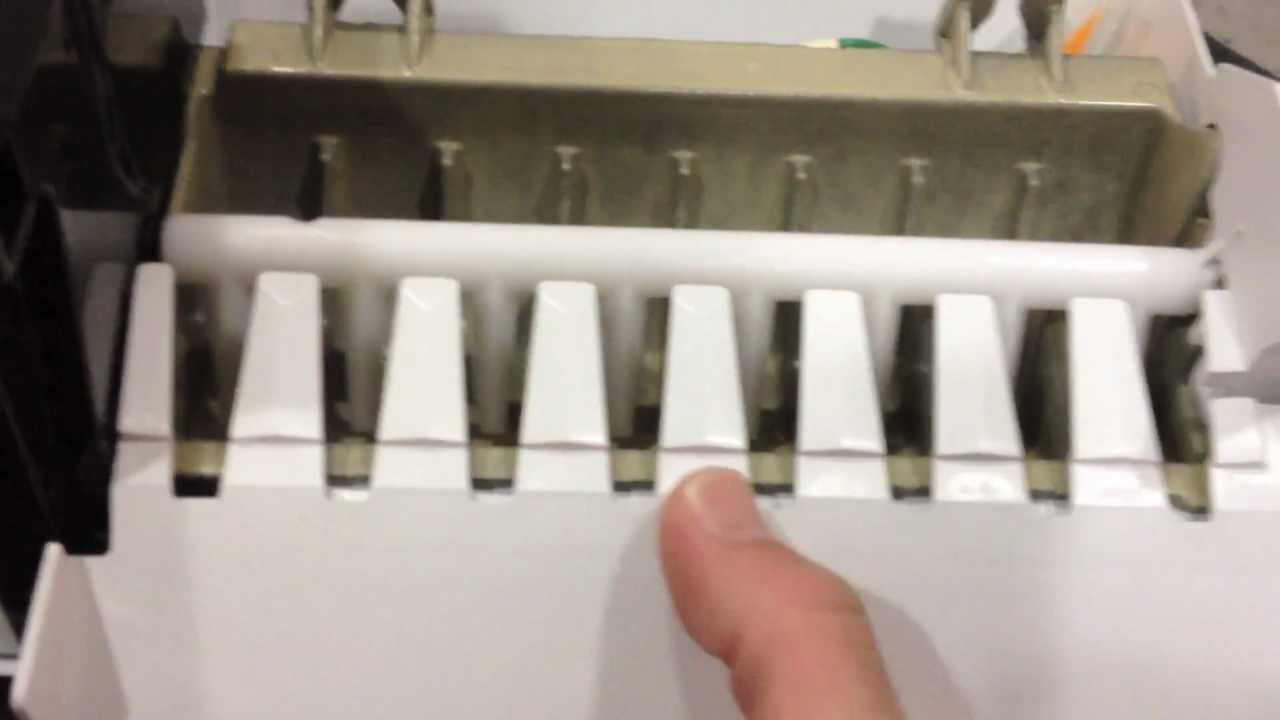
Clearing Ice Jams
Ice jams can block your KitchenAid ice dispenser, stopping ice flow. Clearing these jams quickly helps keep your dispenser working well. This section guides you through easy steps to clear ice jams safely. Follow these tips to remove blockages and prevent future problems.
Removing Blocked Ice From Chute
First, unplug your refrigerator for safety. Check the ice chute for any stuck ice pieces. Use a plastic or wooden tool to gently push ice out. Avoid metal tools that can damage the dispenser. Clear all visible ice to open the chute fully. Wipe the chute dry before plugging the fridge back in. This stops new ice from sticking right away.
Thawing Frozen Auger
The auger moves ice inside the dispenser. It can freeze and stop turning. Unplug the fridge and open the ice bin door. Use a hair dryer on low heat to warm the auger gently. Do not overheat or touch the auger with metal. Melted ice will free the auger to spin again. After thawing, dry the area and plug the fridge back in.
Preventing Future Ice Jams
Keep the ice bin full but not too packed. Overfilling causes ice to stick and jam. Regularly check the ice chute and auger for frost. Clean the dispenser parts with warm water every few months. Avoid using crushed ice if your model does not support it. Keep the fridge temperature steady to stop ice from melting and refreezing. These steps reduce ice jams and keep your dispenser working well.
Adjusting Dispenser Settings
Adjusting the dispenser settings on your KitchenAid ice dispenser can fix many common issues. Small tweaks often restore proper function. Knowing how to check and change the settings saves time and avoids service calls.
This section covers key steps to adjust dispenser settings. Follow these tips to get ice and water flowing smoothly again.
Checking Dispenser Paddle Engagement
The dispenser paddle must fully engage to activate ice or water release. Press the paddle firmly with a glass. If it feels loose or doesn’t click, the switch may not activate. Adjust the glass angle or press harder.
Inspect the paddle for any debris blocking movement. Clean gently if needed. Ensuring the paddle moves freely helps the dispenser respond correctly.
Selecting Ice Or Water On Control Panel
The control panel lets you choose between ice and water. Check the display for the selected option. Tap the icon to switch modes if needed.
Some models have touchpads or buttons. Confirm the right option is highlighted. Incorrect selection can cause no ice or water to dispense.
Unlocking The Dispenser
Many KitchenAid dispensers lock to prevent accidental use. Look for a lock icon or button on the control panel. Press and hold for 3-5 seconds to unlock.
When locked, the dispenser won’t release ice or water. Unlocking restores normal operation quickly and easily.
Credit: www.kitchenaid.com
Maintenance Tips For Smooth Operation
Maintaining your KitchenAid ice dispenser ensures it works without interruptions. Simple care steps keep ice flowing smoothly. Regular upkeep reduces the chance of common issues. Follow these tips to prolong your dispenser’s life and enjoy fresh ice anytime.
Regular Cleaning Of Ice Bin
Clean the ice bin often to prevent odors and clumps. Remove all ice before cleaning. Use warm water and mild soap. Avoid harsh chemicals that can damage the bin. Dry the bin completely before refilling. This prevents ice from sticking together.
Inspecting Water Filters
Check water filters every six months or as recommended. Dirty filters reduce water flow and ice quality. Replace filters promptly to keep water clean. Clean filters improve taste and prevent dispenser blockages. Always use filters compatible with your KitchenAid model.
Ensuring Proper Fridge Positioning
Place the fridge level and away from heat sources. Too much tilt can stop ice from dispensing correctly. Leave space behind the fridge for air circulation. Good airflow helps maintain the ice maker’s temperature. Avoid pushing the fridge too far back against the wall.
When To Call A Professional
Knowing when to call a professional for your KitchenAid ice dispenser is important. Some problems need expert care beyond simple fixes. Recognizing these signs helps avoid further damage and costly repairs.
Here are key situations that signal it is time to get professional help.
Persistent Ice Maker Failures
Ice maker keeps failing after multiple resets and checks. Ice clogs or jams happen often. The dispenser stops working without clear cause. These ongoing problems often need a trained technician to diagnose and fix.
Complex Mechanical Issues
Strange noises come from the ice maker motor or gears. Ice dispenser parts are broken or stuck inside. Electrical components like switches or sensors fail repeatedly. Such complex issues require specialized tools and knowledge to repair safely.
Warranty And Service Options
Check your KitchenAid warranty before attempting major repairs. Many repairs are covered under warranty terms. Authorized service providers ensure genuine parts and proper work. Calling a professional preserves your warranty and protects your appliance investment.
Frequently Asked Questions
How To Reset Kitchenaid Ice Dispenser?
To reset a KitchenAid ice dispenser, unplug the refrigerator for 30 seconds. Press and hold the ice maker reset button until it cycles. Plug the refrigerator back in and turn the ice maker on. Ensure the water supply is connected and the dispenser is unobstructed.
Why Is My Kitchenaid Refrigerator Not Dispensing Ice?
Check if the dispenser paddle is fully pressed and the ice maker is turned on. Ensure the water supply is connected and valve open. Clear ice blockages and reset the ice maker by unplugging and plugging it back in.
How To Reset An Ice Dispenser?
To reset an ice dispenser, unplug the refrigerator, wait 5 minutes, then plug it back in. Locate and press the reset button on the ice maker for 5 seconds. The unit will cycle and eject ice to complete the reset.
Ensure the water supply is on before restarting.
Why Is My Refrigerator Ice Dispenser Not Dispensing Ice?
Your refrigerator ice dispenser may not work due to a blocked chute, frozen ice, or a faulty dispenser switch. Ensure the ice maker is on and water supply is open. Press the dispenser paddle firmly. Reset the ice maker by unplugging, then plugging it back in.
Why Is My Kitchenaid Ice Dispenser Not Working?
The dispenser may be off or the ice maker could be turned off. Check the power switch and ensure the ice maker is on. Also, confirm the water supply line is connected properly.
Conclusion
Troubleshooting your KitchenAid ice dispenser can save time and money. Start by checking the water supply and power connections. Make sure the dispenser paddle works correctly and is not blocked. Performing a simple reset often fixes common issues. Keep the ice maker clean and clear from ice jams.
Regular maintenance helps your dispenser work smoothly. Follow these easy steps for quick fixes at home. This keeps your ice dispenser running well without professional help. Simple care improves performance and extends appliance life.
")


