Is your laptop plugged in but still not charging? It’s frustrating when your device won’t power up as expected, especially when you rely on it every day.
Before rushing to replace your charger or battery, there are simple steps you can take to troubleshoot the problem yourself. By checking connections, inspecting your charger and ports, and performing quick resets, you can often bring your laptop back to life without extra cost.
In this guide, you’ll discover easy, practical fixes that anyone can do—no tech expertise needed. Keep reading to regain control over your laptop’s power and avoid unnecessary expenses.

Credit: www.youtube.com
Common Charger Issues
Laptop chargers face various common problems. These issues stop your laptop from charging properly. Understanding these problems helps fix them faster. Here are frequent charger issues and what causes them.
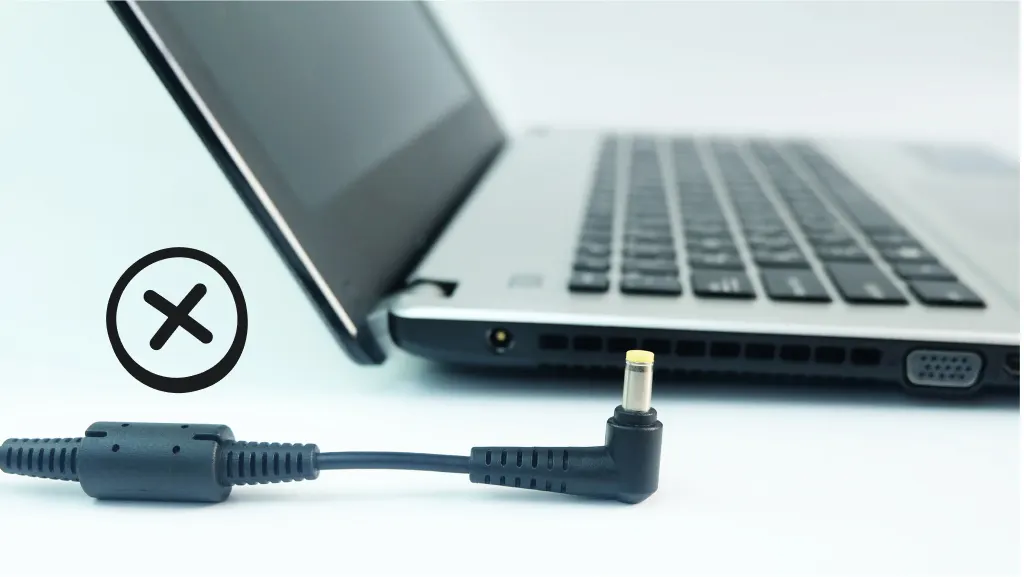
Loose Connections
Loose connections are a top reason chargers fail. The charger may not fit snugly in the laptop port. The power plug might be loose in the wall socket. These gaps stop the flow of electricity. Check both ends of the charger for a tight fit. Wiggle the cable gently to see if charging cuts out. Secure connections restore proper charging.
Damaged Cables
Cables wear out over time. Bends, twists, and pulls break wires inside. The charger may show visible cuts or frays. Damaged cables cause intermittent charging or no charge. Avoid sharp bends and keep cables untangled. Replace cables with visible damage to prevent hazards.
Faulty Power Adapter
The power adapter converts wall power to laptop power. Overheating, drops, or age can damage it internally. A faulty adapter may not supply enough power. Signs include charger lights not turning on or laptop not charging. Test the adapter with a multimeter or try another adapter. Replace faulty adapters for reliable charging.
Overheating Problems
Chargers and laptops generate heat while working. Poor ventilation or blocked vents cause overheating. Overheating stops charging to protect components. Feel the charger and laptop base for excess heat. Allow cooling by unplugging and moving to a cooler spot. Keep vents clean and clear for proper airflow.
Hardware Checks
Hardware problems often cause laptop charging issues. Checking the physical parts can help find the problem fast. Start by examining the charger and the laptop port. Small damages or loose connections often stop charging.
Inspect Charger And Port
Look closely at the charger cable and plug. Find any cuts, bends, or frayed wires. Check the laptop’s charging port for dirt or damage. A broken port or damaged charger can block power flow.
Test Different Power Outlets
Plug the charger into another power outlet. Some sockets may not supply power properly. Using different outlets rules out power source problems. It helps confirm if the issue is with the outlet or the charger.
Clean Charging Ports
Dust and dirt often block the charging port. Use a soft brush or compressed air to clean it gently. Avoid using sharp objects that can cause damage. A clean port ensures good contact between charger and laptop.
Try Another Charger
Use a compatible charger from a friend or spare one. If the laptop charges, your charger may be faulty. Avoid chargers with different voltage or wattage. Testing with another charger helps identify the broken part.
Software Fixes
Software issues can cause your laptop charger to stop working properly. Many charging problems come from system glitches or outdated drivers. Fixing these problems often requires simple software steps. These fixes can help your laptop recognize and use the charger again.
Perform Power Reset
Power reset clears minor system errors that block charging. First, unplug your charger and remove all connected devices. Then, shut down your laptop completely. Wait about 30 seconds before plugging the charger back in. Turn on the laptop and check if it starts charging.
Update Battery Drivers
Outdated or corrupted battery drivers can stop charging. Open Device Manager on your laptop. Find the “Batteries” section and expand it. Right-click on each item like “Microsoft ACPI-Compliant Control Method Battery.” Select “Update driver” and follow the on-screen instructions. Restart your laptop after updating the drivers.
Calibrate Battery
Battery calibration helps the system read the battery level correctly. Fully charge your laptop to 100%. Then, unplug the charger and use the laptop until it turns off automatically. After that, charge the laptop again to 100% without interruption. This process resets the battery meter and may fix charging issues.
Reset Battery Controller
The battery controller manages charging functions. Resetting it can solve some charging problems. Turn off your laptop and unplug the charger. Open Device Manager and expand the “Batteries” section. Right-click on “Microsoft ACPI-Compliant Control Method Battery” and select “Uninstall device.” Restart your laptop to reinstall the controller automatically.

Credit: www.dell.com
Charging Port Issues
Charging port issues often cause laptops to stop charging properly. Dirt, damage, or loose connections can prevent power flow. Troubleshooting these problems can save time and money. Simple checks often fix the issue without professional help.
Identify Port Damage
Look closely at the charging port for physical damage. Bent pins or loose parts stop charging. Use a flashlight to see inside the port clearly. If pins are broken or missing, the port may need repair or replacement.
Clear Dust And Debris
Dust and dirt block the charger from connecting well. Turn off your laptop before cleaning the port. Use a small brush or compressed air to remove debris gently. Avoid using sharp objects that can damage the port.
Proper Charger Insertion
Insert the charger fully and carefully into the port. A loose or partial connection stops charging. Avoid forcing the charger if it feels stuck. Check the charger plug for damage or bent pins before inserting.
Battery Troubleshooting
Battery issues often cause laptop charging problems. Understanding battery troubleshooting helps identify and fix these problems quickly.
Checking the battery condition can save time and prevent unexpected shutdowns. This section covers common signs, calibration steps, and when to replace the battery.
Signs Of Battery Failure
Battery failure shows clear signs that need attention. The laptop may not hold charge for long. It might shut down suddenly even at high battery percentage.
The battery status icon might show errors or not charge fully. Swelling or overheating of the battery also indicates failure. Slow charging or no charging at all are strong warning signs.
Battery Calibration Steps
Calibrating the battery improves its accuracy in showing charge levels. Start by fully charging the battery to 100%. Keep the charger connected for two more hours after full charge.
Disconnect the charger and use the laptop until the battery drains completely and the laptop shuts down. Recharge the battery to 100% without interruption. Repeat this process once every few months for better battery health.
When To Replace Battery
Replace the battery when calibration and troubleshooting fail. If the battery drains very fast or does not charge at all, replacement is necessary. Swollen or leaking batteries must be replaced immediately for safety.
Old batteries with reduced capacity also need replacement to restore laptop performance. Use only compatible and genuine batteries for your laptop model.
Preventive Tips
Preventing laptop charger issues saves time and protects your device. Simple habits keep chargers working longer and avoid sudden failures. Follow these easy preventive tips to maintain your laptop’s charging system in good condition.
Avoid Overheating
Heat damages laptop chargers quickly. Keep chargers and laptops in cool, ventilated places. Avoid placing your laptop on soft surfaces like beds or couches. These block air vents and trap heat. If the charger feels hot, unplug it and let it cool before use.
Use Correct Chargers
Always use chargers made for your laptop model. Wrong chargers may supply incorrect voltage. This can harm the battery or cause charging problems. Check the charger’s power rating matches your laptop’s needs. Avoid cheap or unbranded chargers as they may not meet safety standards.
Regular Port Cleaning
Dust and debris block charging ports and cause poor connections. Clean your laptop’s charging port gently with a soft brush or compressed air. Do the same for the charger’s plug. Regular cleaning prevents loose connections and charging failures.
Credit: www.asurion.com
Frequently Asked Questions
What Do I Do If My Laptop Charger Is Plugged In But Not Charging?
Check all connections and power source. Clean charging port and inspect charger for damage. Restart laptop after unplugging charger. Update battery drivers via Device Manager. Test with another compatible charger to isolate the issue.
How To Tell If A Laptop Charger Is Faulty?
Check for loose connections, visible damage, or overheating on the charger. Test with another device or charger. If charging fails, the charger may be faulty.
How To Troubleshoot Laptop Charging?
Check charger and cable connections firmly. Test charger with another device or outlet. Clean charging port gently. Perform a power reset by unplugging and restarting. Update battery drivers via Device Manager. Ensure vents are clear to prevent overheating. Replace charger if damaged or faulty.
How To Reset Laptop Battery?
To reset a laptop battery, fully charge it, then use the laptop until it shuts down. Recharge fully again. For internal batteries, perform a hard reset by unplugging, removing power, and holding the power button for 15 seconds to clear residual charge.
Why Is My Laptop Plugged In But Not Charging?
A loose charger or damaged port often causes this issue. Check connections and try another power outlet to fix it.
Conclusion
Troubleshooting a laptop charger helps keep your device powered. Check cables, connections, and outlets carefully. Clean ports gently to remove dust and debris. Restart your laptop for a simple power reset. Update battery drivers to fix software issues. Test with another charger if possible.
These steps often solve common charging problems. Stay patient and follow each tip step-by-step. Your laptop can work well again with some care. Keep these troubleshooting tips handy for future use.
")


