Are your LED strip lights not working the way they should? Whether some sections are dark, the colors won’t change, or the entire strip refuses to light up, these problems can be frustrating.
But don’t worry—you’re not alone, and fixing your LED strip lights might be easier than you think. In this guide, you’ll discover simple, step-by-step troubleshooting tips that anyone can follow to get your lights glowing bright again. Ready to bring your LED strips back to life and enjoy the perfect lighting ambiance?
Keep reading, because your quick and effective solution is just ahead.

Credit: www.elstarled.com
Common Led Strip Issues
LED strip lights are popular for their versatility and easy installation. Yet, they can face issues that affect their performance. Understanding common problems helps fix them quickly and avoid frustration.
Most LED strip issues relate to power, connections, or physical damage. These problems cause lights to flicker, dim, or stop working completely. Identifying the root cause is the first step to restoring your lighting.
Power Supply Problems
A faulty power supply is a top cause of LED strip failures. If the voltage is too low or the power adapter is damaged, the lights may not turn on.
Check the power source and adapter for signs of wear or overheating. Using the wrong power supply can also cause issues. Always match the power requirements of your LED strip.
Damaged Sections
LED strips can break or get damaged by bending or cutting incorrectly. Damaged sections cause some lights to go out or flicker.
Inspect the strip carefully for cuts, cracks, or burnt spots. Replace or repair the damaged section to restore full function. Avoid sharp bends during installation.
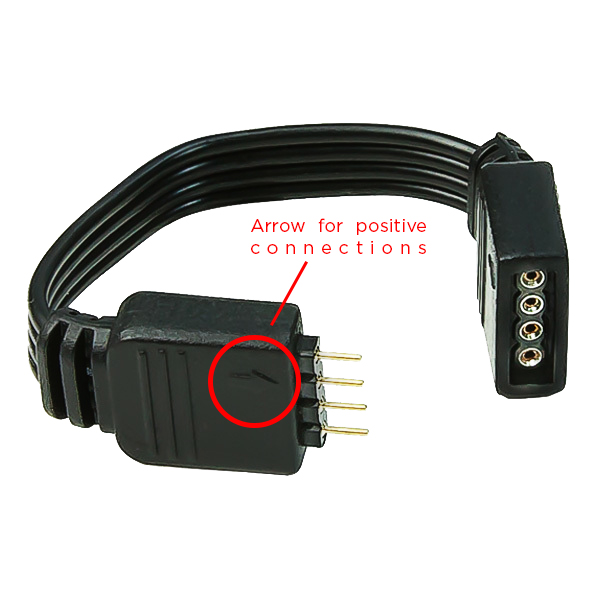
Connection Failures
Loose or poor connections between the strip and power supply often cause problems. Connectors may become loose, dirty, or corroded over time.
Ensure all connectors are secure and clean. Re-seat connectors or replace damaged cables. Good connections keep the current flowing smoothly.
Flickering Lights
Flickering usually means unstable power or a bad connection. It can also indicate a defective LED or controller.
Test the power supply and connectors first. If flickering continues, check the controller or replace the strip. Consistent power is key to steady lighting.
Credit: help.feit.com
Basic Troubleshooting Steps
Troubleshooting LED strip lights starts with simple checks. Basic steps help find common issues fast. These steps do not need special tools or skills. Follow these clear actions to spot and fix problems quickly.
Check Power And Voltage
First, ensure your LED strip light is connected to a working power source. Verify the power adapter plugs firmly into the outlet and the strip. Use a power supply that matches the LED strip’s voltage needs. Too low or high voltage can stop lights from working or cause damage.
Inspect Connections
Look closely at all wire connections and joints. Loose or damaged wires often cause lights to flicker or turn off. Make sure connectors snap into place securely. Check for any signs of wear, corrosion, or broken solder points along the strip.
Test With Multimeter
A multimeter helps check electrical flow in the strip. Set it to measure voltage or continuity. Test the power output from the adapter and along the strip. This shows if electricity reaches every section. No reading means a break or fault in wiring.
Replace Faulty Components
Identify any broken parts like damaged LEDs, connectors, or power adapters. Replace these faulty pieces with compatible parts. New components restore proper function. Take care to match voltage and size to avoid new problems.
Fixing Broken Led Strips
Fixing broken LED strips is possible with some basic steps. Many LED strip issues come from damaged LEDs or poor connections. Repairing these can save money and extend the strip’s life.
Knowing how to find the problem and fix it helps keep your lights working bright. This section guides you through identifying damaged LEDs, soldering repairs, and using replacement modules.
Identify Damaged Leds
Look closely at the LED strip for dark or burnt spots. These spots often show where LEDs are broken. Another sign is LEDs that do not light up when powered on.
Use a multimeter to check the voltage across each LED. If an LED shows no voltage or zero resistance, it may be faulty. Mark the damaged LEDs for repair or replacement.
Soldering And Repair
To fix broken LEDs, you can solder new connections on the strip. Cut out the damaged section carefully with scissors. Strip the copper pads to expose the wiring.
Use a soldering iron to attach jumper wires or new LED sections. Keep the connections clean and secure. Test the strip by powering it on after soldering.
Using Replacement Modules
Some LED strips come with replaceable modules. These modules can be removed and swapped easily. Match the replacement module type to your strip for compatibility.
Remove the broken module by cutting at the marked lines. Insert the new module and connect it using the solder pads or clips. This method saves time and keeps your strip intact.
Credit: blog.1000bulbs.com
Resetting Led Strip Lights
Resetting LED strip lights can fix many common problems like unresponsive colors or dim lighting. A reset restores the lights to their original settings. It often solves glitches caused by power surges or incorrect commands. This process is simple and does not require special tools.
Several methods exist for resetting LED strip lights. Choose the one that suits your setup best. Some resets involve unplugging the power, while others use buttons on the controller or remote. Certain brands have unique steps to follow.
Power Cycle Method
Unplug the LED strip lights from the power source. Wait about 10 seconds before plugging them back in. This brief pause allows the lights to clear temporary issues. After reconnecting, check if the lights respond correctly. Repeat the process once or twice if needed.
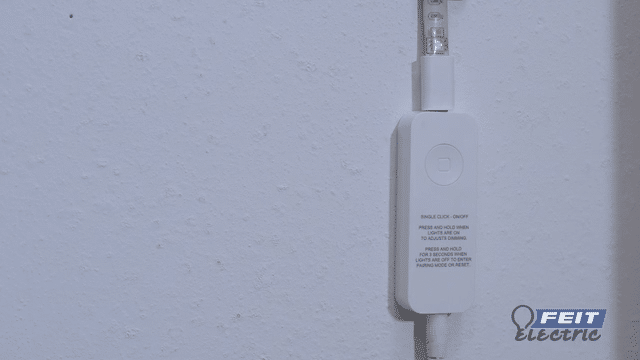
Controller Button Reset
Locate the physical button on the LED strip’s controller box. Press and hold this button for around 5 to 10 seconds. Watch for flashing lights, often blue, green, or red. These flashes mean the reset was successful. Release the button and test the strip’s functions.
Remote Control Reset
Some LED strips reset using the remote control. Hold down a specific color or function button, like “Smooth” or a corner button. While holding, turn the lights off and on again. You may need to press the ‘On’ button on both the remote and strip at the same time. This step pairs the remote and strip, fixing color errors.
Brand-specific Procedures
Different LED brands may require unique reset steps. Popular brands like GE Cync, Philips Hue, SwitchBot, and Magic Home have their own methods. Check the user manual or brand support website. Follow their instructions if general resets do not work. This ensures proper resetting without damaging the lights.
Dealing With Partial Lighting
Partial lighting on LED strip lights can be frustrating. Some sections glow while others stay dark. This problem often points to electrical or connection issues along the strip. Identifying the cause helps fix the dark areas quickly. Follow these steps to troubleshoot and restore full lighting.
Locate Dark Sections
Carefully inspect the LED strip to find where lights do not turn on. Dark sections may be isolated or connected to other lit parts. Mark these areas to focus your repair efforts. Look for damage like cuts or bends that could break the circuit.
Check For Open Circuits
Open circuits stop electricity from reaching certain LEDs. Use a multimeter to test continuity along the strip. Test points before and after the dark sections. If the circuit is broken, the meter will show no connection. Repair breaks by soldering wires or replacing damaged segments.
Secure Loose Wires
Loose wires cause intermittent or partial lighting. Check all connections at the power supply, controller, and strip ends. Press connectors firmly or re-solder loose joints. Ensure wires are not frayed or broken. Tight, secure wiring restores steady power flow.
Preventing Future Issues
Preventing future problems with LED strip lights saves time and money. Taking simple steps helps keep lights working longer. Focus on careful setup, correct power use, and regular checks.
Proper Installation Tips
Start by cleaning the surface before sticking the LED strip. Use the right adhesive to avoid peeling. Cut the strip only at marked points to prevent damage. Connect wires firmly to ensure stable power flow. Avoid bending strips sharply; gentle curves work best.
Avoid Overloading Power Supplies
Check the power supply matches the strip’s voltage and current needs. Never connect more strips than the power supply can handle. Use multiple power supplies if necessary for longer runs. Overloading causes flickering and short circuits. Keep power sources cool and well-ventilated to prevent overheating.
Regular Maintenance
Inspect LED strips monthly for loose connections or dirt buildup. Clean strips gently with a soft cloth to remove dust. Replace any damaged sections promptly to avoid further issues. Test the lights regularly to catch problems early. Proper care extends the life of your LED strips.
When To Seek Professional Help
Knowing when to seek professional help with LED strip lights saves time and prevents damage. Some issues require expert skills beyond basic troubleshooting. Ignoring complex problems can risk safety and worsen faults.
Professional electricians have the right tools and knowledge. They ensure repairs meet electrical codes and standards. Calling a pro also protects your warranty and investment.
Complex Electrical Faults
Complex electrical faults may involve wiring or power supply issues. Problems like flickering, burning smells, or sparks need immediate expert attention. Incorrect handling can cause electric shocks or fires. Professionals can diagnose hidden faults fast and safely. They use specialized equipment to test circuits and connections. Attempting fixes without experience can void warranties and cause further damage. Leave complicated electrical repairs to licensed electricians.
Warranty And Support Options
Check your LED strip lights’ warranty before attempting repairs. Many brands offer free repairs or replacements under warranty. Professional service often keeps warranties valid. Manufacturers may refuse support if you try unauthorized fixes. Contact the seller or manufacturer support for guidance. Some repairs require certified technicians to maintain warranty coverage. Using authorized professionals ensures quality service and genuine parts. Always keep purchase receipts and warranty details ready for support claims.
Frequently Asked Questions
Why Are My Led Strip Lights Not Lighting Up?
Check the power supply for damage and correct voltage. Inspect connections for loose wires. Replace a faulty LED driver if needed.
How To Reset Led Light Strip?
To reset an LED light strip, unplug it, then press and hold the controller button until lights flash. Plug back in and test.
Why Is Only Half Of My Led Strip Lights Working?
Half of your LED strip may not work due to a damaged section, loose connection, or broken wire causing power disruption. Check and secure all connections, inspect for visible damage, and ensure the power supply delivers correct voltage to restore full lighting.
How To Check If A Led Strip Is Bad?
Check the LED strip by inspecting for dark sections, loose connections, or damaged wires. Test the power supply voltage. Replace the LED driver if lights don’t turn on. Use a multimeter to check continuity across the strip. Faulty segments or no light indicate a bad LED strip.
Why Are My Led Strip Lights Not Turning On?
Check if the power supply is connected and working properly. A faulty driver or loose connection often causes this issue.
Conclusion
Troubleshooting LED strip lights is simple with basic checks. Start by confirming power connections and voltage. Inspect the strip for damage or loose parts. Reset the controller or remote to fix color issues. Follow brand-specific steps if standard fixes do not work.
Regular maintenance helps keep your lights bright and functional. With patience, most problems can be solved quickly. Bright, colorful lighting is worth the effort. Keep these tips handy for easy LED strip repairs.
")


