Is your LiftMaster garage door opener acting up, and you’re not sure where to start? Don’t worry—you’re not alone.
When your garage door stops working as it should, it’s frustrating, inconvenient, and can even throw off your entire day. That’s where the LiftMaster 41D7675 manual PDF comes in. This guide is packed with troubleshooting tips that can help you identify and fix common issues quickly and easily.
But here’s the problem: finding the right information and making sense of it can feel overwhelming. That’s why we’ve broken it all down for you in this blog post. Whether your garage door won’t close, the remote isn’t working, or the motor is making strange noises, we’ll walk you through the solutions step by step. Keep reading—you’re just a few minutes away from getting your garage door back on track!

Credit: manuals.plus
Common Issues With Liftmaster 41d7675
The Liftmaster 41D7675 garage door opener is a reliable tool, but like any device, it can occasionally run into problems. Many of these issues are minor and can be resolved with quick troubleshooting. If you’re facing challenges with your Liftmaster, understanding common problems is the first step to fixing them.
Door Not Opening Or Closing
One of the most frustrating issues is when the door refuses to budge. This can happen if the opener’s power source is disrupted or the motor has overheated. Check if the unit is plugged in securely and ensure there’s no tripped circuit breaker.
If the motor seems fine but the door still won’t move, inspect the trolley mechanism. It might have become disengaged from the opener. Reconnecting it is often as simple as pulling the red release cord and resetting the system.
Remote Control Malfunctions
Is your remote control failing to open or close the door? Start by replacing the batteries. It sounds basic, but weak batteries are a common culprit.
If fresh batteries don’t help, verify that the remote is programmed correctly. You might need to reprogram it by pressing the “Learn” button on your opener and syncing the remote again. Also, ensure you’re within the operational range—sometimes we forget the remote has limits.
Unusual Noises During Operation
Hearing grinding, rattling, or squeaking noises? This often points to a mechanical issue. Worn-out parts like the rollers or chain can cause these sounds.
Lubricate the moving parts with garage door lubricant to reduce friction. If the noise persists, examine the chain or belt for any visible damage. Tightening or replacing it could restore smooth operation.
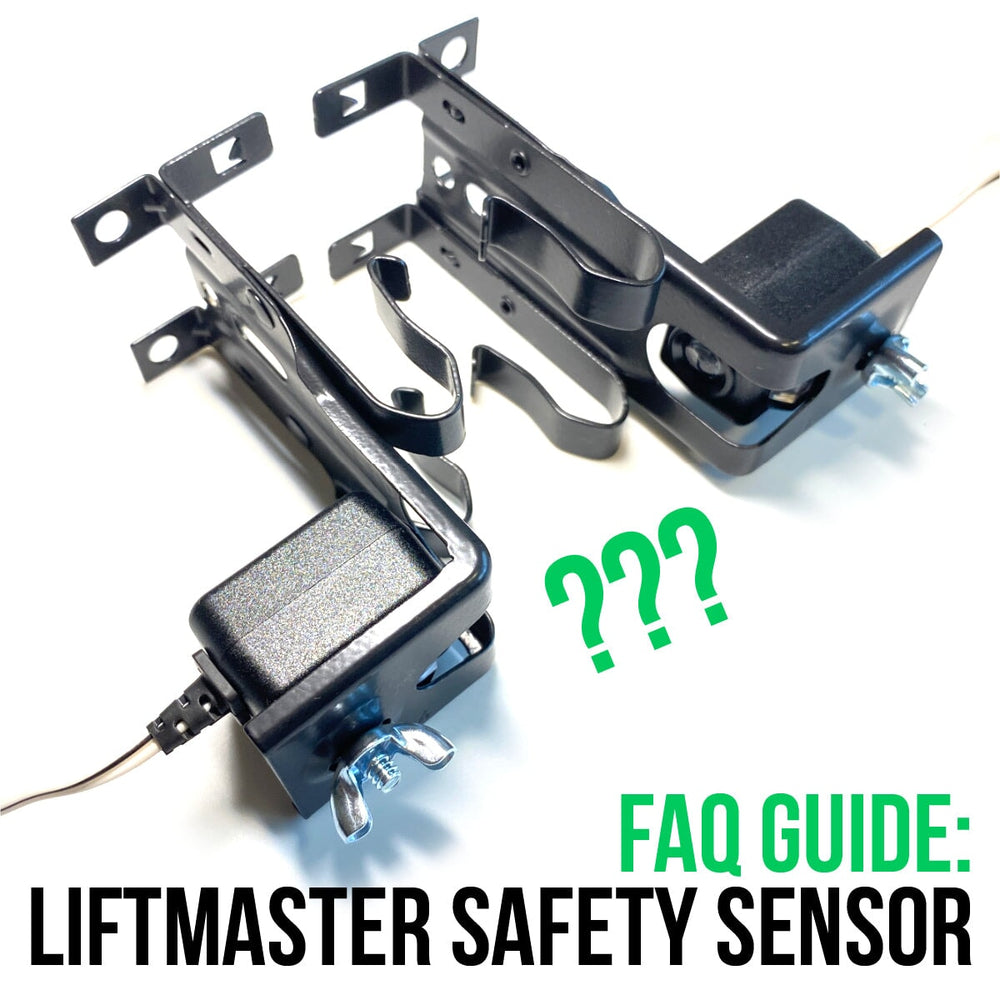
Sensor Alignment Problems
Misaligned sensors can prevent your door from closing properly. If you notice the door reversing after touching the ground, the sensors might not be aligned.
Look at the sensors on both sides of the garage door frame. Are the indicator lights steady? If not, gently adjust the sensors until the lights remain solid. A quick cleaning of the sensor lenses can also help if dirt or cobwebs are obstructing them.
These common issues might seem overwhelming at first, but they’re often simple to resolve. What steps will you take to fix your Liftmaster today?
Tools Needed For Troubleshooting
Proper troubleshooting of the Liftmaster 41D7675 garage door opener requires specific tools. Using the right tools ensures a safe and effective repair process. This section focuses on essential tools to keep handy for diagnosing and fixing issues.
Basic Hand Tools
Basic hand tools are essential for troubleshooting your Liftmaster opener. Screwdrivers help remove and secure screws during the repair process. A wrench or socket set is useful for tightening or loosening nuts and bolts. Needle-nose pliers are helpful for gripping wires and small components. Keep a flashlight to inspect internal parts in dim areas.
Digital Multimeter
A digital multimeter checks electrical connections and ensures proper voltage levels. Use it to test the circuit board and wiring for continuity. It also helps identify faulty components like sensors or switches. Choose a simple multimeter with clear readings for easy use.
Replacement Parts
Replacement parts may be needed for a successful repair. Common items include remote controls, sensors, or circuit boards. Check the Liftmaster 41D7675 manual to confirm compatible parts. Having these on hand saves time and avoids delays during troubleshooting.
Checking Power Supply And Connections
If your LiftMaster garage door opener is acting up, the first step in troubleshooting is checking its power supply and connections. A disruption in power or loose wiring might be the culprit behind its malfunction. Let’s dive into three essential checks you can do yourself to get things back on track.
Inspecting Power Outlets
Start by checking the power outlet your garage door opener is plugged into. Is it working? Plug in another device, like a lamp or phone charger, to confirm. If there’s no power, the issue might be with your outlet, not the opener.
Sometimes, a tripped circuit breaker could be at fault. Head to your electrical panel and see if any breakers have flipped. If one has, reset it and test the outlet again. Simple fixes like this can save you hours of unnecessary troubleshooting.
Verifying Wiring Integrity
Loose or damaged wires can cause intermittent issues with your garage door opener. Carefully inspect the power cord for visible wear or fraying. If you notice anything unusual, stop using the opener until it’s repaired.
Next, check the wiring connections inside the opener unit (refer to the LiftMaster 41D7675 Manual PDF for diagrams). Look for any loose or disconnected wires. Tighten them gently but firmly to ensure a solid connection. Why let a tiny loose wire create big headaches?
Resetting The Opener System
Sometimes, the solution is as simple as hitting the reset button. Locate the reset button on your LiftMaster opener. Press and hold it for about 10 seconds to reboot the system.
This action clears temporary glitches that may be causing the opener to malfunction. Once reset, test the door. Does it open and close smoothly now? If not, you may need to explore other troubleshooting steps in the manual.
When you’re facing garage door troubles, don’t overlook these simple checks. A few minutes spent investigating power supply and connections can save you time, money, and frustration. Which step solved your issue? Share your experience below!
Sensor Alignment And Testing
Proper sensor alignment is crucial for the smooth operation of your Liftmaster garage door opener. Misaligned sensors can cause the door to malfunction or not close properly. Troubleshooting sensor issues involves checking alignment, recalibrating, and testing the safety reversal mechanism. Follow these steps to resolve sensor-related problems effectively.
Identifying Misaligned Sensors
The sensors are located on either side of the garage door near the floor. Check if the LED lights on both sensors are glowing steadily. A flickering or unlit LED indicates misalignment. Inspect for dirt, debris, or any physical obstruction blocking the sensors. Clean the lenses gently to ensure proper functioning.
Verify that both sensors are mounted at the same height. Use a measuring tape to confirm alignment. Slightly adjust the brackets if needed to ensure they face each other directly.
Recalibrating The Sensors
Start by loosening the sensor mounting brackets. Adjust the sensors until the LED lights are steady on both sides. Tighten the brackets once alignment is achieved. Ensure the sensors are secure but not overly tight to avoid damage.
Reconnect the garage door opener to power and test the alignment. The LED lights should remain steady with no interruptions.
Testing Safety Reversal Mechanism
Place an object, like a wooden block, in the door’s path. Close the door using the remote control. The door should reverse upon contact with the object. If it does not, inspect the sensors again for proper alignment. Repeat the recalibration process if necessary.
Always ensure the safety reversal mechanism works correctly to prevent injuries or damage. Regular testing helps maintain the reliability of your Liftmaster garage door opener.
Remote Control Troubleshooting
The Liftmaster 41D7675 remote control is essential for convenient garage access. Troubleshooting remote issues can save you time and unnecessary frustration. Whether the problem involves batteries, programming, or interference, this guide will help you solve common remote control issues.
Replacing Remote Batteries
Dead batteries are a common reason remotes stop working. First, open the battery compartment located at the back of the remote. Use a small screwdriver if necessary. Check the battery type printed inside the compartment. Replace the old batteries with new ones of the same type. Ensure the positive and negative ends align correctly. Once replaced, test the remote to see if it works.
Reprogramming The Remote
Sometimes, the remote loses its programming due to power surges or resets. Locate the “Learn” button on your garage door opener. Press and hold this button until the indicator light turns on. Within 30 seconds, press the button on your remote control. The garage door opener light will blink, confirming the programming. Test the remote to ensure it operates as expected.
Addressing Signal Interference
Signal interference can prevent the remote from working properly. Check for nearby devices like wireless routers or cordless phones. These can disrupt the remote’s signal. Avoid using the remote near metal objects or thick walls. If interference persists, adjust the antenna on the garage door opener. Ensure it points downward for better signal reception.
Motor And Gear Maintenance
Proper motor and gear maintenance ensures a smooth and long-lasting LiftMaster garage door opener. Ignoring these components can lead to operational issues and expensive repairs. Regular checks and upkeep can save time and money in the long run. Follow these steps to keep the motor and gears in excellent condition.
Inspecting Motor Functionality
Start by disconnecting the opener from the power source. Check for unusual noises or vibrations while operating the motor manually. Look for any visible signs of wear, such as cracks or burn marks. Ensure the motor runs smoothly without overheating. If you notice any irregularities, consider professional assistance.
Lubricating Moving Parts
Lubrication reduces friction and extends the life of moving parts. Use a silicone-based or garage door-specific lubricant. Apply it to the chain, gears, and other moving mechanisms. Avoid over-lubricating as excess grease attracts dirt. Wipe off any residue to keep the system clean.
Replacing Worn-out Gears
Inspect the gears for signs of wear, such as chipped teeth or rough surfaces. Worn-out gears can cause jerky movements or complete failure. Replace damaged gears using the LiftMaster 41D7675 manual as a guide. Always use genuine replacement parts for compatibility and durability.
Resetting And Reprogramming Tips
Resetting and reprogramming your LiftMaster garage door opener can feel like a daunting task, but it doesn’t have to be. Whether your keypad codes aren’t working or your travel limits are off, a few simple steps can help you troubleshoot effectively. Let’s dive into some actionable tips to get your LiftMaster back on track, starting with clearing memory settings.
Clearing Memory Settings
Before reprogramming your LiftMaster, it’s essential to clear its memory. This step ensures old codes or settings won’t interfere with the new ones. To clear the memory:
- Press and hold the “Learn” button on the motor unit for about 6 seconds. The indicator light will turn off, confirming memory has been erased.
- If you’re resetting a remote, follow the same procedure for each remote.
Once the memory is cleared, test your garage door opener. Does it stop responding to old codes or remotes? If yes, you’re ready to reprogram. If no, try repeating the process, ensuring you hold the button long enough.
Reprogramming Keypad Codes
Setting up new keypad codes is straightforward but can feel tricky without guidance. Here’s how you can do it:
- Locate the “Learn” button on your LiftMaster opener—it’s typically near the antenna.
- Press and release the button. The indicator light will blink, signaling it’s ready for programming.
- Enter your desired 4-digit code on the keypad and press “Enter.” The light will blink again to confirm the code is saved.
Test your new code immediately. Does your garage door open smoothly? If not, double-check the steps and ensure you didn’t skip the blinking confirmation. Having a sticky note with your code near the keypad (but not in plain sight) can help you remember it.
Adjusting Travel Limits
If your garage door doesn’t fully open or close, the travel limits might be off. Adjusting them is a simple fix:
- Find the adjustment screws on the side of your motor unit, marked “Up” and “Down.”
- Turn the “Up” screw clockwise to increase the open height, or counterclockwise to decrease it.
- Do the same for the “Down” screw to control how far the door closes.
After adjusting, test the door’s movement. Does it stop where you want it to? If not, continue tweaking until the limits match your preferences. This step can save your door from unnecessary wear and tear.
Resetting and reprogramming your LiftMaster isn’t just about fixing issues—it’s about making the system work for you. Have you ever felt frustrated by a garage door that refuses to cooperate? These steps can turn that frustration into confidence. Give them a try today!
Credit: www.expressgaragedoors.com
When To Call A Professional
Sometimes, troubleshooting your Liftmaster 41D7675 garage door opener can feel like solving a puzzle with missing pieces. While the manual PDF provides valuable guidance, there are moments when calling a professional is the smartest move. Knowing when to step back and seek expert help can save you time, money, and headaches.
Identifying Complex Issues
Not all garage door problems are straightforward. If your opener isn’t responding at all or exhibits unusual behavior, like reversing unexpectedly, the issue may involve wiring or circuit board malfunctions. These problems often require specialized tools and expertise.
Ask yourself: do you have the skills and equipment to handle electrical repairs safely? If the answer is no, it’s time to call a professional. Tinkering with complex parts can lead to further complications.
Avoiding Further Damage
Attempting repairs without proper knowledge can make matters worse. For example, forcing a stuck garage door could damage its tracks or springs, leading to costly replacements.
It’s important to recognize when a DIY approach might cause more harm than good. A professional can diagnose the issue correctly and fix it without compromising other components.
Choosing A Trusted Repair Service
Finding the right expert is crucial. Look for repair services with positive reviews and certifications in Liftmaster products. A trusted technician will have hands-on experience and access to genuine replacement parts.
Ask for recommendations from friends or neighbors who have dealt with similar issues. You want someone reliable who values customer satisfaction over quick fixes.
Ultimately, knowing when to call a professional is about protecting your time, effort, and investment. Next time you’re stuck, remember: it’s okay to ask for help.

Credit: fccid.io
Conclusion
Resolving issues with your Liftmaster 41D7675 becomes easier with the manual. It guides you through common problems step by step. Regular maintenance can prevent many issues. Always follow safety guidelines when troubleshooting. Keep the manual handy for quick reference. If problems persist, contacting a professional may be the best option.
A well-maintained garage door opener ensures smooth operation. Don’t overlook small issues, as they may grow over time. Use the manual to address concerns early. Staying proactive can save time and stress.
")


