Struggling with your Liftmaster commercial garage door opener? You’re not alone.
When your garage door isn’t functioning properly, it can disrupt your day and even impact your business. The good news? Most issues are easier to fix than you might think. In this guide, we’ll walk you through simple troubleshooting steps to get your opener back on track.
Whether it’s a door that won’t budge, strange noises, or unresponsive controls, we’ve got you covered. Stick around, and you’ll save time, money, and a lot of frustration. Let’s dive in and solve your garage door troubles together!
Common Issues With Liftmaster Openers
Liftmaster commercial garage door openers are known for their durability and efficiency. However, like any mechanical device, they can encounter problems over time. Understanding these common issues can save you time, money, and frustration.
Door Not Opening Or Closing
One of the most common problems is the door refusing to open or close. This can often be traced back to a blocked safety sensor or misaligned photo eyes. Check if there’s dirt, debris, or an object obstructing the sensors, and clean them if necessary.
If the sensors are clean but the door still won’t move, inspect the power supply. A loose connection or tripped circuit breaker could be the culprit. Always double-check if the opener is plugged in and receiving power.
Unresponsive Remote Control
A remote control that doesn’t work can be incredibly frustrating, especially when you’re in a hurry. Start by replacing the battery in your remote. A weak or dead battery is often the simplest fix.
If a new battery doesn’t solve the problem, try reprogramming the remote. Consult your Liftmaster manual for step-by-step instructions to sync your remote with the opener. Don’t forget to check for interference from nearby devices, which could disrupt the signal.
Noisy Operation
A noisy garage door opener can be a nuisance, especially in a workplace environment. Often, this is due to a lack of lubrication on the moving parts. Regularly apply a garage door lubricant to the chain, rollers, and hinges to keep them running smoothly.
Sometimes, the issue may stem from loose hardware. Tighten any bolts or screws that may have worked their way loose over time. If the noise persists, inspect the opener’s motor or chain for signs of wear and tear.
Intermittent Functionality
Does your garage door opener work sometimes but fail at other times? Intermittent issues can be tricky to diagnose. Begin by checking the wiring connections to ensure they are secure.
Another possible cause could be overheating. If the opener motor overheats, it may temporarily shut down. Let it cool before using it again and consider consulting a professional if overheating becomes frequent.
Have you encountered any of these issues with your Liftmaster opener? What quick fixes worked for you? Share your thoughts or questions in the comments below!

Credit: compaandoor.com
Checking Power And Connections
Liftmaster commercial garage door openers are built for reliability. Still, occasional issues can arise. The first step in troubleshooting is checking power and connections. These basic checks often resolve problems quickly and save time.
Inspecting Power Supply
Begin by checking the opener’s power source. Confirm the outlet is functional. Plug another device into the outlet to test it. Ensure the plug is firmly inserted and not loose.
If using a surge protector, verify it is working. Reset it if needed. Also, check for tripped circuit breakers in the electrical panel.
Testing Wall Control Panel
Look at the wall-mounted control panel. Ensure it is securely fixed. Check if the LED light on the panel is lit. If the light is off, the control panel may lack power.
Press the buttons to test the response. If nothing happens, the panel might need replacement. Dust or debris around buttons can also cause issues.
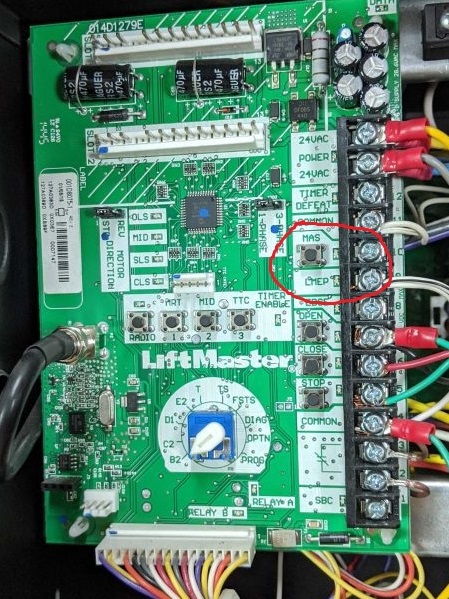
Verifying Wiring And Connections
Inspect the wiring between the opener and control panel. Look for damaged or loose wires. Tighten any loose connections carefully. Replace damaged wires if needed.
Ensure wires are properly connected to terminals. Misaligned or disconnected wires can disrupt functionality. Use a screwdriver to secure connections where necessary.
Also, check for corrosion or wear on connectors. Clean them gently to restore proper contact.
Sensor Alignment Problems
Sensor alignment problems are common with Liftmaster commercial garage door openers. Misaligned sensors can stop the door from closing properly. This issue often triggers the opener’s safety mechanism, leaving the door stuck. Fixing sensor alignment is simple and requires some basic troubleshooting. Follow the steps below to ensure your sensors are working as they should.
Identifying Misaligned Sensors
Check the sensors on both sides of the garage door. Look for blinking lights, as this may indicate misalignment. Sensors should face each other directly with no obstacles in between. If one or both sensors are tilted or not pointing straight, they are likely misaligned.
Inspect the sensor brackets to ensure they are firmly attached. Loose brackets can cause sensors to shift out of position. Use your hand to gently test the stability of each sensor.
Cleaning Sensor Lenses
Dust and dirt can collect on the sensor lenses over time. This buildup can interfere with the infrared beam and mimic alignment issues. Use a soft, dry cloth to gently wipe the sensor lenses. For stubborn dirt, dampen the cloth slightly but avoid using harsh chemicals.
Check the lenses regularly to keep them clean. Dirty lenses can create false alarms, even if the sensors are aligned correctly.
Adjusting Sensor Angles
Align the sensors so they face each other directly. Use a level to ensure both sensors are at the same height. Adjust the angle carefully to avoid over-tightening the brackets. Slight movements can make a big difference in alignment.
Once aligned, check the indicator lights on the sensors. A solid light on both sensors means they are properly aligned. Test the garage door opener to confirm the issue is resolved.
Remote And Keypad Issues
Having trouble with your Liftmaster commercial garage door opener remote or keypad? You’re not alone. These issues are common, but the good news is that they’re often simple to resolve. Whether it’s a dead battery, a forgotten code, or a remote that just won’t sync, you can tackle these problems without calling a professional. Let’s walk through some practical solutions step by step.
Replacing Remote Batteries
A remote that suddenly stops working might just need a fresh battery. Before you panic, flip the remote over and look for a small compartment or screw. Open it carefully—it’s usually where the battery lives.
Most Liftmaster remotes use coin-style batteries like CR2032 or CR2025. Check the old battery for its model number so you can get the right replacement. Swap the old battery out, making sure the new one is inserted with the correct polarity (positive side up).
Once the new battery is in, test the remote. Does it work now? If not, don’t worry—there’s another step to try.
Reprogramming The Remote
If the remote still isn’t working after a battery replacement, it might need reprogramming. Start by locating the “Learn” button on your garage door opener. You’ll usually find it on the back or side of the motor unit, near the antenna wire.
Press and release the “Learn” button. A light will come on or blink, indicating it’s ready to pair. Within 30 seconds, press the main button on your remote until the opener’s light blinks or you hear a click.
Test the remote again. This simple reprogramming step often restores functionality. Still no luck? Let’s move to the keypad.
Resetting Keypad Codes
If your keypad isn’t working, it might need a code reset. Start by pressing and holding the “Learn” button on the opener until the indicator light turns off. This clears the memory of any old codes.
Next, enter your desired 4-digit code on the keypad. Press and hold the “Enter” button until the opener’s light blinks. This confirms the new code is set.
Test the keypad by entering your new code and pressing “Enter.” Does the door respond now? If so, you’re good to go. If not, double-check your steps or consult the user manual for your model.
Troubleshooting remote and keypad issues doesn’t have to feel overwhelming. Small steps, like replacing batteries or resetting codes, can make a big difference. What’s your biggest frustration with your garage door opener? Share your thoughts—we’d love to hear your story!
Troubleshooting Motor Problems
Liftmaster commercial garage door openers are reliable and durable. But motor issues can interrupt smooth operation. Identifying and fixing motor problems ensures your garage door opener works efficiently. This guide covers key steps to troubleshoot motor problems.
Listening For Motor Sounds
Start by observing the motor’s sound. A working motor typically hums during operation. No sound could indicate electrical issues or a disconnected power source. Unusual noises like grinding or clicking may signal internal damage. Listen carefully to pinpoint potential issues.
Checking For Overheating
Overheating can cause the motor to malfunction or shut down. Feel the motor casing after use. If it’s excessively hot, the motor might be overworked. Overheating can result from continuous operation or blocked airflow around the opener. Ensure proper ventilation for the motor unit.
Inspecting Gear Assembly
Gear assembly problems can affect the motor’s performance. Open the motor housing and inspect the gears. Worn or broken gears can prevent the motor from functioning. Look for signs of wear, cracks, or misalignment. Replacing faulty gears can restore normal operation.

Credit: www.youtube.com
Addressing Limit Switch Settings
Adjusting the limit switch settings is essential for proper garage door operation. The limit switches control how far the door opens and closes. Incorrect settings can cause the door to stop early or overextend. By fine-tuning these settings, you ensure smooth movement and prevent mechanical strain.
Adjusting Up And Down Travel Limits
Locate the limit adjustment screws on the garage door opener. These screws are usually labeled “Up” and “Down.” Use a flathead screwdriver to make small adjustments. Turn the “Up” screw clockwise to reduce the door’s opening distance. Turn it counterclockwise to increase the travel distance. Adjust the “Down” screw similarly to control how far the door closes. Make gradual changes and test after each adjustment.
Testing Door Movement
After adjusting the limit screws, test the door’s movement. Activate the opener and observe the door as it moves. Ensure it stops where it should, both at the top and bottom. Watch for any jerky movements or unusual sounds. If the door doesn’t stop correctly, make further adjustments to the limit screws.
Fine-tuning For Smooth Operation
Once the door stops at the right points, focus on smooth operation. Observe the door’s speed and alignment during movement. If it seems off, adjust the limits slightly for better accuracy. Repeat the testing process until the movement feels seamless. Proper fine-tuning reduces wear and tear on the system.
Dealing With Obstruction Detection
LiftMaster commercial garage door openers are designed with obstruction detection features to ensure safety and prevent damage. But what happens when this system starts acting up? Maybe your door stops halfway or reverses unexpectedly. Let’s get hands-on with troubleshooting and restoring smooth operation.
Removing Physical Blockages
Start simple—inspect the area around your garage door. Is there debris, a misplaced object, or any dirt near the sensors? Even small things like leaves or dust can trigger the obstruction detection system.
Give the sensors a quick clean with a soft cloth. Check for misalignment; the sensors should face each other directly. If they’re off even slightly, your door might refuse to budge.
Have you ever noticed how easily wires can get tangled or disconnected? Examine the sensor wiring to ensure everything is plugged in securely. If you spot frayed wires, they’ll need replacing.
Testing Safety Reversal Mechanism
Safety reversal is a critical feature. To test it, place a solid object like a wooden block on the floor under the garage door. Close the door using the opener.
The door should reverse immediately upon contact with the block. If it doesn’t, you might have a problem with the system’s sensitivity or calibration.
This test also highlights whether your sensors are functioning properly. No reversal? Double-check the sensors and their alignment before diving deeper.
Calibrating Force Settings
Force settings control how much power the opener uses to lift or lower the door. Too much force can override the obstruction detection, while too little can cause the door to stall.
Check your LiftMaster manual to locate the force adjustment knobs or dials. Start with small tweaks—turn the dial slightly and test the door operation.
If you’re not sure which direction to turn, think logically. Increase the force if the door struggles to move. Decrease it if the door powers through obstacles without reversing.
Troubleshooting obstruction detection isn’t always a one-step fix. What’s the most unexpected item you’ve ever found blocking your garage sensors? Share your story—it might help someone else solve their mystery.
Credit: ddmgaragedoors.com
When To Seek Professional Help
Liftmaster commercial garage door openers are designed for durability and reliability. But even the best systems can experience issues over time. While some problems are simple to fix, others may require expert assistance. Knowing when to call a professional can save time, money, and prevent further damage.
Recognizing Complex Issues
Not all garage door opener problems are simple. If your opener stops responding entirely, it might indicate deeper electrical issues. Unusual noises like grinding or screeching could mean internal parts are worn out. Doors that won’t open or close evenly might point to alignment or motor problems. These situations often need specialized tools and knowledge.
Finding Certified Technicians
Certified technicians are trained to handle Liftmaster systems. They understand the specific mechanics and software your opener uses. Always check for proper certification before hiring someone. Certified professionals are more likely to diagnose and fix issues correctly. They can also recommend solutions tailored to your system’s model and age.
Weighing Repair Vs. Replacement
Repairing your garage door opener can be cost-effective for minor issues. But extensive damage or outdated systems may call for a replacement. Repairs may only temporarily fix recurring problems. If repair costs are high, investing in a new opener might be smarter. Professionals can guide you based on the condition of your existing unit.
Conclusion
Troubleshooting a Liftmaster commercial garage door opener doesn’t have to be hard. Start by identifying the issue and checking common problem areas. Regular maintenance can prevent many issues before they start. Always prioritize safety when working with garage door systems.
If the problem persists, professional help may be needed. A reliable opener ensures smooth daily operations for your business. By following these steps, you can save time and avoid frustration. Keep your garage door opener in good condition for long-term efficiency.
With proper care, it will serve you well for years to come.
")


