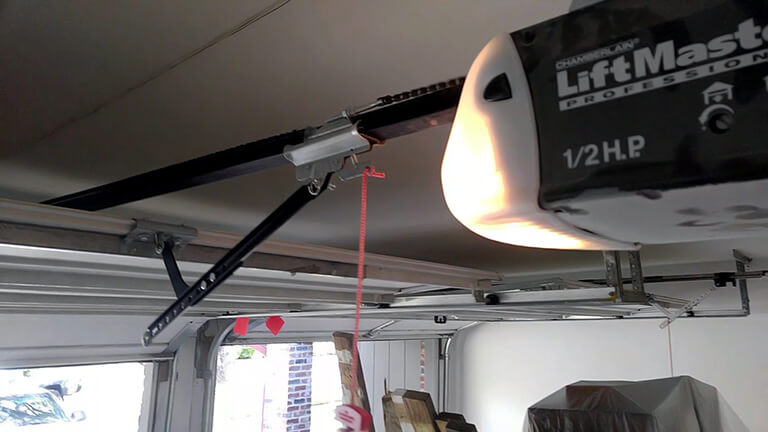
To troubleshoot Liftmaster garage door opener issues in Austin, Texas, start by checking safety sensors and sensor alignment. Then, inspect for any obstructions blocking the sensors or the door’s path.
Additionally, test the safety reversal system and adjust the force control settings if needed. If the door still doesn’t function properly, further diagnose power supply, remote control, and keypad functionality. Be sure to address common problems like sensor misalignment, remote programming, and motor noises.
Regular maintenance and proper adjustments can help ensure your Liftmaster garage door opener operates smoothly and efficiently.
Initial Troubleshooting Steps
To troubleshoot a Liftmaster garage door opener, start by checking the power source and ensuring the remote works correctly. Verify sensor alignment and inspect for any obstructions causing the door to stop. Realign the safety reversal system if needed and program the remote for smooth operation.
If you are experiencing issues with your Liftmaster garage door opener, there are a few initial troubleshooting steps you can take to identify and potentially solve the problem. Before calling a professional, try these steps to save time and money.
Power Supply Check
The first step is to check the power supply. Make sure the opener is properly plugged in and that the outlet is functioning. If the outlet is not working, try unplugging the opener and plugging it into a different outlet. If the opener still does not turn on, it may be a problem with the circuit board or wiring and you may need to call a professional for repair.
Remote Control Battery Replacement
If the opener is functioning but the remote control is not working, try replacing the batteries. Make sure to use fresh batteries and ensure they are properly inserted. If the remote control still does not work, it may be a problem with the remote control itself and you may need to replace it.
Other potential issues with a Liftmaster garage door opener include problems with the safety sensor, keyless entry, and error codes. If these initial troubleshooting steps do not solve the problem, it is recommended to contact a professional for further assistance.
By following these initial troubleshooting steps, you may be able to identify and solve the problem with your Liftmaster garage door opener without having to call a professional. However, if the problem persists, it is always best to seek expert assistance to ensure the safety and functionality of your garage door opener.
Understanding Error Codes
Troubleshoot Liftmaster garage door opener error codes for effective problem-solving. Identify issues with safety sensors, remote control, or keypad functionalities to ensure smooth operation. Addressing error codes promptly can help maintain the optimal performance of your garage door opener.
Decoding The Blink Patterns
Understanding the error codes of your Liftmaster garage door opener can help you troubleshoot issues effectively. One key aspect is decoding the blink patterns of the indicator lights on the opener.
Common Error Code Solutions
When faced with error codes, common solutions include checking for any obstructions in the door’s path, ensuring the safety sensors are properly aligned, and inspecting the remote control batteries.
By understanding the error codes and their solutions, you can quickly address issues with your Liftmaster garage door opener.
Keypad Issues And Fixes
When it comes to troubleshooting your Liftmaster garage door opener keypad, there are a few common issues that can arise. Fortunately, most of these problems have simple fixes that you can do yourself without needing to call a professional. Let’s take a look at some of the most common keypad issues and the steps you can take to resolve them.
Reprogramming The Keypad
If you’re experiencing issues with your Liftmaster garage door opener keypad, reprogramming it may help resolve the problem. Follow these steps to reprogram your keypad:
- Locate the “Learn” button on your garage door opener motor unit.
- Press and release the “Learn” button.
- Within 30 seconds, enter a new four-digit code on the keypad and press the “Enter” button.
- If the reprogramming is successful, the garage door opener lights will flash, confirming that the new code has been accepted.
Replacing The Keypad Battery
If your Liftmaster garage door opener keypad is not responding, a simple fix may be to replace the battery. Follow these steps to replace the keypad battery:
- Locate the battery cover on the keypad and remove it.
- Take out the old battery and replace it with a new one, ensuring it is inserted correctly.
- Close the battery cover securely.
- Test the keypad to see if it is now functioning properly.
Safety Sensor Alignment
Ensure proper safety sensor alignment for your Liftmaster garage door opener troubleshooting. Misaligned sensors can prevent the door from closing correctly. Regularly check and adjust sensor alignment for smooth operation.
Identifying Sensor Misalignment
If your Liftmaster garage door opener is experiencing issues with the safety sensors, it’s crucial to identify whether there’s a misalignment. One common symptom of sensor misalignment is the garage door not closing properly or reversing immediately after touching the floor. Additionally, the opener’s lights might flash as a warning sign of sensor misalignment.
Correcting Sensor Alignment
To correct sensor alignment issues with your Liftmaster garage door opener, start by visually inspecting the sensors. Ensure that the sensors are facing each other and that there are no obstructions blocking the sensor beams. If the sensors are misaligned, adjust them carefully to ensure they are perfectly aligned. Once aligned, test the garage door opener to see if the issue has been resolved.
Door Movement Problems
When it comes to Liftmaster garage door opener troubleshooting, one of the common issues that homeowners encounter is door movement problems. These problems can range from the door not closing or opening properly to getting stuck midway. In this guide, we will delve into the troubleshooting steps for addressing door movement problems with your Liftmaster garage door opener.
Adjusting The Force And Limit Settings
If your Liftmaster garage door opener is experiencing door movement problems, adjusting the force and limit settings can often resolve the issue. Start by locating the adjustment screws on the opener unit. Use a flathead screwdriver to make the necessary adjustments to the force and limit settings. Be sure to refer to the user manual for specific instructions related to your model.
Diagnosing And Resolving Stuck Doors
Stuck doors can be frustrating, but with the right troubleshooting steps, you can often resolve this issue with your Liftmaster garage door opener. Begin by inspecting the tracks for any obstructions or debris that may be causing the door to get stuck. Additionally, check the rollers and hinges for any signs of wear or damage that may be impeding the door’s movement. Lubricating the tracks and hinges can also help to alleviate the problem.
Remote Control Troubleshooting
When experiencing issues with your Liftmaster garage door opener remote, it’s essential to troubleshoot effectively to ensure smooth operation.
Reprogramming The Remote
To reprogram your remote, follow these steps:
- Locate the “Learn” button on the opener motor
- Press and release the “Learn” button
- Press the button on the remote you want to program
- Wait for the opener light to blink, indicating successful programming
Solving Intermittent Remote Issues
If your remote works sporadically, try the following solutions:
- Replace remote batteries
- Check for interference from other devices
- Ensure the remote is within range of the opener
Mechanical Issues
When troubleshooting a Liftmaster garage door opener, it’s essential to address mechanical issues that may be affecting its performance. Mechanical problems can lead to various issues such as excessive noise, erratic movements, or even complete failure of the opener. By focusing on specific mechanical aspects, you can effectively diagnose and resolve common problems, ensuring that your garage door operates smoothly and safely.
Chain Tension Adjustments
One of the critical mechanical aspects to consider is the tension of the garage door opener’s chain. Proper chain tension is vital for the smooth operation of the door. If the chain is too loose or too tight, it can lead to issues such as jerky movements, excessive noise, or even damage to the opener mechanism. To address this, you can refer to the manufacturer’s guidelines for adjusting the chain tension. By maintaining optimal chain tension, you can ensure that the garage door opener operates quietly and efficiently.
Lubrication Of Moving Parts
Another crucial aspect of garage door opener maintenance is the lubrication of moving parts. Over time, the various moving components of the opener can become dry or worn, leading to increased friction and potential damage. By regularly lubricating the moving parts such as the chain, rollers, and hinges, you can minimize friction and wear, ensuring that the opener operates smoothly and quietly. Additionally, proper lubrication can extend the lifespan of the opener components, reducing the need for frequent repairs.
Advanced Diagnostics
For advanced diagnostics on Liftmaster garage door opener troubleshooting, rely on expert techniques to resolve keypad, circuit board, and safety sensor issues efficiently. Ensure smooth functioning with professional guidance on error codes, remote control programming, and keyless entry solutions.
Circuit Board Inspection
One of the main components of the Liftmaster garage door opener is the circuit board. It is responsible for the proper functioning of the opener. In case of any issues, it is recommended to inspect the circuit board thoroughly. Look for any visible signs of damage like burnt components, loose connections, or corroded areas. Use a multi-meter to check for continuity and resistance of the electrical components. If you find any faults, replace the faulty components with new ones.
Testing The Safety Reversal System
The safety reversal system is a crucial component of the Liftmaster garage door opener that prevents the door from closing on any obstruction. If the safety reversal system is not working properly, it can cause damage to your car or harm to people. To test the safety reversal system, place an object like a block of wood or cardboard under the garage door. Try to close the door using the opener. The door should reverse back immediately when it senses the obstruction. If it does not, you need to adjust the safety reversal system or replace it if necessary.
Other Troubleshooting Tips
Apart from the circuit board and the safety reversal system, there could be several other issues that can cause problems with the Liftmaster garage door opener. Some of the common issues include error codes, faulty safety sensors, malfunctioning remote control, or keyless entry. To troubleshoot these issues, refer to the Liftmaster garage door opener manual or seek professional help.
In conclusion, advanced diagnostics can help identify and fix issues with the Liftmaster garage door opener. If you are not comfortable performing the troubleshooting yourself, it is always better to seek professional help. Regular maintenance and inspection can prevent major issues and extend the lifespan of the garage door opener.
Reset And Memory Clearing
When troubleshooting issues with your Liftmaster garage door opener, performing a system reset or clearing the opener’s memory can often resolve common problems. Below, we’ll guide you through the process of performing a system reset and erasing the opener’s memory.
Performing A System Reset
If your Liftmaster garage door opener is experiencing malfunctions, a system reset may help resolve the issue. Follow these steps to perform a system reset:
- Locate the “Learn” button on the opener. It is typically found on the back or side of the motor unit.
- Press and hold the “Learn” button for about 6 seconds until the indicator light next to the button goes out.
- Release the button, and the opener’s system should now be reset.
Erasing The Opener’s Memory
If you need to erase the memory of your Liftmaster garage door opener, follow these steps:
- Locate the “Learn” button on the opener.
- Press and hold the “Learn” button for about 10 seconds until the indicator light next to the button turns off.
- Release the button, and the memory of the opener should now be cleared.
Frequently Asked Questions
Is There A Reset Button On A Liftmaster Garage Door Opener?
Yes, there is a reset button on a Liftmaster garage door opener. It is usually located on the back panel of the opener.
What Causes A Liftmaster Garage Door Opener Not To Work?
A Liftmaster garage door opener may not work due to various reasons. Some common causes include malfunctioning keypads or remotes, faulty circuit boards, safety sensor issues, and blocked or misaligned sensors. Force control adjustment and limit adjustment may also be needed.
It is recommended to troubleshoot the problem or seek professional help for repair.
Why Is My Liftmaster Garage Door Blinking And Not Closing?
If your LiftMaster garage door blinks and won’t close, check for sensor blockage or misalignment. Test safety reversal system.
How To Reset Liftmaster Garage Door Sensors?
To reset LiftMaster garage door sensors, first, ensure they’re aligned and free from obstructions. Then, press and hold the “Learn” button until the LED light blinks. Release the button, then press it again. The LED will remain lit, indicating a successful reset.
Conclusion
Troubleshooting your Liftmaster garage door opener can be manageable with the right guidance. Remember to check sensors, remotes, and power sources for common issues. Proper maintenance and periodic inspections can prevent future problems. Keep your garage door functioning smoothly with these tips.
")


