Is your LiftMaster Professional 1/2 HP garage door opener giving you trouble? Don’t worry—you’re not alone, and you’ve come to the right place.
A malfunctioning garage door can be frustrating, especially when it disrupts your routine or compromises your home’s security. But here’s the good news: most issues with the LiftMaster Professional 1/2 HP are easy to diagnose and fix, even without professional help.
In this guide, we’ll walk you through simple troubleshooting steps to get your garage door opener back in action. Whether it’s a door that won’t close, a motor that’s acting up, or strange noises that have you scratching your head, we’ve got solutions tailored just for you. Stick around—you’re just a few steps away from peace of mind and a smoothly working garage door.
Common Issues With Liftmaster 1/2 Hp
The Liftmaster Professional 1/2 HP garage door opener is a reliable and popular choice for many homeowners. However, like any mechanical device, it can encounter problems over time. Understanding common issues can save you time, money, and frustration.
1.Garage Door Won’t Open or CloseOne of the most common issues is a garage door that refuses to budge. This can happen due to a misaligned safety sensor, a blocked sensor path, or a disrupted power supply. Check if the safety sensors at the bottom of the door are clean and aligned—dust or cobwebs can often be the culprit.
Also, verify that the opener is plugged into a working power outlet. If the door still doesn’t move, manually check the door’s balance to ensure it’s not jammed or off-track.
2.Remote Control Not WorkingHave you ever repeatedly pressed the remote button only to feel like the opener is ignoring you? A non-responsive remote is often due to dead batteries. Replace the batteries and test again.
If that doesn’t work, reprogram the remote following your Liftmaster manual. Sometimes, interference from nearby electronics can also disrupt the signal, so try using the remote closer to the opener.
3.Strange Noises During OperationA noisy opener can be more than just annoying—it could be a sign of a bigger issue. Grinding or rattling sounds usually mean worn-out gears or a loose chain. Inspect the chain for slack and adjust it if necessary.
If the noise persists, check the motor’s internal components. Applying lubricant to moving parts can also reduce noise and improve the opener’s performance.
4.Garage Door Reverses Before ClosingIf your garage door starts closing but then reverses, it’s likely a safety sensor issue. The sensors might detect an obstruction, even if there isn’t one. Clean the sensor lenses with a soft cloth and ensure they’re aligned properly.
Another possibility is that the down-force setting on the opener is too low. Consult your manual to adjust it to the correct level.
5.Wall Button Not RespondingA non-functional wall button can halt your garage door operations. First, check if the button is securely connected to the opener. Loose or damaged wires could be the issue.
If the wiring looks fine, the button itself might be faulty. Replacing the wall button is typically a quick and affordable fix.
Addressing these common issues doesn’t require you to be an expert. With a bit of patience and some basic troubleshooting, you can often get your Liftmaster 1/2 HP back in working order. What’s the most frustrating issue you’ve faced with your garage door opener? Let us know in the comments below!
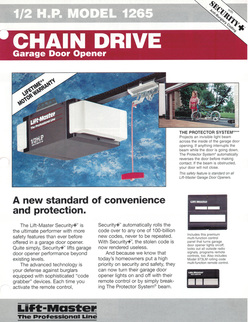
Credit: support.garagedoorzone.com
Garage Door Won’t Open Or Close
Dealing with a garage door that won’t open or close can be frustrating. The LiftMaster Professional 1/2 HP is a reliable system, but issues can arise over time. Troubleshooting the problem can save you time and money. Below are steps to pinpoint and fix common issues.
Checking The Power Supply
The garage door opener needs a steady power source to function. Check if the power cord is securely plugged into the outlet. Inspect the outlet for damage or loose connections. Test the outlet by plugging in another device to confirm it works.
If the device doesn’t work, check your home’s circuit breaker. A tripped breaker can cut power to the outlet. Reset the breaker if necessary. If the problem persists, call an electrician to inspect the wiring.
Inspecting The Remote Control
A faulty remote control can stop the door from opening or closing. Check if the batteries in the remote are working. Replace the batteries if they are dead or weak. Ensure the battery terminals are clean and free of corrosion.
Also, confirm the remote is programmed to the LiftMaster system. Refer to the user manual for programming instructions.
Testing The Wall Button
The wall-mounted button is another key component to check. Press the button and observe the garage door’s response. If the door doesn’t move, inspect the wiring connected to the button.
Look for loose or damaged wires. Tighten any loose connections and replace damaged wires. If the button itself is damaged, install a new one. Ensure the button is compatible with your LiftMaster opener.
If the button works but the door doesn’t move, the issue might be with the opener unit. Consider calling a technician for professional assistance.
`Motor Making Unusual Noises
Is your LiftMaster Professional 1/2 HP motor making unusual noises? A noisy garage door opener can be more than just an annoyance—it might signal a deeper issue. Ignoring the sounds could lead to costly repairs or even a complete motor breakdown. Let’s dive into the potential causes and actionable fixes for the strange noises coming from your motor.
Identifying Grinding Sounds
A grinding sound is one of the most common complaints. It might remind you of metal scraping against metal. This could point to worn-out gears or a damaged belt inside the motor housing.
To pinpoint the issue, start by observing when the noise occurs. Does it happen when the door is opening, closing, or both? If the grinding persists, you may need to open the motor cover and inspect the internal components for visible wear.
Keep in mind that prolonged grinding can lead to further damage. Addressing it quickly could save you from a bigger headache later.
Checking For Loose Components
Sometimes, the culprit is as simple as a loose bolt or screw. Vibrations from regular use can cause parts to shift over time. A quick inspection might reveal what’s causing the rattling or clanking noises.
Grab a wrench or screwdriver and check the motor mounts, brackets, and any other visible connections. Tighten anything that feels loose. If you’re unsure about a component’s placement, consult the user manual for guidance.
Don’t overlook the chain or belt tension. A loose chain can slap against the rail, creating a racket that’s easy to fix with a simple adjustment.
Lubricating Moving Parts
Dry or poorly lubricated moving parts can also cause unusual noises. Friction builds up over time, leading to squeaking or grinding sounds. Proper lubrication keeps everything running smoothly and quietly.
Use a garage door-specific lubricant, not WD-40. Spray a small amount on the chain, rollers, and hinges, but avoid over-lubricating. Wipe away any excess to prevent build-up, which can attract dirt and debris.
If the noise persists, it might be coming from internal motor parts that aren’t user-serviceable. In that case, consider reaching out to a professional for further inspection.
Does your garage door opener still sound off after trying these fixes? It might be time to dig deeper or call in an expert. Don’t let a noisy motor disrupt your peace—or your door’s functionality.
Door Reverses Before Closing
Is your LiftMaster Professional 1/2 HP garage door reversing before it fully closes? This issue can be frustrating, especially when you’re in a hurry or it’s pouring rain outside. The good news is, this problem is usually fixable with a little troubleshooting. Let’s tackle the common causes and how you can get your garage door back to operating smoothly.
Adjusting The Close-force Setting
The close-force setting determines how much force your garage door opener uses to close the door. If it’s set too low, the opener might think there’s an obstruction when there isn’t one, causing the door to reverse.
Locate the close-force adjustment screw on your opener. It’s typically marked with a “+” and a “-“. Turn it slightly toward the “+” to increase the force. Test the door after each adjustment to see if it fully closes. Be careful not to overdo it—too much force can damage the door or opener.
Does this sound intimidating? Don’t worry. Just make small adjustments and test frequently. You’ll get it dialed in without any guesswork.
Inspecting The Safety Sensors
Safety sensors are there to prevent accidents, but if they’re misaligned or dirty, they can falsely signal an obstruction. This can make the door reverse before closing.
Look at the sensors located near the bottom of the door tracks. Are they facing each other directly? Are the indicator lights solid (not blinking)? If not, adjust their alignment until the lights stabilize. Use a clean, dry cloth to wipe off any dust or dirt that might be blocking the sensors.
Still not working? Check the wiring for any damage. A loose or frayed wire can interrupt the signal between the sensors. Fixing this could be the key to solving your problem.
Clearing Obstructions
Sometimes, the simplest solution is the correct one. Even a small object in the path of the door can trigger the safety mechanism and cause it to reverse.
Inspect the tracks and the area beneath the door. Look for debris like leaves, toys, or tools. Even a tiny pebble can make a big difference. Clear anything in the way and try closing the door again.
It’s also worth checking the tracks for any dents or bends. A misaligned track can confuse the system into thinking there’s an obstruction.
Have you tried these steps, but the door still reverses? It might be time to consult a professional. Some issues require specialized tools or expertise, and it’s better to be safe than sorry.
Remote Control Not Working
Experiencing issues with your Liftmaster Professional 1/2 HP remote control can be frustrating. The remote control plays an important role in operating your garage door conveniently. If it stops working, you might need to troubleshoot the issue. Below, we’ll cover common fixes like replacing the remote batteries, reprogramming the remote, and checking for signal interference.
Replacing Remote Batteries
Dead batteries are a common cause of remote problems. Check the battery compartment of your remote. Open it carefully to avoid damaging the remote. Remove the old batteries and replace them with new ones. Make sure the batteries are installed in the correct orientation. Use high-quality batteries for better performance.
Reprogramming The Remote
If the remote is not synced with your Liftmaster opener, it won’t work. Locate the “Learn” button on your garage door opener. Press and release the button, then press the button on your remote. Wait for the light on the opener to blink or remain steady, indicating successful programming. Test the remote afterward to ensure it works.
Checking Signal Interference
Signal interference can block the communication between the remote and opener. Check if electronic devices or metal objects are near the opener or remote. These can disrupt the signal. Move such items away from the opener and remote. If interference persists, try using the remote closer to the opener.

Credit: www.youtube.com
Door Moves Unevenly
When your LiftMaster Professional 1/2 HP garage door moves unevenly, it can be frustrating and even dangerous. Uneven movement usually points to a mechanical issue that needs attention. The good news is that you can often fix it yourself with a few simple steps.
Inspecting The Tracks
Start by taking a close look at the tracks. Are they dirty, bent, or misaligned? Dirt and debris can restrict the door’s movement, while bent tracks can cause uneven motion.
Use a clean rag to wipe the tracks and remove any buildup. If you notice a bend, gently straighten it with a rubber mallet. Don’t ignore minor misalignments—loosen the track brackets, realign them, and tighten the screws securely.
Tightening Loose Hinges
Loose hinges can throw off the balance of your garage door, making it wobble or tilt as it moves. Check each hinge for loose screws or visible wear.
Use a screwdriver to tighten any loose screws. If a hinge is cracked or damaged, replace it entirely to avoid further issues. It’s a quick fix that can make a big difference in how smoothly your door operates.
Balancing The Door
An unbalanced door is a common cause of uneven movement. You can test the balance by disconnecting the opener and manually lifting the door halfway. Does it stay in place, or does it fall?
If it falls, the springs likely need adjustment. Call a professional for spring adjustments as these can be dangerous to handle on your own. Keeping your door balanced not only fixes uneven movement but also prolongs the life of your garage door opener.
By addressing these simple issues, you can save yourself time and money while keeping your garage door operating smoothly. If you’ve tried these fixes and the door still moves unevenly, it might be time to consult a professional for a deeper inspection.
Flashing Led Indicators
When your LiftMaster Professional 1/2 HP garage door opener starts flashing LED indicators, it’s a clear sign that the system is trying to communicate an issue. These indicators aren’t just random blinks; they’re codes designed to pinpoint specific problems. Understanding what these flashes mean can save you time, frustration, and potentially a call to a technician.
Understanding Led Error Codes
The flashing LED indicators on your LiftMaster Professional 1/2 HP opener are essentially its language. Each pattern corresponds to a particular error. For example, a steady flashing light might signal a problem with the safety sensors, while a rapid blink could point to a connection issue.
To decode these signals, refer to your user manual. It has a chart that matches each blink pattern to its cause. If you don’t have the manual handy, LiftMaster’s website often provides downloadable guides that can help.
Think of this process like diagnosing a car engine light. The quicker you understand the problem, the faster you can address it. Have you ever ignored an LED indicator only for the issue to snowball? Don’t let that happen here.
Resetting The System
Sometimes, flashing LEDs are simply a sign that your garage door opener needs a reset. This is a straightforward process and often resolves minor glitches. Start by unplugging the unit from power for about 60 seconds.
Once plugged back in, test the opener. Is the LED still flashing? If it stops, you’ve likely fixed the issue. If it persists, double-check the connections on the safety sensors or wiring.
Think of resetting as giving your system a fresh start. It’s quick, easy, and can save you hours of troubleshooting. Have you tried this step yet?
Calling For Professional Help
Not all LED errors can be fixed at home. If you’ve followed the manual, reset the system, and inspected the wiring, but the LED still blinks, it may be time to call a professional. Professionals have specialized tools and experience to diagnose deeper issues.
LiftMaster customer support can guide you to certified technicians in your area. They’ll ensure your opener is repaired safely and efficiently. While DIY fixes save money, some problems require expert intervention.
Don’t hesitate to ask for help when needed. Have you ever had a problem where calling an expert saved the day? It’s better to be safe than sorry, especially with equipment that affects your home security.

Credit: firstlinegarage.com
Preventive Maintenance Tips
Regular maintenance helps keep your Liftmaster Professional 1/2 HP functioning smoothly. It reduces wear and tear, extends its lifespan, and prevents unexpected breakdowns. By following some simple steps, you can maintain the safety and efficiency of your garage door opener.
Regular Cleaning Of Sensors
The safety sensors detect obstacles and stop the door from closing. Dirt, dust, or debris on the sensors can hinder their performance. Use a soft, dry cloth to clean the sensor lenses regularly. Avoid using harsh chemicals that might damage the sensors. Ensure the sensors are aligned and secure for optimal performance.
Testing Emergency Reversal
The emergency reversal system prevents accidents if the door encounters an object. Test this feature by placing an object under the door and closing it. The door should reverse immediately upon touching the object. If it doesn’t reverse, check the settings or consult the manual for adjustments. This test ensures your door operates safely at all times.
Scheduling Annual Inspections
Professional inspections help identify potential issues before they become major problems. Technicians can check the motor, chain, and other components for wear. They also ensure the garage door opener complies with safety standards. Schedule an annual inspection to keep your Liftmaster working efficiently year-round.
Conclusion
Troubleshooting your LiftMaster Professional 1/2 HP opener doesn’t have to be hard. Start by checking common issues like power, sensors, and remote batteries. Always follow the manual for safe and accurate steps. Regular maintenance can prevent future problems and extend its lifespan.
If the issue persists, contacting a professional might be the best solution. Remember, a well-functioning garage door opener ensures convenience and safety for your home. By addressing problems early, you save time and avoid costly repairs later. Keep your opener in good shape, and it will serve you well for years to come.


