Is your LiftMaster remote control giving you trouble? You’re not alone.
It can be frustrating when the one device you count on to open or close your garage door suddenly stops working. But don’t worry—there’s good news. Most of these issues are easier to fix than you might think, and you don’t need to be a tech expert to get things back on track.
In this guide, we’ll walk you through the most common LiftMaster remote control problems and how to troubleshoot them step by step. Whether your remote isn’t responding, has a weak signal, or seems completely dead, we’ve got practical solutions to help you. Stick around—by the end of this article, you’ll feel confident tackling the issue and getting your garage door opener back in action. Let’s dive in and get your LiftMaster working like new!
Credit: allsecurityequipment.com
Common Issues With Liftmaster Remotes
Liftmaster remotes are reliable, but issues can arise over time. These problems can disrupt the smooth operation of your garage door. Understanding common issues helps you troubleshoot effectively. Below are some frequent problems and their possible causes.
Remote Not Responding
If your Liftmaster remote doesn’t respond, check the battery first. A dead or low battery is often the culprit. Replace it with a new one and test again. Make sure the remote is within range of the garage door opener. If the issue persists, inspect the remote for physical damage. Buttons that are stuck or worn out can prevent proper functioning. Finally, confirm the remote is correctly programmed to your garage door opener.
Intermittent Signal Problems
Sometimes, Liftmaster remotes work sporadically. This can be frustrating and inconvenient. Signal interference is a common cause. Devices like routers or cordless phones may disrupt the signal. Ensure the antenna on the opener is not damaged and is hanging straight. Dirty or corroded battery contacts can also cause intermittent issues. Clean the contacts gently with a dry cloth for better connectivity.
Door Not Closing Or Opening
If the remote fails to open or close the door, check the safety sensors. Misaligned or blocked sensors may stop the door from moving. Ensure there’s nothing obstructing the sensors’ path. Inspect the garage door tracks for debris or damage. Sometimes, the opener’s travel limits may need adjustment. Refer to the user manual for specific instructions on fine-tuning these settings.

Credit: www.bankogaragedoors.com
Checking The Batteries
When your Liftmaster remote control stops working, the culprit might be something as simple as the batteries. It’s a common issue that can be fixed in minutes, saving you time and frustration. Let’s dive into how you can check and replace the batteries to get your remote back in action.
Signs Of Low Battery Power
Ever notice your garage door not opening on the first click? Or maybe the range of your remote feels shorter than usual. These are classic signs of low battery power.
If you find yourself pressing the button multiple times before the door responds, it’s a strong indicator the batteries are dying. Another clue is if the light on your remote flickers or doesn’t turn on at all. Don’t ignore these hints—they’re your remote’s way of asking for new batteries.
Replacing The Batteries Properly
Replacing the batteries in your Liftmaster remote is simple, but there’s a right way to do it. First, check your owner’s manual to confirm the type of battery your remote needs. Most Liftmaster remotes use CR2032 or similar coin-style batteries.
Open the remote carefully using a small screwdriver or your fingers, depending on the design. Remove the old battery and avoid touching the metal contacts directly with your fingers. Oils from your skin can interfere with proper connectivity.
Insert the new battery with the positive side facing up. Make sure it sits snugly in its slot. Close the remote casing securely and test it by pressing a button to see if the light turns on. If the garage door operates smoothly again, you’ve done it correctly!
Have you ever overlooked something simple like battery replacement and wasted time troubleshooting? It’s a reminder that small fixes can often solve big problems. Next time your Liftmaster remote acts up, start with the batteries—you might not need to look any further.
Reprogramming The Remote
Reprogramming your Liftmaster remote can solve many common issues. Whether your remote isn’t working or needs to connect with a new opener, reprogramming is a quick fix. This guide will help you reset and sync your remote step by step.
Steps To Reset The Remote
Resetting your Liftmaster remote is a straightforward process. Start by locating the “Learn” button on your garage door opener. This button is usually near the antenna wire or the light cover. Press and hold the “Learn” button until the indicator light turns off. This removes the remote’s previous programming.
Next, press any button on the remote to clear its stored codes. Wait a few seconds before proceeding to the next step. Your remote is now reset and ready for reprogramming.
Syncing The Remote With The Opener
To sync the remote, press the “Learn” button on the opener. The indicator light will turn on or blink, signaling it’s ready to pair. Within 30 seconds, press and hold the button on your remote that you want to program. Release the button when the opener’s light blinks or you hear a click.
Test the connection by pressing the programmed button. The garage door should move. If it doesn’t, repeat the steps carefully. Ensure the remote battery has enough charge for successful pairing.
Reprogramming is now complete. Your Liftmaster remote should work seamlessly with the opener.
Inspecting For Interference
Liftmaster remote controls are reliable, but signal interference can disrupt them. Understanding and addressing interference ensures smooth operation. Regular inspection for interference is key to resolving issues.
Identifying Sources Of Signal Interference
Signal interference can come from various electronic devices. Wi-Fi routers, cordless phones, and baby monitors are common culprits. Nearby metal objects can also block the signal. LED lights, especially cheap ones, may emit interference. Neighbors’ devices operating on the same frequency can cause issues too. Inspect your surroundings for possible sources of interference.
Minimizing Disruptions
To minimize disruptions, reposition devices that emit strong signals. Move routers or phones further away from the garage door opener. Replace older LED lights with high-quality, interference-free ones. Ensure no large metal objects block the remote’s signal path. Adjust the antenna on the opener for better reception. Regularly check for new devices that might interfere with the signal.
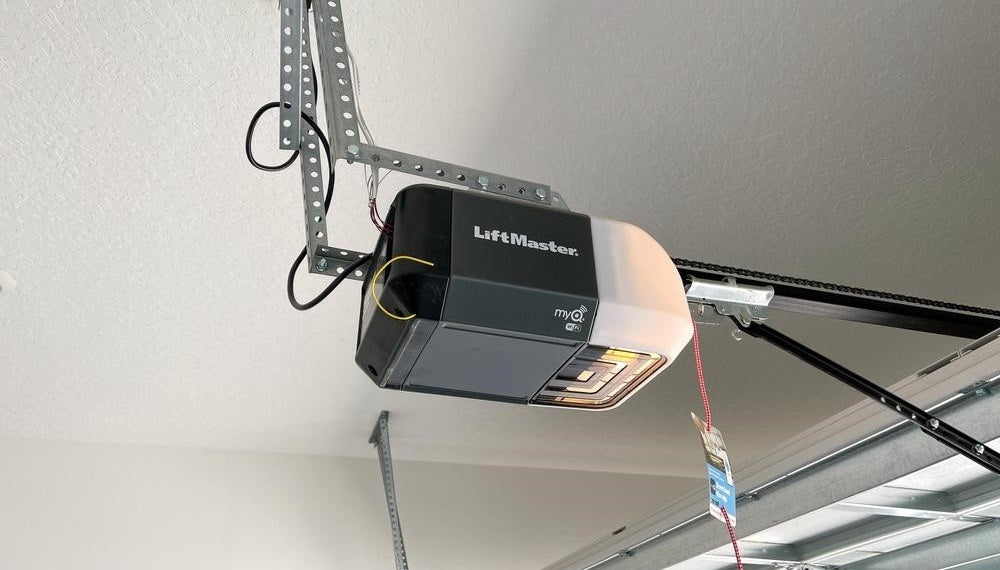
Testing The Garage Door Opener
Testing the garage door opener is crucial for identifying issues with your Liftmaster remote control. A malfunctioning opener can disrupt your entire system. By checking its functionality, you can pinpoint the problem and take the right steps to fix it.
This process involves ensuring the opener is operational and resetting its system if needed. Follow these simple steps to troubleshoot efficiently and get your garage door working again.
Ensuring The Opener Is Functional
Start by visually inspecting the garage door opener. Look for signs of physical damage or loose wiring. Check the power source and ensure the unit is plugged in securely.
Press the manual button on the opener to test its response. If the door doesn’t move, it may be an electrical or mechanical issue. Verify the remote battery is not dead before proceeding.
Watch the indicator lights on the opener. Blinking or unusual patterns may signal a problem. Refer to your Liftmaster manual to decode these signals for further troubleshooting.
Resetting The Opener System
Resetting the opener can resolve many common issues. Locate the reset button on the device. Usually, it’s near the motor housing or side panel.
Press and hold the reset button until the lights blink. This clears the memory of the opener and removes outdated remote connections.
Reconnect your Liftmaster remote after resetting. Follow the pairing instructions from your user manual to establish a fresh connection. Test the remote to ensure it works properly after the reset.
Checking For Physical Damage
Physical damage is a common issue with Liftmaster remote controls. A damaged remote can stop functioning properly, causing frustration. Examining the remote for physical issues is a good starting point. This simple step can save time and money.
In this section, we’ll guide you through checking for visible damage. You’ll also learn about repair and replacement options if necessary.
Inspecting The Remote Casing
Start by closely inspecting the outer casing of your Liftmaster remote. Look for cracks, dents, or broken parts. Even small cracks can affect the remote’s performance. Pay attention to the battery compartment. A damaged compartment might prevent the remote from working.
Check the buttons for wear or signs of sticking. Worn-out buttons may not send signals to the garage door opener. Dirt or debris around the buttons can also interfere. Clean the remote gently with a soft cloth to remove dirt.
Repair Or Replacement Options
If the casing or buttons are damaged, consider repair options first. For minor issues, you can try fixing the casing with strong adhesive. Sticky or jammed buttons may work again after proper cleaning.
For severe damage, replacing the remote may be the best solution. Liftmaster remotes are widely available online or at hardware stores. Ensure you purchase a compatible model for your garage door opener.
Always check if the remote is under warranty before replacing it. A valid warranty can save costs on repairs or replacements.
Updating The Remote System
Updating the remote system for your LiftMaster garage door opener is a smart move to ensure smooth and secure operation. Technology evolves, and outdated systems may face compatibility issues or security vulnerabilities. By keeping your remote system up-to-date, you can enjoy a hassle-free experience and even unlock useful features.
Checking For Firmware Updates
Firmware updates are like giving your remote a software tune-up. Start by checking your LiftMaster product manual or visiting their official website. Look for any available updates that match your remote model.
If you’re not sure how to check, look for a section labeled “Support” or “Downloads” on the website. Follow instructions carefully, as firmware updates often involve connecting your remote to a computer or following a specific button sequence.
Updating firmware can fix bugs, improve performance, and even add new features. If your remote has been acting up lately, a quick firmware update might be the fix you need.
Upgrading To A Newer Model If Necessary
Sometimes, updating the system means upgrading the hardware. If your LiftMaster remote is older, it might not support modern features like rolling code technology or smartphone compatibility.
Take a moment to assess your current model. Does it lack features you’d use daily, like a longer range or advanced security? If yes, upgrading to a newer model could be worth the investment.
LiftMaster offers several advanced remote options, including models that pair effortlessly with Wi-Fi-enabled garage door openers. Think about how much easier life could be with a remote that meets your needs.
What’s holding you back from updating or upgrading? Is it the cost or the process itself? Don’t let these concerns stop you—modernizing your LiftMaster remote system can save time and prevent frustration in the long run.
When To Contact Professional Support
Knowing when to contact professional support for your LiftMaster remote control can save you time and frustration. While some issues can be fixed with basic troubleshooting, others might require a trained technician. But how do you decide when it’s time to call in the pros?
Signs Of Deeper Technical Issues
Sometimes, your remote control problem might be more than just a dead battery. If your remote doesn’t respond even after replacing batteries and reprogramming, it could point to internal hardware damage.
Another red flag is inconsistent operation. If your remote works intermittently or only when you’re very close to the garage door, the issue might involve signal interference or a faulty circuit board.
Pay attention to unusual noises from your garage door opener. If the motor hums or struggles when you press the remote, it might indicate a mechanical or electrical problem that extends beyond the remote itself.
Finding A Certified Technician
Look for technicians who specialize in LiftMaster products. Certification ensures they understand the specifics of your model and can diagnose issues accurately.
Check reviews and recommendations. Websites like Yelp or Google Reviews can help you find trusted professionals in your area.
Ask about warranties. A certified technician often offers a warranty for their work, giving you peace of mind if the problem reoccurs.
Don’t let frustration force you into DIY repairs that might make things worse. Is it worth risking more damage when a professional can get it right the first time?

Credit: www.youtube.com
Conclusion
Troubleshooting your Liftmaster remote control doesn’t have to feel overwhelming. Start with basic checks like the battery and signal range. Ensure your remote is properly programmed to the opener. Clean the buttons if they seem stuck or unresponsive. For advanced issues, consult the manual or contact support.
Regular maintenance can help prevent future problems. Taking these steps can save time and effort. A working remote brings convenience back to your daily routine. Stay patient and methodical as you resolve the issue. Your Liftmaster remote can function smoothly again with a little care.
")


