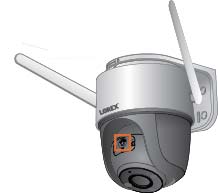
Are you feeling frustrated because your Lorex camera isn’t working the way it should? Don’t worry—you’re not alone.
Whether it’s a blurry feed, connection issues, or an unresponsive system, troubleshooting can feel overwhelming. But here’s the good news: most common Lorex camera problems have simple fixes you can handle yourself. In this guide, we’ll walk you through straightforward steps to get your camera back on track.
Stick with us, and by the end, you’ll feel confident solving these issues and making the most of your security system. Ready to take the guesswork out of troubleshooting? Let’s dive in.
Common Setup Problems
Setting up a Lorex camera can sometimes feel overwhelming. Many users face common problems during installation. These issues can hinder the camera’s performance. Below are common setup problems and their solutions.
Camera Not Powering On
A camera that doesn’t power on is frustrating. First, check the power source. Ensure the power adapter is securely plugged into an outlet. Examine the cable for any damage or wear. A faulty cable can prevent power delivery. Also, confirm that the outlet is working. Test it with another device to verify.
If the camera uses batteries, check their placement. Make sure they are inserted correctly. Replace old or drained batteries with new ones. For wired cameras, inspect the connection to the camera. Loose or disconnected wires can stop the camera from turning on.
Issues With Wi-fi Connection
Wi-Fi problems are another common issue. Begin by checking your router’s settings. Ensure the router is powered on and working. Place the camera closer to the router during setup. Weak signals can disrupt the connection.
Verify the Wi-Fi network name and password. Enter them carefully during setup. Incorrect details will block the connection. Also, ensure your camera and router support the same frequency. Most Lorex cameras use 2.4GHz networks, not 5GHz.
Wrong Network Configuration
Incorrect network settings can cause setup failures. Confirm the IP address of your camera. It should match your local network settings. Open your router’s control panel and check connected devices. If the camera is missing, reconfigure the network.
Disable any VPN or firewall temporarily. These can block camera communication. Restart the router and camera to refresh the connection. If using a static IP, ensure the IP settings are correct.
Credit: help.lorex.com
Video Quality Issues
Are your Lorex cameras failing to deliver crisp, clear video? Poor video quality can be frustrating, especially when you rely on these cameras for security. Let’s dive into common issues like blurry images, low resolution, and night vision problems—and how you can fix them.
Blurry Or Distorted Images
Blurry or distorted images are a common annoyance. Start by checking the camera lens for dirt or smudges. Even a small fingerprint can ruin the video clarity.
Next, ensure the camera is securely mounted. A shaky or misaligned camera can cause distortion. If you’ve recently adjusted the angle, double-check its stability.
Still seeing blurry footage? Look into the focus settings. Many Lorex cameras allow manual adjustments for sharper visuals. A quick tweak can make all the difference.
Low Resolution Settings
Is your video looking grainy? Your camera might be set to a lower resolution. Access the Lorex app or software and verify the resolution settings.
Choose higher resolutions like 1080p or 4K if your camera supports it. Keep in mind, higher resolution may require faster internet or more storage space.
Also, check your monitor or device settings. Sometimes, the issue lies in the display, not the camera itself.
Night Vision Not Working
Night vision is crucial for 24/7 security, but it can fail occasionally. Start with the basics—ensure your camera’s infrared (IR) lights are functioning. Look for a faint red glow on the camera lens in the dark.
If the IR lights are fine, check surrounding light sources. Bright streetlights or indoor lights can interfere with night vision. Try repositioning your camera to reduce glare.
Lastly, update your camera firmware. Software bugs can mess with night vision, and a quick update might solve the problem.
What’s your biggest video quality challenge with Lorex cameras? Share your experience below—your insights might help someone else troubleshoot their setup!
App And Software Errors
Experiencing app and software errors can disrupt your Lorex camera experience. These issues often affect how you interact with the system. They can lead to frustration if not resolved quickly. Below are common problems and troubleshooting tips to fix them.
Live View Not Loading
Live View failing to load can happen due to connectivity issues. First, check your internet connection on both your phone and the camera. Ensure the app has the necessary permissions enabled in your device settings. Clear the app cache to remove temporary data that may cause glitches. If the problem persists, restart the app or reinstall it for a fresh setup.
Failed Firmware Updates
Firmware updates sometimes fail due to unstable internet or power interruptions. Ensure your camera and device have a stable internet connection. Avoid running updates during peak hours when networks are busy. If an update fails, restart your camera and try again. Check the official Lorex website for manual update files if the issue continues.
App Crashing Or Freezing
An app that crashes or freezes disrupts monitoring and control. Update the app to the latest version from your app store. Older versions may have bugs causing crashes. If it still freezes, clear the app cache to free up memory. Restart your phone to ensure no background processes interfere with the app. If none of these steps work, reinstall the app for a clean start.

Credit: help.lorex.com
Storage And Playback Problems
Lorex security cameras are fantastic tools to safeguard your property, but storage and playback issues can sometimes throw a wrench in your peace of mind. Imagine trying to review a crucial moment only to find playback errors or a full storage notification. These hiccups can be frustrating, but the good news is they’re often easy to fix. Let’s tackle some common storage and playback problems and get your camera running smoothly.
Sd Card Not Detected
Is your Lorex camera suddenly not recognizing your SD card? This issue is more common than you think and often boils down to simple fixes.
- Ensure the SD card is properly inserted. It should click securely into place.
- Check the card’s compatibility. Lorex cameras typically support Class 10 or UHS-I cards with specific size limits (e.g., 32GB or 128GB).
- Format the SD card in the camera’s settings. Sometimes, file system mismatches prevent detection.
If none of these work, try testing the SD card on another device. If it doesn’t show up there either, it might be time for a replacement. Have you ever had an SD card fail at the worst moment? It’s a reminder to always keep backups of important footage.
Playback Errors On Recorded Footage
Playback issues can be incredibly annoying, especially when you need to review something urgent. These errors often signal either a corrupted file or a misconfigured setting.
- Restart the camera and app. A quick reboot can resolve temporary glitches.
- Update the firmware and mobile app. Outdated software can lead to compatibility issues.
- Check the recording schedule. Make sure the footage you’re trying to play matches the set recording time.
If playback still fails, download the footage to another device and try playing it there. Some users report success using third-party media players like VLC. Have you ever wondered how much troubleshooting could be avoided with regular updates?
Storage Full Notifications
Receiving “Storage Full” notifications is frustrating, especially if you rely on continuous recording. But it’s easy to manage when you know what to do.
- Enable overwrite mode in your camera settings. This will automatically replace the oldest footage with new recordings.
- Delete unnecessary videos. Review and remove non-critical clips directly from the app.
- Upgrade your storage. If you’re frequently running out of space, consider using a higher-capacity SD card or external storage solution.
Regularly clearing your storage or enabling overwrite mode ensures your camera stays ready to capture important events. Imagine missing a critical incident because of a full SD card—don’t let that happen to you.
Storage and playback problems can be a hassle, but they’re almost always solvable with a few tweaks. Take control of your Lorex camera today and keep your recordings seamless and stress-free.
Motion Detection Issues
Motion detection is one of the most valuable features of Lorex cameras. It helps keep your property secure by alerting you to potential intrusions. Sometimes, users experience issues with motion detection. These problems can range from false alerts to no triggers. Troubleshooting these issues ensures your camera performs effectively.
False Motion Alerts
False motion alerts can occur due to environmental triggers. Moving tree branches, shadows, or changes in lighting may activate alerts. Check if your camera is positioned near windows or reflective surfaces. Adjust the camera angle to avoid unnecessary triggers. This simple tweak often reduces false motion notifications.
Motion Detection Not Triggering
Motion detection may fail to trigger due to incorrect settings. Ensure the motion detection feature is enabled in the camera’s menu. Verify the area covered by the motion detection zone. If the detection zone is too small, it may not capture movements. Expand the zone to include key areas for monitoring.
Adjusting Sensitivity Settings
Sensitivity settings control how easily the camera detects motion. High sensitivity may result in false alerts. Low sensitivity might miss important movements. Access your Lorex camera settings to adjust sensitivity levels. Start with a medium setting and test its effectiveness. Gradually fine-tune the sensitivity to match your environment.
Audio Problems
Audio problems with Lorex cameras can disrupt your surveillance experience. Clear sound is essential for complete monitoring. Issues like no sound, microphone failure, or speaker glitches can cause frustration. Addressing these problems ensures your security system works effectively.
No Sound In Recordings
Sometimes, Lorex cameras fail to record audio. This can result from incorrect settings. Ensure audio recording is enabled in the camera’s settings. Check the audio input source to confirm it’s active. Update the firmware if the problem persists. Faulty hardware may also cause this issue. Inspect the camera’s microphone for damage. If none of these steps resolve the problem, contact Lorex support.
Microphone Not Capturing Audio
A non-functional microphone can disrupt audio capture. Verify that the camera’s microphone is clean and unobstructed. Dirt or debris can block sound input. Confirm that the microphone is securely connected to the system. Test the microphone with another device to rule out hardware failure. If the issue continues, consider replacing the microphone.
Speaker Output Issues
Speaker problems can affect two-way communication. Check the volume settings on the camera and your connected device. Ensure the speaker is not muted in the app. Test the speaker by playing a recorded clip. If the sound is still distorted or absent, inspect the speaker for physical damage. Firmware updates can also fix software glitches. If the speaker remains unresponsive, seek professional assistance.
Connection And Signal Troubles
Connection and signal troubles can be one of the most frustrating issues you face when using your Lorex cameras. Whether you’re experiencing constant disconnections or weak signal strength, these problems can compromise your ability to monitor your property effectively. Let’s dive into practical solutions for some common challenges.
Frequent Disconnections
Does your Lorex camera keep disconnecting? This issue can often be traced back to unstable internet or outdated firmware. Check your router first; restarting it can sometimes restore consistent connectivity.
Make sure your camera is running the latest firmware version. Manufacturers release updates to fix bugs, improve stability, and enhance compatibility. If you’re unsure how to update it, refer to the Lorex support page for step-by-step instructions.
Placement matters too. If your camera is far from the router, disconnections are more likely. Consider moving the camera closer or using a Wi-Fi extender to strengthen the signal.
Weak Signal Strength
Weak signals can lead to delayed video feeds or grainy footage. Start by checking the Wi-Fi signal bars in your Lorex app. If it shows low signal strength, your camera may be too far from the router.
Think about physical barriers. Walls, doors, and large furniture can interfere with Wi-Fi signals. Try repositioning your router or camera to reduce these obstructions.
You can also upgrade your router to one with stronger coverage, especially if your current one struggles to support multiple devices. Dual-band routers work particularly well with Lorex cameras.
Interference With Other Devices
Did you know your smart home setup could be sabotaging your camera’s performance? Devices like baby monitors, cordless phones, or microwaves can interfere with Wi-Fi signals. Check if these devices are operating on the same frequency as your camera—usually 2.4 GHz.
Switching your router to the 5 GHz band can solve interference issues. Many Lorex cameras support dual-band connectivity, so you have the option to use a less congested frequency.
If interference persists, consider scheduling your camera’s operation times to avoid peak usage hours for other devices. This can minimize clashes and keep your camera running smoothly.
What’s the most frustrating signal issue you’ve faced with your Lorex camera? Share your experience in the comments—it might help someone else troubleshoot effectively!

Credit: www.youtube.com
Hardware Malfunctions
Lorex security cameras are reliable, but hardware malfunctions can disrupt performance. Understanding common issues can help users identify and solve problems quickly. This section explores frequent hardware-related concerns and how to address them.
Overheating Cameras
Overheating can affect camera performance or cause sudden shutdowns. Excessive heat may result from direct sunlight exposure or lack of ventilation. Place cameras in shaded areas or install cooling systems to prevent overheating. Check for dust buildup in vents and clean them regularly to improve airflow.
If overheating persists, inspect the power supply for irregularities. Faulty power adapters can generate extra heat, damaging the camera. Replace damaged adapters promptly to avoid further issues.
Damaged Cables Or Ports
Faulty cables or ports can disrupt video and power connections. Inspect cables for visible cuts, fraying, or signs of wear. Replace damaged cables to restore proper functionality. Use high-quality cables to reduce future problems.
Loose connections in ports can also cause malfunctions. Ensure cables are securely plugged into the camera and the power source. For corroded or broken ports, professional repairs might be necessary.
Water Damage Concerns
Water exposure can harm cameras, especially outdoor models. Check for signs of moisture in the casing or lens. Use waterproof enclosures to protect cameras from rain or humidity.
Inspect seals and gaskets for wear and replace them if needed. Ensure cables entering the camera are properly sealed to prevent water intrusion. Dry affected cameras thoroughly and test functionality before further use.
Reset And Restore Options
When your Lorex camera isn’t functioning as expected, resetting and restoring it can often solve the problem. These options allow you to start fresh, clear out glitches, or reconfigure settings for better performance. Let’s break down the steps for resetting, what to do afterward, and when it’s time to ask for help.
Factory Reset Procedures
A factory reset wipes all settings and restores your Lorex camera to its original state. This can resolve issues like connectivity problems, frozen screens, or unresponsive features.
To perform a factory reset, locate the reset button on your camera. It’s typically a small, recessed button that you’ll need a pin or paperclip to press. Hold it down for 10 to 15 seconds until you see the camera reboot or its indicator lights change.
After the reset, your camera will no longer remember your Wi-Fi or custom settings. Make sure you have your network details and login credentials handy before starting the process.
Reconfiguring Settings After Reset
Once your camera is reset, you’ll need to set it up again as if it’s brand new. Open the Lorex app on your phone or tablet, and follow the step-by-step instructions to reconnect your camera to your Wi-Fi network.
Double-check settings like motion detection zones, recording schedules, and notification preferences. These adjustments ensure your camera functions exactly the way you want.
Is this your first time resetting the camera? Don’t worry—it’s simpler than it sounds. Lorex’s guided app setup makes the process user-friendly, even if you’re not tech-savvy.
When To Contact Support
If resetting and reconfiguring doesn’t resolve the issue, it may be time to contact Lorex support. Persistent issues like blurry video, inconsistent recording, or frequent disconnections could indicate a deeper problem.
Before reaching out, gather key details like your camera model, firmware version, and a clear description of the issue. This information helps the support team assist you faster.
Still unsure if you should call? Think about how much time you’ve spent troubleshooting on your own. If it’s more than 30 minutes with no progress, let the experts step in.
Conclusion
Troubleshooting Lorex cameras doesn’t have to feel overwhelming. Start with simple checks. Ensure cables, power, and internet connections are secure. Restart your system to resolve minor glitches. Update firmware regularly to avoid compatibility issues. For advanced problems, refer to the user manual or contact support.
With patience and these tips, most issues can be fixed at home. A well-maintained system ensures better performance and security. Keep your cameras running smoothly for peace of mind.
")


