Melnor sprinklers are reliable tools for lawn care. But sometimes, they face issues.
If your Melnor sprinkler isn’t working right, don’t worry. Troubleshooting can often fix the problem. This guide will help you understand common issues and how to solve them. From poor water flow to sprinkler heads not rotating, we’ll cover it all.
Knowing these solutions can save you time and money. With our tips, your lawn can stay lush and green. So, let’s dive into Melnor sprinkler troubleshooting and get your garden back on track.
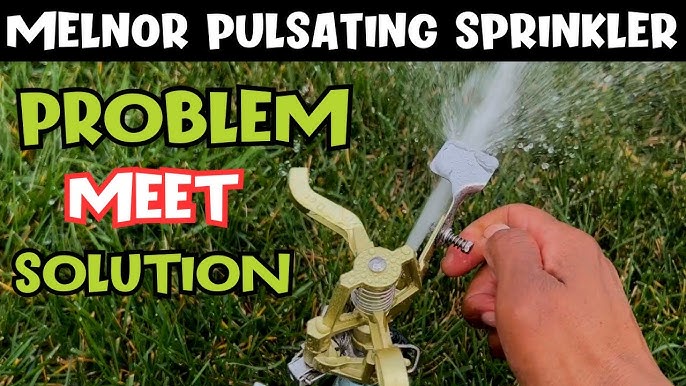
Credit: www.youtube.com
Common Issues
Using a Melnor sprinkler can make watering your garden easy. Yet, sometimes, problems arise. This guide will help you with some common issues. Learn how to troubleshoot your Melnor sprinkler effectively.
Sprinkler Won’t Turn On
If your Melnor sprinkler won’t turn on, check the following:
- Power Supply: Ensure the sprinkler is connected to a power source.
- Timer Settings: Verify the timer settings are correct.
- Batteries: Replace the batteries if using a battery-powered model.
- Water Supply: Make sure the water supply is turned on.
- Connections: Inspect the hose and connections for any leaks or blocks.
Sometimes, resetting the sprinkler can help. Refer to the manual for reset instructions.
Uneven Water Distribution
Uneven water distribution can lead to dry spots in your garden. To fix this:
- Check Spray Patterns: Adjust the sprinkler’s spray patterns for even coverage.
- Clean Nozzles: Remove any dirt or debris from the nozzles.
- Pressure Issues: Ensure the water pressure is consistent.
- Sprinkler Placement: Position the sprinkler in a central location.
If the issue persists, consider using multiple sprinklers for better coverage.
Addressing these common issues can ensure your Melnor sprinkler works efficiently. Happy gardening!
Tools Needed
Having the right tools is crucial for effective Melnor sprinkler troubleshooting. This guide covers the basic tools and specialized equipment you need. Being prepared saves time and ensures efficient repairs.
Basic Tools
Start with these essential items:
- Screwdrivers – Both flathead and Phillips types are necessary.
- Adjustable Wrench – Useful for various sizes of nuts and bolts.
- Pliers – Needle-nose and standard pliers for gripping and twisting.
- Cleaning Brushes – Soft-bristle brushes help clean debris from sprinkler heads.
- Garden Hose – Needed to test the water flow and pressure.
These basic tools are usually found in most households. They help with common tasks like tightening, loosening, and cleaning.
Specialized Equipment
For more complex issues, use specialized equipment:
- Pressure Gauge – Measures water pressure to identify issues.
- Multimeter – Tests electrical components for faults.
- Pipe Cutter – Cuts pipes to the desired length for replacement.
- Sealant Tape – Ensures watertight seals on connections.
- Wire Strippers – Strips insulation from wires for electrical repairs.
Specialized equipment may not be in every toolbox but is essential for advanced troubleshooting.
Initial Checks
When troubleshooting your Melnor sprinkler, start with some initial checks. These simple steps can often resolve common issues. They help ensure your sprinkler works efficiently.
Inspect Water Source
First, ensure your water source is on and functioning. Check if other water fixtures work. Low water pressure can affect the sprinkler’s performance. Verify there’s no blockage at the water source.
Check Hose Connections
Next, inspect the hose connections. Ensure they are secure and tight. Loose connections can cause leaks or reduce water flow. Look for kinks or damage in the hose. Replace any damaged parts.

Credit: www.youtube.com
Adjusting Spray Patterns
Adjusting spray patterns on your Melnor sprinkler can help you achieve the perfect watering coverage for your lawn or garden. Whether you need a narrow strip or a wide, even spread, making these adjustments is essential for efficient watering.
Manual Adjustments
Most Melnor sprinklers come with easy-to-use manual adjustment options. Look for the pattern control dial or levers on your sprinkler. These are usually located on the sides or top of the unit.
To change the spray pattern, rotate the dial to your desired setting. You can switch between different patterns like full circle, half circle, or rectangle. Levers can be moved to adjust the width and length of the spray.
- Locate the pattern control dial.
- Rotate to select your desired spray pattern.
- Move levers to adjust spray width and length.
Using Adjustment Tools
Some Melnor sprinklers come with adjustment tools for more precise control. These tools can help you fine-tune the spray pattern to better suit your needs. They are usually included in the package or can be purchased separately.
To use these tools, follow these steps:
- Insert the adjustment tool into the designated slot.
- Turn the tool to change the spray angle and direction.
- Test the spray pattern and make further adjustments if needed.
Using adjustment tools can provide a more customized watering experience. This allows for targeted watering in specific areas of your lawn or garden.
By understanding and utilizing these manual and tool-based adjustments, you can ensure that your Melnor sprinkler delivers optimal coverage and efficiency.
Cleaning Nozzles
Regular maintenance of your Melnor sprinkler ensures it works well. Cleaning the nozzles is a key part of this maintenance. Over time, dirt and debris can block the nozzles. This section will guide you through the process of cleaning them.
Removing Debris
To remove debris from the nozzles, follow these steps:
- Turn off the water supply.
- Remove the sprinkler from the hose.
- Use a small brush or a toothpick to clear the nozzle holes.
- Rinse the nozzles with clean water.
- Reattach the sprinkler to the hose.
These steps help ensure your sprinkler sprays water evenly. Repeat this process as needed to keep the nozzles clean.
Preventing Future Clogs
Preventing future clogs can save you time and effort. Here are some tips:
- Use a water filter to remove particles from the water.
- Clean the nozzles regularly, at least once a month.
- Store the sprinkler in a clean, dry place when not in use.
By following these tips, you can keep your Melnor sprinkler in good condition. Clean nozzles ensure better water distribution and a healthier garden.
Replacing Parts
Replacing parts in a Melnor sprinkler can extend its lifespan and efficiency. Knowing how to identify and replace worn parts ensures your sprinkler works optimally. This guide will help you tackle common Melnor sprinkler issues by replacing parts.
Identifying Worn Parts
Start by inspecting your sprinkler for any visible damage. Look for cracks, rust, or wear on the sprinkler head and hoses. Listen for unusual noises when the sprinkler is on. If the water pressure is low, there may be a blockage or worn-out part. Pay attention to any leaks, as they often indicate a part needs replacement.
Step-by-step Replacement
First, gather the necessary tools and replacement parts. Turn off the water supply to the sprinkler. Remove the damaged part carefully. For the sprinkler head, unscrew it from the base. Replace it with a new head, ensuring it fits securely. For hoses, detach the worn hose and attach the new one firmly. Check for any leaks after replacing the parts. Turn on the water supply and test the sprinkler. Ensure it operates smoothly without any issues.
Winterizing Your Sprinkler
Winterizing your Melnor sprinkler is essential to keep it in good condition. The cold weather can damage the sprinkler if not properly winterized. This guide will walk you through the steps to ensure your sprinkler is ready for the next season.
Draining Water
First, turn off the water supply to your sprinkler system. This prevents any new water from entering the pipes. Next, open the drain valves to let the water flow out. If your system has multiple zones, repeat this step for each zone. It’s important to ensure all water is drained to prevent freezing and cracking.
Use an air compressor to blow out any remaining water. Connect the compressor to the mainline of the sprinkler system. Set the pressure to 50 psi to avoid damaging the pipes. Run the compressor until no more water comes out of the sprinkler heads. This step ensures that every drop of water is removed.
Storing Properly
Once the sprinkler system is dry, disconnect all hoses and attachments. Store them in a dry place to prevent rust and damage. Place the sprinkler heads in a container with a lid. This keeps them clean and prevents any dirt buildup.
Keep your sprinkler controller in a safe place. Remove the batteries to prevent corrosion. Store the controller in a cool, dry area. This protects the electronics from moisture and cold temperatures.
| Step | Action |
|---|---|
| 1 | Turn off the water supply |
| 2 | Open drain valves |
| 3 | Use air compressor |
| 4 | Disconnect hoses and attachments |
| 5 | Store sprinkler heads |
| 6 | Remove and store the controller |
Following these steps ensures your Melnor sprinkler remains in good condition through winter. Proper winterization prevents damage and extends the life of your sprinkler system.
Credit: melnor.com
When To Call A Professional
Sometimes, your Melnor sprinkler may face issues that simple troubleshooting cannot fix. In such cases, it’s essential to know when to call a professional. Knowing the right time can save you from further damage and costly repairs. Below are some scenarios where professional help is recommended.
Complex Issues
If your Melnor sprinkler system has complex mechanical problems, it’s time to call an expert. These issues include:
- Broken internal components
- Electrical malfunctions
- Pressure regulation issues
These issues require technical skills and specialized tools. A professional can diagnose and fix these problems effectively.
Warranty Considerations
Your Melnor sprinkler may still be under warranty. Attempting to fix it yourself could void the warranty. Check your warranty terms before doing any repairs.
Many warranties cover:
- Defective parts
- Labor costs
- Replacement units
Hiring a professional ensures the warranty remains valid. This can save you money in the long run.
Frequently Asked Questions
Why Is My Melnor Sprinkler Not Rotating?
Your Melnor sprinkler may not rotate due to clogged nozzles. Clean them to ensure smooth operation.
How Do I Fix Low Water Pressure In My Melnor Sprinkler?
Check for leaks in the hose or connections. Ensure the water source is fully open.
What Should I Do If My Melnor Sprinkler Leaks?
Inspect the connections and seals. Tighten any loose parts and replace damaged washers.
Why Is My Melnor Sprinkler Not Spraying Evenly?
Uneven spraying can be caused by blocked nozzles. Clean them regularly to maintain even water distribution.
How Can I Adjust The Spray Pattern On My Melnor Sprinkler?
Use the adjustment knobs or levers on the sprinkler to set the desired spray pattern. Follow the manual instructions.
Conclusion
Troubleshooting your Melnor sprinkler doesn’t have to be difficult. Follow these simple steps. Check water pressure, inspect the sprinkler head, and clean any debris. Replace worn-out parts if necessary. Regular maintenance can prevent many issues. Proper care ensures your garden stays lush and green.
Understanding your Melnor sprinkler can save you time and effort. Keep this guide handy for future reference. Enjoy a well-watered garden with minimal fuss. Happy gardening!
")


