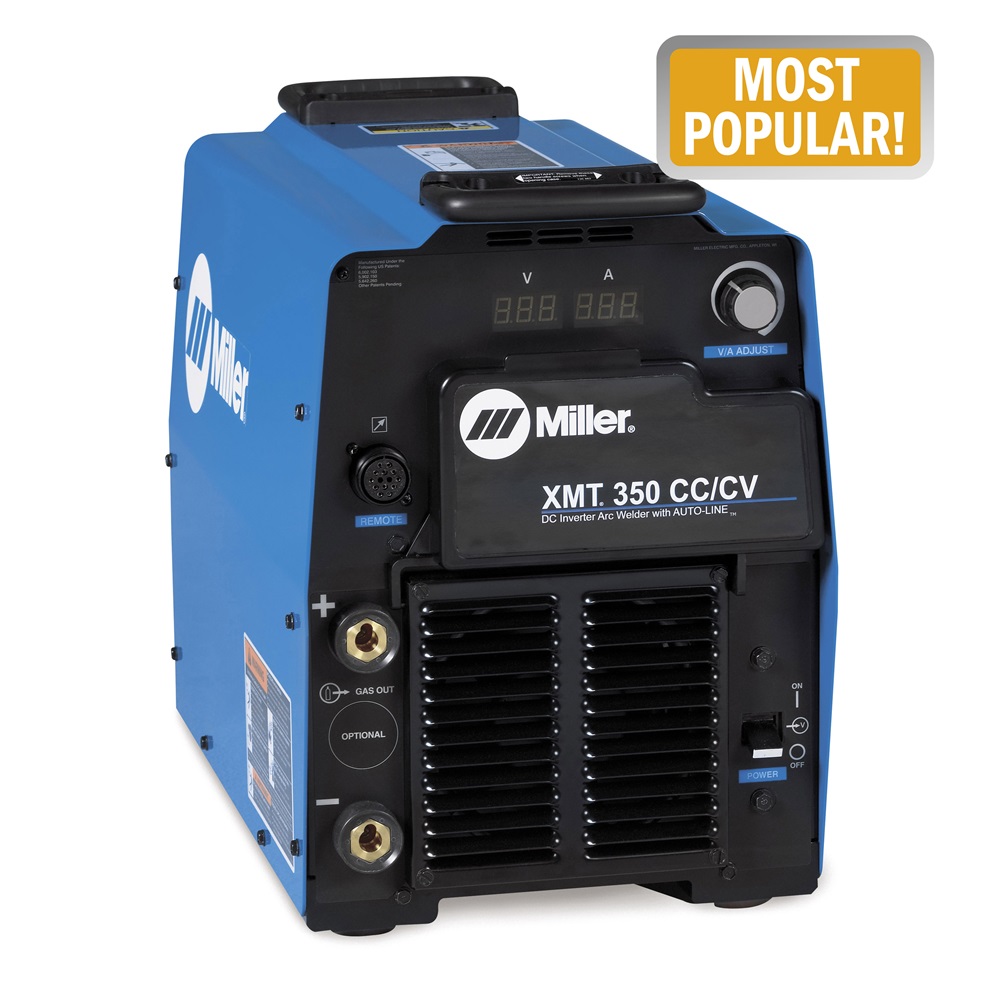
Are you struggling with issues on your Miller XMT 350 CC/CV and feeling stuck? You’re not alone.
Troubleshooting welding equipment can be frustrating, especially when you’re in the middle of a project and time is ticking. But here’s the good news: most problems with the Miller XMT 350 CC/CV can be fixed quickly once you know where to look.
We’ll break down the most common issues, show you exactly how to identify them, and guide you step-by-step toward solutions that actually work. Stick around—because by the end of this, you’ll feel more confident and in control of your machine than ever before. Let’s get your welder back to work!
Credit: www.canadianmetalworking.com
Common Issues With Miller Xmt 350 Cc Cv
The Miller Xmt 350 Cc Cv welder is known for its reliability. Yet, like any machine, it can encounter problems over time. Regular maintenance and troubleshooting can help resolve most issues. Below are some common issues users face and how to address them.
Power Supply Failures
Power supply issues are a frequent concern with the Miller Xmt 350. These problems often stem from loose connections or damaged cables. Inspect the power cord for visible wear or breaks. Ensure the connections are tight and free of corrosion. Faulty circuit boards may also cause power issues. If the welder fails to turn on, professional service may be required.
Erratic Arc Performance
Unstable arc performance can disrupt welding quality. This issue often arises from incorrect settings or worn consumables. Check the electrode and work cable connections for proper attachment. Ensure the gas flow rate aligns with the material being welded. Dirty or damaged contact tips can also impact arc stability. Replacing worn parts often resolves this problem.
Overheating Problems
Overheating can occur during prolonged use or in high-temperature environments. The internal cooling fan may not function correctly, causing heat buildup. Ensure the machine’s ventilation is unobstructed and the fan is operational. Excessive heat can damage internal components, so allow the welder to cool before restarting.
Display Error Codes
The Miller Xmt 350 displays error codes to indicate specific issues. These codes help identify problems like overheating, power faults, or improper settings. Refer to the user manual to decode these messages. Resetting the welder often clears minor errors. Persistent error codes may require professional diagnostics to address underlying faults.
Essential Tools For Troubleshooting
When troubleshooting the Miller XMT 350 CC/CV, having the right tools can make all the difference. Not only do these tools save time, but they also help pinpoint problems accurately. If you’re a welding professional or a DIY enthusiast, you’ll want to ensure your toolkit is equipped with these essential items.
Multimeters And Test Leads
A multimeter is a must-have for any troubleshooting task. It helps you measure voltage, current, and resistance in circuits. Whether you’re checking for continuity or diagnosing erratic readings, a multimeter is your go-to tool.
Invest in quality test leads that can handle high currents and provide secure connections. Look for leads with insulated grips to ensure safety during testing. If your multimeter has advanced features, like auto-ranging, it can save you time during diagnostics.
Oscilloscopes For Circuit Analysis
Oscilloscopes are essential for analyzing circuit behavior. They let you visualize electrical signals and detect irregularities that might not show up on a multimeter. If you’re dealing with complex issues like waveform distortion, an oscilloscope is invaluable.
For the Miller XMT 350, an oscilloscope can help you check the power conversion circuits for stability. Portable models are convenient, especially if you’re working onsite. Do you already have one in your toolkit?
Cooling System Inspection Tools
Overheating is a common issue in welding machines, and the Miller XMT 350 is no exception. Cooling system inspection tools, like infrared thermometers, allow you to measure surface temperatures quickly. These tools help identify hotspots in the cooling system.
Don’t forget to check the cooling fans and airflow pathways. A can of compressed air can help clear out debris that might be blocking airflow. Regular inspections can prevent overheating and extend your machine’s lifespan.
Manufacturer’s Manual And Guidelines
The manufacturer’s manual is your troubleshooting bible. It provides step-by-step instructions tailored to the Miller XMT 350. Keep it handy and refer to it whenever you’re stuck.
Most manuals also include wiring diagrams and error code explanations. These can save you hours of guesswork. If you’ve misplaced your manual, many manufacturers offer digital copies online. Have you checked if yours is readily available?
Equipping yourself with these tools ensures smoother troubleshooting and faster problem-solving. Each tool serves a specific purpose, so don’t skip any of them. What’s in your toolkit right now? Are you missing any of these essentials?
Step-by-step Fixes For Power Issues
Experiencing power issues with your Miller XMT 350 CC/CV can be frustrating. Whether you’re in the middle of a critical welding project or just setting up, a power hiccup can disrupt your workflow. The good news? Many of these problems can be solved by following a systematic approach. Let’s dive into the key steps to get your machine back on track.
Checking Power Connections
Start by examining the power cord and plug. Are there visible signs of wear, like fraying or burns? A damaged cord can lead to intermittent power supply or complete failure.
Next, ensure the plug is firmly inserted into the outlet. A loose connection can cause power fluctuations. If you’re using an extension cord, confirm it’s rated for the machine’s amperage to avoid overheating or voltage drops.
Inspecting Circuit Breakers
Head over to your breaker panel. Is the breaker for your machine tripped? A tripped breaker could be a sign of a short circuit or an overload.
Reset the breaker and observe. If it trips again immediately, your machine might be drawing too much power or there could be an issue with your electrical supply.
Testing The Internal Fuse
Open the machine’s panel and locate the internal fuse. A blown fuse can prevent the machine from powering on.
Check the fuse visually or use a multimeter to test for continuity. If it’s blown, replace it with a fuse of the same rating—using the wrong type can damage your equipment.
Addressing Voltage Fluctuations
Voltage instability can wreak havoc on your Miller XMT 350. Use a voltmeter to check the voltage at the power outlet.
If the voltage is inconsistent, consider installing a voltage stabilizer or contacting an electrician to resolve the issue. Consistent power is crucial for your machine to operate effectively.
Power issues can feel overwhelming, but they’re often easier to fix than you think. By systematically addressing each component, you’ll save time and get back to welding faster. What’s the first thing you’ll check on your machine today?
Credit: www.ebay.com
Resolving Arc Performance Problems
Arc performance problems with the Miller XMT 350 CC/CV can be frustrating, especially when you’re in the middle of an important welding project. A weak or inconsistent arc can lead to poor weld quality and wasted time. The good news? You can address most of these issues with a few targeted troubleshooting steps. Let’s break it down so you can get back to welding with confidence.
Calibrating Voltage And Amperage
Incorrect voltage or amperage settings are often the root cause of arc issues. Always double-check your machine’s settings before starting a weld. Refer to the user manual for material-specific recommendations.
Use a multimeter to test your voltage and amperage output. If they differ significantly from the display on the machine, it may need recalibration. Regular calibration ensures your machine performs as expected, especially if you frequently switch between different materials or processes.
Cleaning Or Replacing The Torch
A dirty or worn-out torch can disrupt your arc stability. Inspect the torch regularly for signs of carbon buildup, spatter, or damage. Even a small amount of debris can lead to inconsistent performance.
Clean the torch with a wire brush or replace it entirely if wear is evident. Don’t overlook the consumables like nozzles and contact tips—these small parts play a big role in arc quality. Keeping your torch in top condition can save you hours of frustration.
Inspecting Cables And Connectors
Damaged cables or loose connections can interfere with the flow of electricity, weakening your arc. Carefully examine all cables for cuts, frays, or burns. Even minor damage can create big problems during welding.
Ensure all connectors are tight and free from corrosion. A quick wipe with a contact cleaner can improve conductivity. Taking five minutes to inspect your cables can prevent hours of troubleshooting down the line.
Adjusting Weld Settings For Material Type
Different materials require different settings. Using the wrong parameters can make the arc unstable or ineffective. Review the material thickness, type, and joint configuration before setting up your weld.
Use the Miller XMT 350’s chart or settings guide to adjust parameters like travel speed, wire feed, and polarity. For example, aluminum might require AC polarity, while steel may work better with DC. Tailoring your settings ensures you get a clean, strong weld every time.
Have you tried these steps and still face issues? It might be time to consult a professional technician. However, more often than not, these simple adjustments will restore your arc’s performance and keep your projects on track.
Dealing With Overheating
Overheating is a common issue that can disrupt the functionality of your Miller XMT 350 CC/CV welding machine. If left unchecked, it can lead to downtime, costly repairs, or even permanent damage. Knowing how to troubleshoot overheating effectively can help you avoid these headaches and keep your machine running smoothly.
Inspecting Fan Functionality
The cooling fan is crucial for preventing overheating. Check if the fan turns on automatically when the machine heats up. If it doesn’t, it might be due to a faulty wiring connection or a damaged motor.
Listen for unusual noises when the fan operates. A grinding or buzzing sound can indicate wear and tear, which may require replacement. Make fan inspection part of your routine maintenance for better performance.
Clearing Dust And Debris
Dust buildup can block airflow and hinder cooling. Open the machine’s panels and inspect the vents for accumulated debris. Using compressed air can help you clear out stubborn dirt.
If you’ve noticed overheating issues after working in dusty environments, this could be the root cause. Keep the machine clean regularly to minimize heat-related problems.
Checking Thermal Shutdown Systems
Miller XMT 350 CC/CV machines are equipped with thermal shutdown systems that activate when the unit overheats. If your machine shuts down frequently, it’s a sign that the cooling system isn’t working efficiently.
Verify if the thermal sensors are functioning correctly. Faulty sensors can cause premature shutdowns or fail to activate protection mechanisms. Replacing worn sensors could save you from recurring issues.
Ensuring Proper Ventilation
Ventilation is key to maintaining the right operating temperature. Check if the machine is placed in an area with adequate airflow. Avoid placing it near walls or other obstructions that can trap heat.
Consider using external fans or relocating the machine to a cooler spot if the workspace is naturally hot. Small adjustments to improve air circulation can make a big difference in preventing overheating.
Have you experienced overheating issues with your Miller XMT 350 CC/CV? What troubleshooting steps worked for you? Share your insights below to help others tackle this common problem!
Credit: www.millerwelds.com
Decoding And Fixing Error Codes
The Miller XMT 350 CC/CV welder is a powerful and versatile machine, but like all equipment, it can encounter issues. Error codes act as its way of communicating problems to you. Decoding and addressing these codes quickly can save you time, money, and frustration. Let’s break down the process step by step, so you’re not left scratching your head when your machine starts flashing unfamiliar numbers.
Understanding Manufacturer Error Codes
Miller has a system of error codes designed to identify specific problems. These codes appear on the machine’s display panel and are often a combination of letters and numbers, such as “HELP 31” or “Err 14”.
Each code corresponds to a particular issue. For instance, “HELP 31” usually signals overheating, while “Err 14” might point to a communication failure between components.
Refer to the user manual to decode these messages. If you’ve misplaced the manual, Miller’s website has downloadable PDFs for most models. Keep this resource handy—it’s your first step to solving the problem.
Steps To Clear Error Messages
Some error codes don’t indicate major faults and can be cleared with simple steps. Start by powering off the machine and letting it rest for 10–15 minutes. This allows any internal sensors to reset.
Next, check for obvious issues like loose cables, blocked vents, or improper voltage settings. Fix these and power the machine back on to see if the error persists.
If the code is still there, try a factory reset. Consult your manual for instructions specific to your model. Always double-check that you’re not erasing critical settings before resetting.
When To Replace Internal Components
Not all issues can be fixed with a reset or quick adjustment. If error codes persist, internal components like capacitors or circuit boards might be damaged. Signs include recurring errors or the machine shutting off unexpectedly.
Replacement isn’t always a DIY project. If you’re comfortable, you can open the unit to inspect for visible damage, such as burnt marks or swollen parts. However, working with electrical components carries risks, so proceed cautiously.
In many cases, taking the machine to a certified technician is the safest option. They have the tools and expertise to diagnose deeper mechanical or electrical faults.
Contacting Customer Support For Persistent Issues
Sometimes, even after trying everything, the error codes won’t go away. This is where Miller’s customer support team can step in. They’re trained to assist with troubleshooting and may offer solutions you hadn’t considered.
Before reaching out, gather key information like the error code, model number, and any steps you’ve already tried. This will make the conversation more efficient and productive.
If your machine is under warranty, customer support can guide you on how to get repairs or replacements at no additional cost. Don’t hesitate to use this service—it’s part of what you paid for when you bought the welder.
Troubleshooting error codes doesn’t have to be overwhelming. By understanding the messages, taking logical steps, and seeking help when needed, you can get your Miller XMT 350 CC/CV back to work faster. What’s the most confusing error code you’ve encountered? Let us know in the comments!
Preventative Maintenance Tips
The Miller XMT 350 CC/CV is a reliable welding machine. To keep it working efficiently, regular preventative maintenance is essential. Proper care reduces downtime and extends its lifespan. Below are key maintenance tips to ensure optimal performance.
Regular Cleaning And Inspection
Dust and debris can harm the machine’s internal components. Clean the machine’s exterior weekly using a soft cloth. Inspect vents for blockages and remove dirt with compressed air. Check cables and connectors for wear or damage. Replace worn parts immediately to prevent bigger issues.
Monitoring Usage Patterns
Track how often and how long the machine is used. Avoid overloading the machine or using it beyond its duty cycle. Excessive use can lead to overheating or wear. Adjust usage patterns to match the machine’s specifications. This helps maintain efficiency and prevents unnecessary stress.
Updating Firmware And Software
Firmware updates improve machine functionality and fix potential bugs. Check the manufacturer’s website for updates regularly. Follow the instructions to install updates safely. Updated software ensures the machine runs smoothly and integrates with newer tools.
Scheduling Professional Servicing
Routine professional servicing is crucial for detecting hidden issues. Schedule annual servicing with authorized technicians. They can test internal parts and replace worn components. Professional checks ensure the machine stays in peak condition.
When To Seek Professional Help
Knowing when to tackle a repair yourself and when to call an expert can save you time, money, and frustration. The Miller XMT 350 CC/CV is a robust welding machine, but troubleshooting its issues can sometimes get complicated. If you’re facing challenges that seem beyond your skill set, it may be time to seek professional help.
Identifying Complex Electrical Failures
Electrical problems can be tricky and even dangerous to handle without the right expertise. If your XMT 350 shows erratic behavior like inconsistent arc performance or power surges, it might signal deeper electrical issues. These types of failures often require specialized diagnostic tools, which professionals are equipped with.
Attempting to fix complex electrical failures on your own could worsen the situation or lead to safety hazards. Think about it—do you really want to risk damaging an expensive machine or, worse, endangering yourself? If the problem involves circuit boards or internal wiring, it’s best to leave it to certified technicians.
Determining Cost-effectiveness Of Repairs
Not every repair is worth doing, especially if the costs outweigh the benefits. If your XMT 350 is older and keeps breaking down, you might need to evaluate whether repairing is more expensive than replacing. Professionals can give you a clear estimate of repair costs so you can make an informed decision.
Ask yourself: Is it smarter to invest in a new machine rather than continue sinking money into repairs? A professional can help you weigh the pros and cons based on the extent of the damage and the machine’s overall condition.
Warranty And Service Options
Your Miller XMT 350 may still be under warranty, which could cover certain repairs. Before you attempt anything yourself, check the warranty terms. Unauthorized repairs could void the warranty, leaving you with bigger expenses down the line.
If your machine qualifies for free or discounted repairs under warranty, why not take advantage of it? Contacting a Miller service center could save you from unnecessary hassle and costs.
Choosing Certified Repair Technicians
Not all repair technicians are equal. Certified professionals have the training and experience to handle complex issues specific to Miller machines. Choosing a certified technician ensures your XMT 350 gets the care it deserves.
Look for technicians who are accredited by Miller or have strong reviews from other customers. You wouldn’t trust just anyone with your car; why treat your welding machine any differently?
Remember, your Miller XMT 350 is an investment. Treating it with care and calling in experts when needed will keep it running smoothly for years to come. So, what’s stopping you from picking up the phone and seeking help when things get complicated?
Conclusion
Troubleshooting the Miller XMT 350 CC/CV doesn’t have to feel overwhelming. Focus on common issues like power, connections, or settings first. Regular maintenance prevents many problems and keeps the machine running smoothly. Always consult the manual for guidance and safety tips.
If problems persist, seek help from a qualified technician. Proper care ensures better performance and longer equipment life. Keep tools and resources handy for quick fixes when needed. By staying proactive, you’ll save time and avoid unnecessary downtime. A little effort now goes a long way toward keeping your equipment reliable.
")


