Replacing a Moen 1225 cartridge can seem daunting. Many encounter issues during the process.
Understanding how to troubleshoot these problems is crucial. Moen 1225 cartridges control water flow in faucets. Over time, they wear out, leading to leaks or poor water pressure. Replacing them restores function but can bring challenges. This guide will help you navigate common issues.
From stuck cartridges to improper installation, we cover it all. Whether you’re a DIY enthusiast or a novice, our troubleshooting tips will make the replacement process smoother. Let’s dive into the most common problems and their solutions.
Credit: www.youtube.com
Introduction To Moen 1225 Cartridge
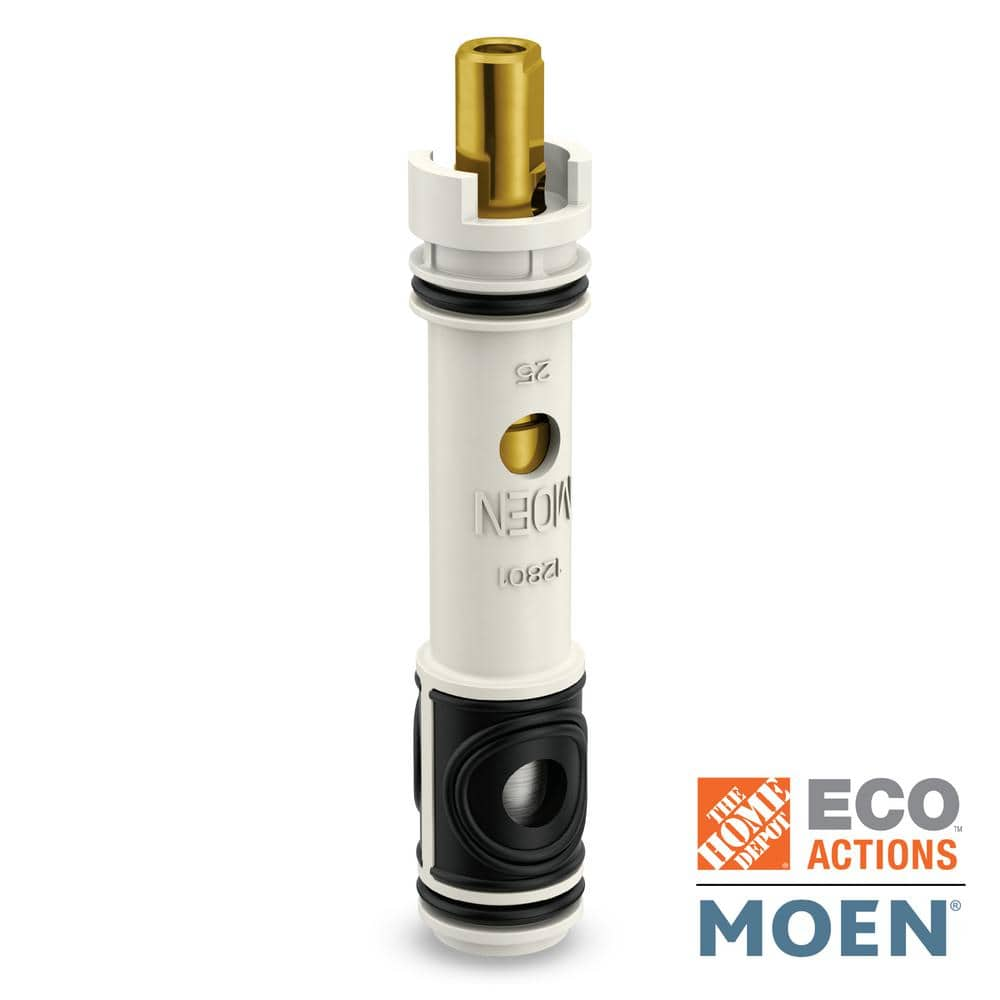
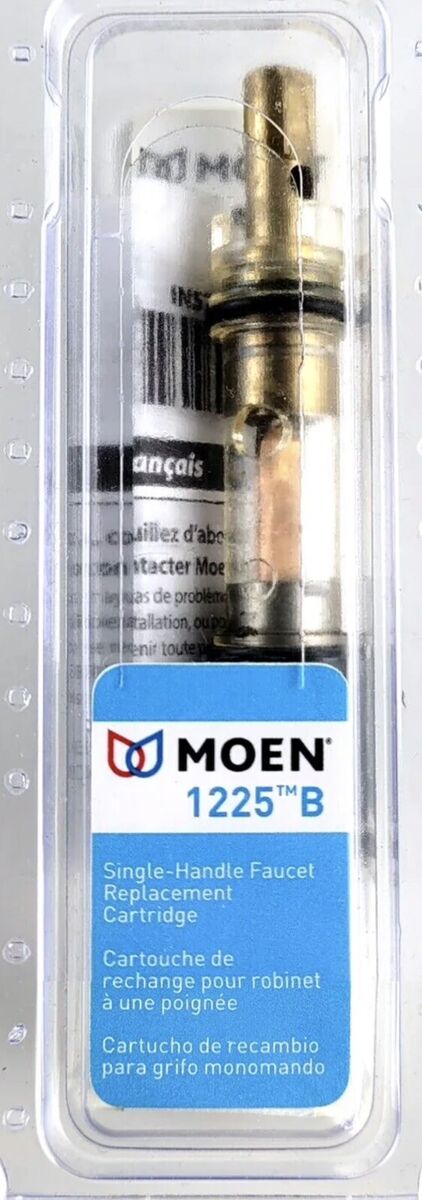
The Moen 1225 cartridge is a vital part of many Moen faucets. This component controls water flow and temperature. Over time, it may wear out or malfunction. Understanding its importance helps in maintaining your faucet’s performance.
Common Issues
Many users face certain issues with the Moen 1225 cartridge. A frequent problem is leaking. This happens when the cartridge’s seals wear out. Water may drip from the faucet even when turned off. Low water pressure is another issue. This occurs due to blockages in the cartridge. Sometimes, the faucet handle becomes hard to turn. This indicates internal cartridge damage.
Importance Of Replacement
Replacing the Moen 1225 cartridge is crucial. It ensures your faucet works efficiently. A new cartridge stops leaks, saving water and reducing bills. It also restores proper water flow and pressure. This enhances your overall experience. Regular replacement prevents long-term damage to the faucet. This can save you from costly repairs.
Credit: www.homedepot.com
Tools Needed
Replacing the Moen 1225 cartridge can sometimes be a challenge. Having the right tools is essential. This guide will cover the essential and optional tools needed. This will help make the replacement process smooth and efficient.
Essential Tools
To replace the Moen 1225 cartridge, you will need some essential tools. These tools ensure you can complete the job without any problems.
- Adjustable Wrench: This is crucial for loosening and tightening nuts.
- Screwdriver: A Phillips head or flathead screwdriver will help remove screws.
- Cartridge Puller: A cartridge puller makes it easy to remove the old cartridge.
- Plumber’s Grease: Use this to lubricate the new cartridge for easy installation.
- Bucket or Towel: Place a bucket or towel under the sink to catch any water.
Optional Tools
While not necessary, these optional tools can make the job easier and more efficient.
- Needle-Nose Pliers: These are useful for gripping small parts and pulling them out.
- Allen Wrench: Some faucets may require an Allen wrench to remove certain screws.
- Flashlight: A flashlight can help you see better in dark or tight spaces.
- Pipe Wrench: Useful if the adjustable wrench is not sufficient for larger nuts.
- Replacement O-Rings: Sometimes the O-rings may need replacement to prevent leaks.
Having these tools ready will help you replace your Moen 1225 cartridge efficiently. Ensure you have everything you need before starting the project.
Preparation Steps
Replacing the Moen 1225 cartridge can seem challenging, but with the right steps, it’s doable. The first step is preparation. Proper preparation ensures a smooth and hassle-free replacement process. Below are the key preparation steps to follow before you start.
Turning Off Water Supply
Before you begin, it is critical to turn off the water supply. This prevents any water damage or mess during the replacement. Follow these steps:
- Locate the main water valve. It is usually in the basement or near the water meter.
- Turn the valve clockwise to shut off the water.
- Open a faucet to release any remaining water in the pipes.
Gathering Supplies
Having all the necessary tools and supplies ready will make the replacement process smoother. Here is a list of items you will need:
- Replacement Moen 1225 cartridge
- Adjustable wrench
- Needle-nose pliers
- Flat-head screwdriver
- Cloth or towel
Make sure you have all these tools within reach to avoid any interruptions during the process.
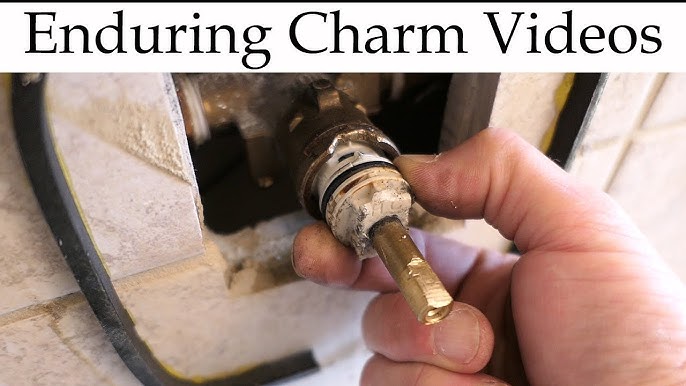
Removing The Old Cartridge
Removing the old cartridge from your Moen 1225 faucet can be a bit tricky. But with the right steps, you can do it easily. Let’s look at how to disassemble the faucet and extract the cartridge.
Disassembling The Faucet
First, turn off the water supply to the faucet. This step is crucial to avoid any water mess. Next, cover the sink drain with a cloth. This will prevent small parts from falling into the drain.
Now, use a screwdriver to remove the handle screw. Keep the screw in a safe place. Gently pull the handle off the faucet. Set the handle aside.
After removing the handle, you will see a retaining clip. Use pliers to pull the clip out. Be careful not to damage it. The clip holds the cartridge in place.
Extracting The Cartridge
With the retaining clip removed, you can now see the cartridge. Use pliers to grip the cartridge stem. Pull it up gently. The cartridge might be stuck due to mineral buildup.
If the cartridge is stuck, use a cartridge puller tool. This tool makes the job easier. Place the tool over the cartridge and turn it to loosen the cartridge. Then pull it out.
Inspect the old cartridge for any damage or wear. This will help you understand why it needed replacement. Clean the inside of the faucet before installing a new cartridge.
Follow these steps carefully to remove the old cartridge. Your Moen faucet will work smoothly again.
Installing The New Cartridge
Replacing a Moen 1225 cartridge can solve many faucet issues. Follow these steps to install the new cartridge correctly. Proper installation ensures your faucet operates smoothly without leaks. Let’s dive into the details.
Inserting The Cartridge
First, ensure the area is dry and clean. Remove any debris. A clean surface helps the new cartridge fit snugly.
Next, take the new cartridge and align it with the faucet body. Look for the tabs on the cartridge. These tabs align with the notches in the faucet body. Proper alignment ensures the cartridge fits perfectly.
Once aligned, gently push the cartridge into the faucet body. Apply firm, even pressure. Avoid using excessive force. The cartridge should slide in smoothly. If it doesn’t, recheck the alignment.
Reassembling The Faucet
After inserting the cartridge, it’s time to reassemble the faucet. Start with the retaining clip. This clip holds the cartridge in place. Insert the clip into its slot. Ensure it snaps into place securely.
Next, reattach the faucet handle. Align the handle with the cartridge stem. Secure it with the set screw. Tighten the screw using a screwdriver. Avoid over-tightening to prevent damage.
Finally, turn on the water supply. Check for any leaks. If there are no leaks, your Moen 1225 cartridge replacement is successful. Enjoy your smoothly operating faucet!
Credit: www.ebay.com
Testing For Leaks
Testing for leaks is an essential step after replacing your Moen 1225 cartridge. Ensuring there are no leaks helps maintain the integrity of your plumbing system. Follow these steps to check for any leaks in your newly installed cartridge.
Turning On Water Supply
First, turn on the water supply. This will allow you to check if the installation was successful. Locate the main water valve and turn it on slowly. This prevents sudden pressure that might cause damage. Observe the cartridge area as the water flows.
Checking For Drips
Next, check for drips around the cartridge. Look closely at the base and the connections. Even a small drip indicates a potential problem. Tighten any loose fittings carefully. Use a dry cloth to wipe the area and check for new drips.
If you find no drips, the installation is likely successful. Keep an eye on the cartridge over the next few days. This ensures no hidden issues arise. A well-sealed cartridge will keep your faucet functioning smoothly.
Troubleshooting Common Issues
Replacing the Moen 1225 cartridge can sometimes lead to problems. Understanding these issues can help you fix them quickly. This section will cover some of the most common problems you may encounter.
Cartridge Stuck
One common problem is a stuck cartridge. Mineral buildup can cause this. First, turn off the water supply. Use a wrench to gently wiggle the cartridge. Applying a penetrating oil can help loosen it. Let the oil sit for a few minutes. Then, try wiggling the cartridge again. If it remains stuck, you may need a cartridge puller. This tool can provide extra leverage. Always follow the manufacturer’s instructions. Be patient and avoid using too much force.
Persistent Leaks
Leaks after replacement can be frustrating. First, ensure the new cartridge is properly aligned. Misalignment can cause leaks. Check the O-rings for damage. Replace them if necessary. Tighten all connections securely. Turn on the water supply. Check for leaks at different points. If leaks persist, the issue might be with the valve body. Inspect the valve body for any damage or wear. In some cases, you may need to replace the entire valve body.
Maintenance Tips
Maintaining your Moen 1225 Cartridge ensures it works smoothly and lasts longer. Regular care prevents issues and keeps the cartridge in top shape. Here are some maintenance tips to keep your cartridge functioning properly.
Regular Inspection
Inspect your Moen 1225 Cartridge every few months. Check for signs of wear or damage. Look for leaks around the cartridge area. If you notice any, it may need replacement.
During inspection, turn the faucet handle. Ensure it moves smoothly. If you feel resistance or hear strange noises, it might indicate an issue. Identifying these problems early can save you from bigger repairs.
Cleaning The Cartridge
Cleaning the Moen 1225 Cartridge is crucial for its longevity. Follow these steps to clean it effectively:
- Turn off the water supply.
- Remove the faucet handle using a screwdriver.
- Pull out the cartridge carefully.
- Clean the cartridge with a soft brush and vinegar. This helps remove mineral deposits.
- Rinse the cartridge with water.
- Reinstall the cartridge and handle.
- Turn on the water supply and test the faucet.
For best results, clean the cartridge every six months. Regular cleaning keeps it functioning properly and extends its lifespan.
| Step | Description |
|---|---|
| 1 | Turn off the water supply. |
| 2 | Remove the faucet handle. |
| 3 | Pull out the cartridge. |
| 4 | Clean with a soft brush and vinegar. |
| 5 | Rinse with water. |
| 6 | Reinstall the cartridge and handle. |
| 7 | Turn on the water supply and test. |
Following these maintenance tips ensures your Moen 1225 Cartridge works efficiently and lasts longer. Regular inspection and cleaning are key.
When To Call A Professional
Replacing a Moen 1225 cartridge may seem simple. But sometimes, unexpected problems arise. In such cases, calling a professional can save time and prevent damage. Knowing when to seek help ensures a smooth repair process.
Complex Issues
Some problems go beyond basic troubleshooting. For instance, if the cartridge is stuck or corroded, special tools may be needed. Professionals have experience handling these situations. They can safely remove and replace the cartridge.
Another complex issue is hidden damage. A professional can identify and fix underlying problems. This ensures your faucet works correctly. Attempting complex repairs without expertise may worsen the issue.
Safety Concerns
Handling plumbing repairs involves certain risks. Water can cause damage if not properly managed. Professionals know how to control water flow. They can prevent leaks and water damage.
Using tools incorrectly can lead to injury. Professionals have the right tools and know how to use them safely. This reduces the risk of accidents. They also follow safety protocols to ensure a secure repair process.
Frequently Asked Questions
How Do I Identify A Faulty Moen 1225 Cartridge?
A faulty Moen 1225 cartridge may cause leaks, difficulty turning, or inconsistent water temperature.
What Tools Are Needed For Moen 1225 Cartridge Replacement?
You need pliers, a screwdriver, and a cartridge puller. These tools help in easy removal and installation.
How Can I Remove A Stuck Moen 1225 Cartridge?
Use a cartridge puller. It helps in extracting a stuck cartridge safely and effectively.
Why Is My Faucet Still Leaking After Replacing The Moen 1225 Cartridge?
Check for debris or incorrect installation. Ensure the cartridge is seated properly and secured tightly.
How Often Should I Replace The Moen 1225 Cartridge?
Replace it every 1-2 years. This depends on usage and water quality to maintain optimal performance.
Conclusion
Replacing a Moen 1225 cartridge can seem tricky, but it’s manageable. Follow the steps carefully, and you’ll restore your faucet’s function. Use the right tools and take your time. If issues persist, consult a professional plumber. Regular maintenance can prevent future problems.
This guide aims to help you solve common issues easily. With patience and attention, you can achieve a successful replacement. Enjoy a properly working faucet again!
")