The One Touch Ultra 2 is a popular glucose meter. It helps many manage their diabetes.
But, like any device, it can have issues. Troubleshooting these problems can be confusing and stressful. In this post, we will guide you through common problems with the One Touch Ultra 2. Understanding these issues and their fixes can save you time and frustration.
Whether it’s a display problem or an error message, we’ve got you covered. Our goal is to make your device work smoothly again. Let’s dive into the details and solve these common issues together.
Credit: professional.onetouch.ca
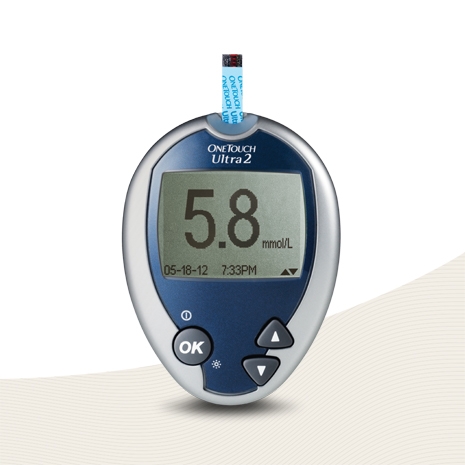
Introduction To One Touch Ultra 2
The One Touch Ultra 2 is a popular blood glucose meter. It helps individuals manage their diabetes with ease. This device is known for its accuracy and simplicity.
Device Overview
The One Touch Ultra 2 is designed to be user-friendly. It has a large, backlit screen for easy reading. The buttons are easy to press, making it accessible for all users.
Here are some key features:
- Large display
- Quick testing time
- Memory storage for up to 500 readings
- Simple navigation buttons
Understanding these features helps in troubleshooting.
Common Issues
Sometimes, users face issues with the One Touch Ultra 2. Below are common problems and their solutions.
| Issue | Possible Cause | Solution |
|---|---|---|
| Device won’t turn on | Dead battery | Replace the battery |
| Error message on screen | Incorrect test strip insertion | Reinsert the test strip correctly |
| Inaccurate readings | Expired test strips | Use new test strips |
To ensure proper functioning, clean the device regularly. Check the battery before each use. Always use fresh test strips.
Following these steps can resolve most issues.
Battery Problems
Having trouble with your One Touch Ultra 2 meter? One common issue users face is related to battery problems. Addressing these problems can ensure your device works smoothly. Let’s dive into some solutions.
Checking Battery Life
The first step in troubleshooting battery problems is checking the battery life. Follow these steps:
- Turn on your device by pressing the power button.
- Look for the battery icon on the screen.
- If the icon shows a low battery, it’s time to replace it.
Ensure you regularly check the battery status to avoid sudden issues during important readings.
Replacing The Battery
If your One Touch Ultra 2 indicates a low battery, you need to replace the battery. Here’s how:
- Turn off your device completely.
- Locate the battery compartment at the back.
- Open the compartment by sliding the cover.
- Remove the old battery and dispose of it properly.
- Insert the new battery, ensuring the correct polarity.
- Close the compartment securely.
- Turn on your device to check if it works.
Use high-quality batteries to ensure a longer life for your device. This will help in maintaining accurate readings and reliable performance.
Error Messages
Encountering error messages on your One Touch Ultra 2 can be frustrating. These messages are the device’s way of communicating issues. Understanding them can help you resolve problems quickly. Let’s dive into common error codes and how to fix them.
Understanding Error Codes
Error codes on the One Touch Ultra 2 indicate specific issues. Each code provides clues about what is wrong. For example, an “E-2” error usually means the test strip was removed too soon. An “E-3” error could indicate a problem with the test strip. These codes help you identify the problem.
Another common error is “E-4”. This often means the blood sample is too small. Understanding these codes can save you time. It can also help ensure accurate readings.
Steps To Resolve Errors
Resolving errors on the One Touch Ultra 2 is straightforward. First, check the test strip. Ensure it is inserted correctly. If the error persists, try using a new test strip. This often resolves “E-2” and “E-3” errors.
For “E-4” errors, ensure you have enough blood sample. The device needs an adequate sample to provide accurate readings. If the error continues, clean the device’s test strip holder. Sometimes debris can cause errors.
If you still face issues, consult the user manual. It provides detailed instructions and troubleshooting tips. Remember, keeping your device clean and using it properly reduces error messages. This ensures accurate and reliable readings.
Test Strip Issues
Test strip issues are common while using the One Touch Ultra 2. Users may face errors due to improper handling or expired strips. Let’s dive into some common problems and their solutions.
Proper Insertion
Ensure the test strip is inserted correctly. The strip should fit snugly into the meter. If not, the device may not read it. Look for the metallic end of the strip. This part should go into the meter first. Check for any debris in the slot. Clean it if necessary. Improper insertion often leads to errors. Always double-check the strip placement before testing.
Expired Strips
Always check the expiration date on your test strips. Expired strips can give inaccurate readings. Store strips in a cool, dry place. Moisture can damage them. Use the strips within the recommended time frame. Discard any expired strips immediately. Using fresh strips ensures accurate blood sugar readings.
Calibration And Accuracy
Ensuring your One Touch Ultra 2 device is calibrated correctly is vital. Accurate readings help you manage your blood glucose levels effectively. This section will guide you through the calibration process and offer tips for ensuring accurate readings.
Calibrating The Device
Calibrating the One Touch Ultra 2 is simple. Follow these steps to ensure your device is ready for accurate measurements:
- Insert a new test strip into the meter.
- Wait for the meter to turn on.
- Check the code on the test strip vial.
- Compare it with the code on the meter display.
- If they match, your device is calibrated. If not, adjust the code on the meter using the arrow buttons.
Ensuring Accurate Readings
Accurate readings are crucial for effective diabetes management. Consider these tips to ensure your readings are reliable:
- Wash hands: Clean your hands with soap and water. Dry them completely to avoid contamination.
- Use fresh strips: Always use new test strips. Expired strips can give inaccurate results.
- Proper storage: Store your test strips in a cool, dry place. Avoid extreme temperatures.
- Control solutions: Use control solutions to check the accuracy of your meter regularly.
- Consistent technique: Follow the same technique each time you test your blood sugar.
Following these steps helps ensure your One Touch Ultra 2 provides accurate readings. Proper calibration and consistent testing techniques contribute to better diabetes management.
Maintenance Tips
Keeping your One Touch Ultra 2 in great condition is essential. Proper maintenance ensures accurate readings and extends the device’s life. Follow these simple tips to keep your device functioning optimally.
Cleaning The Device
Regular cleaning is crucial for the One Touch Ultra 2. Use a soft, lint-free cloth to wipe the device. Avoid using any harsh chemicals or abrasive materials. These can damage the screen and buttons.
For the test strip port, use a small brush. Gently remove any dust or debris. Ensure the device is powered off before cleaning. This prevents any accidental readings or damage.
Storing The Device Properly
Proper storage is key to maintaining the One Touch Ultra 2. Store the device in a cool, dry place. Avoid extreme temperatures. High heat or cold can affect the battery and accuracy.
Keep the device away from direct sunlight. Exposure to sunlight can damage the internal components. Use the provided case for storage. This protects the device from dust and impact.
Ensure the test strips are also stored properly. Keep them in their original container. Close the lid tightly after each use. This prevents moisture from affecting the strips.
Software Updates
Keeping your One Touch Ultra 2 device updated ensures it works correctly. Software updates fix bugs, improve performance, and add new features. Regular updates keep your device running smoothly.
Checking For Updates
First, turn on your One Touch Ultra 2 device. Go to the settings menu. Look for the “Software Update” option. Click on it to check for any available updates. Ensure your device is connected to the internet. This allows it to check for the latest updates.
Installing Updates
If an update is available, a notification will appear. Click on the notification to start the download. Make sure your device has enough battery. It should be at least 50% charged. Connect to a stable Wi-Fi network. This ensures the update downloads without interruption.
Once the download is complete, follow the on-screen instructions. The device will guide you through the installation process. It may restart a few times during this process. Do not turn off the device or disconnect it from the power source. This could cause issues. After installation, your device will be updated with the latest software.
Credit: professional.onetouch.com
Customer Support
Experiencing issues with your One Touch Ultra 2? Don’t worry. Customer support is available to help you get back on track quickly. Support is essential for resolving any technical problems. Here, we’ll explore how to contact support and understand warranty information.
Contacting Support
If you need help with your One Touch Ultra 2, contacting customer support is a straightforward process. First, visit the official website. Look for the “Contact Us” page. You will find phone numbers and email addresses. Choose your preferred method.
Calling the customer support team provides immediate assistance. Explain your issue clearly. The representative will guide you through troubleshooting steps. For less urgent issues, emailing is a good option. Provide detailed information about your problem. Attach any relevant photos or screenshots. This helps the support team understand your issue better.
Warranty Information
It’s crucial to know your device’s warranty details. The One Touch Ultra 2 usually comes with a limited warranty. This covers defects in materials and workmanship. Check your device’s manual or the official website for specific terms.
If your device is still under warranty, you may be eligible for a repair or replacement. Contact customer support to start a warranty claim. Have your purchase receipt and device details ready. This speeds up the process. If your warranty has expired, the support team can still help. They may offer repair services for a fee.

Credit: pdf.medicalexpo.com
Frequently Asked Questions
How Do I Reset My One Touch Ultra 2?
To reset, remove the battery. Wait 10 seconds. Reinsert the battery. Turn on the device.
Why Is My One Touch Ultra 2 Not Turning On?
Check the battery. Replace it if needed. Ensure proper insertion. If it still doesn’t work, contact customer support.
What Should I Do If My Readings Seem Inaccurate?
Clean the meter and strip port. Use new strips. Check code on strip vial and meter match.
How Do I Clean My One Touch Ultra 2?
Use a damp cloth. Wipe the meter surface gently. Avoid water entering the strip port.
What Does “error 2” Mean On One Touch Ultra 2?
“Error 2” indicates a used strip or incorrect strip insertion. Use a new strip and retry.
Conclusion
Troubleshooting your One Touch Ultra 2 can seem challenging at first. With the right steps, you can solve common issues quickly. Always check the battery and test strips first. Clean your device regularly for accurate readings. If problems persist, contact customer support.
Remember, a well-maintained device ensures reliable results. Keep these tips handy for future reference. Stay patient and persistent. Happy monitoring!
")