Orbit irrigation timers are essential for efficient lawn care. They automate watering, saving time and water.
But what happens when your Orbit irrigation timer malfunctions? Troubleshooting these issues can be a daunting task, especially for beginners. Understanding common problems and their solutions can save you time and frustration. From display errors to scheduling mishaps, knowing the ins and outs of your irrigation timer is crucial.
This guide will walk you through simple steps to identify and resolve common issues with your Orbit irrigation timer. Whether you are dealing with a blank screen, stuck valve, or incorrect watering schedule, we’ve got you covered. Let’s dive into practical tips and solutions to keep your lawn healthy and your irrigation system running smoothly.
Credit: www.homedepot.com
Common Timer Issues
Orbit irrigation timers can sometimes face common issues that disrupt their functionality. These problems can be frustrating, especially when you rely on them for watering your garden or lawn. Below, we will discuss some of these common timer issues, focusing on display problems and programming errors. Understanding these issues can help you troubleshoot and fix them efficiently.
Display Problems
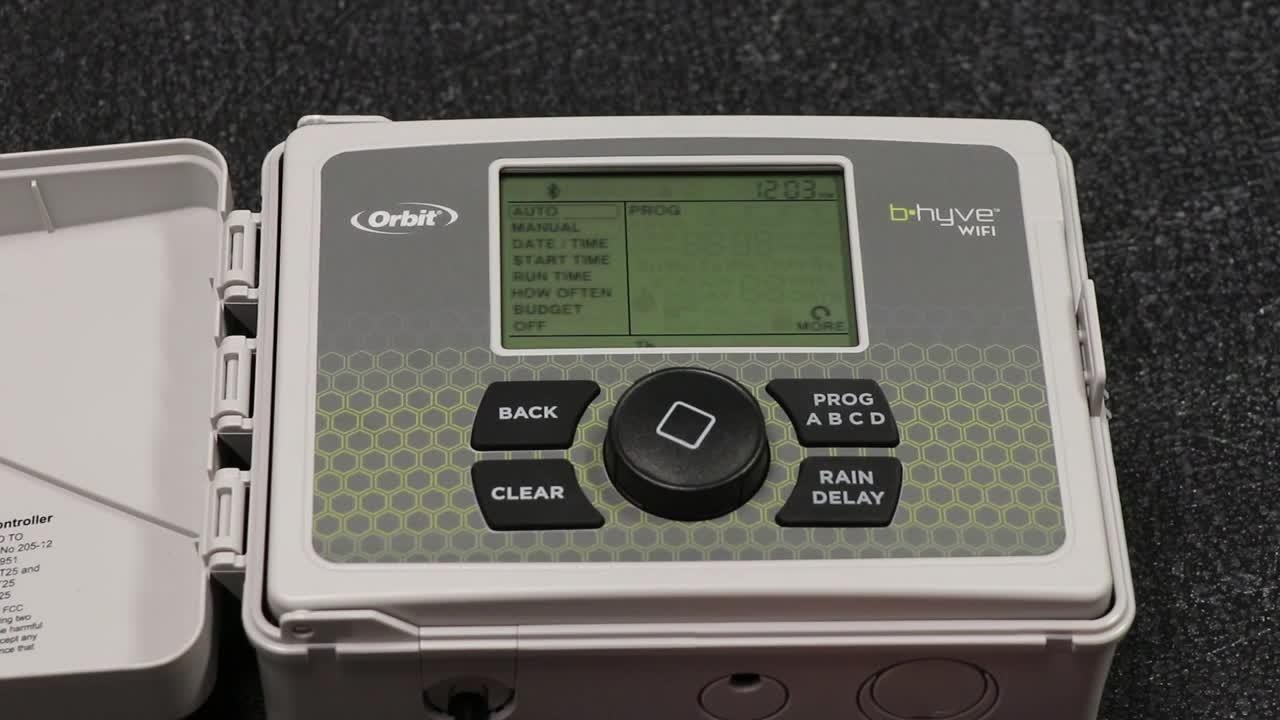
One common issue with Orbit irrigation timers is display problems. The display might be blank or show incorrect information. This can be due to various reasons, such as dead batteries or power supply issues. First, check if the batteries need replacement. If the timer is plugged in, ensure the power source is working correctly.
Sometimes, the display might be hard to read because of dirt or moisture. Clean the screen gently with a soft cloth. If the display is still not working, try resetting the timer. This often resolves minor glitches. For persistent problems, consult the user manual or contact customer support.
Programming Errors
Programming errors are another common issue with Orbit irrigation timers. These errors can cause the timer to run at incorrect times or not run at all. Verify that you have set the current time and date correctly. Incorrect settings can lead to programming errors.
Ensure you have programmed the start times, run times, and watering days accurately. Double-check each program to avoid overlapping schedules. Sometimes, clearing the timer’s memory and reprogramming from scratch can help. If you still face issues, refer to the user manual for advanced troubleshooting steps.
Timer Not Turning On
Experiencing issues with your Orbit irrigation timer not turning on? This can be frustrating, especially when your garden depends on a reliable watering schedule. Before you call a professional, there are a few troubleshooting steps you can take. These simple checks can help identify and fix the issue.
Power Source Check
First, ensure the timer is plugged into a working outlet. Sometimes, the problem is as simple as a loose plug. Test the outlet by plugging in another device. If the outlet works, the issue might be with the timer’s connection.
If your timer uses a power adapter, examine it closely. Look for any signs of damage or wear. A faulty adapter can prevent the timer from turning on. Try using a different adapter to see if the timer powers up.
Battery Replacement
If your timer runs on batteries, check them. Dead or weak batteries can cause the timer to fail. Open the battery compartment and remove the old batteries. Replace them with fresh, high-quality batteries.
Water Not Flowing
Experiencing issues with your Orbit Irrigation Timer can be frustrating, especially when water is not flowing. This is a common problem that many homeowners face. Understanding the root cause can help you fix it quickly. There are a few key areas to check when dealing with this issue.
Valve Inspection
The valve is a crucial part of your irrigation system. If the valve is not working, water will not flow. Start by checking if the valve is in the open position. Sometimes, it might accidentally get closed. Ensure the valve is free from debris. Dirt or small stones can block the valve, preventing water flow. If the valve appears damaged or worn out, consider replacing it. This can often solve the problem.
Clogged Filters
Filters play an important role in keeping your irrigation system clean. Over time, filters can get clogged with dirt and debris. This can stop water from flowing. Regularly check and clean the filters. Remove the filter and rinse it under running water. Ensure all dirt is removed before reattaching it. If the filter is too dirty or damaged, replace it with a new one. Clean filters help maintain a smooth water flow.
Incorrect Timer Settings
Incorrect timer settings can cause your Orbit irrigation system to malfunction. This can lead to under-watering or over-watering your garden. Fixing this issue is crucial for your plants’ health. Let’s explore some steps to resolve this problem.
Resetting The Timer
First, reset your timer to its default settings. This can solve many issues. Locate the reset button on your Orbit timer. Press and hold it for a few seconds. The timer will revert to its factory settings. This action often clears any programming errors.
Adjusting Watering Schedules
Next, adjust your watering schedules. Ensure the timer aligns with your garden’s needs. Set the start times and durations for each zone. Make sure the frequency matches the season. For example, water more frequently in summer. Less in winter. This ensures plants get the right amount of water.
Leaks And Drips
Dealing with leaks and drips can be a common challenge with Orbit Irrigation Timers. These issues can affect water efficiency and increase your utility bills. Addressing them promptly can save water and prevent further damage to your irrigation system.
Seal And Washer Inspection
Inspect the seals and washers regularly. Over time, they can wear out and cause leaks. Here’s how to check:
- Turn off the water supply to avoid any accidents.
- Carefully remove the timer from the faucet or hose.
- Examine the seals and washers for any signs of wear or damage.
- If you notice cracks or tears, replace them immediately.
Using high-quality replacement parts ensures a better fit and a longer lifespan.
Tightening Connections
Loose connections can be another source of leaks and drips. Follow these steps to tighten connections:
- Ensure the timer is properly attached to the faucet or hose.
- Hand-tighten the connections to avoid stripping the threads.
- If leaks persist, use a wrench for a tighter fit. Be careful not to over-tighten.
Properly tightened connections will stop leaks and improve water efficiency.
Remember, regular maintenance of your Orbit Irrigation Timer can prevent most leaks and drips. This simple routine will keep your system running smoothly.

Credit: www.amazon.com
Programming Tips
Programming an Orbit Irrigation Timer can seem daunting. But with these simple tips, you can ensure your lawn gets the right amount of water. From setting up zones to making seasonal adjustments, we’ve got you covered.
Setting Up Zones
Begin by identifying the different zones in your garden. Each zone requires a different watering schedule.
- Front Yard: Needs daily watering
- Back Yard: Water every two days
- Flower Beds: Water three times a week
To set up a zone:
- Press the “Zone” button on your timer.
- Select the zone number you want to program.
- Set the start time using the arrow buttons.
- Choose the run time for the zone.
- Repeat for each zone.
Seasonal Adjustments
Adjusting your irrigation schedule according to the season is crucial. Your garden needs different amounts of water in summer and winter.
Use the Seasonal Adjustment feature on your timer:
| Season | Adjustment Percentage |
|---|---|
| Spring | 80% |
| Summer | 100% |
| Fall | 70% |
| Winter | 50% |
To adjust:
- Press the “Seasonal Adjust” button.
- Use the arrow buttons to select the percentage.
- Press “Enter” to save the setting.
These adjustments help save water and keep your garden healthy.
Maintaining Your Timer
Maintaining your Orbit irrigation timer is crucial for its optimal performance. Regular upkeep ensures longevity and functionality, helping you conserve water and maintain a healthy garden. This section will guide you through essential maintenance tasks.
Regular Cleaning
Dust and debris can affect your timer’s performance. To clean your timer, follow these steps:
- Turn off the power to the timer.
- Remove the timer from its mounting.
- Use a soft cloth to wipe down the exterior.
- Open the battery compartment and check for corrosion.
- Use a brush to gently clean any dirt from connectors.
Cleaning regularly prevents buildup that can cause malfunctions. Ensure the area around the timer is free from dirt and insects.
Storage Tips
Proper storage during off-seasons helps prolong the life of your timer. Follow these tips for effective storage:
- Disconnect the timer from the power source.
- Remove the batteries to prevent leakage.
- Store the timer in a dry, cool place.
- Use a protective cover to shield from dust and moisture.
Consider these practices to keep your timer in peak condition. Proper storage ensures it is ready for the next season.
When To Seek Professional Help
If your Orbit irrigation timer is malfunctioning, you might try to fix it yourself. But sometimes, seeking professional help becomes necessary. Knowing when to call a technician can save you time and headaches. It also ensures your irrigation system works properly.
Identifying Complex Issues
Some problems are simple, like a dead battery or a loose wire. These are easy to fix on your own. But other issues can be more complex. If your timer does not respond to programming, it might have internal damage. This is not something you can easily fix. Another sign of a serious problem is if your timer shows error codes that you do not understand. In such cases, it is best to call a professional.
Finding A Technician
Once you decide to seek help, the next step is finding a qualified technician. Look for technicians who specialize in irrigation systems. They will have the right tools and knowledge. You can check online reviews and ask for recommendations. Make sure the technician you choose is licensed and insured. This guarantees that they will do a good job. It also protects you from liability in case of accidents.

Credit: www.youtube.com
Frequently Asked Questions
Why Is My Orbit Irrigation Timer Not Turning On?
Check the power source. Ensure the batteries are not dead or the outlet is working.
How Do I Reset My Orbit Irrigation Timer?
Locate the reset button on the timer. Press and hold it for 5 seconds.
What Does “err” Mean On Orbit Timer?
“Err” indicates an error. Check for loose wires, wrong settings, or possible electrical issues.
Why Is My Orbit Timer Skipping Scheduled Watering?
Verify the schedule settings. Ensure no rain delay is activated, and the timer is in “Auto” mode.
How Do I Change The Watering Schedule On Orbit Timer?
Press the “Program” button. Use the arrows to adjust days, start times, and run times.
Conclusion
Solving issues with your Orbit Irrigation Timer can be straightforward. Follow the steps outlined in this guide. Understanding the basic functions helps. Regular maintenance ensures longevity. Troubleshooting common problems saves time and money. Your garden will thrive with a properly working timer.
Keep this guide handy for future reference. Happy gardening!
")


