Oxygen sensor problems can affect your vehicle’s performance. Identifying and fixing them is crucial.
Your car’s oxygen sensor monitors the amount of oxygen in the exhaust gases. It helps your engine run efficiently. A faulty sensor can lead to poor fuel economy, increased emissions, and even engine damage. So, understanding how to troubleshoot oxygen sensor issues is important for any car owner.
Whether you’re a beginner or have some experience, knowing the basics will save you time and money. In this guide, we’ll explore common oxygen sensor problems and how to address them. Stay with us to keep your car running smoothly and efficiently.
Symptoms Of A Failing Oxygen Sensor
Identifying the symptoms of a failing oxygen sensor is crucial. This part ensures your vehicle runs smoothly and efficiently. An oxygen sensor monitors the amount of oxygen in your car’s exhaust. If it fails, it can lead to various problems.
Check Engine Light
A failing oxygen sensor often triggers the Check Engine Light. This is the first sign. Your car’s computer detects an issue with the sensor. It then illuminates the check engine light on your dashboard.
To confirm, use an OBD-II scanner. This tool reads the error codes from your car’s computer. A specific code for the oxygen sensor confirms the problem.
Poor Fuel Economy
Another symptom is poor fuel economy. A bad oxygen sensor can send incorrect signals to the engine’s computer. This may cause the fuel mixture to be too rich or too lean.
- You may notice more frequent trips to the gas station.
- Your car might burn more fuel than usual.
- The overall mileage per gallon decreases.
Engine Performance Issues
Engine performance can suffer from a failing oxygen sensor. You might experience engine misfires or rough idling. In some cases, your car may stall or have difficulty starting.
These issues arise because the engine is not getting the right fuel mixture. The incorrect mixture affects combustion, leading to performance problems.
Below is a summary table of the symptoms:
| Symptom | Description |
|---|---|
| Check Engine Light | Light on dashboard indicating sensor failure |
| Poor Fuel Economy | Increased fuel consumption and decreased mileage |
| Engine Performance Issues | Misfires, rough idling, stalling |
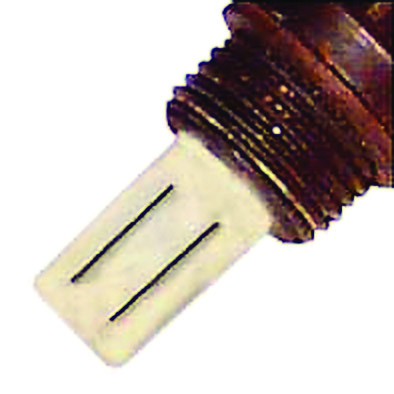
Credit: www.walkerproducts.com
Preparing For Troubleshooting
Before diving into oxygen sensor troubleshooting, it is crucial to prepare properly. This preparation ensures the process is smooth and efficient. It also helps in identifying the root cause of the problem quickly. Below are the essential steps to prepare for oxygen sensor troubleshooting.
Tools Needed
To troubleshoot an oxygen sensor, you need several tools. Here is a list of essential tools:
- OBD-II Scanner: This device reads the error codes from the vehicle’s computer.
- Multimeter: Use this to check the voltage and resistance of the sensor.
- Wrench Set: A set of wrenches is necessary to remove the oxygen sensor.
- Protective Gloves: These protect your hands from dirt and heat.
- Safety Goggles: These protect your eyes from any debris.
Safety Precautions
Safety is paramount when working on your vehicle. Follow these precautions to stay safe:
- Disconnect the Battery: Always disconnect the battery before starting any work to avoid electric shocks.
- Work in a Well-Ventilated Area: Ensure the area is well-ventilated to avoid inhaling harmful fumes.
- Wear Protective Gear: Always wear gloves and safety goggles to protect yourself.
- Let the Engine Cool Down: The engine and exhaust can be very hot. Wait until they are cool before starting.
By following these steps, you are now well-prepared to troubleshoot your oxygen sensor. This preparation ensures your safety and helps you identify the problem efficiently.
Locating The Oxygen Sensor
Finding the oxygen sensor in your vehicle is crucial for effective troubleshooting. The oxygen sensor, also known as an O2 sensor, monitors the oxygen levels in your exhaust gases. This helps your engine run efficiently. Below are some steps to locate the oxygen sensor easily.
Identifying Sensor Placement
The first step is to identify where the oxygen sensors are located. Typically, they are found in the exhaust system. Most vehicles have multiple sensors: one before the catalytic converter and one after.
The table below outlines common sensor placements:
| Sensor Position | Location |
|---|---|
| Upstream Sensor | Before the catalytic converter |
| Downstream Sensor | After the catalytic converter |
These sensors can be found by tracing the exhaust pipe from the engine back to the tailpipe. Look for a small, plug-like component connected to wires.
Reference Vehicle Manual
For more precise information, refer to your vehicle’s manual. The manual provides detailed diagrams and locations for the oxygen sensors specific to your vehicle model.
Follow these steps to use the manual effectively:
- Open the manual to the index section.
- Look up “Oxygen Sensor” or “O2 Sensor”.
- Navigate to the referenced page number.
- Review the diagrams and instructions provided.
Using the manual ensures you locate the sensors accurately and avoid unnecessary dismantling of other parts.
Knowing where to find the oxygen sensor is the first step in effective troubleshooting. Proper identification simplifies the process and saves time.
Testing The Oxygen Sensor
Testing the oxygen sensor is an essential part of vehicle maintenance. It ensures your engine runs efficiently. It also helps reduce harmful emissions. In this section, we will go through the process of testing the oxygen sensor.
Using A Multimeter
A multimeter is a useful tool for this task. It measures voltage, current, and resistance. To start, locate the oxygen sensor in your vehicle. It is usually near the exhaust manifold. Next, set your multimeter to the voltage setting. Connect the multimeter probes to the sensor’s signal and ground wires.
Turn on your car’s engine and let it idle. Observe the multimeter reading. It should fluctuate between 0.1 and 0.9 volts. If the reading is steady or outside this range, the sensor may be faulty. A faulty sensor can lead to poor fuel economy and higher emissions.
Reading Sensor Outputs
Reading the sensor outputs helps diagnose its condition. The oxygen sensor produces a voltage signal based on the oxygen level in the exhaust. A healthy sensor will produce a varying voltage signal. This signal should switch between low and high values rapidly.
If the sensor output is slow or unresponsive, the sensor might be worn out. Replacing it can restore engine performance and efficiency. For more accurate readings, use a scan tool to monitor the sensor’s live data. This tool displays the sensor’s performance in real-time.
Testing your oxygen sensor regularly can prevent engine issues. It keeps your vehicle running smoothly. A well-maintained sensor ensures better fuel efficiency and lower emissions. Keep these steps in mind for effective oxygen sensor troubleshooting.
Cleaning The Oxygen Sensor
The oxygen sensor in your vehicle plays a crucial role in monitoring the air-fuel mixture. Over time, it can become dirty and less effective. Cleaning the oxygen sensor can help maintain your vehicle’s performance and fuel efficiency. Follow these steps for proper cleaning.
Removing The Sensor
To clean the oxygen sensor, you first need to remove it. Here is a simple guide:
- Turn off the engine and let it cool completely.
- Locate the oxygen sensor. It is usually found in the exhaust manifold or the exhaust pipe.
- Use a wrench or an oxygen sensor socket to carefully unscrew the sensor.
- Disconnect the sensor from the wiring harness.
- Handle the sensor with care to avoid damage.
Proper Cleaning Techniques
Once you have removed the oxygen sensor, you can proceed to clean it. Proper cleaning techniques are essential to avoid damaging the sensor.
- Soak the Sensor: Fill a container with gasoline or a specialized sensor cleaner. Submerge the sensor in the liquid and let it soak for a few hours.
- Scrub Gently: Use a soft brush to remove any remaining dirt or debris. Do not use abrasive materials that can damage the sensor.
- Rinse and Dry: Rinse the sensor with clean water and let it air dry completely. Ensure there is no moisture left before reinstalling.
Following these steps will help keep your oxygen sensor clean and functional. Regular maintenance can prevent issues and keep your vehicle running smoothly.
Replacing The Oxygen Sensor
Replacing the oxygen sensor in your vehicle ensures it runs efficiently. A faulty sensor can reduce fuel efficiency and increase emissions. Here, we’ll guide you through selecting the right replacement and the installation steps.
Selecting The Right Replacement
Selecting the correct oxygen sensor is crucial for your vehicle’s performance. Here are some steps to help you choose the right one:
- Check your vehicle’s manual: Identify the exact specifications needed.
- OEM vs. Aftermarket: Decide between an Original Equipment Manufacturer (OEM) or an aftermarket sensor. OEM sensors are typically more reliable.
- Sensor type: Determine if your vehicle requires a narrowband or wideband sensor.
- Compatibility: Ensure the sensor matches your vehicle’s make, model, and year.
Choosing the correct sensor prevents installation issues and ensures optimal performance.
Installation Steps
Installing a new oxygen sensor is straightforward. Follow these steps:
- Gather your tools: You will need a wrench, jack, and safety gear.
- Locate the sensor: Identify the sensor’s position in your vehicle. Refer to your manual if needed.
- Lift the vehicle: Use a jack to safely lift your vehicle for easier access.
- Disconnect the battery: Ensure safety by disconnecting the battery before starting.
- Remove the old sensor: Use the wrench to unscrew and remove the faulty sensor.
- Install the new sensor: Screw in the new sensor and tighten it securely.
- Reconnect the battery: Reconnect the battery to power your vehicle.
- Test the sensor: Start your vehicle and ensure the sensor is working correctly.
Following these steps helps you replace your oxygen sensor efficiently. Always refer to your vehicle’s manual for specific instructions.
Post-replacement Checks
After installing a new oxygen sensor, some important checks must be done. These checks ensure the sensor works properly and the vehicle runs smoothly. Let’s explore the key steps involved.
Resetting The Check Engine Light
First, you must reset the check engine light. This light often stays on after replacing the sensor. Disconnect the car battery for a few minutes to reset the light. Reconnect the battery and start the engine. The check engine light should be off. If it remains on, there might be another issue.
Verifying Sensor Functionality
Next, verify the sensor’s functionality. Use an OBD-II scanner to check for error codes. No error codes indicate the sensor is working well. Drive the car for a short distance. Observe the vehicle’s performance. Ensure there are no unusual sounds or behaviors. The engine should run smoothly and efficiently.

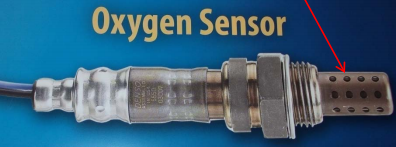
Credit: auto.howstuffworks.com
Preventative Maintenance Tips
Maintaining your vehicle’s oxygen sensor is crucial for optimal performance and fuel efficiency. Regular checkups and using high-quality fuel can extend the sensor’s life. Let’s dive into some preventative maintenance tips to keep your oxygen sensor in top shape.
Regular Inspections
Frequent inspections can identify issues before they become serious problems. Here’s what you need to do:
- Check for warning lights: If your dashboard shows a check engine light, it could signal an oxygen sensor issue.
- Inspect sensor wiring: Look for any signs of wear or damage. Frayed wires can lead to poor sensor performance.
- Listen for unusual sounds: Strange noises from the exhaust could indicate a faulty sensor.
- Use a diagnostic tool: An OBD-II scanner can read error codes and pinpoint sensor problems.
Using Quality Fuel
The type of fuel you use impacts your oxygen sensor’s health. Consider these tips:
- Opt for high-quality fuel: Cheap fuel may contain impurities that clog the sensor.
- Avoid additives: Some fuel additives can leave deposits that harm the sensor.
- Check for ethanol content: Higher ethanol levels can cause sensor wear and tear.
Quality fuel ensures cleaner combustion and extends the lifespan of the oxygen sensor. Following these tips can prevent costly repairs and keep your vehicle running smoothly.
Credit: www.densoautoparts.com
Frequently Asked Questions
What Is An Oxygen Sensor In A Car?
An oxygen sensor measures the amount of oxygen in a car’s exhaust gases. It helps optimize fuel efficiency.
How Do You Know If An Oxygen Sensor Is Bad?
A bad oxygen sensor may cause poor fuel economy, rough engine idle, or a check engine light.
Can A Car Run Without An Oxygen Sensor?
A car can run without an oxygen sensor, but it will have poor fuel efficiency and higher emissions.
How Often Should You Replace An Oxygen Sensor?
Replace an oxygen sensor every 60,000 to 100,000 miles, depending on the vehicle and driving conditions.
What Tools Are Needed To Replace An Oxygen Sensor?
You need a wrench, a socket set, and sometimes an oxygen sensor socket to replace it.
Conclusion
Troubleshooting your oxygen sensor can seem daunting at first. With the right steps, it’s manageable. Regular checks ensure your vehicle runs smoothly. This saves money and prevents bigger issues. Remember, a well-maintained sensor means better fuel efficiency. Always consult a professional for complex problems.
Keep your car in top shape with these easy tips. Happy driving!
")