Is your Ryobi battery charger not working like it used to? You’re not alone.
Many Ryobi users face frustrating charging problems that stop their tools from running when they need them most. But before you toss your charger or battery aside, there are simple steps you can take to diagnose and fix the issue yourself.
In this guide, you’ll learn easy troubleshooting tips that save you time and money. Whether it’s a blinking light, no charge, or your battery just won’t power up, we’ll walk you through what to check and how to get your Ryobi charger back to work. Keep reading—you’re just a few steps away from powering up your tools again!
Credit: www.direct-powertools.co.uk
Common Charger Issues
Common charger issues often cause frustration during battery charging. These problems can stop your Ryobi charger from working properly. Understanding these issues helps you fix them quickly and safely.
Loose Connections
Loose connections are a frequent cause of charging failure. Check if the charger plug fits tightly in the wall outlet. Also, ensure the battery clicks firmly into the charger. Wiggling or loose plugs disrupt the power flow.
Secure every connection point. This simple step often restores charging without further work.
Dirty Charging Port
Dirt and dust can block the charging port on the battery or charger. Use a soft brush or toothpick to clean any debris gently. Avoid using liquids or sharp tools that may damage the port.
Cleaning helps maintain a good electrical connection. A clean port ensures smooth power transfer to the battery.
Faulty Power Source
A faulty power source may stop the charger from receiving electricity. Test the charger in another wall outlet that you know works. Circuit breakers or power strips can also cause issues. Connect directly to the main outlet for best results.
Power interruptions prevent the charger from functioning. Confirming the power source is working is key to troubleshooting.
Damaged Cables And Adapters
Inspect cables and adapters for visible damage like cuts or frays. Damaged parts can break the electrical circuit. Replace any worn or broken cables immediately to avoid hazards.
Using original Ryobi cables and adapters is recommended. Non-compatible parts may cause charging errors or safety risks.

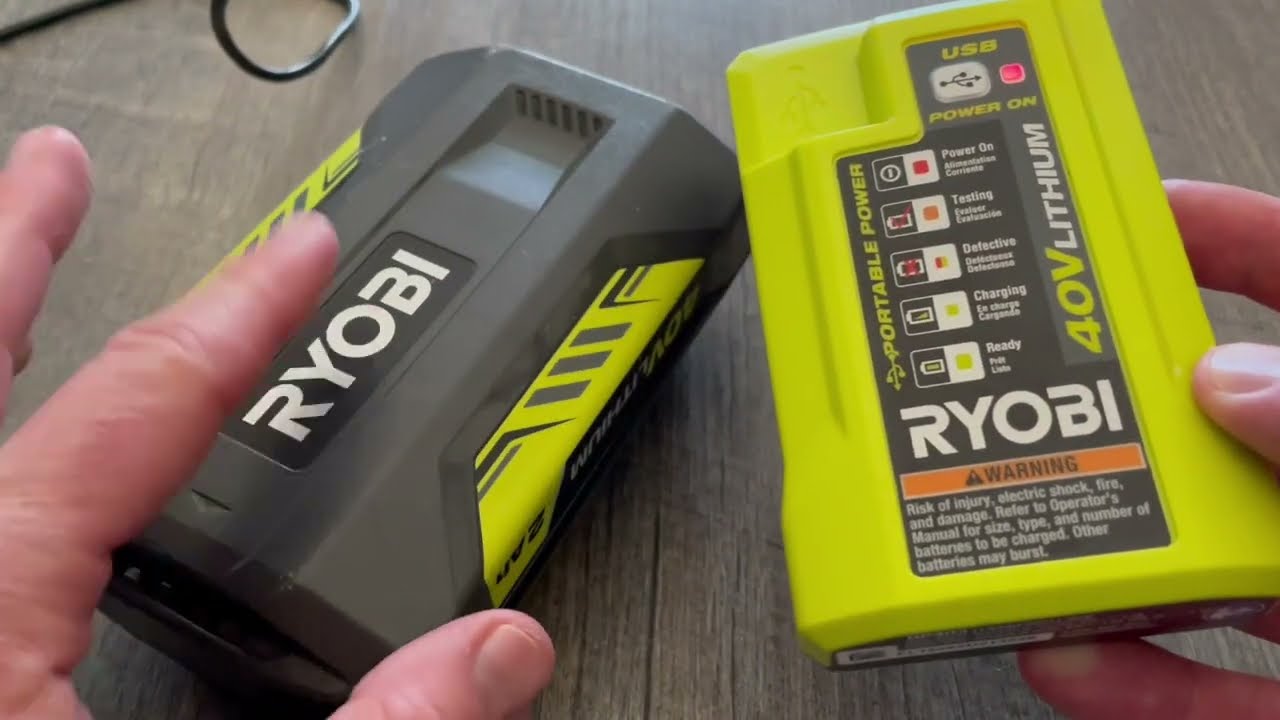
Credit: www.youtube.com
Quick Fixes
Quick fixes can solve many Ryobi battery charger issues fast. These simple steps help identify and clear common problems. Follow each fix carefully to get your charger working again.
Inspect And Secure Connections
Check the charger cable and adapter connections. Make sure the cable is firmly plugged into the charger and the wall outlet. Loose plugs can stop charging. Secure all connections tightly before testing the charger again.
Clean Charging Port
Dust and dirt block charging ports easily. Use a soft brush or a toothpick to clear out debris gently. Avoid sharp tools that may damage the port. Cleaning the port often restores proper contact for charging.
Try Different Outlets
Power issues may come from the wall outlet. Plug the charger into another outlet that you know works. This step rules out outlet problems. A different power source can fix charging failures quickly.
Test With Alternate Accessories
Use a different charger cable or power adapter if available. Sometimes the cable or adapter is faulty. Testing with alternate accessories helps find the exact issue. Swap parts one at a time to isolate the problem.
Restart Charger
Unplug the charger and wait a few minutes. Plug it back in and restart the charging process. This simple reset can fix minor software glitches inside the charger. It often restores normal function without more work.
Remove Protective Cases
Protective cases or covers on batteries can block charging contacts. Remove any case or cover before charging. This ensures the charger connects fully with the battery. Charging works best with direct contact.
Software Troubleshooting
Software issues can cause your Ryobi battery charger to stop working correctly. These problems often prevent the charger from communicating with the battery. Troubleshooting software-related errors helps restore normal charging function. This section explains simple software fixes to try at home.
Update Drivers
Outdated or corrupted drivers can block the charger’s operation. Check your computer or device for the latest Ryobi driver updates. Visit the official Ryobi website and download the newest software version. Install the updates carefully, then restart your device. Updated drivers improve compatibility and fix bugs that cause charging errors.
Reset Power Settings
Incorrect power settings can interfere with battery charging. Resetting these settings often clears hidden software glitches. On your device, open the power management options. Choose the option to restore default settings. This reset ensures the charger uses correct power protocols. After resetting, plug in the charger and test if charging resumes.
Hardware Problems
Hardware problems often cause Ryobi battery chargers to stop working properly. These issues affect the physical parts inside the charger or battery. They need careful checking to find the root cause. Fixing hardware problems can restore charging power and extend battery life.
Battery Internal Damage
Battery internal damage happens when the cells inside the battery break down. This can occur due to drops, overcharging, or old age. Damaged cells stop holding a charge or cause the battery to heat up. Look for swelling, leaks, or unusual smells as signs of damage. Replace the battery if internal damage is present.
Charging Port Wear
The charging port on the battery or charger can wear out over time. Constant plugging and unplugging cause loose connections or bent pins. Dirt and debris may also block the contacts. A worn port prevents proper electrical contact, stopping the battery from charging. Clean the port gently and check for visible damage. Replace the port if it is too worn.
Circuit Failures
Circuit failures inside the charger happen due to power surges or internal faults. These failures stop the charger from sending power to the battery. Signs include no lights on the charger or sudden power loss. Opening the charger for inspection can reveal burnt components or loose wires. Repair or replace the charger circuit to fix this problem.
Battery Specific Issues
Battery specific issues often cause charging problems with Ryobi batteries. These problems stop the charger from working correctly. Understanding common battery faults helps fix them faster. This section covers three main issues: deep discharge effects, dirty or corroded contacts, and mini-charges with lockouts.
Deep Discharge Effects
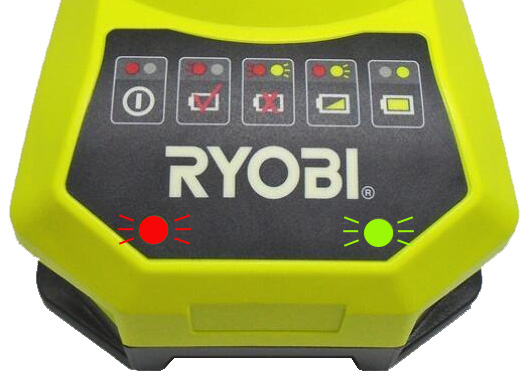
Deep discharge happens when a battery drains too much power. It makes the battery voltage drop below normal levels. Ryobi chargers may not recognize deeply discharged batteries. The charger might refuse to charge or blink red. Over time, deep discharge can reduce battery life. Avoid storing batteries fully drained. Recharge them soon after use to keep them healthy.
Dirty Or Corroded Contacts
Battery contacts connect the battery to the charger. Dirt, dust, or corrosion can block this connection. Poor contact stops the battery from charging properly. Check the metal contacts on the battery and charger for grime. Clean contacts gently with a dry cloth or fine sandpaper. Removing dirt helps the charger detect the battery and charge it fully. Regular cleaning prevents charging issues caused by poor contact.
Mini-charges And Lockouts
Mini-charges are short charging attempts that fail to fully charge the battery. They may cause the charger to lock out the battery. Lockouts protect batteries from damage but stop charging completely. This happens if the battery is too hot, cold, or faulty. Let the battery cool or warm to room temperature. If the lockout continues, reset the charger by unplugging it. Persistent lockouts may mean the battery needs replacement.
When To Get Professional Help
Knowing when to seek professional help can save time and protect your Ryobi battery charger. Some problems need expert skills beyond simple troubleshooting. Recognizing these signs helps avoid further damage and ensures safety.
Persistent Charging Failures
Repeated failure to charge despite all basic fixes signals a deeper issue. Professionals can test the charger and battery with specialized tools. They identify problems that are not visible or easy to fix at home.
Internal Hardware Damage
Damage inside the charger, like burnt circuits or broken parts, needs expert repair. Opening the charger without skills may cause electric shock or worsen damage. Trained technicians handle hardware problems safely and correctly.
Complex Battery Repairs
Batteries have delicate components and chemicals that can be hazardous. Complex repairs, such as replacing cells or fixing connections, require professional tools and knowledge. Experts ensure the battery is repaired safely and works well again.
Maintenance Tips
Maintaining your Ryobi battery charger ensures longer life and reliable performance. Simple care steps prevent common issues and keep charging smooth. Follow these maintenance tips to avoid frequent problems and extend your charger’s usability.
Regular Cleaning
Clean the charger’s contacts often to remove dirt and dust. Use a dry cloth or a soft brush for this task. Avoid using water or liquids that can damage the charger. Keeping the contacts clean helps maintain good electrical connection and fast charging.
Proper Storage
Store the charger in a cool, dry place away from direct sunlight. Avoid areas with extreme temperatures or high humidity. Proper storage prevents damage to internal components and reduces the risk of corrosion. Always unplug the charger before storing it.
Avoid Over-discharge
Do not let your Ryobi battery drain completely before charging. Over-discharging can harm the battery and reduce charger efficiency. Charge your battery regularly to keep it healthy. This habit also ensures the charger works correctly every time you need it.
Credit: www.youtube.com
Frequently Asked Questions
Why Is My Ryobi Charger Not Charging My Battery?
Your Ryobi charger may not charge due to dirty ports, faulty cables, bad outlets, software glitches, or a failing battery. Clean the port, check connections, try different outlets or cables, and restart the device. Persistent issues might require professional repair or battery replacement.
Where Is The Fuse On A Ryobi Charger?
The fuse on a Ryobi charger is usually inside the charger casing. You must open the casing carefully to locate it.
Why Is My Battery Charger Not Charging When Plugged In?
Your charger may not charge due to faulty cables, dirty ports, power outlet issues, software glitches, or a damaged battery. Check connections, clean the port, try different outlets and cables, restart the device, or seek professional repair if problems persist.
What Are The Common Problems With Ryobi Batteries?
Common Ryobi battery problems include poor charging, rapid power loss, overheating, connection issues, and battery swelling or damage.
Why Is My Ryobi Battery Charger Not Charging?
A dirty port or loose connection often stops charging. Check the charger, cable, and power source first. Clean the port gently and try plugging into a different outlet.
Conclusion
Troubleshooting your Ryobi battery charger can save time and money. Start with simple checks like connections and cleaning the port. Test different outlets and cables to find the cause. Restarting the device often fixes minor glitches quickly. If problems continue, software updates or resets may help.
Persistent issues might need professional repair or part replacement. Regular maintenance keeps your charger working well. Stay patient and follow these steps to keep your tools ready. This approach ensures your Ryobi charger lasts longer and works reliably.
")


