Ryobi weed wackers are popular for maintaining neat gardens. But sometimes, they face issues.
If your Ryobi weed wacker isn’t working right, you’re not alone. Many users encounter problems like the engine not starting, the trimmer line not feeding, or unusual noises. These issues can be frustrating, especially when you need to get yard work done.
This guide will help you understand common problems and provide simple solutions. Whether you’re a seasoned gardener or new to yard tools, troubleshooting your Ryobi weed wacker can be straightforward. Let’s dive in and make your gardening tasks smoother and more enjoyable.

Credit: m.youtube.com
Common Problems
Ryobi weed wackers are reliable tools for keeping your lawn tidy. Despite their durability, you may encounter some common problems. This section will help you troubleshoot these issues.
Engine Won’t Start
One common issue is the engine not starting. First, check the fuel level. Low or old fuel can cause starting problems. Ensure the fuel mixture is correct. Ryobi engines need a 50:1 ratio of gas to oil. Next, inspect the spark plug. A dirty or damaged spark plug can prevent the engine from starting. Clean or replace it as needed. Lastly, check the air filter. A clogged air filter can restrict airflow, making it hard to start the engine. Clean or replace the air filter if it’s dirty.
Poor Cutting Performance
Poor cutting performance is another frequent problem. First, check the trimmer line. If the line is too short or worn out, it won’t cut efficiently. Replace the line if needed. Also, examine the trimmer head. A damaged or improperly installed trimmer head can reduce cutting performance. Ensure it’s in good condition and correctly attached. Lastly, inspect the engine. A poorly running engine can affect cutting power. Clean the carburetor and adjust the idle speed for better performance.
Starting Issues
Dealing with a Ryobi Weed Wacker that won’t start can be frustrating. Whether you’re a seasoned pro or a weekend warrior, starting issues can halt your yard work. This guide will help you troubleshoot common starting problems.
Checking The Fuel
First, check the fuel. Old or contaminated fuel can cause starting issues.
- Check the fuel tank: Ensure it has fresh, clean fuel.
- Use the right mix: If your model uses a fuel mix, ensure the correct ratio.
- Drain old fuel: If the fuel is older than 30 days, drain and replace it.
Using the correct and fresh fuel can often solve starting problems.
Inspecting The Spark Plug
The spark plug is crucial for starting your Ryobi Weed Wacker. A faulty spark plug can prevent the engine from starting.
- Remove the spark plug: Use a spark plug wrench to remove it.
- Inspect the plug: Look for dirt, damage, or wear.
- Clean or replace: Clean the plug with a wire brush or replace it if damaged.
- Check the gap: Ensure the spark plug gap matches the specifications in the manual.
A clean and correctly gapped spark plug ensures a good start.
Performance Issues
A Ryobi Weed Wacker is a reliable tool for maintaining your lawn. Yet, like any device, it can face performance issues. Addressing these problems ensures your tool runs smoothly and efficiently. This section covers common performance issues and how to troubleshoot them.
Dull Trimmer Line
A dull trimmer line is a common issue affecting performance. When the trimmer line becomes dull, it may not cut grass and weeds effectively. This can make your work take longer and result in a less tidy lawn.
- Check the trimmer line regularly.
- If it looks worn out, replace it.
- Ensure you use the right type of line for your model.
Here is a simple table to understand the different line types and their usage:
| Line Type | Best For |
|---|---|
| Round | General use |
| Twisted | Heavy weeds |
| Multi-sided | Thick grass |
Clogged Air Filter
A clogged air filter can hinder your weed wacker’s performance. The air filter prevents dirt and debris from entering the engine. If it becomes clogged, it can reduce engine power and efficiency.
- Turn off the weed wacker and let it cool.
- Locate the air filter cover and remove it.
- Take out the air filter.
- Check for debris and dirt.
- Clean the filter with soapy water or replace it if needed.
Tip: Check the air filter every few uses to ensure it stays clean.
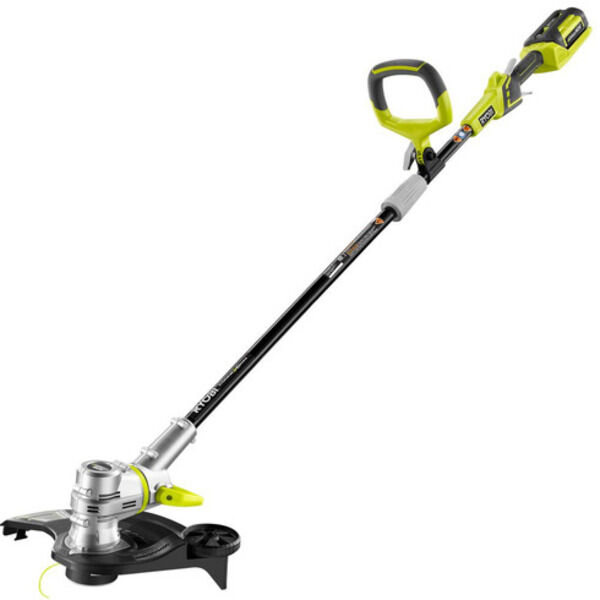
Credit: www.ryobitools.com
Overheating
Ryobi Weed Wackers are reliable. Yet, overheating can reduce their performance. Overheating can also cause damage. Let’s explore ways to handle this issue.
Proper Ventilation
Proper ventilation is key to avoiding overheating. Ensure the vents are not blocked. Always check for debris. Cleaning the vents can help. Use a soft brush to remove dirt. This simple step can improve airflow.
Also, avoid using the weed wacker in tight spaces. Open areas allow better ventilation. This helps the machine stay cool. Regularly inspect the vents. This will ensure they remain clear.
Cooling System Maintenance
The cooling system is vital. It keeps your Ryobi Weed Wacker cool. Regular maintenance is necessary. Clean the cooling fins. This improves heat dissipation.
Follow these steps for maintenance:
- Turn off the weed wacker and unplug it.
- Remove any covers blocking the cooling system.
- Use a soft brush to clean the fins.
- Reassemble all parts securely.
Check the cooling system often. This ensures it functions well. Replace damaged parts promptly. This will prevent overheating.
Battery Problems
Ryobi weed wackers are reliable tools for garden maintenance. But sometimes, they face battery problems. These issues can halt your yard work. Understanding these problems is key. Two common issues are the battery not charging and short battery life.
Battery Not Charging
If your Ryobi battery is not charging, check the charger. Ensure it is plugged in correctly. Inspect the charging port for debris. Clean it if needed. A dirty port can block the connection. Next, look at the battery contacts. They should be clean and shiny. Wipe them with a cloth if dirty. Also, check the battery itself. If it is swollen or damaged, replace it.
Short Battery Life
A short battery life can be frustrating. First, ensure the battery is fully charged. Sometimes, it might not get a full charge. Use the correct charger for your battery. Mismatched chargers can cause problems. Also, consider the battery’s age. Older batteries tend to hold less charge. If your battery is old, a new one might be needed. Finally, store your battery in a cool, dry place. Heat can reduce battery life.
Credit: support.ryobitools.com
Strange Noises
Noticing strange noises from your Ryobi weed wacker? Don’t worry. These noises can often be fixed with simple steps. Let’s dive into two common sounds: rattling sounds and grinding noises.
Rattling Sounds
If your Ryobi weed wacker makes a rattling sound, it could be loose parts. Check the following:
- Cover Screws: Ensure all cover screws are tight.
- Spool: Make sure the spool is securely attached.
- Handle: Confirm the handle is firmly in place.
Loose parts can cause vibrations, leading to rattling sounds. Tightening these parts can often solve the issue.
Grinding Noises
Grinding noises are typically more serious. They may indicate an issue with the internal components. Here’s what to check:
- Gearbox: Inspect the gearbox for signs of wear or damage.
- Shaft: Look at the drive shaft for any bends or breaks.
- Bearings: Check the bearings for smooth operation.
Grinding noises can mean parts are rubbing together incorrectly. You might need to replace worn or damaged components.
By following these simple steps, you can often identify and fix the source of strange noises in your Ryobi weed wacker.
Trimmer Line Issues
Are you frustrated with your Ryobi Weed Wacker? Trimmer line issues can be a common problem. From line not advancing to frequent line breaking, these issues can slow you down. Let’s dive into some troubleshooting tips to get your trimmer back in action.
Line Not Advancing
One of the common issues with the trimmer line is that it does not advance properly. Here are some potential causes and solutions:
- Check the Spool: Ensure the line is wound correctly on the spool. An improper winding can cause line advancement issues.
- Clean the Head: Dirt and debris can clog the trimmer head. Clean it thoroughly to ensure smooth line advancement.
- Replace Worn Parts: Worn-out parts can hinder line movement. Inspect and replace any damaged components.
- Use Correct Line Size: Using the wrong size of line can cause problems. Always use the size recommended by the manufacturer.
Line Breaking Frequently
Another annoying problem is the trimmer line breaking too often. Here’s how you can fix it:
- Check for Obstructions: Ensure there are no hard objects like rocks or metal in the trimming area. These can cause the line to break.
- Use High-Quality Line: Low-quality lines can break easily. Invest in a durable, high-quality trimmer line.
- Adjust Cutting Technique: Avoid hitting the ground or hard surfaces too hard. It can weaken and break the line.
- Inspect the Spool: Ensure the line is not tangled or improperly wound. This can cause frequent breaks.
By following these tips, you can solve common trimmer line issues and keep your Ryobi Weed Wacker running smoothly.
Maintenance Tips
Keeping your Ryobi Weed Wacker in good condition ensures it runs smoothly. Regular maintenance can prevent common issues and extend its lifespan. Here are some essential tips to help you maintain your weed wacker.
Regular Cleaning
Clean the weed wacker after every use. Remove any grass and debris from the cutting head. This helps maintain its efficiency. A clean tool performs better and lasts longer. Use a soft brush to clean the vents and air filter. This ensures proper airflow and prevents overheating.
Periodic Inspection
Inspect the weed wacker for loose or damaged parts. Check the spark plug for wear and tear. Replace it if necessary. Also, examine the cutting line. Make sure it’s at the right length. A worn or broken line reduces cutting performance. Regular inspection helps identify issues early. This prevents major problems later.
Frequently Asked Questions
Why Is My Ryobi Weed Wacker Not Starting?
Check the fuel level and spark plug. Clean or replace them if needed.
How Do I Fix A Ryobi Weed Wacker That Won’t Spin?
Inspect the trimmer head for debris. Clean it and tighten any loose parts.
What Type Of Fuel Should I Use In My Ryobi Weed Wacker?
Use unleaded gasoline mixed with 2-cycle oil. Follow the ratio recommended by Ryobi.
Why Is My Ryobi Weed Wacker Overheating?
Ensure proper ventilation. Clean air filters and avoid overworking the motor.
How Can I Replace The Line On My Ryobi Weed Wacker?
Remove the trimmer head. Insert new line following the instructions in the manual.
Conclusion
Troubleshooting your Ryobi weed wacker can be simple with these tips. Regular maintenance ensures your tool works efficiently. Check for common issues and address them promptly. Clean your weed wacker after each use. Replace worn parts as needed. Follow the manual for specific instructions.
With these steps, you can keep your Ryobi weed wacker in top shape. Happy gardening!
")