Is your garage door refusing to close or acting up unexpectedly? The culprit might be the sensors that keep your garage door safe and efficient.
These small devices work quietly but are essential for preventing accidents and ensuring smooth operation. When sensors go out of alignment, get dirty, or lose connection, your garage door can stop working properly — leaving you frustrated and stuck. But don’t worry, you can troubleshoot these sensor issues yourself with some simple steps.
In this guide, you’ll learn how to identify common sensor problems, how to fix them quickly, and when to call in a professional. Keep reading to get your garage door working smoothly again and regain peace of mind.
Credit: www.allstyledoor.com
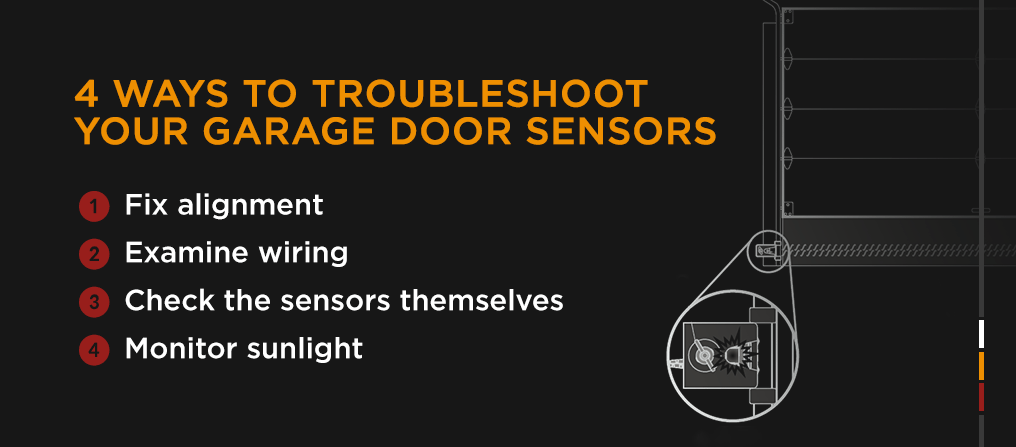
Common Sensor Problems
Garage door sensors play a critical role in safety and smooth operation. Problems with these sensors can stop your door from closing or opening properly. Understanding common sensor issues helps you troubleshoot quickly and prevent bigger problems.
Blocked Sensor Path
Objects or dirt can block the sensor path. Even small items like spider webs or dust can cause sensor failure. Make sure the area between sensors is clear. Remove any obstacles that may interrupt the sensor beam.
Misaligned Sensors
Sensors must face each other directly. If they are tilted or shifted, the door may not close. Check both sensors are at the same height and angle. Adjust them until the indicator light shows a strong connection.
Dirty Sensor Lenses
Sensor lenses collect dust and grime over time. Dirty lenses weaken the sensor beam. Clean the lenses gently with a soft cloth. Avoid using harsh chemicals that could damage the sensor surface.
Loose Or Damaged Wiring
Wiring connects sensors to the garage door opener. Loose or damaged wires disrupt the signal. Inspect wiring for breaks or loose connections. Tighten or replace wires as needed to restore proper function.
Blinking Or Red Indicator Lights
Blinking or red lights on sensors signal a problem. This can mean misalignment, blockage, or wiring issues. Use the indicator lights as a guide to find the fault. Fix the issue and watch for the light to turn solid green.

Credit: utahgaragedoors.net
Safety Sensor Location
Proper placement of safety sensors on garage doors is vital for smooth operation and safety. These sensors detect obstacles and prevent the door from closing on people or objects. Knowing their exact location helps with troubleshooting and maintenance. This guide covers how to identify sensor boxes and where sensors are placed on the tracks.
Identifying Sensor Boxes
Safety sensors come in small, rectangular boxes. They sit near the bottom of the garage door frame. Usually, there are two boxes facing each other across the door opening. Each box has a lens or light on its front. One sensor sends an invisible beam, while the other receives it. Look for wires running from these boxes to the garage door opener unit. This setup ensures the door stops if something blocks the beam.
Sensor Placement On Tracks
Sensors are mounted on the vertical tracks of the garage door. They sit about 4 to 6 inches above the floor. This height keeps the beam low enough to detect small obstacles. Both sensors must be aligned perfectly at the same height and directly opposite each other. Misaligned sensors cause the door to reverse or not close. Dirt, spider webs, or objects in front of the sensors can also block the beam and trigger safety stops.
Power Reset Steps
Power reset is a simple yet effective step in troubleshooting garage door sensors. It helps clear minor glitches and restores sensor function. Resetting power often fixes sensor errors caused by electrical issues.
Resetting involves cutting and restoring power to the garage door opener. This action allows the system to reboot and recalibrate sensor connections. Follow these steps carefully to perform a proper power reset.
Unplugging The Opener
First, locate the power cord of your garage door opener. Unplug it from the wall outlet to cut off electricity.
Leave it unplugged for about 30 seconds. This pause helps the opener fully power down.
After waiting, plug the cord back into the outlet. The opener will start to reset its system.
Once powered, test the garage door sensors to see if they work correctly. This step often clears sensor error lights.
Using Circuit Breaker
If unplugging is difficult, use the circuit breaker instead. Find the breaker controlling your garage door opener.
Flip the breaker switch to the OFF position. This cuts power to the opener safely.
Wait for 30 seconds to ensure the system fully resets. Then, flip the breaker back ON.
After restoring power, check the sensors and garage door operation. This method resets the opener similarly to unplugging.
Cleaning Sensor Lenses
Cleaning sensor lenses is essential for the smooth operation of garage doors. Dirt, dust, and spider webs can block the sensors. This blockage prevents the door from closing properly or reverses its motion. Regular cleaning keeps the sensors clear and functioning well. It also helps avoid unnecessary repairs and safety hazards.
Tools Needed
- Soft microfiber cloth
- Mild detergent or glass cleaner
- Water
- Dry paper towel or cloth
Proper Cleaning Technique
Start by turning off the garage door opener to ensure safety. Use a soft cloth dampened with water or mild detergent. Gently wipe the sensor lenses to remove dust and grime. Avoid using harsh chemicals or abrasive materials. These can scratch or damage the lenses.
After cleaning, dry the lenses with a clean paper towel or cloth. Check the sensors for any remaining dirt or smudges. Repeat the cleaning if needed. Finally, turn the garage door opener back on and test the door’s operation.
Sensor Alignment Tips
Proper sensor alignment is key to a smoothly working garage door. Misaligned sensors often cause the door to stop or reverse unexpectedly. This section explains simple tips to align your garage door sensors. Follow these steps to keep your sensors working correctly and avoid frustration.
Adjusting Sensor Height
Check that both sensors sit at the same height. Sensors too high or too low can block the signal. Use a tape measure or ruler to compare their position. Loosen the brackets slightly to move a sensor up or down. Tighten screws once both sensors line up evenly.
Ensuring Direct Facing
Sensors must face each other directly for a clear signal. A slight angle can cause miscommunication. Look down the sensor line to ensure they point straight at one another. Adjust the angle by gently tilting the sensor body. Confirm they are perfectly aligned before tightening.
Securing Mounting Screws
Loose screws can shift sensor position and cause misalignment. Check all mounting screws on both sensors. Tighten any loose screws to hold sensors firmly in place. Avoid over-tightening to prevent damage. Secure sensors prevent frequent adjustments and sensor errors.

Credit: www.youtube.com
Wiring Inspection
Wiring inspection plays a crucial role in troubleshooting garage door sensors. Faulty wiring can cause sensors to malfunction, stopping the door from closing properly. Careful inspection helps find issues early, saving time and money. This section explains how to check wiring effectively.
Checking For Loose Wires
Start by turning off the garage door opener power. Locate the sensor wires near the door tracks. Gently tug each wire connection to see if it feels loose. Loose wires can cause sensors to lose power or signal. Tighten any loose wire connectors carefully. Avoid pulling too hard to prevent damage. A secure connection ensures sensors work correctly.
Identifying Damaged Connections
Look closely at the wires for cuts, frays, or corrosion. Damaged wires stop the sensor from sending signals. Use a flashlight to see small cracks or worn spots. Replace any wires with visible damage. Check the wire insulation to make sure it is intact. Damaged insulation can cause short circuits. Properly connected and intact wires keep sensors reliable and safe.
Testing Sensor Function
Testing the function of garage door sensors is key to safe operation. These sensors stop the door from closing when an object blocks the path. Faulty sensors cause the door to reverse or not close at all. Follow simple steps to check if sensors work correctly and avoid costly repairs.
Recognizing Indicator Light Colors
Garage door sensors have small lights that show their status. A solid green light on the receiving sensor means it works well. A blinking or red light signals a problem. The transmitting sensor usually shows a steady light when powered. Different colors help identify if sensors are aligned and powered properly.
Check both sensor lights carefully during testing. A missing light may mean no power or a broken sensor. Understanding these lights makes troubleshooting faster and easier.
Confirming Beam Connection
The sensors send an invisible beam between each other. This beam tells the opener if the path is clear. To confirm the beam connection, clear the area between sensors. Remove any dirt, spiderwebs, or objects blocking the beam. Misalignment can also break the beam.
Gently adjust the sensors so they face each other straight and are at the same height. When aligned, the indicator lights usually turn solid green. Test the garage door after adjustment to see if it closes smoothly. A good beam connection ensures proper sensor function and door safety.
Troubleshooting Persistent Issues
Persistent sensor issues on garage doors can cause frustration and safety risks. These problems often need more than simple cleaning or realignment. Troubleshooting persistent issues requires a step-by-step approach. This ensures the sensors and remote controls work smoothly again. Below are key steps to try before calling a professional.
Clearing Opener Memory
Sometimes the garage door opener’s memory gets confused. Clearing the memory can fix this issue. Start by unplugging the opener from the power source. Wait about 30 seconds, then plug it back in. This resets the system and clears old commands.
Next, press and hold the “learn” button on the opener. Hold it for about 10 seconds until the indicator light goes off. This erases all remote controls from the opener’s memory. You will need to reprogram the remotes after this step.
Reprogramming Remotes
After clearing the opener memory, reprogram the remote controls. Press the “learn” button on the opener once briefly. The indicator light will turn on, showing it is ready to learn a remote.
Press a button on the remote control within 30 seconds. The opener light will blink or turn off, confirming the remote is programmed. Repeat this for all remotes. Test each remote to ensure they work properly.
When To Call A Professional
Some sensor problems need expert help. Call a professional if the door still won’t close or open after troubleshooting. Persistent blinking lights on sensors may signal wiring issues. Loose or damaged wires need special tools and skills to fix.
Also, call a technician if the sensors do not align properly or the door reverses unexpectedly. Professionals can safely test and repair sensors and openers. This prevents accidents and keeps your garage door reliable.
Quick Fixes At Home
Garage door sensors help keep your garage safe. Sometimes, sensors stop working well. Quick fixes at home can solve many sensor problems. No need to call a repair person right away. Follow these simple steps to get your sensors working fast.
Resetting Sensors
Start by unplugging the garage door opener from power. This cuts electricity and allows a safe reset. Next, check both sensors near the door tracks. Remove any dirt or spider webs on the lenses. Use a soft cloth for gentle cleaning. Look for loose or damaged wires and fix them carefully. Make sure the sensors face each other directly. Usually, the receiving sensor shows a solid green light when aligned. After cleaning and checking, plug the opener back in. Test the door to see if the sensors work correctly. This process resets the sensors by fixing simple physical issues.
Simple Realignment Tricks
Sensors must be at the same height on both sides of the door. Use a tape measure to check their positions. Adjust sensor brackets to align both lenses perfectly. Sensors should face each other without any tilt. Clear objects that block the sensor path. Even small obstacles can stop the door from closing. Shine a flashlight on sensors to check light signals. A green light usually means good alignment. A red or no light means realign again. Repeat adjustments until the sensors show a steady green light. Test the garage door after each change to confirm results.
Frequently Asked Questions
How Do I Reset My Garage Door Sensors?
Unplug the garage door opener. Clean sensor lenses and remove obstructions. Check and tighten sensor wires. Align sensors facing each other at the same height until the receiving sensor shows a solid green light. Plug the opener back in and test the door operation.
Should Both Lights Be Green On Garage Door Sensors?
Both garage door sensor lights should not be green. One sensor shows a steady green or amber light; the other usually blinks or is off. A solid green on the receiving sensor confirms proper alignment and beam connection.
What Are Common Garage Door Sensor Problems?
Common garage door sensor problems include misalignment, dirty lenses, loose or damaged wiring, and obstructions blocking the sensor beam.
What Are Common Sensor Alignment Problems?
Common sensor alignment problems include sensors not facing each other, uneven height placement, loose wires, and blocked sensor lenses. These issues cause the sensors to misread signals, preventing the garage door from closing properly. Regularly clean lenses and ensure sensors align directly for optimal function.
How Do I Know If Garage Door Sensors Need Troubleshooting?
Look for blinking or no lights on sensors, or the door won’t close. Misalignment or dirt often causes sensor problems.
Conclusion
Troubleshooting garage door sensors is simple with these easy steps. Keep sensors clean and aligned for best results. Check wires regularly to avoid common problems. A steady green light means sensors work properly. Small fixes often restore your door’s safety and function.
Regular checks can prevent bigger repairs later. Stay patient and follow each step carefully. Your garage door will close smoothly and safely again.
")


