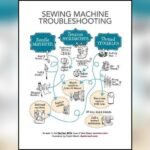
Is your sewing machine acting up just when you need it most? Whether your thread is bunching like a bird’s nest, stitches are skipping, or your fabric refuses to feed smoothly, these common problems can quickly turn a fun project into a frustrating experience.
But don’t worry—you’re not alone, and most issues have simple fixes you can try right now. In this guide, you’ll discover easy, step-by-step solutions to get your machine running perfectly again. Keep reading to learn how to troubleshoot your sewing machine like a pro and keep your creativity flowing without interruption.
Thread Bunching
Thread bunching, often called bird’s nesting, creates messy loops under fabric. This problem stops smooth sewing and can ruin projects. It happens when threads tangle below the fabric, making stitching uneven and frustrating. Understanding causes and fixes helps keep your machine running well.
Causes
Thread bunching happens for several reasons. Incorrect threading of the top thread is a common cause. The presser foot must be raised during threading to avoid slack. Unbalanced tension between the top thread and bobbin thread also leads to loops. A loosely wound bobbin can cause uneven feeding of thread. Dirt or lint in the bobbin area blocks thread flow. Using the wrong needle or thread type can worsen the issue.
Quick Fixes
Start by raising the presser foot and rethreading the top thread carefully. Check that the thread passes through each guide correctly. Remove the bobbin and clean the area of lint and dust. Rewind the bobbin evenly if it looks loose or uneven. Replace the needle if it is dull or bent. Use thread suited for your fabric type. Test stitching on scrap fabric to see if the problem persists.
Bobbin Tension Adjustment
Proper bobbin tension is key to stopping thread bunching. Locate the small screw on your bobbin case. Turn it slightly to tighten or loosen the tension. Tightening reduces loose loops, loosening prevents thread snapping. Make small adjustments and test the stitch after each change. Aim for balanced tension so the top and bobbin threads lock in the fabric center. Avoid overtightening, which can cause thread breakage.
Thread Breaking
Thread breaking is a common problem that interrupts sewing projects. It can cause frustration and slow down your work. Understanding why thread breaks helps fix the issue fast. The right thread, needle, and threading method play key roles in preventing breaks.
Common Reasons
Thread breaks often due to tight tension settings. The needle eye may be rough or damaged, cutting the thread. Using the wrong thread type or poor-quality thread also leads to breaks. Pulling the fabric too hard can snap the thread. Dirt or lint in the machine can cause friction on the thread.
Choosing The Right Thread And Needle
Select thread that matches your fabric weight. Thin thread with heavy fabric breaks easily. Use good-quality thread to avoid weak spots. Match needle size to thread thickness. A needle too small for the thread will cut it. Different fabrics need different needle types, such as ballpoint for knits.
Proper Rethreading Technique
Always raise the presser foot before threading. This opens the tension discs properly. Thread must pass smoothly through each guide and tension point. Follow your machine’s threading path exactly. Pull thread gently while sewing to avoid snapping. Recheck threading if the thread keeps breaking.
Skipped Stitches
Skipped stitches disrupt your sewing flow and weaken seams. These gaps occur when the needle misses forming stitches properly. Pinpointing the cause helps fix the problem quickly. Common reasons include needle issues, presser foot pressure, and incorrect needle insertion.
Needle Issues
A dull or bent needle often causes skipped stitches. Needles wear out over time and lose sharpness. Using the wrong needle type for your fabric also leads to missed stitches. Always replace needles regularly and choose the correct needle for your material.
Presser Foot Pressure
Low presser foot pressure can let fabric slip under the needle. This movement causes the needle to miss stitches. Adjust the pressure to match your fabric thickness. Heavier fabrics need more pressure, while delicate ones require less.
Correct Needle Insertion
Inserting the needle incorrectly stops proper stitch formation. The flat side of the needle must face the right direction, usually the back. Push the needle up fully into the clamp before tightening. A loose or wrongly placed needle leads to skipped stitches.

Credit: www.youtube.com
Needle Breaking And Bending
Needle breaking and bending are common issues that disrupt sewing projects. These problems can cause skipped stitches, fabric damage, and machine jams. Understanding how to prevent and fix needle damage saves time and frustration. Careful handling and proper needle use keep your machine running smoothly.
Avoiding Damage
Do not force fabric under the needle. Sew slowly over thick layers or seams. Keep your sewing machine clean and well-oiled. Check the needle position before starting. Replace bent needles immediately to avoid fabric damage.
Needle Selection
Choose needles designed for your fabric type. Use sharp needles for woven fabrics and ballpoint needles for knits. Match the needle size to the thread weight and fabric thickness. Using the correct needle reduces the risk of bending or breaking.
Handling Obstructions
Clear lint and thread buildup from the needle area often. Avoid sewing over pins or hard objects in the fabric. Stop sewing if the machine feels jammed or the needle hits resistance. Remove the obstruction before continuing to protect the needle and machine.
Fabric Not Feeding
Fabric not feeding properly can stop your sewing project fast. The fabric should move smoothly under the presser foot. If it stays still or moves unevenly, stitches will be uneven or skipped. Fixing this issue helps keep your sewing neat and easy.
Feed Dog Problems
The feed dogs are small teeth under the needle plate. They pull the fabric as you sew. If these teeth are lowered or stuck, fabric will not move. Check if the feed dogs are raised. Clean any lint or threads blocking them. Sometimes feed dogs wear down and need replacing.
Presser Foot Settings
The presser foot holds fabric in place. If the pressure is too light, fabric slips and won’t feed. Adjust the presser foot pressure for your fabric type. Thick fabrics need more pressure, thin fabrics need less. Also, check if you use the right presser foot for your fabric.
Cleaning And Maintenance
Dust and lint build-up can stop fabric from feeding. Clean your machine regularly, especially around feed dogs and bobbin area. Remove the needle plate and use a small brush to clear debris. Oil the machine parts as the manual says. This keeps everything moving smoothly.

Credit: www.palindromedrygoods.com
Puckering And Uneven Stitches
Sewing machine jams and sudden stops can disrupt your creative flow. These issues often cause frustration and delay your sewing projects. Understanding how to fix these problems helps keep your machine running smoothly. Most jams result from thread tangles or dirt buildup in key areas. Following simple steps can quickly clear jams and prevent future stops.
Removing Thread Jams
Turn off your sewing machine first to avoid injury. Gently open the needle plate and remove the fabric. Use small scissors or tweezers to cut tangled threads. Pull out all thread pieces carefully to avoid damage. Check around the bobbin and feed dogs for hidden threads. Slowly turn the handwheel to ensure the machine moves freely after clearing the jam.
Cleaning Bobbin Area
Remove the bobbin case and take out the bobbin. Use a small brush or soft cloth to clean lint and dust. Avoid using water or liquid cleaners on mechanical parts. Clean the bobbin case and surrounding area thoroughly. Reinsert the bobbin and case correctly before closing the machine. Regular cleaning prevents build-up that causes jams and stops.
Correct Threading
Raise the presser foot to release thread tension. Follow your machine’s threading path exactly. Ensure the thread passes through all guides and tension discs. Pull a small length of thread to check tension feels right. Thread the needle from front to back or as your machine requires. Proper threading reduces the chance of thread bunching and jams.
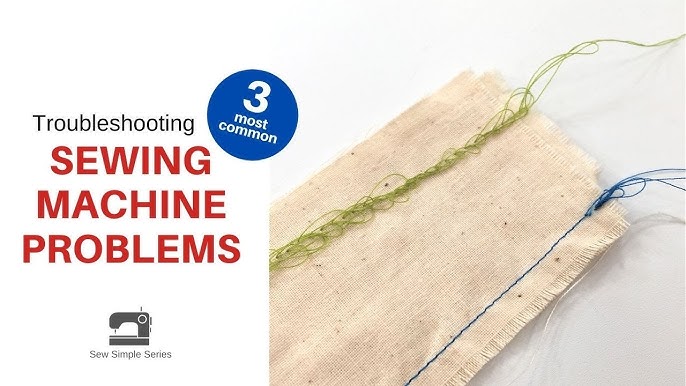
Machine Jams And Stops
Thread looping under fabric is a common sewing machine problem. It causes loops or knots on the fabric’s underside. This issue can ruin your project and slow your work. Understanding the main causes helps fix the problem fast. Many times, it relates to machine timing, tension, or needle and bobbin setup.
Timing Issues
Timing controls how the needle and hook work together. If the timing is off, the hook misses the thread loop. This causes thread to bunch under the fabric. You might need to adjust or reset the timing. Most home machines have a manual or guide for timing checks. If unsure, seek professional help to avoid damage.
Tension Troubleshooting
Tension keeps the thread tight and balanced. Wrong tension makes loops or loose stitches. Check both upper and bobbin thread tension. Tighten loose threads or loosen tight ones. Use your machine’s tension dial for adjustment. Test on scrap fabric until stitches look even. Clean lint from tension discs regularly to keep smooth thread flow.
Needle And Bobbin Checks
A bent or dull needle can cause thread looping. Replace needles often and choose the right type for fabric. Check the bobbin for correct winding and placement. A loose or uneven bobbin thread creates loops below fabric. Remove lint and old thread from the bobbin case. Proper needle and bobbin care prevents many stitching problems.
Credit: www.youtube.com
Frequently Asked Questions
What Are The 7 Common Sewing Machine Troubles?
The 7 common sewing machine troubles are thread bunching, thread breaking, skipped stitches, needle bending, fabric not feeding, puckering stitches, and machine jams.
Why Is My Thread Looping Underneath?
Thread loops underneath due to incorrect top threading, unbalanced tension, or loose bobbin winding. Rethread with presser foot up, adjust tension, and clean bobbin area.
What Is The First Thing You Should Check If Your Machine Is Not Sewing Properly?
Check if the machine is threaded correctly with the presser foot raised. Incorrect threading causes most sewing issues.
Why Will My Sewing Machine Not Stitch?
Your sewing machine may not stitch due to incorrect threading, dull or bent needle, unbalanced tension, or clogged feed dogs. Check threading with presser foot raised, replace the needle, clean lint from bobbin area, and ensure feed dogs and presser foot are properly set.
What Causes Thread Bunching Under Fabric In Sewing Machines?
Thread bunching happens when the top thread is threaded incorrectly or tension is unbalanced. Also, loose bobbin winding and lint buildup can cause this issue. Cleaning the bobbin area and adjusting tension often fixes it.
Conclusion
Sewing machine problems can feel frustrating but are often easy to fix. Check your threading, needle, and tension first. Keep your machine clean and well-oiled for smooth operation. Small adjustments prevent bigger issues later. Practice patience and take time to learn your machine’s needs.
With these tips, sewing will become more enjoyable and less stressful. Don’t hesitate to revisit troubleshooting steps when problems arise. Your sewing projects deserve a well-running machine.
")