Is your sourdough starter acting up? You’re not alone.
Many home bakers face issues with their starters. From sluggish rises to strange smells, sourdough starters can be tricky. Understanding these problems is key to solving them. A healthy starter is crucial for baking delicious sourdough bread. Troubleshooting your starter can save you time and frustration.
Common issues include weak bubbles, mold, and odd odors. Each problem has a solution. With the right guidance, you can get your starter back on track. This guide will help you identify and fix common sourdough starter problems. Get ready to bake like a pro!
Introduction To Sourdough Starters
Embarking on the journey of making sourdough bread starts with a sourdough starter. This magical mixture of flour and water brings life to your bread. But, it can sometimes be tricky to manage. Let’s dive into the basics to understand it better.
What Is A Sourdough Starter?
A sourdough starter is a live culture of flour and water. It ferments and houses wild yeast and bacteria. This mixture is what makes sourdough bread rise.
Here is what goes into a sourdough starter:
- Flour – Choose whole grain or all-purpose flour.
- Water – Use filtered or bottled water.
These ingredients work together to create a natural leavening agent. Unlike commercial yeast, a sourdough starter is entirely natural.
Importance Of A Healthy Starter
A healthy starter is crucial for good sourdough bread. It impacts the rise, flavor, and texture of your bread.
Signs of a healthy starter include:
- Bubbly surface
- Fruity or tangy smell
- Doubling in size within a few hours after feeding
If your starter isn’t healthy, your bread won’t turn out well. Maintaining the right balance of yeast and bacteria is key.
To keep your starter healthy:
- Feed it regularly.
- Use fresh, high-quality ingredients.
- Keep it in a warm environment.
Credit: www.kingarthurbaking.com
Identifying Common Issues
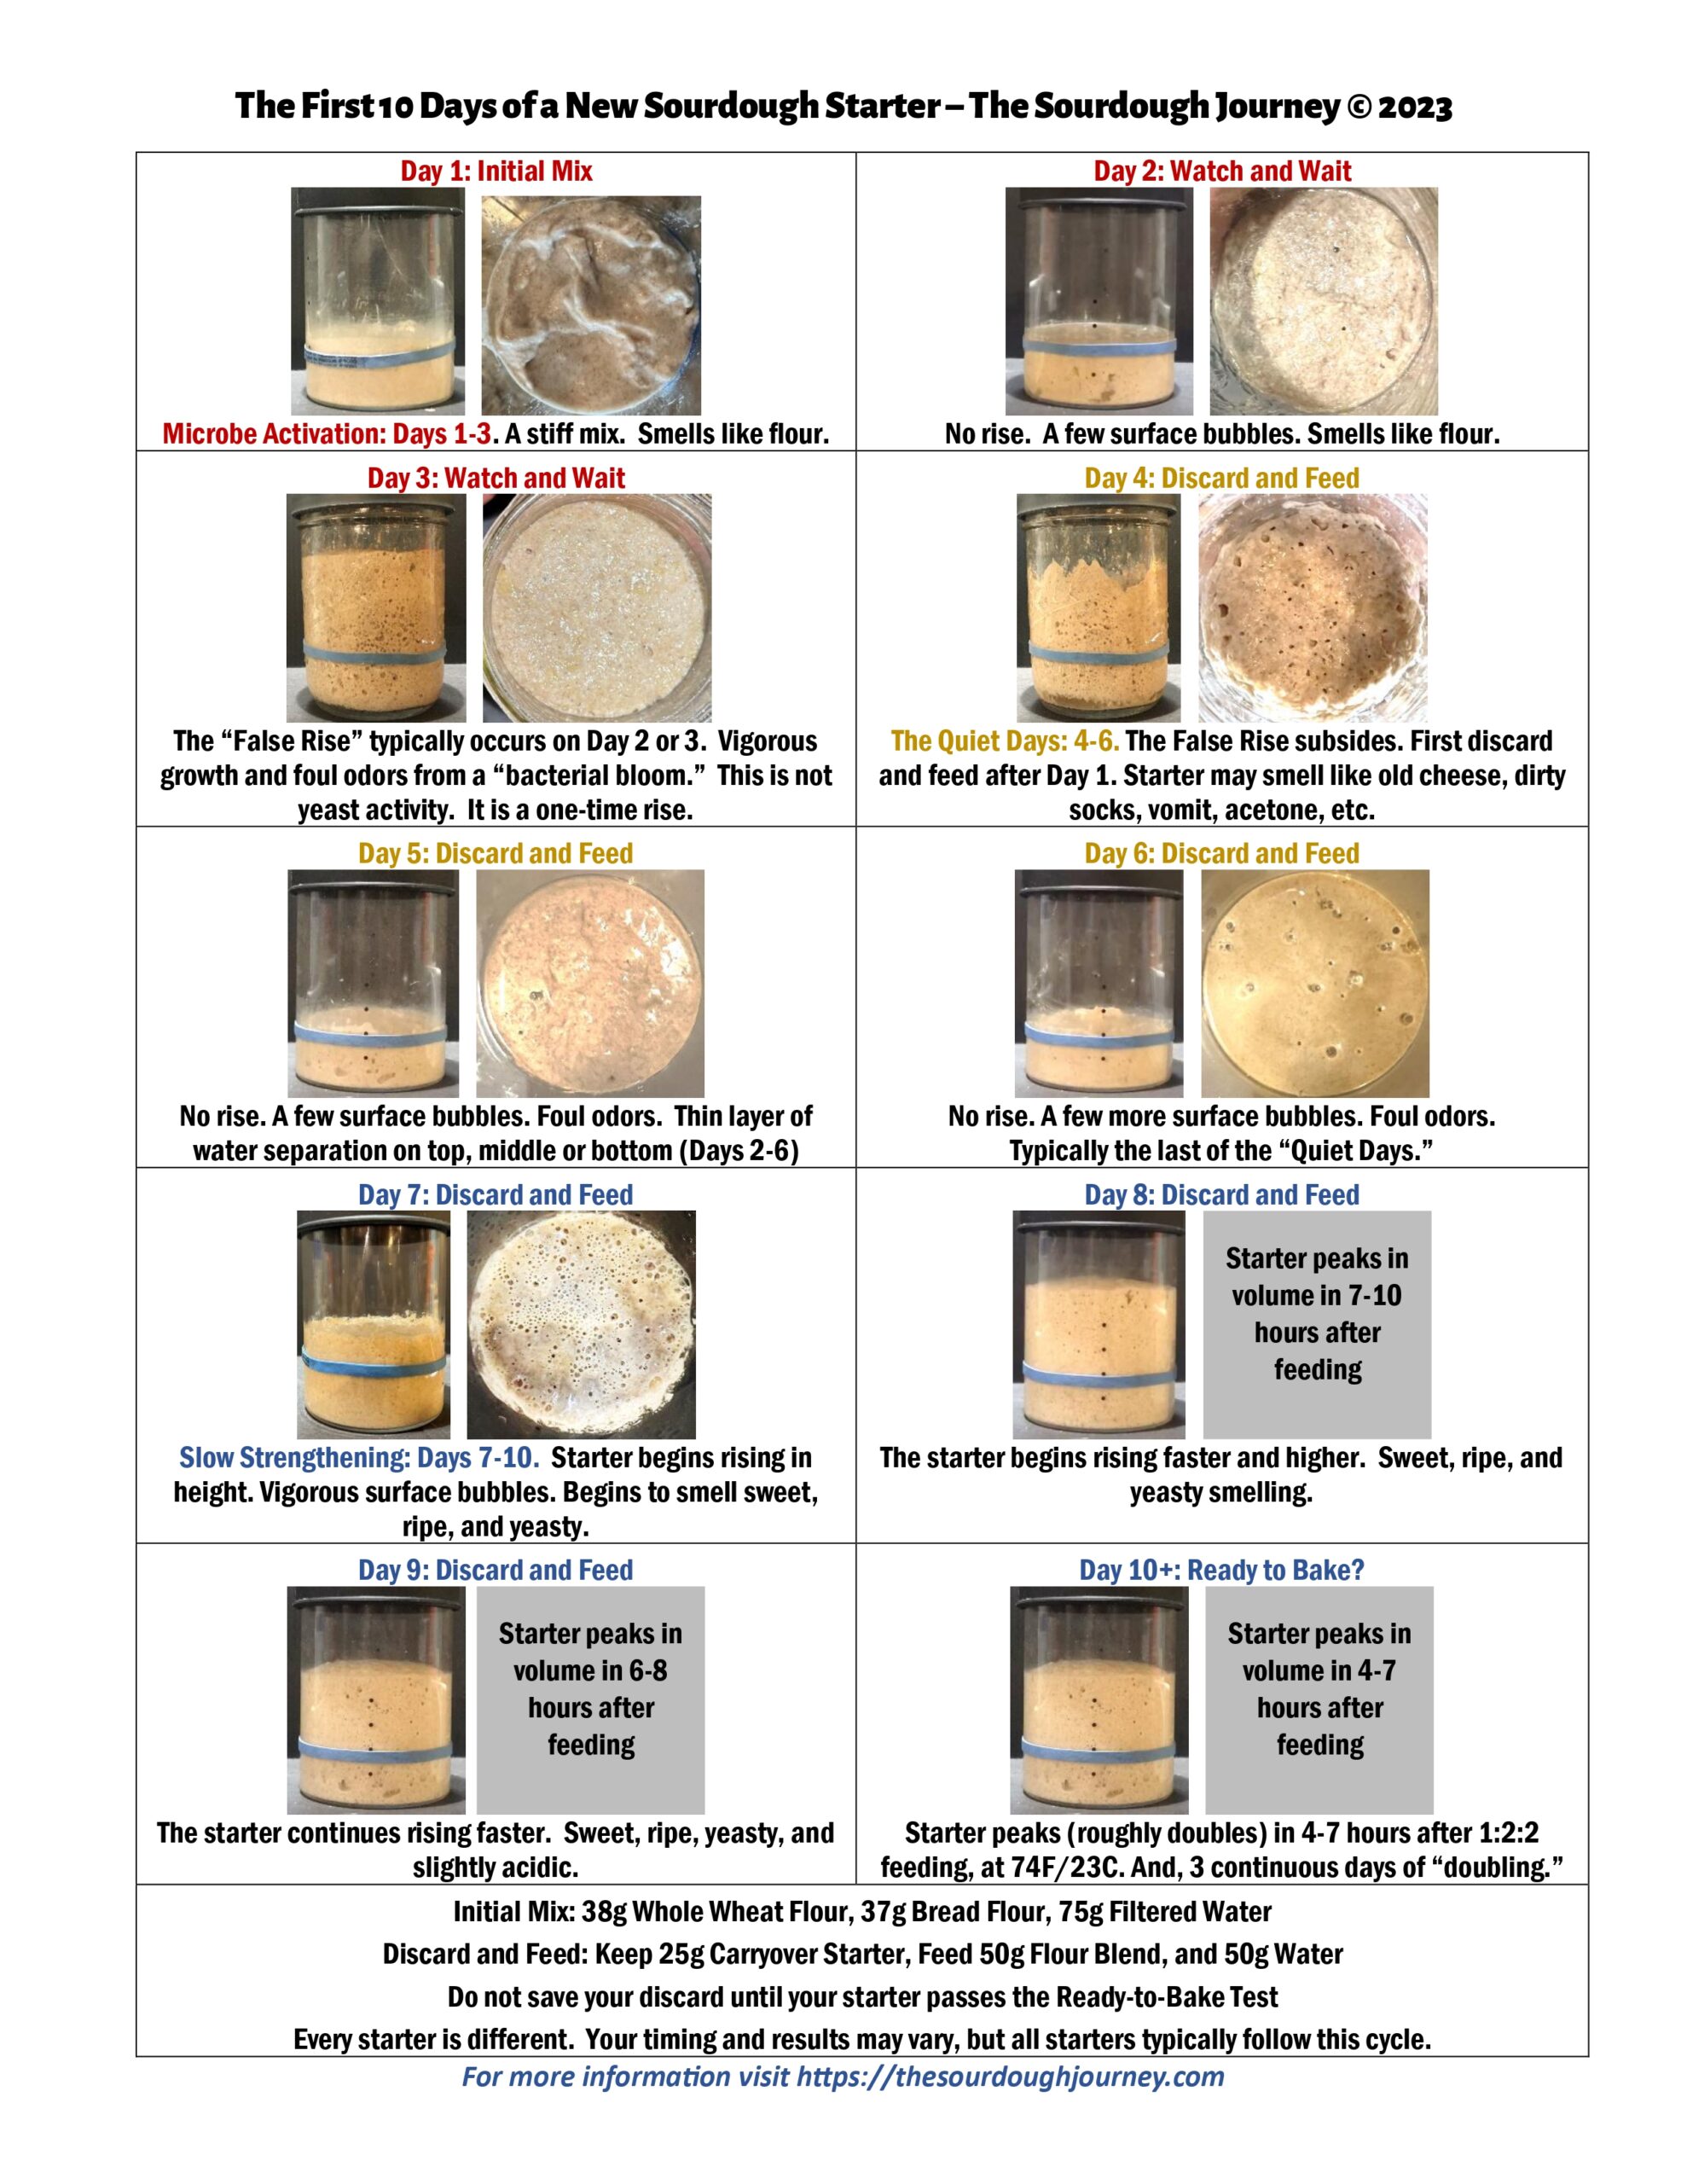
Creating a sourdough starter can be a fun and rewarding process. But sometimes things can go wrong. Identifying common issues with your starter can save you a lot of time and frustration. In this section, we will explore the signs of an unhealthy starter and some common problems you might face.
Signs Of An Unhealthy Starter
An unhealthy starter can show different signs. One common sign is a foul smell. This can indicate harmful bacteria. If your starter smells like rotten eggs or mold, it is likely unhealthy.
Another sign is the appearance of mold. Mold can be green, black, or pink. If you see mold, discard the starter immediately. Also, a starter that does not bubble or rise is unhealthy. This means it is not fermenting properly.
Common Problems
One common problem is a starter that is too watery. This can happen if you add too much water. The correct ratio of flour to water is crucial. A watery starter will not rise well.
Another problem is a starter that is too thick. This can happen if you add too much flour. A thick starter will not ferment properly. It will also be hard to mix.
Temperature can also affect your starter. If your kitchen is too cold, the starter will ferment slowly. If it is too hot, it can ferment too quickly and become sour.
Using the wrong type of flour can be a problem too. Whole wheat or rye flour can make a starter more active. But white flour can slow down fermentation.
Finally, contamination can ruin a starter. Always use clean utensils and containers. Wash your hands before handling the starter. This will keep harmful bacteria away.
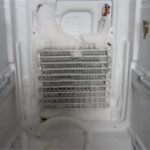
Dealing With Mold
Sourdough starters are hardy, but they can sometimes develop mold. Mold can ruin the entire starter, making it unsafe to use. It’s important to know how to recognize and remove mold to keep your starter healthy.
Recognizing Mold In Your Starter
Mold in a sourdough starter appears as fuzzy spots. These spots can be white, green, black, or pink. Mold usually grows on the surface of the starter. It may also have a distinct, unpleasant odor.
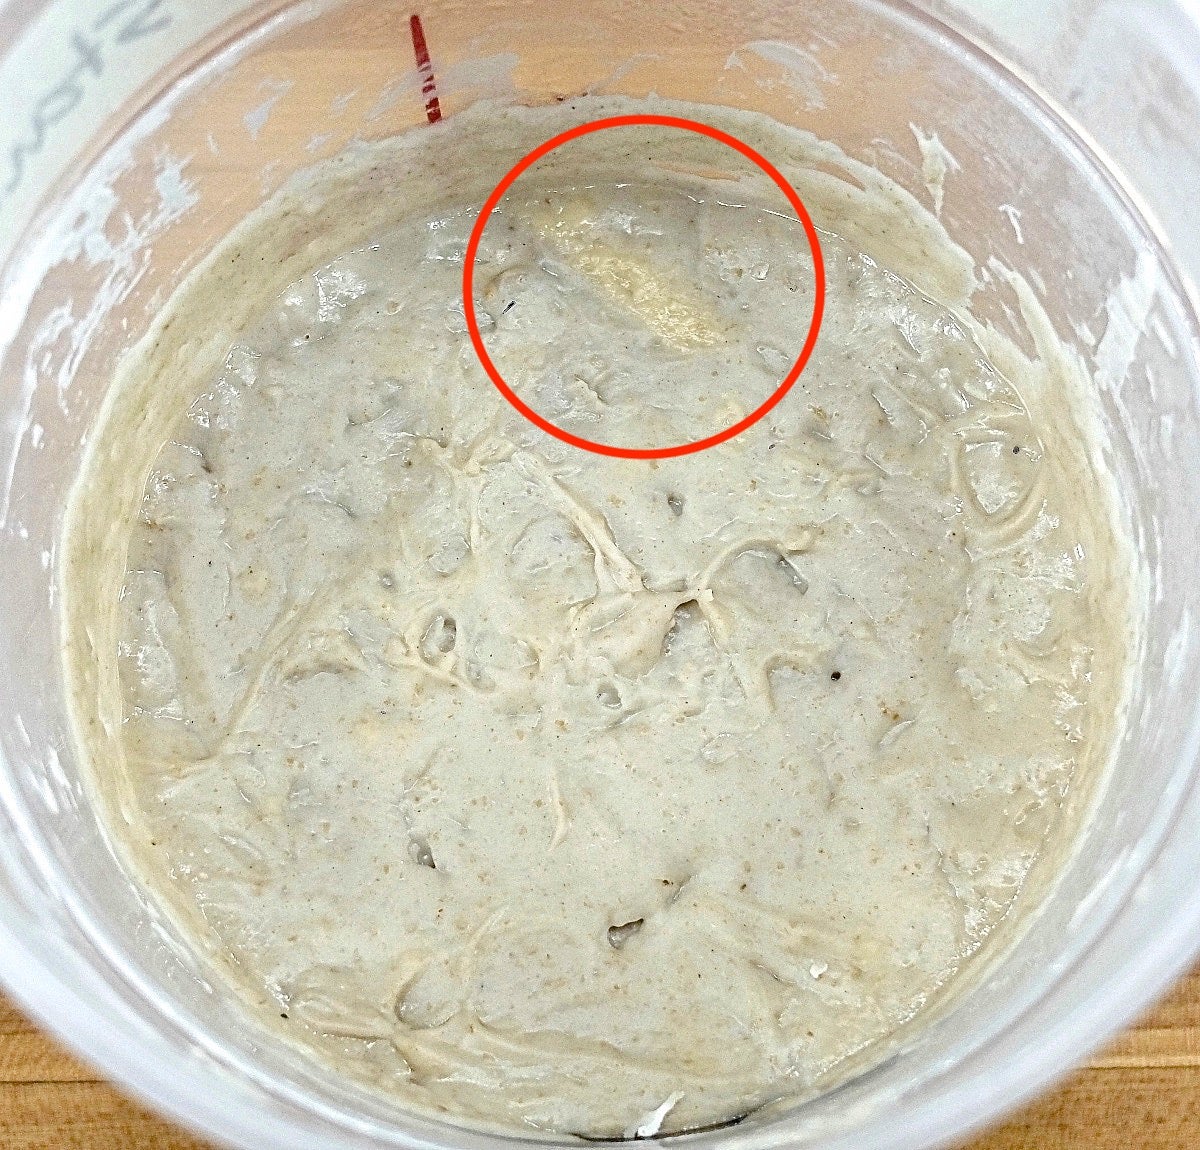
Sometimes, you might mistake hooch (a liquid that forms on top) for mold. Hooch is harmless and can be mixed back in. Mold, on the other hand, should be addressed immediately.
Steps To Remove Mold
If you see mold, act quickly. Start by carefully removing the moldy parts of the starter. Use a clean spoon to scoop out the affected areas. Discard these parts immediately.
Next, transfer the remaining healthy starter to a clean jar. Use a new, sterilized container to prevent further contamination. Feed the starter with fresh flour and water.
Monitor the starter closely in the following days. If mold reappears, it might be better to start over with a new batch. Keeping your starter clean and feeding it regularly can help prevent mold growth.
Credit: thesourdoughjourney.com
Fixing A Weak Starter
A strong sourdough starter is essential for baking perfect bread. Sometimes, your starter may become weak. It might not rise well or have a poor smell. This section will help you fix a weak starter. Follow these tips to revive your starter and get it back to full strength.
Causes Of Weak Starters
There are several reasons why a sourdough starter may become weak. Understanding the causes is the first step to fixing the issue.
- Infrequent Feeding: Starters need regular feeding to stay active. If you skip feedings, your starter may weaken.
- Temperature: Starters thrive at room temperature. Too cold or too hot conditions can slow down their activity.
- Water Quality: Tap water with chlorine or other chemicals can harm the natural yeast.
- Flour Quality: Using poor quality or old flour can result in a weak starter.
Strengthening Techniques
To strengthen a weak starter, follow these techniques. These methods will help revive your starter and make it robust again.
- Regular Feeding: Feed your starter every 12 hours. Use equal parts flour and water.
- Warm Environment: Keep your starter at a consistent room temperature, around 70-75°F (21-24°C).
- Use Filtered Water: Avoid tap water. Use filtered or bottled water for feeding.
- Quality Flour: Use fresh, high-quality flour. Whole grain flours can add extra nutrients.
Table For Quick Reference
| Problem | Cause | Solution |
|---|---|---|
| Weak Rise | Infrequent Feeding | Feed every 12 hours |
| Slow Activity | Cold Temperature | Keep at 70-75°F (21-24°C) |
| Poor Smell | Bad Water Quality | Use filtered water |
| Low Nutrients | Old Flour | Use fresh, quality flour |
Addressing Unpleasant Odors
Sourdough starters can be tricky. Sometimes, they produce unpleasant odors. These smells can be off-putting. They might even make you question your baking skills. Don’t worry! This guide will help you understand and fix these issues.
Types Of Bad Smells
A sourdough starter can emit various bad smells. A common one is the smell of nail polish remover. This indicates the presence of acetone. Your starter might also smell like rotten eggs. This is due to sulfur compounds. Another possible odor is the smell of vomit. This means the starter has an overgrowth of bad bacteria.
Eliminating Odors
To eliminate odors, start by refreshing your starter. Discard most of the old starter. Keep a small amount as a base. Feed it with fresh flour and water. Do this twice a day. Ensure your kitchen environment is clean. This helps prevent bad bacteria growth.
Another tip is to use filtered water. Tap water can contain chlorine. This can harm your starter. Also, check your flour. Fresh, high-quality flour gives better results. Lastly, store your starter in a glass container. Plastic can absorb and hold odors.
Credit: www.kingarthurbaking.com
Managing Consistency Issues
Managing consistency issues in your sourdough starter is crucial for successful baking. The texture and thickness of your starter can impact the quality of your bread. Addressing these issues early helps maintain a healthy and active starter.
Too Thick Or Too Thin
A sourdough starter that is too thick can be hard to stir and may not rise well. This could be due to adding too much flour or not enough water. If your starter is too thin, it may become watery and separate. This can happen if there is too much water or not enough flour.
To fix a thick starter, gradually add small amounts of water until you reach the desired consistency. Aim for a pancake batter-like texture. For a thin starter, add a bit of flour and mix well until it thickens.
Balancing Hydration Levels
Hydration levels play a key role in the health of your sourdough starter. Too much water can make the starter runny. Too little water can make it dense.
To balance hydration, measure your ingredients accurately. Use a digital scale for precise measurements. Stick to a 1:1 ratio of flour and water by weight. This helps maintain a consistent texture.
Regular feeding with the correct ratio keeps your starter active and bubbly. If you notice changes in consistency, adjust the flour or water slightly. Small tweaks can make a big difference.
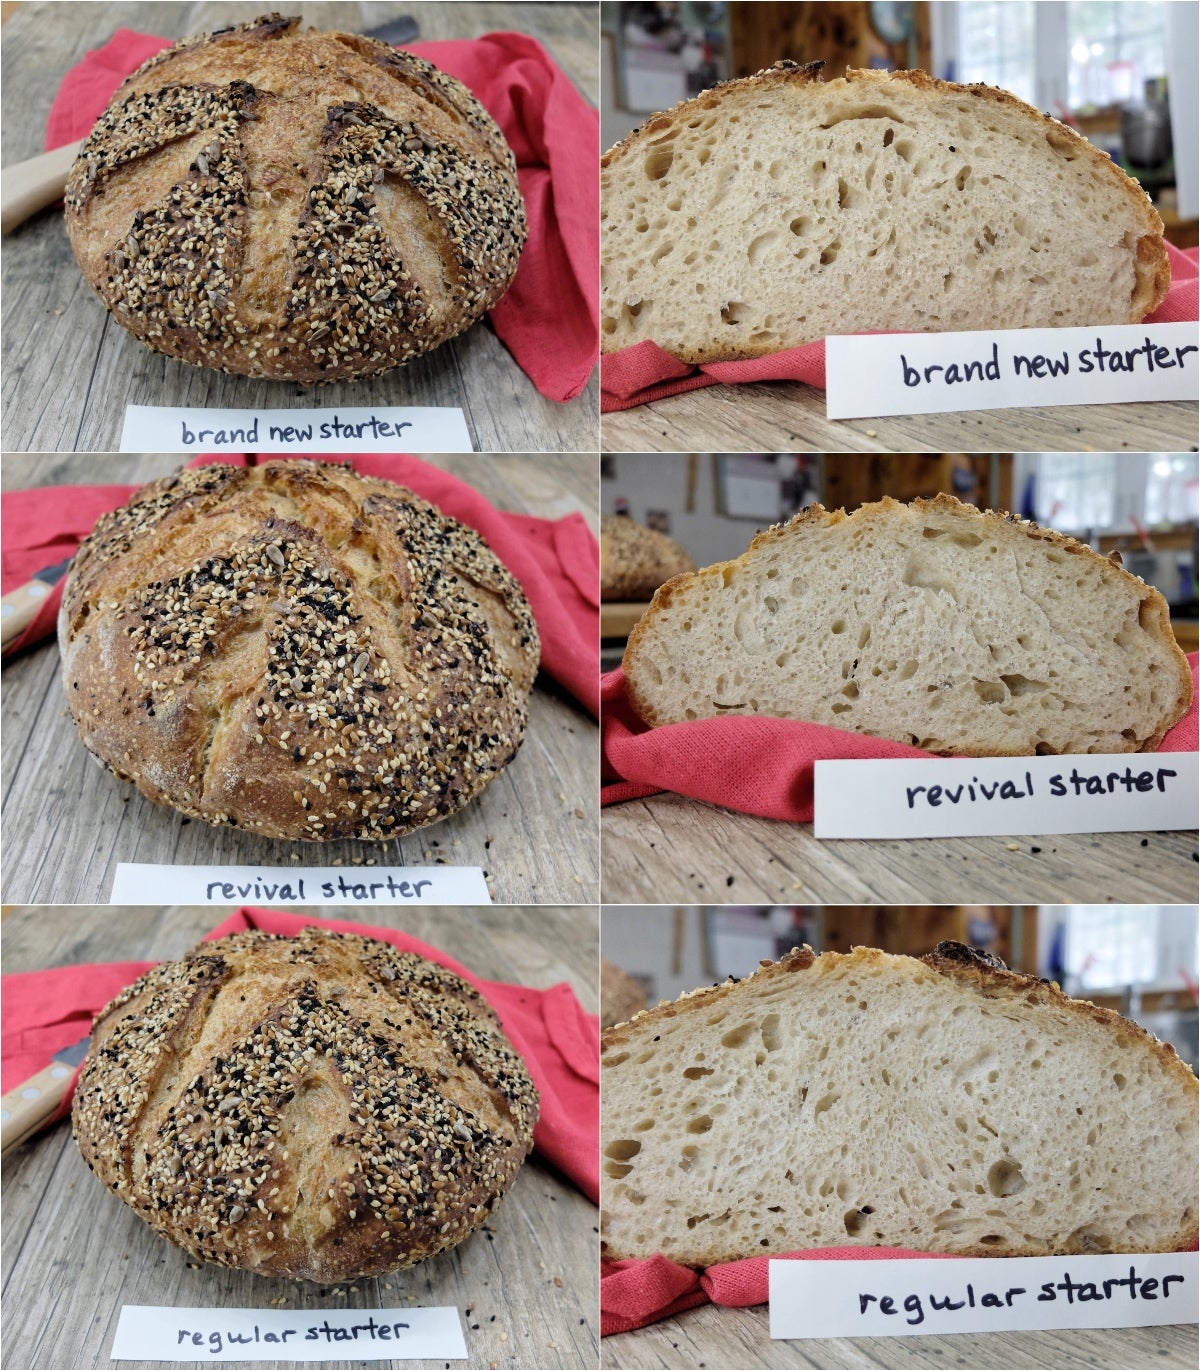
Reviving A Dormant Starter
A dormant sourdough starter can be frustrating. But, it can be revived. Understanding the symptoms and steps to reactivate it is key. Let’s dive into the process of bringing your starter back to life.
Symptoms Of Dormancy
A dormant starter shows clear signs. It may have a layer of liquid on top. This liquid, called hooch, is harmless. The starter may also smell different. It might smell like alcohol or vinegar. Another symptom is a lack of bubbles. No bubbles mean no activity. The starter might look flat and lifeless.
Steps To Reactivate
Start by discarding half of the starter. This step reduces the acidity. Next, feed the starter with equal parts of flour and water. Use room temperature water. Mix the starter well. Cover it loosely and let it sit in a warm place. Wait for 12-24 hours.
Check for bubbles and growth. If there’s no change, repeat the feeding process. Sometimes, it takes a few days to see results. Keep feeding and checking. Once bubbles appear, your starter is active again.
Move the reactivated starter to the fridge if not using daily. Feed it weekly to keep it alive. An active starter is key to delicious sourdough bread.
Preventative Measures
Keeping your sourdough starter healthy requires consistent care. Preventative measures help ensure your starter remains active and ready for baking. These measures include regular maintenance and proper storage. By following these tips, you can avoid common issues and keep your starter in great shape.
Regular Maintenance Tips
Regular maintenance is key to a thriving sourdough starter. Here are some tips to keep your starter happy:
- Feed your starter: Feed it equal parts flour and water. Do this every 12 hours.
- Use clean tools: Always use clean utensils and containers. This prevents contamination.
- Monitor temperature: Keep your starter in a warm place. Ideal temperature is 70-75°F (21-24°C).
- Check for activity: Look for bubbles and growth. These are signs of a healthy starter.
- Discard regularly: Remove and discard half of the starter before each feeding. This keeps the acidity balanced.
Storing Your Starter
Proper storage is essential for maintaining the vitality of your sourdough starter. Consider these methods:
- Room temperature storage: Ideal for daily bakers. Feed your starter twice a day.
- Refrigeration: For less frequent baking. Feed once a week. Store in an airtight container.
- Freezing: For long-term storage. Freeze in small portions. Thaw and feed to reactivate.
| Storage Method | Feeding Frequency | Notes |
|---|---|---|
| Room Temperature | Twice daily | Best for active starters |
| Refrigeration | Weekly | Use airtight container |
| Freezing | Before use | Thaw and feed to reactivate |
Frequently Asked Questions
Why Is My Sourdough Starter Not Bubbling?
Your starter may need more time or warmth. Feed it regularly. Keep it in a warm spot.
What Should I Do If My Starter Smells Bad?
A bad smell can mean it’s hungry. Feed it more often. Discard some if necessary.
Why Does My Sourdough Starter Have Hooch On Top?
Hooch is a sign of hunger. Stir it back in or pour it off. Feed your starter.
How Can I Fix A Watery Sourdough Starter?
Add more flour to thicken it. Aim for a pancake batter consistency. Feed it regularly.
Why Is My Sourdough Starter Not Rising?
It could be too cold or inactive. Place it in a warmer spot. Feed it twice daily.
Conclusion
Troubleshooting your sourdough starter can be easy with patience and practice. Remember to keep your starter warm and fed regularly. Check for signs of activity like bubbles and rising. If issues arise, don’t worry. Adjusting feeding schedules or temperatures can help.
Stay observant and experiment with small changes. Success comes with time and experience. Happy baking!
")