Tesla Wall Connector Troubleshooting can be daunting. Problems can arise unexpectedly, frustrating users.
Owning a Tesla Wall Connector simplifies electric vehicle charging. But like any tech, it can face issues. From connectivity problems to charging errors, these hurdles can hinder your charging experience. Understanding common problems and their solutions can save time and stress.
This guide will help you identify and fix common issues, ensuring your Wall Connector operates smoothly. By the end, you will have practical steps to address these problems confidently. So, let’s dive in and tackle these troubleshooting tips together!
Common Issues
Experiencing issues with your Tesla Wall Connector? You are not alone. Many users face common issues that can disrupt charging. Understanding these problems can help you troubleshoot and maintain your device efficiently.
Power Problems
Power problems are frequent with Tesla Wall Connectors. They can arise due to several factors.
- No Power to the Connector: Ensure the circuit breaker is on. Check if the power supply is working. Verify the wiring is correct.
- Intermittent Power: This can happen due to loose connections. Inspect the wiring and tighten any loose connections.
- Overheating: High temperatures can cause the connector to shut down. Keep the unit in a cool, ventilated area.
Connectivity Issues
Connectivity issues can prevent your Wall Connector from functioning correctly. Here’s what you should look for:
- Wi-Fi Connection Problems: Ensure your Wi-Fi signal is strong. Move the router closer to the Wall Connector if needed. Double-check the Wi-Fi credentials are correct.
- Firmware Updates: Outdated firmware can cause connectivity issues. Make sure your Wall Connector has the latest updates installed.
- App Not Syncing: Sometimes, the Tesla app may not sync with the Wall Connector. Restart the app and reconnect to your device.

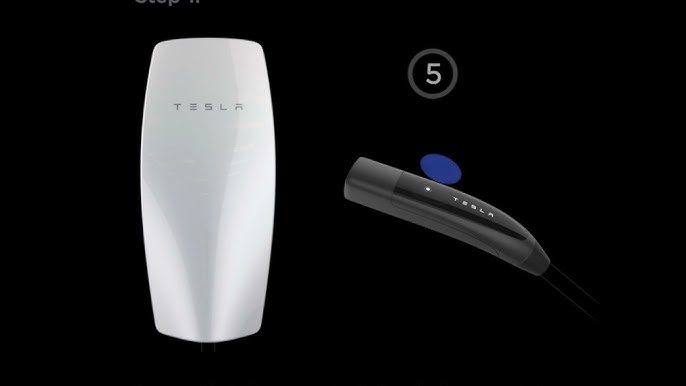
Credit: www.youtube.com
Initial Checks
Are you experiencing issues with your Tesla Wall Connector? Before diving into advanced troubleshooting, start with some initial checks. These simple steps often resolve common problems and save time. Let’s look at what you should do first.
Inspecting Cables
Begin by inspecting the charging cables. Check for any visible damage, such as cuts or frays. Ensure the cable is securely connected to the wall connector. Look at the connector itself for any signs of wear or damage. If you find any issues, it may be time to replace the cable.
Checking Power Supply
Next, check the power supply to your Tesla Wall Connector. Verify that the circuit breaker is on and functioning. Inspect the outlet for any signs of damage or wear. Ensure the connector is plugged in securely. If the power supply seems fine but the connector still doesn’t work, you might need professional help.
Led Indicator Guide
Troubleshooting your Tesla Wall Connector can be easier with the help of the LED indicator. The LED light on your charger provides important information about its status. This guide will help you understand the different colors and blink patterns of the LED indicator, so you can quickly identify and resolve any issues.
Understanding Colors
The LED indicator on your Tesla Wall Connector changes colors to signal different statuses. Here is a quick reference to what each color means:
- Green: The Wall Connector is ready and waiting to charge.
- Blue: The Wall Connector is connected to the car and is ready to charge.
- Flashing Blue: The Wall Connector is communicating with the car.
- Yellow: The Wall Connector is in a limited state or firmware update mode.
- Red: There is an error that needs attention.
Interpreting Blink Patterns
The blink pattern of the LED indicator provides more specific information about the status or error. Below is a table explaining common blink patterns and their meanings:
| Blink Pattern | Meaning |
|---|---|
| Solid Green | The Wall Connector is ready to charge. |
| Slow Pulsing Blue | The Wall Connector is charging the car. |
| Rapid Pulsing Blue | The Wall Connector is communicating with the car. |
| Solid Yellow | The Wall Connector is in a limited state. |
| Flashing Red | An error has occurred. Refer to the error code. |
If you see a flashing red light, count the number of blinks between pauses. This blink count is an error code that can help diagnose the issue. For example, three red blinks followed by a pause indicates a ground fault error.
Understanding these colors and blink patterns can save you time and effort in troubleshooting. Keep this guide handy for quick reference whenever you need it.
Resetting The Wall Connector
If your Tesla Wall Connector isn’t working right, you might need to reset it. This can help fix many common issues. We’ll guide you through two types of resets: a soft reset and a hard reset.
Soft Reset
A soft reset is the easiest way to restart your Wall Connector. This reset will not erase any settings. Follow these steps to perform a soft reset:
1. Find the reset button on the Wall Connector.
2. Press and hold the button for 5-10 seconds.
3. Release the button and wait for the lights to flash.
4. The Wall Connector will restart and should work properly again.
Hard Reset
A hard reset is more thorough. It will restore the Wall Connector to factory settings. Use this if the soft reset doesn’t work:
1. Turn off the circuit breaker connected to the Wall Connector.
2. Wait for at least 30 seconds.
3. Turn the circuit breaker back on.
4. Press and hold the reset button for 15-20 seconds.
5. Release the button and wait for the Wall Connector to restart.
After a hard reset, you may need to reconfigure your settings. This process should resolve most technical issues.
Firmware Updates
Firmware updates are crucial for the smooth operation of your Tesla Wall Connector. These updates ensure your device runs the latest software, offering improved features and security. Let’s delve into how you can check and install these updates.
Checking For Updates
Checking for firmware updates is straightforward. Follow these steps:
- Connect your Wall Connector to Wi-Fi.
- Open the Tesla app on your smartphone.
- Navigate to the ‘Settings’ menu.
- Look for the ‘Firmware Updates’ section.
- Check if there is an update available.
Keeping your Wall Connector connected to Wi-Fi helps it automatically check for updates.
Installing Updates
Installing firmware updates is just as simple. Here’s how to do it:
- Ensure your Wall Connector is connected to power.
- Confirm the availability of an update in the Tesla app.
- Tap on ‘Install Update’ in the app.
- Wait for the installation process to complete.
Do not interrupt the power supply during the update. This can cause issues.
After installation, your Wall Connector will restart. Verify the update by checking the firmware version in the app.
Regular updates help your Tesla Wall Connector function better. They enhance performance and fix bugs. Always keep an eye out for notifications about new updates.

Credit: www.reddit.com
Wi-fi Connection Tips
Having trouble with your Tesla Wall Connector’s Wi-Fi connection? This guide will help you troubleshoot common issues. Proper Wi-Fi connectivity ensures your wall connector functions efficiently. Follow these simple tips to improve your connection.
Improving Signal Strength
First, check the distance between your wall connector and the Wi-Fi router. The closer they are, the better the signal strength. Walls and other obstacles can block the signal. Try to place your router in a central location.
Next, consider using a Wi-Fi extender. It can boost the signal strength. Ensure the extender is compatible with your router. This can significantly improve connectivity.
Finally, reduce interference from other electronic devices. Devices like microwaves and cordless phones can disrupt the Wi-Fi signal. Keep such devices away from your router and wall connector.
Reconnecting To Network
If your wall connector disconnects, try reconnecting to the network. Start by rebooting your router. Unplug it, wait for a minute, then plug it back in.
Next, reset the Wi-Fi settings on your wall connector. Press and hold the reset button for five seconds. This will initiate a fresh connection attempt.
After resetting, follow the setup instructions in the Tesla app. Ensure you select the correct network and enter the right password. Double-check for typos in the password.
If problems persist, check for firmware updates. Updating the firmware can resolve many connectivity issues. Follow the instructions in the Tesla app to update.
If none of these steps work, contact Tesla support. They can provide further assistance. It’s essential to maintain a stable Wi-Fi connection for optimal performance.
Safety Precautions
Safety should always be the top priority during Tesla Wall Connector troubleshooting. Understanding and following safety precautions is crucial. It ensures your well-being and prevents damage. Mishandling electrical components can lead to serious injuries. Using the right protective gear is vital. Below are important safety measures.
Handling Electrical Components
Always turn off the power before starting any work. This prevents electric shocks. Use a voltage tester to ensure the power is off. Handle wires and connectors carefully. Avoid touching exposed wires. Use insulated tools to avoid accidents. Keep your hands dry and free from moisture. Wet hands increase the risk of electrical shock.
Using Protective Gear
Wear protective gloves to safeguard your hands. Insulated gloves are the best choice. They prevent electrical shock. Safety goggles protect your eyes from debris. They also shield your eyes from sparks. Wear non-conductive shoes to avoid grounding yourself. Rubber-soled shoes are ideal. A safety helmet protects your head from falling objects. Always wear appropriate clothing. Avoid loose clothing that can get caught.
When To Contact Support
Troubleshooting your Tesla Wall Connector can sometimes be straightforward. Yet, there are moments when contacting support becomes necessary. Knowing when to reach out for expert help can save you time and prevent further issues.
Identifying Critical Issues
Some problems need professional attention. Recognize these critical issues:
- No power to the Wall Connector
- Frequent tripping of the circuit breaker
- Burning smell from the unit
- Visible damage to the cable or connector
- Persistent error codes on the LED display
Providing Necessary Information
When contacting Tesla support, provide detailed information to expedite the process:
- Wall Connector serial number
- Error code displayed (if any)
- Details of any visible damage
- Steps you’ve already taken to troubleshoot
- Photographs of the installation and error messages (if possible)
Clear, concise information helps the support team diagnose and resolve issues faster. Ensure you have all necessary details before contacting them.

Credit: www.theelectricconnection.com
Frequently Asked Questions
Why Is My Tesla Wall Connector Not Charging?
Check if the circuit breaker is on. Ensure the connector is plugged in securely.
How Do I Reset My Tesla Wall Connector?
Press the reset button on the connector. Wait for it to restart.
What Do The Lights On The Tesla Wall Connector Mean?
Green means charging. Blue means ready. Red indicates an error.
How Can I Update My Tesla Wall Connector Firmware?
Connect it to WiFi. Updates happen automatically when connected.
What Should I Do If My Tesla Wall Connector Overheats?
Unplug it immediately. Let it cool down before using it again.
Conclusion
Troubleshooting your Tesla Wall Connector can seem daunting. Yet, it’s manageable with patience. Check connections regularly. Ensure firmware is up-to-date. Inspect the power source. Follow these steps to maintain efficiency. If issues persist, contact Tesla support. They offer expert help.
Keep your Wall Connector in top shape. Happy charging!


