To troubleshoot a walking pad, first, ensure it’s on a flat surface and check the power connections. Then, inspect the belt for proper alignment.
Walking pads are convenient for indoor exercise but can occasionally face issues. Proper troubleshooting helps keep them in optimal condition. Common problems include power issues, belt misalignment, and unusual noises. Regular maintenance and quick troubleshooting can extend the lifespan of your walking pad.
This guide will help you identify and resolve common issues efficiently. Whether it’s a loose belt or a power problem, these steps will keep your walking pad running smoothly. Stay active and maintain your walking pad for a seamless workout experience.
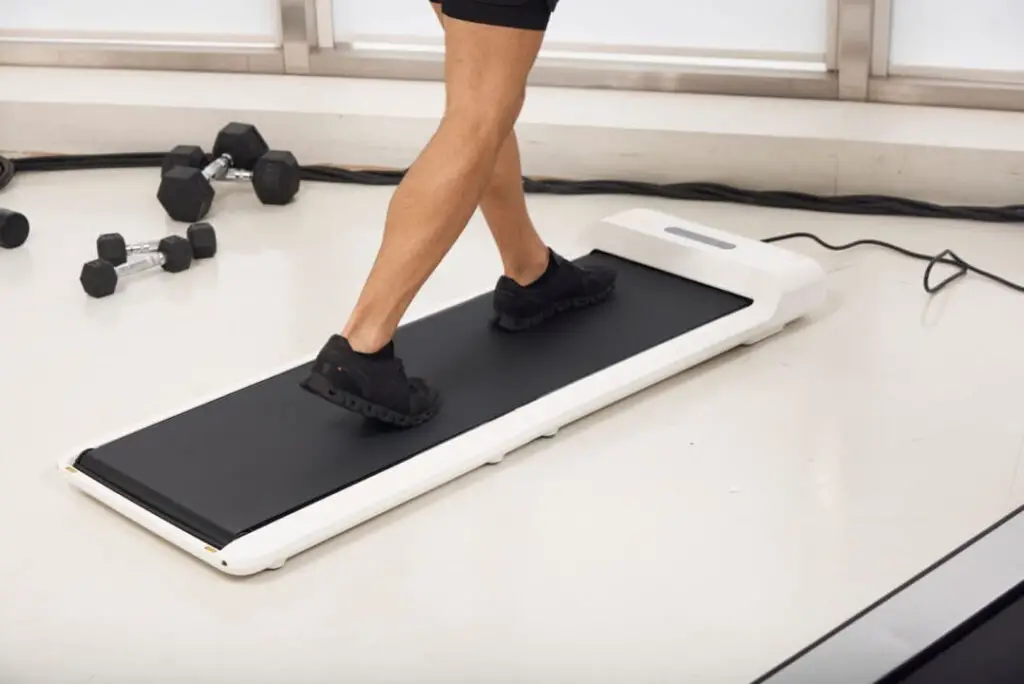
Common Issues
Walking pads are great for exercise at home. Yet, users often face issues. This section will address common problems and offer solutions.
Speed Problems
Speed problems can frustrate users. Here are some common causes and fixes:
| Issue | Solution |
|---|---|
| Speed not changing | Check the remote batteries. Replace if needed. |
| Speed too fast | Adjust the speed settings. Refer to the manual. |
| Speed too slow | Ensure the walking pad is on a flat surface. |
Noise Concerns
Noises can be annoying. Here are potential noise issues and their fixes:
- Rattling noise: Tighten any loose bolts or screws.
- Grinding noise: Clean the belt and motor area.
- Squeaking noise: Apply lubricant to the belt.
Regular maintenance can prevent noise. Always keep your walking pad clean and lubricated.
Startup Failures
Experiencing startup failures with your walking pad can be frustrating. These issues can stem from various sources. Below, we address common startup failure problems and how to troubleshoot them effectively.
Power Supply Check
The first step in addressing startup failures is to check the power supply. Ensure the walking pad is plugged in securely. Verify that the outlet is functioning correctly. You can use a different device to check the outlet’s power.
Inspect the power cord for any visible damage. If there are signs of wear or fraying, replace the cord. A damaged power cord can prevent the walking pad from starting.
Here is a quick checklist for power supply issues:
- Confirm the walking pad is plugged in.
- Test the outlet with another device.
- Examine the power cord for damage.
- Replace the cord if necessary.
Control Panel Reset
If the power supply is working, the next step is to reset the control panel. Sometimes, a simple reset can resolve startup failures.
Follow these steps to reset the control panel:
- Turn off the walking pad and unplug it.
- Wait for at least 30 seconds.
- Plug the walking pad back in.
- Turn it on and check if it starts.
If the walking pad still does not start, consult the user manual. The manual may have specific reset instructions for your model.
| Step | Description |
|---|---|
| 1 | Turn off and unplug the walking pad. |
| 2 | Wait for 30 seconds. |
| 3 | Plug the walking pad back in. |
| 4 | Turn it on and check functionality. |
Resetting the control panel can often resolve startup issues. If the problem persists, additional troubleshooting may be necessary.
Belt Alignment
Ensuring proper belt alignment is essential for the optimal performance of your walking pad. A misaligned belt can lead to uneven wear, reduced efficiency, and potential safety hazards. Regular checks and adjustments can help you maintain the longevity of your walking pad.
Visual Inspection
Before making any adjustments, start with a visual inspection of the belt. Look for any signs of wear or damage. Check if the belt is centered. A centered belt should have equal spacing on both sides.
- Turn on the walking pad at a low speed.
- Observe the belt from the front and the back.
- Note if the belt drifts to one side.
Adjustment Steps
If the belt is not centered, follow these adjustment steps to align it correctly:
- Locate the adjustment bolts at the rear of the walking pad.
- Use an Allen wrench to turn the bolts.
- To move the belt to the right, turn the right bolt clockwise.
- To move the belt to the left, turn the left bolt clockwise.
- Make small adjustments, about a quarter turn each time.
- Run the walking pad and observe the belt’s position.
- Repeat the process until the belt is centered.
Always make sure to perform adjustments with the walking pad running at a low speed. This ensures you can immediately see the results of your adjustments.
Speed Calibration
Walking pad speed calibration ensures your device runs smoothly. It helps maintain accurate speed settings.
Manual Calibration
Manual calibration is crucial for your walking pad. Follow these simple steps:
- Turn off the walking pad.
- Locate the calibration screws on the pad.
- Use a screwdriver to adjust the screws.
- Turn on the walking pad and test the speed.
Repeat these steps if the speed is still incorrect. Ensure the pad is on a flat surface.
Software Updates
Software updates can fix speed issues. Follow these instructions:
- Connect your walking pad to the internet.
- Check for updates in the device’s settings menu.
- Download and install any available updates.
- Restart the walking pad.
Always keep your device’s software up to date. This ensures it runs at optimal performance.
| Step | Action |
|---|---|
| 1 | Turn off the walking pad. |
| 2 | Locate the calibration screws. |
| 3 | Adjust the screws with a screwdriver. |
| 4 | Turn on and test the speed. |
Lubrication Tips
Proper lubrication of your walking pad is crucial for its longevity and performance. In this section, we offer essential lubrication tips to keep your walking pad running smoothly. Follow these guidelines for optimal results.
Recommended Lubricants
Using the right lubricant is essential. Here are the best options:
- Silicone-Based Lubricants: These are the most common and effective.
- Non-Petroleum Lubricants: Safe for the belt and motor.
| Lubricant Type | Benefits |
|---|---|
| Silicone-Based | Reduces friction, safe for belts |
| Non-Petroleum | Prevents motor damage |
Application Guide
Follow this guide to apply lubricant correctly:
- Turn Off the walking pad and unplug it.
- Lift the belt to access the deck.
- Apply lubricant under the belt. Use about 1 oz.
- Spread the lubricant evenly using an applicator.
- Plug In and turn on the walking pad.
- Walk on it for 3-5 minutes to distribute the lubricant.
Regular lubrication ensures your walking pad works efficiently. This reduces wear and tear. It also minimizes noise during use.
Error Codes
Your walking pad might show error codes when there’s a problem. These codes help you understand what needs fixing. Below, we’ll explore common error codes and how to reset them.
Common Codes
Here are some of the most common error codes:
| Error Code | Description |
|---|---|
| E1 | Motor malfunction |
| E2 | Overheating |
| E3 | Speed sensor error |
| E4 | Communication error |
Reset Procedures
Follow these steps to reset your walking pad:
- Unplug the walking pad from the power source.
- Wait for at least 30 seconds.
- Plug it back in.
- Press the reset button on the console.
If the error persists, refer to your user manual or contact customer support.
Sensor Issues
Walking pads are amazing for indoor exercise. But sensor issues can disrupt workouts. This guide helps with sensor cleaning and replacement. Keep your walking pad working smoothly.
Sensor Cleaning
Dirty sensors can cause malfunctions. Regular cleaning is essential. Follow these steps to clean your sensors:
- Turn off the walking pad and unplug it.
- Locate the sensors. They are usually under the belt.
- Use a soft cloth to wipe the sensors gently.
- Check for any debris or dust around the sensors.
- Use compressed air to blow away any stubborn dirt.
Clean sensors ensure accurate performance. Make this a monthly routine.
Replacement Guide
Sometimes, sensors may need replacement. Follow this guide for a simple replacement:
| Step | Description |
|---|---|
| 1 | Turn off and unplug the walking pad. |
| 2 | Remove the walking pad cover to access the sensors. |
| 3 | Disconnect the old sensors carefully. |
| 4 | Connect the new sensors in the same position. |
| 5 | Replace the cover and plug in the walking pad. |
| 6 | Turn on the walking pad and test the new sensors. |
New sensors can restore your walking pad’s functionality. Follow these steps for a hassle-free experience.
Regular Maintenance
Regular maintenance of your walking pad ensures its longevity and smooth operation. Without proper upkeep, you may face unexpected issues. Follow these simple steps to keep your walking pad in top condition.
Cleaning Schedule
Maintaining a clean walking pad is crucial for optimal performance. Set a regular cleaning schedule to prevent dirt buildup.
- Daily: Wipe the surface with a dry cloth.
- Weekly: Clean the belt and deck with a damp cloth.
- Monthly: Vacuum the motor area to remove dust.
Use a mild detergent for stubborn stains. Avoid using harsh chemicals.
Inspection Checklist
Regular inspection helps identify issues early. Use this checklist to maintain your walking pad:
| Frequency | Task |
|---|---|
| Weekly | Check for loose bolts and screws. |
| Monthly | Inspect the belt for wear and tear. |
| Quarterly | Examine the motor and electrical components. |
- Ensure the belt is centered and not frayed.
- Check the display for error codes.
- Listen for unusual noises during operation.
Address any issues immediately to prevent further damage.
Frequently Asked Questions
How Do You Reset The Walkingpad?
To reset the WalkingPad, hold the mode button for 10 seconds. The display will show “RESET. ” Release the button.
Why Does My Walkingpad Stop?
Your WalkingPad may stop due to safety features, battery issues, or a malfunction. Check for obstructions, battery levels, and errors.
Why Is My Ks Walkingpad Remote Not Working?
Your KS WalkingPad remote might not work due to dead batteries, pairing issues, or interference. Check and replace batteries first. Ensure proper pairing by following the manual.
How Do You Put A Walkingpad In Pairing Mode?
To put a WalkingPad in pairing mode, press and hold the power button for 5 seconds. The LED will flash.
Why Is My Walking Pad Not Starting?
Check power connection, ensure safety key is in place, and verify the power switch is on.
Conclusion
Troubleshooting your walking pad can be simple with the right steps. Ensure regular maintenance for optimal performance. Address minor issues promptly to avoid bigger problems. Follow the manufacturer’s guidelines for best results. Keep enjoying your walking pad and maintain your fitness routine effortlessly.



This walking pad is crap!!! I unpacked it according to the directions and it appears to be on automatic display mode… switching from one display to the next every few seconds without taking commands from the remote. Right when it starts it says US.2 on the display. The battery on the remote is fine as well 3.099 volts DC
Sorry to hear that you’re having trouble with your walking pad. The “US.2” error code usually indicates a system mode issue. Try the following steps:
If none of these solutions work, I recommend reaching out to the manufacturer’s support team for further assistance.
I appreciate your patience and hope this helps! Let me know if you need further guidance.
– TroubleshootingLAB
The lights on the walking pad do not come on. I have unplugged it and tried again with no results. The remote works to increase/decrease speed and turn on/ off.
Thank you for reaching out. If the lights on your walking pad are not turning on but the remote is functioning, there could be a few possible causes:
If none of these steps resolve the issue, we recommend contacting the manufacturer for further assistance.
Hope this helps! Let us know if you need any more troubleshooting tips. TroubleshootingLAB
My display stopped working after 3 uses and I cannot find replacement parts or even a troubleshooting guide for this. cannot even find a contact for this company.
Sorry to hear that your walking pad’s display stopped working after just a few uses. I understand how frustrating this can be, especially when replacement parts and troubleshooting guides are hard to find.
First, try checking the power connection and any loose wires inside the display panel (if accessible). Sometimes, a reset can help—unplug the walking pad for a few minutes and plug it back in. If there’s a fuse inside the display unit, check if it’s blown.
If you’re unable to find a support contact, try checking the manual (if available) or looking for the brand’s official website. Some manufacturers list support emails or social media pages where you can reach out.
We will keep updating our resources to help users like you find better troubleshooting solutions. Hope this helps!
TroubleshootingLAB
walking pad does not work it as a code EOC how do i correct the situation
Hi,
Thank you for reaching out! The EOC error code on your walking pad usually indicates a communication issue between the control board and the motor. Here are a few steps you can try to resolve the issue:
Let us know if you need further assistance!
– TroubleshootingLAB