Imagine the frustration of having a pile of wet laundry and a dryer that refuses to heat up. You depend on your Whirlpool Duet Dryer to keep your clothes fresh and ready, but when it’s not working as it should, it feels like everything comes to a standstill.
You’re not alone in facing this issue, and the good news is there are practical solutions you can try before calling in professional help. You’ll discover simple steps to troubleshoot your dryer, uncover potential reasons behind the heating problem, and learn how you can possibly fix it yourself, saving both time and money.
Keep reading to find out how you can get your dryer back to doing what it does best—quickly and efficiently drying your clothes.
Common Causes
Is your Whirlpool Duet Dryer leaving your clothes damp and cold? You’re not alone. A dryer that isn’t heating can be frustrating, but understanding the common causes can help you troubleshoot effectively. From power issues to malfunctioning thermostats, let’s dive into what might be going wrong.
Power Supply Issues
Before you panic, check the power supply. Sometimes, it’s as simple as a tripped circuit breaker. Ensure the dryer is plugged in and the outlet is functioning. If you’ve ever had a light switch mysteriously stop working, you know the importance of checking the basics. Could your dryer be facing a similar issue?
Thermal Fuse Problems
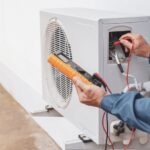
The thermal fuse is a safety device that protects your dryer from overheating. When it blows, the dryer won’t heat. It’s like having a security guard that shuts everything down at the first sign of trouble. You can check the fuse with a multimeter, a handy tool that often saves the day. Have you ever wondered how many times a tiny fuse has saved your appliances?
Heating Element Failure
The heating element is crucial for producing heat. If it fails, your dryer won’t warm up. Imagine trying to toast bread without a heating coil; it just won’t work. A visual inspection can sometimes reveal breaks or damages in the element. Is your dryer’s heating element due for a replacement?
Thermostat Malfunctions
Thermostats regulate temperature. If they’re faulty, your dryer might not heat properly. It’s like having a broken thermometer; you can’t trust the readings. Testing the thermostat with a multimeter can confirm if it’s working. Ever had a room heater mislead you with its temperature settings?
Remember, each of these issues can be tackled with a bit of patience and the right tools. By knowing where to look, you can save time and perhaps even a service call. Have you ever fixed an appliance with just a screwdriver and some determination?
Power Supply Check
If your Whirlpool Duet Dryer is not heating, the first thing you should investigate is the power supply. Without adequate power, your dryer simply cannot perform its heating functions. Checking the power supply is a straightforward task but can be crucial in diagnosing the problem. A simple power issue could be the root of your heating woes. So, let’s roll up our sleeves and dive into some practical steps.
Inspecting Circuit Breakers
Begin by inspecting your home’s circuit breakers. This is where many power supply issues originate. Circuit breakers can trip, especially if your dryer is sharing a circuit with other high-demand appliances. Head to your electrical panel and look for any breakers that are in the “off” position.
Flip them back to “on” if necessary. Sometimes, a partially tripped breaker might appear to be on but isn’t fully engaged. Give it a firm switch to ensure it’s completely reset. Have you ever had an experience where a simple flip of a breaker solved a major appliance headache? It’s more common than you think!
Verifying Outlet Voltage
Next, verify the voltage at the outlet where your dryer is plugged in. This step requires a multimeter, a handy tool for measuring electrical voltage. Set your multimeter to measure AC voltage and check the outlet. You’re looking for a reading of around 240 volts.
If the voltage is significantly lower, it could be the reason your dryer isn’t heating. Without the full 240 volts, the heating element won’t receive enough power to operate. Imagine your dryer as a runner who can’t sprint without the proper shoes—getting the right voltage is essential. Have you ever wondered why your dryer is sluggish? This might be the answer.
By ensuring your power supply is stable, you are taking a vital step toward resolving your dryer issue. Could a simple power check be the solution you’ve been looking for? Dive into these steps and see for yourself.
Thermal Fuse Replacement
Experiencing a Whirlpool Duet dryer not heating? Replacing the thermal fuse might fix the issue. This small component prevents overheating, ensuring your dryer runs safely and efficiently.
If your Whirlpool Duet dryer is not heating, it might be time to consider replacing the thermal fuse. This small yet crucial component is a safety device that prevents overheating by breaking the circuit when the dryer reaches a certain temperature. A blown fuse means your dryer won’t heat up, leaving you with damp clothes and frustration. Let’s dive into how you can locate and replace this essential part, ensuring your dryer runs smoothly again.Locating The Thermal Fuse
The first step in replacing your thermal fuse is finding it. Typically, the thermal fuse is located on the blower housing or at the dryer’s heat source, such as the heating element. Unplug your dryer for safety. Remove the back panel to access the internal components. Once you’re inside, look for a small, white or gray component with two wires connected to it. This is your thermal fuse.Steps To Replace The Fuse
Replacing the thermal fuse is straightforward. Start by ensuring your dryer is unplugged to prevent any electrical accidents. Disconnect the wires from the faulty thermal fuse using a screwdriver. Keep track of which wire goes where to make reconnection easy. Remove the old fuse and install the new one in the same position. Reconnect the wires securely, and replace the back panel of your dryer. Plug your dryer back in and test it to see if it’s heating properly. Feel the relief of warm air and know you’ve tackled a common household problem. Did you find this process challenging or surprisingly simple? Sometimes, these small DIY projects can empower you to take on more in the future.Heating Element Testing
Experiencing a Whirlpool Duet dryer that isn’t heating? Testing the heating element is crucial. A faulty element often causes drying issues, making this a necessary step for restoring functionality.
A Whirlpool Duet Dryer not heating can be a frustrating experience, especially when you have a pile of wet laundry waiting for attention. One common culprit behind this issue is a faulty heating element. Testing the heating element is a practical step that you can take to diagnose the problem. If your dryer isn’t producing heat, it might be time to roll up your sleeves and investigate the heating element. This component is crucial as it generates the heat needed to dry your clothes. Understanding how to test it can save you time and potentially a costly repair bill.Signs Of A Faulty Heating Element
There are several signs that your dryer’s heating element might be failing. If your dryer runs but doesn’t heat up, the heating element is a primary suspect. You might also notice that your clothes take longer to dry than usual, hinting at an inefficiency in the heating process. A burning smell during operation can also indicate a problem with the heating element. This is a sign that should never be ignored, as it could pose a safety risk. Always unplug the dryer before inspecting any components to ensure your safety.How To Test The Heating Element
Testing the heating element is a straightforward process that you can do with basic tools. You’ll need a multimeter to check for continuity. First, unplug the dryer and locate the heating element, typically found at the back of the unit behind a panel. Once you access the heating element, disconnect the wires attached to it. Set your multimeter to the resistance or continuity setting and connect the probes to the element terminals. A reading of zero or infinite resistance indicates a faulty element that needs replacing. Testing doesn’t require advanced technical skills. It’s about following steps and being cautious. Have you ever successfully tested an appliance before? It’s a rewarding experience that boosts your confidence in home repairs. By understanding these testing steps, you empower yourself to tackle minor appliance issues. Instead of feeling frustrated by a malfunctioning dryer, you can approach the problem with a calm, methodical mindset. Testing the heating element might just be the solution to getting your laundry routine back on track.Thermostat Troubleshooting
Experiencing a Whirlpool Duet dryer not heating can be frustrating. The thermostat could be the culprit. This small device regulates the dryer’s temperature. Understanding how to troubleshoot it can save time and money.
Identifying Thermostat Issues
A faulty thermostat can cause heating problems. Check if your dryer runs but doesn’t heat. This is a common sign. Use a multimeter to test the thermostat’s continuity. If it reads zero, the thermostat is working. If not, it needs replacing.
Replacing The Thermostat
Turn off the power to the dryer first. Safety is crucial. Next, remove the dryer’s back panel. Locate the thermostat near the dryer vent. Carefully disconnect the wires. Remove the screws holding the thermostat. Replace it with a new one. Reattach the wires and screws. Finally, replace the back panel. Turn the power back on. Your dryer should now heat properly.

Credit: www.reddit.com
Lint Buildup Prevention
Keeping your Whirlpool Duet dryer in good condition prevents heating issues. Lint buildup is a common problem. It can block airflow and cause the dryer to overheat. This can lead to no heat during cycles. Regular maintenance can help avoid these problems.
Cleaning The Lint Trap
Always clean the lint trap after each use. Remove the lint screen and wipe away the collected fibers. Use a soft brush for stubborn lint. A clean lint trap ensures proper airflow. It can also help your dryer run more efficiently.
Maintaining Exhaust Ventilation
Check the exhaust vent for lint buildup every few months. Disconnect the dryer from power before starting. Use a vacuum to remove lint from the vent tube. This keeps air moving and reduces fire risk. A clear vent also helps the dryer heat properly.
Professional Help
Sometimes, a Whirlpool Duet dryer not heating needs expert attention. DIY fixes may not solve the problem. Professional help ensures the issue is correctly identified and repaired. This prevents further complications or damage to your dryer.
When To Call A Technician
If your dryer still doesn’t heat after basic troubleshooting, contact a technician. Signs like strange noises or unusual odors also require professional assessment. A technician can safely handle electrical components. They have the skills to diagnose and fix complex issues.
Finding Reliable Repair Services
Choose repair services with positive reviews. Check for certifications and licenses. Ask family or friends for recommendations. Reliable services often offer warranties on their repairs. This ensures peace of mind and quality service.

Credit: diy.stackexchange.com

Credit: www.youtube.com
Frequently Asked Questions
Why Is My Whirlpool Duet Dryer Not Heating?
A faulty thermal fuse can stop your dryer from heating. Check and replace it if needed.
How Do I Fix A Whirlpool Dryer That Won’t Heat?
First, clean the lint screen. Then, inspect the heating element and thermostat. Replace if they are faulty.
Can A Clogged Vent Cause A Dryer To Stop Heating?
Yes. A clogged vent restricts airflow, causing the dryer to overheat and not work properly.
What Does It Mean If My Dryer Runs But Doesn’t Heat?
This often indicates a broken heating element or a blown thermal fuse. Check these parts.
How Often Should I Clean My Dryer’s Lint Screen?
Clean it after every load. This ensures good airflow and helps the dryer heat efficiently.
Conclusion
Fixing a Whirlpool Duet dryer that won’t heat can be simple. Check the power supply first. Next, inspect the thermal fuse for damage. Examine the heating element for signs of wear. Clean the lint filter thoroughly. Blocked filters often cause heating issues.
Consider professional help if problems persist. Regular maintenance ensures efficient drying. A working dryer saves time and energy. Keep these tips handy for future reference. Your dryer can work smoothly again with the right steps. Enjoy warm, dry clothes without stress.


