Is your Whirlpool ice dispenser suddenly refusing to deliver that refreshing ice you rely on? You’re not alone.
Ice dispensers can stop working for many simple reasons, and often, the fix is easier than you think. Whether your ice maker is jammed, not producing ice, or just won’t dispense, this guide is designed specifically for you. We’ll walk you through clear, step-by-step troubleshooting tips that anyone can follow—no technical jargon, no frustration.
By the end, you’ll know exactly how to get your Whirlpool ice dispenser back to working perfectly, saving you time and the cost of a service call. Keep reading to discover the solutions that bring ice—and peace of mind—right back to your kitchen.
Common Ice Dispenser Issues
Whirlpool ice dispensers sometimes face common problems. These issues can stop ice from coming out or slow down production. Understanding these problems helps fix them quickly. Below are some frequent issues and how they affect your ice dispenser.
Ice Jam And Blockages
Ice jams occur when ice cubes stick together inside the dispenser. Blockages can stop ice from moving through the chute. This often happens if ice melts and refreezes. Removing the ice bin and thawing it can clear the jam. Clean the bin and dry it before putting it back. Regular use helps prevent ice from melting and freezing again.
Dispenser Not Responding
The dispenser may not respond to button presses or lever pushes. This can happen if the dispenser switch is off or broken. Sometimes, the feeler arm is stuck in the “full” position, blocking ice release. Check the ice maker’s power switch first. Gently move the feeler arm to free it. Electrical issues or a faulty control board can also cause this problem.
Slow Or No Ice Production
Ice may take too long to make or stop altogether. This can be caused by a blocked water line or a closed water valve. A low freezer temperature can also slow ice production. Ensure the water supply line is clear and the valve is open. Keep the freezer temperature between 0 and 5 degrees Fahrenheit. If ice production remains slow, the water inlet valve might be faulty.
Basic Troubleshooting Steps
Troubleshooting your Whirlpool ice dispenser starts with simple checks. These basic steps solve many common problems. Follow them carefully to save time and avoid unnecessary repairs.
Begin by confirming the dispenser has power and is set correctly. Next, ensure the water supply line is connected and flowing properly. Finally, check the ice bin and feeler arm for any obstructions or misalignment.
Check Power And Switch Settings
Verify the refrigerator is plugged in and receiving power. Look for any tripped circuit breakers or unplugged cords. Confirm the ice maker’s power switch is in the “On” position. Sometimes, this switch is hidden inside the freezer compartment. If the switch is off, the dispenser won’t work.
Inspect Water Supply Line
Trace the water line from the fridge to the main supply valve. Make sure the valve is fully open. Look for kinks or bends that could block water flow. A clogged or frozen water line will stop ice production. Clear any blockages and check again after a few hours.
Examine Ice Bin And Feeler Arm
Remove the ice bin and check for ice jams or clumps. Melt any ice that has frozen around the auger or dispenser. Dry the bin before replacing it. Gently move the feeler arm to ensure it is not stuck in the “full” position. A stuck arm stops the dispenser from working properly.
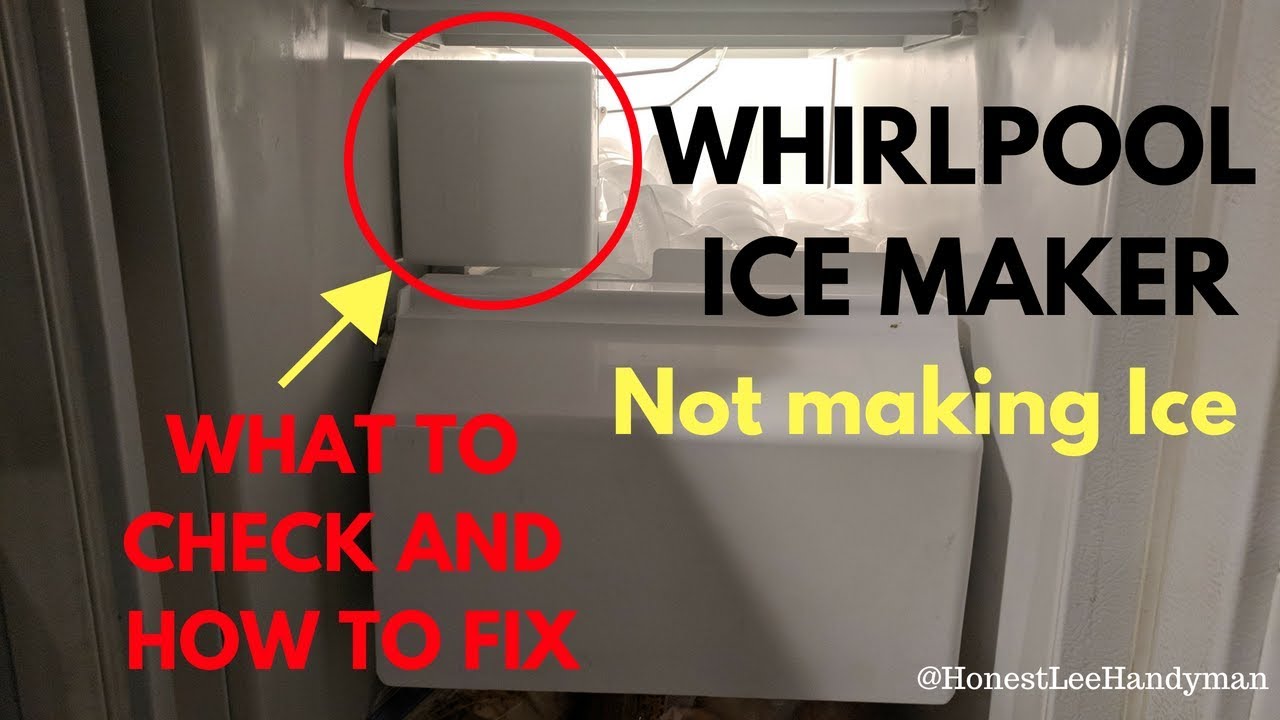
Resetting The Ice Maker
Resetting the ice maker is a common step to fix many ice dispenser issues in Whirlpool refrigerators. This simple process can clear minor errors and restart the ice-making cycle. It helps solve problems like no ice production or ice jams. Resetting often saves time and avoids costly repairs.
There are two main ways to reset your Whirlpool ice maker. Each method suits different situations. Understanding these will help you choose the right one and get your ice dispenser working again quickly.
Push-button Reset Method
Locate the small reset button on the ice maker unit. It is usually on the bottom or side of the ice maker. Press and hold this button for about 10 seconds. You will hear the ice maker cycle and the bail arm will move. This action dumps any old ice and refills the tray with water. This method quickly resets the ice maker and clears minor errors.
Place a towel or container below to catch water or ice that falls during the reset. After the cycle, wait a few hours for new ice to form.
Power Cycle Reset Process
Unplug the refrigerator from the power outlet. Leave it unplugged for about 5 minutes. This allows the ice maker’s internal system to fully reset. Plug the refrigerator back in and make sure the ice maker switch is turned on. The ice maker will start its cycle again. This method can fix deeper electrical or control board issues.
After power cycling, give the ice maker several hours to resume normal ice production.
When To Use Each Reset
Use the push-button reset for quick fixes or after clearing ice jams. It works best if the ice maker simply needs a fresh start. The power cycle reset is better for persistent problems or after power outages. This method resets the entire system and can fix electronic glitches.
Check the ice maker switch and water supply before resetting. These steps help avoid unnecessary resets. Choose the method that fits your ice maker’s symptoms for faster results.

Credit: www.cinchhomeservices.com
Clearing Ice Jams
Ice jams can stop your Whirlpool ice dispenser from working properly. Ice may melt and refreeze, causing blockages. Clearing these jams quickly restores smooth ice flow. This section explains how to clear jams safely and easily.
Removing And Thawing The Ice Bin
First, unplug the refrigerator for safety. Open the freezer door and slide out the ice bin carefully. Place the bin in a sink or large container. Let the ice melt at room temperature. Avoid using sharp tools to break the ice. After thawing, wipe the bin dry with a clean cloth. Put the bin back in its place firmly.
Clearing The Ice Chute
Check the ice chute for any stuck ice pieces. Use a soft cloth or sponge to wipe the chute’s walls. If needed, warm water can help melt small ice blocks inside. Do not pour hot water directly to avoid damage. Dry the chute completely before closing the freezer door. Make sure the chute door opens and closes freely.
Preventing Future Jams
Keep the freezer temperature steady around 0°F (-18°C). Avoid frequent door openings to prevent warm air inside. Regularly clean the ice bin and chute every few months. Use the ice dispenser often to keep ice moving. Check the water supply line for leaks or blockages. These steps reduce ice buildup and keep your dispenser working well.
Advanced Checks And Repairs
Advanced checks and repairs help fix complex issues with your Whirlpool ice dispenser. These steps go beyond simple resets and basic cleaning. They require careful inspection and sometimes part replacement. Understanding these processes can save time and costly repairs.
Start with a detailed look at key components. Follow safety precautions like unplugging the fridge before any work. Use basic tools and take your time. This will improve your chances of success and avoid further damage.
Inspecting The Water Inlet Valve
The water inlet valve controls water flow to the ice maker. A faulty valve can stop ice production or cause leaks. First, locate the valve at the back of the refrigerator near the water line connection.
Check for blockages or damage. Use a multimeter to test for electrical continuity. If the valve does not show continuity, it needs replacement. Also, examine the water line for kinks or clogs.
Checking Wiring And Electrical Components
Loose or damaged wiring can interrupt the ice dispenser function. Inspect all visible wires and connectors near the dispenser and ice maker. Look for signs of wear, corrosion, or breaks.
Test the electrical components with a multimeter. Pay special attention to the dispenser switch, motor, and control board. Replace any faulty parts to restore proper operation.
Replacing Faulty Parts
Replacing worn or broken parts often fixes persistent problems. Common parts to replace include the water inlet valve, auger motor, dispenser switch, and ice maker assembly.
Use manufacturer-approved parts for compatibility. Follow the user manual or repair guide for step-by-step instructions. Take photos during disassembly to help with reassembly. Proper replacement ensures long-term reliability of your ice dispenser.
Maintenance Tips
Proper maintenance keeps your Whirlpool ice dispenser working well. Simple care prevents many common issues. Follow these tips to ensure smooth operation and fresh ice every time.
Regular Cleaning Routine
Clean the ice dispenser every few weeks. Remove the ice bin and empty any old ice. Wipe the bin with a damp cloth and mild soap. Dry it fully before placing it back. Clean the dispenser chute to stop ice jams. Avoid harsh chemicals that can damage parts.
Avoiding Temperature Fluctuations
Keep the freezer temperature steady to prevent ice problems. Set the freezer between 0°F and 5°F (-18°C to -15°C). Avoid opening the door often or leaving it open long. Temperature swings cause ice to melt and refreeze, blocking the dispenser. Check door seals regularly to keep cold air in.
Ensuring Proper Usage
Use the dispenser as instructed in your manual. Do not force the ice door or push the lever too hard. Keep the ice bin properly aligned to avoid jams. Avoid overfilling the ice bin to prevent clogs. Regularly check the water supply for leaks or blockages. Proper use extends the life of your dispenser.
When To Call A Professional
Knowing when to call a professional for your Whirlpool ice dispenser saves time and avoids further damage. Some problems require expert attention beyond basic troubleshooting. Understanding these signs helps you make the right decision. Prompt professional help can restore your appliance quickly and safely.
Signs Of Major Mechanical Issues
Continuous ice jamming inside the dispenser signals a serious problem. Strange noises like grinding or buzzing suggest mechanical failure. Water leaks near the ice maker point to broken seals or valves. If the dispenser stops working despite resets and basic fixes, major parts might be damaged. Electrical issues such as sparks or a burning smell require immediate professional inspection.
Finding Authorized Repair Services
Choose authorized Whirlpool repair centers for genuine parts and skilled technicians. Use Whirlpool’s official website to locate nearby certified service providers. Authorized services maintain warranty coverage and follow proper repair standards. Avoid unofficial repair shops that may use low-quality parts or cause further damage. Booking a professional ensures reliable and safe repair work.
Cost Considerations
Repair costs vary based on the problem’s complexity and required parts. Simple fixes like replacing seals cost less than motor or circuit board repairs. Authorized services might charge more but offer quality assurance and warranty. Consider repair cost against the price of a new refrigerator if the appliance is old. Professional diagnosis helps you understand repair expenses before committing.
Credit: www.youtube.com

Credit: www.nelaappliancerepair.com
Frequently Asked Questions
Why Is My Whirlpool Refrigerator Ice Dispenser Not Dispensing Ice?
Your Whirlpool ice dispenser may not dispense ice due to jammed ice, frozen auger, or a stuck feeler arm. Check the water supply, ensure the ice maker switch is on, and reset the ice maker by pressing its reset button or power cycling the refrigerator.
How To Reset Whirlpool Ice Dispenser?
To reset a Whirlpool ice dispenser, unplug the fridge, locate the reset button on the ice maker, press and hold it. Plug the fridge back in, and wait for the ice maker to cycle and restart ice production. Ensure the ice maker switch is ON before resetting.
Why Is My Ice Dispenser Not Dispensing Ice?
Ice dispenser may jam from melted, refrozen ice or power issues. Remove and thaw the ice bin, clean it, then reposition properly. Check the water supply and reset the ice maker if needed.
How To Reset An Ice Dispenser?
To reset an ice dispenser, unplug the refrigerator, remove the ice bin, then press and hold the reset button. Plug it back in and turn the ice maker on. Wait for the test cycle to complete. Ensure the water supply and ice maker switch are on before resetting.
Why Is My Whirlpool Ice Dispenser Not Dispensing Ice?
Ice may be jammed or frozen around the auger. Remove the ice bin, thaw it, and clean before replacing. This often happens due to temperature changes or infrequent use.
Conclusion
Troubleshooting your Whirlpool ice dispenser can save time and money. Simple checks often fix common issues fast. Make sure the water supply is open and lines aren’t blocked. Test the reset button to restart the ice maker’s cycle. Clear any ice jams and clean the bin regularly.
If problems persist, professional help might be needed. Regular maintenance keeps your dispenser working smoothly. Following these tips helps ensure steady ice supply at home. Don’t ignore small problems; they can grow worse over time. Stay patient and methodical for the best results.
")


