Is your Zurn automatic flush valve sensor giving you trouble? Don’t worry—you’re not alone.
A malfunctioning sensor can be incredibly frustrating, especially when you rely on it for a smooth and hygienic restroom experience. But here’s the good news: most issues with Zurn automatic flush valve sensors can be fixed quickly with the right guidance.
In this post, we’ll walk you through practical troubleshooting steps that can save you time, money, and unnecessary stress. Whether your sensor isn’t flushing at all, flushing too often, or behaving unpredictably, you’ll find clear and simple solutions to get it back in perfect working order. Ready to put an end to the hassle? Let’s dive in!
Common Sensor Issues
Automatic flush valves, like the Zurn sensor models, improve restroom hygiene and efficiency. Despite their advanced design, they sometimes face common sensor-related issues. These problems can cause inconvenience and disrupt regular use. Understanding these issues can help identify and address the root cause quickly.
Sensor Not Detecting Motion
This issue occurs when the sensor fails to recognize user presence. First, check if the sensor lens is clean. Dirt or debris can block its ability to detect motion. Ensure the power supply is functioning properly. Low batteries can also lead to sensor malfunctions. Confirm the sensor’s alignment with the user position. Misalignment can cause detection problems.
Flush Valve Activating Randomly
Random flushing is often caused by sensor sensitivity issues. Bright light reflections or objects moving near the sensor may trigger it. Adjust the sensitivity settings to minimize unnecessary activations. Inspect the sensor for damage or wear. Physical damage can cause erratic behavior. Ensure the sensor is free from water or moisture exposure. Excess moisture might interfere with its functionality.
Weak Or No Flushing Response
A weak or absent flush may result from low water pressure. Check the water supply to ensure it’s fully open. Examine the solenoid valve for clogs or blockages. Debris can restrict water flow and weaken the flush. Verify the battery level if the unit is battery-powered. Weak batteries often reduce the sensor’s effectiveness.

Checking Power Supply
Dealing with an automatic flush valve sensor that isn’t working can be frustrating. Often, the root cause is related to the power supply. Whether your Zurn flush valve uses batteries or hardwired connections, ensuring it has a steady power source is key to troubleshooting. Let’s break it down step by step.
Inspecting Battery Life
Batteries are the lifeline of battery-powered flush valve sensors. If the sensor isn’t responding, the first thing you should check is the battery life. Open the sensor housing and inspect the batteries for corrosion or leaks. Damaged batteries can disrupt the power flow and cause the sensor to malfunction.
Replace the batteries with fresh ones, even if the current ones appear to have life left. Sometimes, batteries lose their charge unexpectedly, especially if they’ve been sitting in storage for a while. After replacing them, test the flush sensor to see if it responds correctly.
Wondering how often to replace batteries? It depends on usage. In high-traffic areas, batteries tend to run out faster. Keeping spare batteries on hand can save you time when troubleshooting.
Testing Hardwired Connections
If your flush valve sensor is hardwired, power issues might stem from loose or damaged connections. Carefully inspect the wiring to ensure all connections are secure. A loose wire can interrupt the power supply and render the sensor non-functional.
Look for visible signs of damage such as frayed wires or cracked insulation. If you spot any issues, it’s a good idea to replace the damaged wires. Use a voltage tester to confirm the power is flowing to the sensor properly.
Have you recently had electrical work done? There’s a chance the power supply might have been disrupted during the process. Double-check the circuit breaker to ensure it hasn’t tripped.
Taking a few minutes to examine the power source can often resolve sensor issues quickly. What’s your go-to method for troubleshooting? Share your tips or experiences below!
Cleaning The Sensor
Keeping your Zurn automatic flush valve sensor clean is essential for smooth operation. A dirty sensor can lead to inconsistent flushing or no flushing at all, which can be frustrating. The good news? Cleaning the sensor is straightforward and can often restore functionality in minutes. Let’s break it down.
Removing Dirt And Debris
Start by turning off the water supply to the flush valve. This prevents accidental flushing while you work.
Inspect the sensor area for visible dirt, grime, or water spots. Dust and debris can block the sensor’s ability to detect motion.
Use a soft, dry cloth or a handheld duster to gently wipe away loose debris. Avoid using abrasive tools or scrubbing pads, as they can scratch the sensor lens.
Using Appropriate Cleaning Materials
Choose cleaning materials that are safe for electronics. A microfiber cloth lightly dampened with water works well for most cases. If needed, you can add a drop of mild dish soap to remove stubborn grime.
Avoid harsh chemicals like bleach, ammonia, or glass cleaners. These can damage the sensor’s surface or interfere with its performance.
Gently wipe the sensor, focusing on the lens area. Once clean, use a dry microfiber cloth to remove any remaining moisture. This ensures the sensor is ready to function properly.
Have you noticed that even a small cleaning effort can make a big difference? A clean sensor often brings your flush valve back to life instantly. So, when was the last time you gave it some attention?
Adjusting Sensor Settings
Adjusting the sensor settings on a Zurn automatic flush valve can improve its performance. Proper configuration ensures the sensor works efficiently in your restroom environment. Below, we will discuss two key adjustments: modifying sensor range and calibrating flush timing.
Modifying Sensor Range
The sensor range determines how far the sensor detects movement. If the range is too short, the flush may not activate. If it’s too long, the valve may flush unnecessarily. Locate the adjustment dial or buttons on the sensor module. Refer to the user manual for specific instructions for your model.
Turn the dial or press the buttons to increase or decrease the range. Test the sensor by stepping into its detection zone. Ensure it activates at the desired distance. Repeat the process until the range is accurate. Avoid setting it too sensitive to prevent false activations.
Calibrating Flush Timing
Flush timing controls how long the valve flushes after activation. Incorrect timing can waste water or lead to incomplete flushing. Most Zurn sensors have a timing adjustment feature. Look for a screw or button labeled “Timing” or similar.
Adjust the setting to change the flush duration. Start with a moderate timing value. Test the flush by triggering the sensor. Observe if it clears the bowl effectively without overusing water. Fine-tune the timing as needed for optimal performance.
Inspecting The Flush Valve
Proper inspection of the flush valve is key to resolving sensor issues. A malfunctioning automatic flush valve can disrupt restroom operations. Understanding common areas to inspect ensures smoother troubleshooting.
Checking For Obstructions
Start by examining the flush valve sensor area for any blockages. Dirt, debris, or mineral buildup can interfere with the sensor’s functionality. Use a soft cloth or brush to gently clean the sensor lens. Ensure the area around the sensor is clear of objects that may obstruct its signal.
Inspect the flush mechanism for physical obstructions. Items like tissue paper or foreign objects can prevent the valve from operating correctly. Remove any visible debris to restore proper function.
Examining Valve Seals And Diaphragms
Inspect the valve seals and diaphragms for signs of damage or wear. Cracks, tears, or buildup can hinder water flow and cause flush errors. Carefully remove the diaphragm and check its condition. Replace it if it shows signs of deterioration.
Check the seals around the valve for leaks or misalignment. Faulty seals may disrupt the flush cycle or cause water wastage. Ensure all components are securely fitted to avoid future problems.
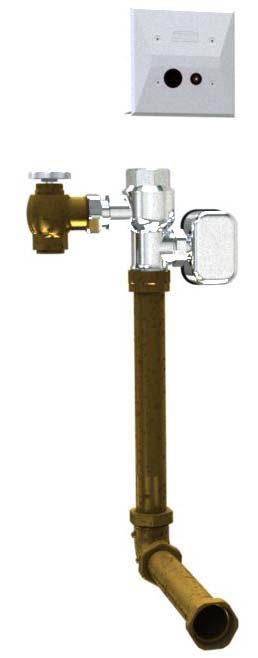
Credit: www.zurn.ca
Resetting The Sensor
Resetting the sensor on a Zurn automatic flush valve can resolve common issues. This process helps restore the sensor’s functionality and ensures proper flushing. Whether you need a quick manual reset or want to restore factory settings, follow the steps below to troubleshoot effectively.
Performing A Manual Reset
A manual reset is a quick way to address minor sensor issues. Start by locating the sensor panel on your Zurn flush valve. Remove the cover carefully using a screwdriver. Once open, find the reset button near the sensor mechanism. Press and hold the reset button for 5 seconds. Release the button and allow the sensor to recalibrate. Test the sensor by waving your hand in front of it. If the flush activates, the reset was successful. Replace the cover securely to protect the internal components.
Restoring Factory Settings
Restoring factory settings can resolve persistent sensor malfunctions. Begin by turning off the water supply to the flush valve. Remove the sensor panel cover using a screwdriver. Locate the factory reset button near the control unit. Press and hold the button for 10 seconds until the sensor light blinks. This indicates the system has been reset to its original configuration. Turn the water supply back on and test the flush valve. Ensure the sensor responds to hand movements as expected. Reattach the cover and check for a secure fit.
Replacing Faulty Components
Replacing faulty components in your Zurn automatic flush valve sensor can save you time, frustration, and unnecessary expenses. A malfunctioning sensor often leads to improper flushing, which can be inconvenient and unhygienic. Knowing how to identify and replace damaged parts will help you restore your flush valve to perfect working order without hassle.
Identifying Damaged Parts
The first step in troubleshooting is to figure out which component is causing the issue. Does the sensor not detect motion? Or is the flush inconsistent? These are clues pointing to a faulty part.
Inspect the sensor for visible damage like cracks or loose wires. Pay attention to the battery compartment—corroded batteries can disrupt the sensor’s functionality. If the flush mechanism seems sluggish, the solenoid might be the culprit.
A handy tip: Keep the user manual nearby to compare the current state of your flush valve with the manufacturer’s diagrams. It can help you spot what’s out of place.
Installing Replacement Components
Once you’ve identified the damaged part, it’s time to replace it. Start by shutting off the water supply to prevent accidental leaks. Carefully remove the faulty component using basic tools like a screwdriver or wrench.
When installing the replacement, ensure it fits snugly into its designated spot. Loose connections can cause recurring issues. For example, if you’re replacing the sensor, double-check that the wires are properly connected and the sensor window is clean.
After installation, turn the water supply back on and test the flush valve. If the flush works consistently, you’ve successfully fixed the issue. If not, you may need to revisit the previous step to confirm everything is properly aligned.
Have you ever hesitated to fix something because it seemed too technical? By breaking this process down into simple steps, you can confidently handle your Zurn flush valve sensor issues without calling a professional.
Preventive Maintenance Tips
Keeping your Zurn automatic flush valve sensor in top condition is essential for a smooth restroom experience. Preventive maintenance helps you avoid unexpected breakdowns and ensures the sensor works flawlessly. Let’s dive into practical tips you can implement to keep your flush valve sensor functioning reliably.
Scheduling Regular Inspections
Set up a routine inspection schedule to catch minor issues before they escalate. Monthly checks are a good starting point, but if your restroom sees heavy use, consider inspecting every two weeks.
During inspections, test the sensor by waving your hand or stepping into its range. If the flush isn’t triggered, it’s time to troubleshoot. Also, check for loose wires or dirt buildup that could interfere with the sensor’s performance.
A quick check now can save you the headache of dealing with a malfunction during peak hours. Have a checklist handy to ensure you don’t miss anything during your inspection.
Using Proper Cleaning Techniques
Cleaning the sensor regularly is crucial, but using the wrong products can cause damage. Avoid abrasive cleaners or harsh chemicals that could scratch or corrode the sensor’s surface.
Use a soft cloth with mild soap and water to wipe the sensor gently. Make sure it’s completely dry before testing its functionality again. A damp sensor can sometimes fail to detect movement accurately.
Neglecting cleaning can lead to grime buildup, which reduces the sensor’s efficiency. Would you trust a dirty sensor to keep your restroom running smoothly?
Preventive maintenance isn’t just about fixing problems; it’s about avoiding them altogether. By sticking to these simple tips, you’ll keep your Zurn automatic flush valve sensor performing at its best and ensure a hassle-free restroom experience for everyone.
Conclusion
Troubleshooting a Zurn automatic flush valve sensor can save time and frustration. Start by checking the power source and sensor alignment. Clean any dirt or debris that might block the sensor. Replace worn-out parts if needed. Regular maintenance ensures better performance and longer life.
Always follow the user manual for accurate guidance. If problems persist, consult a professional for help. Understanding these basics makes repair easier and avoids unnecessary costs. Keep your system running smoothly with these simple steps. A little effort goes a long way in maintaining your flush valve sensor.
")


