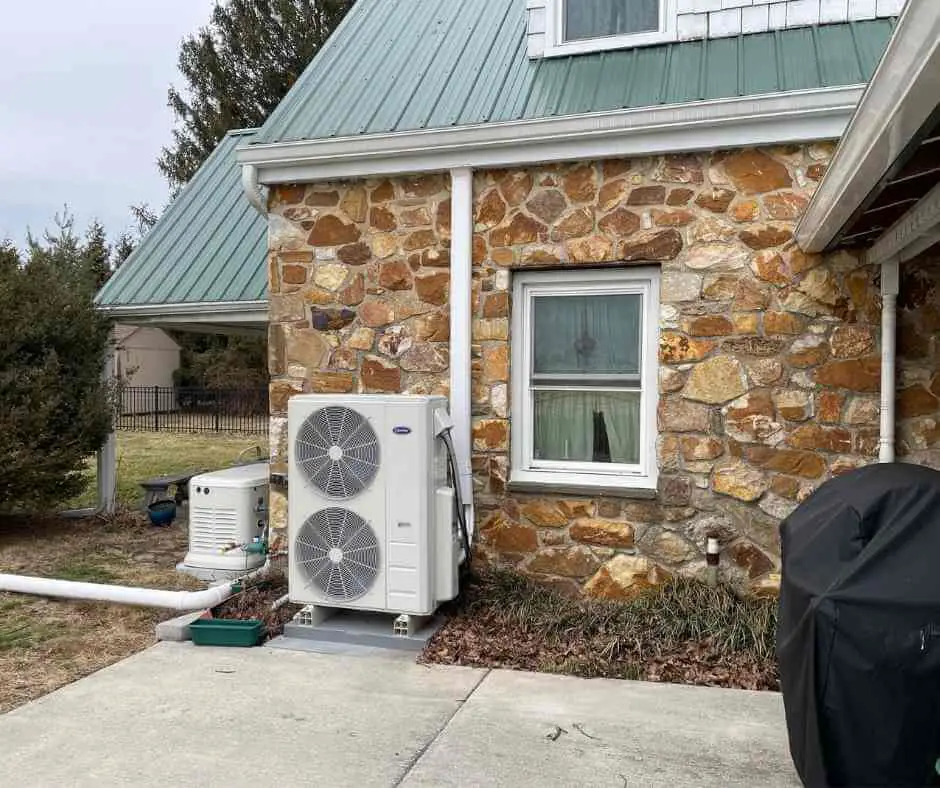
If your Carrier Mini Split is experiencing issues, start by checking for power supply problems and ensuring that the unit is receiving power. Next, inspect the thermostat settings and make sure they are properly configured.
The remote control batteries should also be replaced if necessary. Additionally, check the air filters for any clogs or dirt buildup, and clean or replace them as needed. If the problem persists, it may be due to a refrigerant leak or a faulty compressor, in which case it’s best to contact a professional technician for further assistance.
Mini split systems offer efficient, zoned heating and cooling solutions for residential and commercial spaces. However, like any HVAC system, they can experience technical issues that require troubleshooting. We will cover some common problems that may arise with Carrier Mini Split systems and provide practical solutions for addressing them. By following these troubleshooting steps, you can potentially resolve minor issues and ensure optimal performance from your mini split system.

Common Issues
Common issues can occur with Carrier mini-split systems, causing inconvenience and discomfort. Being aware of these issues and their troubleshooting steps can help in quick resolution. Here are some common issues and their possible solutions:
Unit Not Turning On
If your Carrier mini-split is not turning on, check the power supply and the remote control. Ensure that the unit is receiving power by checking the circuit breaker. Additionally, a faulty thermostat or a defective control board may be the cause. Consult a professional technician for a thorough inspection and repair.
Inadequate Cooling Or Heating
If you notice inadequate cooling or heating, check the air filters for dirt and debris. Dirty filters can restrict airflow and affect the unit’s performance. Also, verify that the indoor and outdoor units are free from obstructions and debris. If the issue persists, the refrigerant levels and the condition of the compressor should be assessed by a qualified HVAC technician.
Strange Noises
If you hear unusual noises from your mini-split system, such as rattling, buzzing, or clicking, it may be due to loose components or faulty fan blades. Regular maintenance and tightening of loose parts can help mitigate this issue. However, for complex problems related to the compressor or motor, seeking professional assistance is recommended.
Leaking Water
Leaking water from the indoor unit may indicate a clogged condensate drain or a blocked drainage pipe. Inspect the drain line and remove any obstructions to allow smooth water flow. Moreover, ensure that the unit is installed correctly and tilted slightly to enable proper drainage. In case of persistent leaks, consult a technician to resolve the issue effectively.
Troubleshooting Steps
When your Carrier mini split system is not functioning properly, troubleshooting steps can help you identify and resolve the issue. By following these simple steps, you can potentially avoid the need for a costly service call and ensure that your mini split system is running efficiently. Here are the essential troubleshooting steps to tackle some common issues that might arise with your Carrier mini split system:
Check Power Source
Firstly, ensure that the power source is properly connected and turned on. Verify that the circuit breaker or fuse associated with the mini split system is functional. Inspect the power supply for any loose connections or damaged components. If any issues are found, address them before proceeding further with troubleshooting.
Clean Or Replace Air Filters
Regular maintenance of the air filters is crucial for the efficient operation of your mini split system. Inspect the air filters for any dirt or debris accumulation, and clean or replace them as needed. Dirty filters can obstruct airflow and reduce the system’s performance. Ensure that the filters are cleaned or replaced according to the manufacturer’s recommendations.
Inspect For Blocked Air Flow
Examine the indoor and outdoor unit to check for any obstructions that could impede airflow. Clean the area around the units to remove any debris or vegetation that could be blocking the airflow. Allow for proper clearance around the units to facilitate optimal airflow and performance.
Examine Refrigerant Levels
Check the refrigerant levels in the system to ensure that they are within the specified range. Low refrigerant levels can indicate a leak or other issues that need to be addressed by a professional. Consult a qualified technician if you suspect a refrigerant-related problem with your mini split system.
Diy Fixes
When facing issues with your Carrier Mini Split system, there are various DIY fixes you can try before calling a professional technician.
Resetting The Unit
- Locate the reset button on your Carrier Mini Split unit.
- Press and hold the reset button for 3-5 seconds.
- Release the button and wait for the unit to restart.
Proper Maintenance Practices
- Regularly clean or replace air filters to ensure efficient operation.
- Check the outdoor unit for any debris or obstructions.
- Inspect the condenser coils and clean them if dirty.
When To Call A Professional
If you’re experiencing issues with your Carrier mini split system, it’s important to know when to call a professional for assistance. While some troubleshooting can be done on your own, certain problems require the expertise of a trained technician to ensure they are resolved correctly.
Complex Electrical Issues
If you encounter complex electrical issues with your Carrier mini split system, it is crucial to seek professional help. Dealing with electrical components can be dangerous and requires specialized knowledge to diagnose and repair the problem safely. A professional technician has the necessary expertise to accurately identify and fix complicated electrical issues, ensuring your system operates safely and efficiently.
Refrigerant Leaks
Refrigerant leaks are another problem that should only be addressed by a professional. These leaks can occur due to various reasons, such as faulty connections, corrosion, or physical damage to the refrigerant lines. Attempting to fix a refrigerant leak without proper training and equipment can worsen the problem or result in personal injury.
A professional technician will have the tools and knowledge to locate the source of the leak and repair it effectively. Additionally, they can recharge your system with the appropriate amount of refrigerant to ensure optimal performance.
Calling a professional for assistance with complex electrical issues and refrigerant leaks saves you time, money, and potential safety hazards. Their expertise and experience enable them to accurately diagnose and fix problems, restoring your Carrier mini split system to its optimal functionality.
Safety Precautions
When it comes to troubleshooting your Carrier Mini Split system, it’s important to always prioritize safety. By following these safety precautions, you can avoid potential hazards and ensure a smooth troubleshooting process.
Power Safety
Before you begin any troubleshooting steps, it’s essential to handle the power supply correctly. Here are some power safety measures to keep in mind:
- Ensure the power to the unit is turned off before performing any maintenance or repairs.
- Use a voltage tester to confirm that there is no electricity flowing to the unit.
- Keep all electrical connections secure and properly insulated to avoid electric shock.
- Avoid touching any electrical components with wet hands or when standing on a wet surface.
Remember, electricity can be dangerous, so it’s crucial to prioritize power safety at all times when troubleshooting your Carrier Mini Split system.
Handling Refrigerant
Handling refrigerant is another important aspect of troubleshooting a Carrier Mini Split system. Here are some safety precautions to follow when dealing with refrigerant:
- Always wear protective gloves and goggles to prevent direct contact with refrigerant.
- Ensure proper ventilation in the area where you’re working with refrigerant to avoid inhaling harmful gases.
- When connecting or disconnecting refrigerant lines, make sure to use proper tools and avoid bending or twisting the lines excessively.
- If you suspect a refrigerant leak, do not attempt to fix it yourself. Contact a professional technician who is trained in handling refrigerants.
By handling refrigerant safely, you can avoid any potential health risks and ensure the effectiveness of your troubleshooting efforts.
Future Prevention
- Regularly clean and replace air filters every 1-3 months.
- Inspect and clean the evaporator and condenser coils annually.
- Ensure the outdoor unit is clear of debris and vegetation.
- Check for any refrigerant leaks or abnormal noises.
- Consider replacing units over 10 years old for more energy efficiency.
- Upgrade to newer models with advanced features for better performance.
- Consult with a professional for proper sizing and installation.
Frequently Asked Questions Of Carrier Mini Split Troubleshooting
How Do I Troubleshoot My Carrier Mini Split?
To troubleshoot your Carrier Mini Split, start by checking if the unit is receiving power and if the thermostat is set correctly. Make sure the filters are clean and the air vents are clear. If the issue persists, it’s best to contact a professional technician for further diagnosis and repair.
Conclusion
If you’re facing issues with your Carrier Mini Split, follow these troubleshooting tips to resolve common problems. Regular maintenance can prevent future malfunctions and ensure efficient cooling and heating. Stay informed about these solutions for a comfortable and hassle-free experience with your Carrier Mini Split system.


