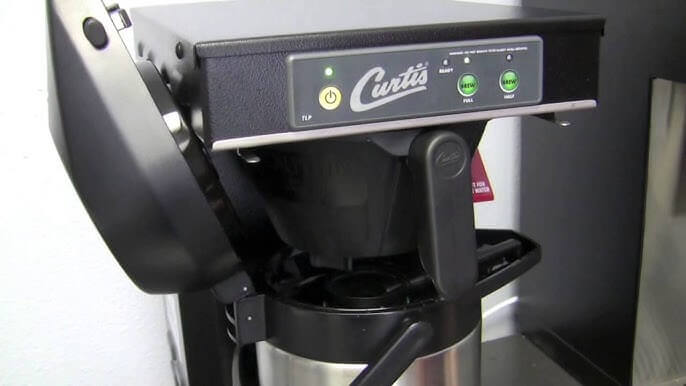
Curtis Coffee Brewer troubleshooting involves checking power connections and ensuring water supply. Clean the spray head and check for blockages.Curtis Coffee Brewers are renowned for their reliability and quality. But like any appliance, they can face issues. Troubleshooting is crucial for maintaining optimal performance and extending the machine’s lifespan. Regular maintenance helps avoid common problems like brewing inconsistencies or error messages.
Simple checks can often resolve issues, saving time and money on repairs. Always start with basic steps like ensuring proper power connection and water supply. Cleaning the spray head can prevent clogs and improve coffee quality. By following these steps, you can keep your Curtis Coffee Brewer running smoothly and enjoy delicious coffee every day.
No Power
Experiencing no power issues with your Curtis Coffee Brewer can be frustrating. Ensuring your brewer is operational is crucial for maintaining your coffee routine. Below are some steps to troubleshoot and resolve power issues.
Check Power Source
First, confirm that the power source is functioning correctly. Plug another device, like a lamp, into the same outlet. This helps determine if the outlet is working. If the lamp lights up, the outlet has power. If not, you might need to check your circuit breaker.
Sometimes, the outlet may be controlled by a wall switch. Ensure the switch is turned on. If you are using a power strip, make sure it is switched on and functioning properly.
Inspect Power Cord
Next, inspect the power cord of the Curtis Coffee Brewer. Unplug the brewer and carefully examine the cord for any signs of damage. Look for cuts, frays, or exposed wires. If the cord is damaged, it needs to be replaced.
Ensure the plug is firmly inserted into the outlet. A loose connection can prevent the brewer from receiving power. You can also try plugging the brewer into a different outlet to rule out outlet issues.
If both the power source and power cord are in good condition, the problem might be internal. In this case, contacting Curtis customer support for further assistance is recommended.
| Step | Action |
|---|---|
| 1 | Check the power source with another device. |
| 2 | Ensure the outlet is not controlled by a switch. |
| 3 | Inspect the power cord for damage. |
| 4 | Check if the plug is securely inserted. |
| 5 | Try a different outlet. |
Water Not Heating
Experiencing issues with your Curtis Coffee Brewer and the water not heating? This can be a common problem that disrupts your coffee brewing routine. Understanding the potential causes is crucial for a quick fix. Let’s dive into two primary areas that might be causing the issue: thermostat issues and heating element problems.
Thermostat Issues
The thermostat controls the water temperature in your coffee brewer. If the thermostat fails, the water won’t heat properly. Here’s how to troubleshoot thermostat issues:
- Ensure the thermostat is set to the correct temperature.
- Check for any visible damage to the thermostat.
- Use a multimeter to test the thermostat’s functionality.
If the thermostat is faulty, replacing it might be necessary. A malfunctioning thermostat can cause irregular water heating or no heating at all.
Heating Element Problems
The heating element is responsible for warming the water. If it’s damaged or faulty, the water will remain cold. Follow these steps to check the heating element:
- Unplug the coffee brewer for safety.
- Access the heating element by removing the brewer’s cover.
- Inspect the heating element for any visible damage or burns.
- Use a multimeter to test the element’s continuity.
If the heating element is defective, it needs replacement. A working heating element is essential for the coffee brewer to function correctly.
By checking both the thermostat and the heating element, you can identify why the water in your Curtis Coffee Brewer is not heating. Addressing these components ensures your coffee maker works efficiently again.
Brewer Not Dispensing
Is your Curtis Coffee Brewer not dispensing coffee? This can be frustrating. There are common issues that might be causing this problem. Below, we address two key areas to troubleshoot: Clogged Nozzles and Pump Malfunctions.
Clogged Nozzles
One common reason for a brewer not dispensing is clogged nozzles. Coffee grounds can build up and block the nozzles. This prevents coffee from flowing out.
- Turn off the brewer and unplug it.
- Remove the nozzle and inspect it for clogs.
- Clean the nozzle with warm water and a brush.
- Reattach the nozzle and test the brewer.
If the issue persists, consider using a descaling solution. This helps remove mineral buildup inside the nozzles.
Pump Malfunctions
If your Curtis Coffee Brewer is still not dispensing, the pump might be malfunctioning. The pump is crucial for pushing water through the coffee grounds.
- Ensure the brewer is unplugged before inspecting the pump.
- Locate the pump inside the machine.
- Check for any visible damage or loose connections.
- If damaged, you may need to replace the pump.
Sometimes, the pump may just need a reset. Consult the user manual for specific reset instructions.
Below is a quick troubleshooting table for your reference:
| Issue | Possible Cause | Solution |
|---|---|---|
| Not Dispensing | Clogged Nozzles | Clean the nozzles thoroughly. |
| Not Dispensing | Pump Malfunction | Inspect and possibly replace the pump. |
By following these steps, you can quickly identify and solve the problem. Ensuring your Curtis Coffee Brewer is back to working condition.
Weak Coffee
Experiencing weak coffee from your Curtis Coffee Brewer can be frustrating. This issue can stem from a few common problems. Below, we will explore the most likely causes and how to troubleshoot them effectively.
Incorrect Coffee Grounds
The type of coffee grounds you use is critical. Using the wrong grind size can result in weak coffee. For a Curtis Coffee Brewer, medium-coarse grounds work best.
- Too fine grind: Causes over-extraction, leading to bitter coffee.
- Too coarse grind: Causes under-extraction, leading to weak coffee.
Make sure to use a consistent grind size for each brew. A burr grinder can help achieve this consistency better than a blade grinder.
Brew Time Adjustments
The brew time can also impact coffee strength. If the brew time is too short, the water does not extract enough flavor from the grounds.
Check your Curtis Coffee Brewer settings:
- Locate the brew time settings on the machine.
- Adjust the brew time to a longer duration if needed.
Typical brew times for a Curtis Coffee Brewer should be between 4 to 6 minutes. Adjusting within this range can help achieve the desired strength.
| Grind Size | Result | Adjustment |
|---|---|---|
| Too Fine | Bitter | Coarser grind |
| Too Coarse | Weak | Finer grind |
By ensuring correct grind size and proper brew time, you can fix weak coffee issues effectively. Enjoy a perfect cup every time with these simple adjustments.
Leaking Water
Experiencing a leaking Curtis Coffee Brewer can be frustrating. Water leakage often disrupts brewing and creates a mess. Here, we’ll explore common causes and solutions for a leaking Curtis Coffee Brewer.
Seal And Gasket Checks
Leaking water may result from worn-out seals or gaskets. Inspect the seals and gaskets carefully. Any damage or wear can cause leaks.
- Turn off the coffee brewer.
- Remove the water reservoir.
- Examine the seals and gaskets.
- Replace if any damage is found.
Use only manufacturer-approved seals and gaskets for replacements. This ensures a proper fit and prevents future leaks.
Reservoir Inspection
A cracked or damaged reservoir can also cause leaks. Inspect the reservoir closely for any visible cracks or damage.
- Detach the water reservoir from the brewer.
- Inspect the reservoir under good light.
- Look for any cracks or holes.
- Replace the reservoir if damaged.
Always ensure the reservoir is properly seated when reattaching. An improperly placed reservoir can also lead to leaks.
| Problem | Solution |
|---|---|
| Worn-out seals | Replace seals and gaskets |
| Cracked reservoir | Replace the water reservoir |
Proper maintenance and regular checks can prevent water leaks. Ensure you use compatible parts to avoid recurring issues.
Error Codes
Encountering error codes on your Curtis Coffee Brewer can be frustrating. These codes signal specific issues that need addressing. Understanding these error messages can help you troubleshoot effectively and ensure a smooth coffee brewing process.
Common Error Messages
Below is a table that outlines some common error messages and their meanings:
| Error Code | Description |
|---|---|
| E1 | Water temperature too high. |
| E2 | Water temperature too low. |
| E3 | Brewer not filling with water. |
| E4 | Overflow detected. |
Reset Procedures
Follow these steps to reset your Curtis Coffee Brewer:
- Turn off the brewer. Wait for 10 seconds.
- Unplug the brewer from the electrical outlet.
- Wait for 1 minute. This allows the system to reset.
- Plug in the brewer back into the outlet.
- Turn on the brewer. Check if the error persists.
If the error code remains, consult the brewer’s manual or contact customer support for further assistance.
Regular Maintenance
Regular maintenance is crucial for keeping your Curtis coffee brewer in top shape. By performing routine tasks, you can ensure your machine works efficiently and produces great-tasting coffee. This section will provide you with essential tips for regular maintenance.
Cleaning Tips
Cleaning your Curtis coffee brewer helps maintain its performance and longevity. Follow these simple steps:
- Wipe the exterior with a damp cloth daily.
- Clean the brew basket after each use.
- Rinse the water reservoir weekly.
- Descale the machine monthly using a descaling solution.
Use mild, non-abrasive cleaners to avoid damage. Avoid submerging electrical parts in water.
Routine Inspections
Regular inspections help identify potential issues early. Check these components regularly:
| Component | Inspection Frequency | Action |
|---|---|---|
| Water Filters | Monthly | Replace if clogged |
| Brewing Elements | Weekly | Ensure they are clean |
| Electrical Cords | Monthly | Check for wear |
| Control Panel | Weekly | Test buttons and settings |
If you find any worn or damaged parts, replace them promptly. Always refer to the user manual for specific guidelines.
Frequently Asked Questions
How Do I Fix The Water Level Error On My Curtis Coffee Maker?
Check the water reservoir for proper filling. Ensure the float switch isn’t stuck. Clean the water inlet valve.
Why Is My Coffee Maker On But Not Brewing?
Your coffee maker might not brew due to clogs, incorrect settings, or a malfunctioning pump. Ensure water reservoir is filled and clean.
Why Is My Coffee Maker Not Percolating?
Your coffee maker might not percolate due to a clogged filter, faulty pump, or incorrect water level. Clean the machine, check the pump, and ensure proper water level.
Why Has My Coffee Machine Stopped Working?
Your coffee machine might stop working due to a clogged filter, lack of water, or an electrical issue. Check for blockages, ensure there’s enough water, and verify power connections. Regular maintenance helps prevent these problems.
How To Reset Curtis Coffee Brewer?
To reset, turn off the brewer, wait 10 seconds, then turn it back on. This helps clear minor issues.
Conclusion
Mastering Curtis Coffee Brewer troubleshooting ensures smooth operation and delicious coffee. Regular maintenance prevents common issues. Follow our tips to keep your brewer in top shape. Enjoy hassle-free brewing and a perfect cup every time. Your morning routine just got easier.
Happy brewing!
")