ELISA troubleshooting can be tricky. This blog will help you understand common issues.
ELISA, or Enzyme-Linked Immunosorbent Assay, is a popular lab test. It’s used to detect and measure antibodies in your samples. Despite its usefulness, ELISA can sometimes give errors. These errors can lead to wrong results. Understanding how to troubleshoot ELISA problems is essential.
It saves time and ensures accurate results. In this blog, we will discuss common ELISA issues. You’ll learn how to identify and solve them. This will help you get reliable results in your experiments. Stay tuned for helpful tips and solutions.
Introduction To Elisa Troubleshooting
Enzyme-Linked Immunosorbent Assay (ELISA) is a popular lab technique. It helps detect and measure antibodies, proteins, and hormones. Yet, like any lab test, it can face issues. Troubleshooting ELISA ensures accurate results and saves time and resources. Understanding common problems can help avoid errors and improve outcomes.
Importance Of Accurate Troubleshooting
Accurate troubleshooting is crucial for reliable ELISA results. Errors can lead to false positives or negatives. This impacts research outcomes and patient care. Proper troubleshooting identifies and corrects issues. It ensures data accuracy and experiment success.
Accurate ELISA results build trust in research findings. They help make informed decisions. Troubleshooting enhances lab efficiency and reduces costs. It minimizes repeat tests and saves valuable resources.
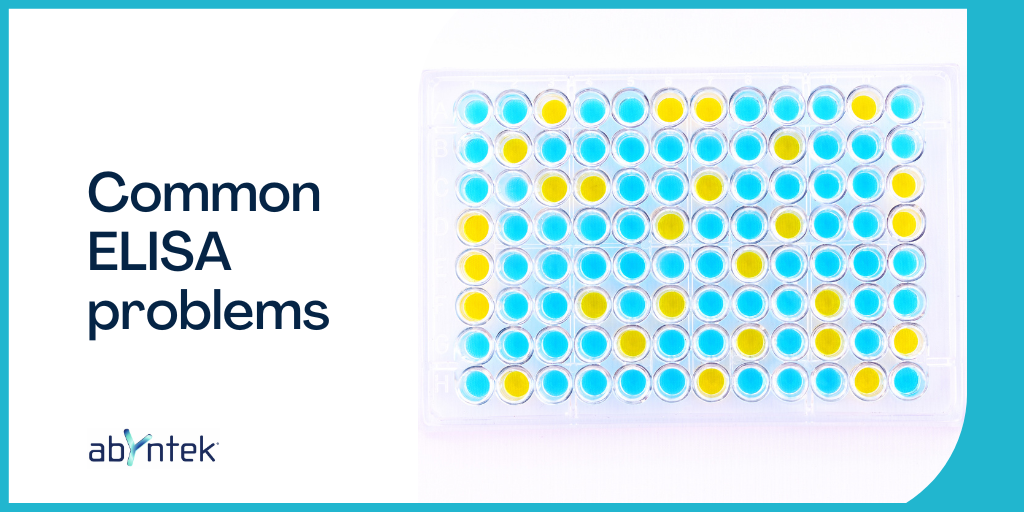
Common Issues Encountered
Several issues can arise during ELISA procedures. These include high background noise, low signal strength, and inconsistent results. High background noise often results from inadequate washing. It can also be due to non-specific binding of antibodies. Low signal strength might occur due to improper reagent storage. It can also stem from expired reagents.
Inconsistent results are another common problem. They may arise from varying incubation times or temperatures. Using different batches of reagents can also cause inconsistencies. Addressing these issues ensures reliable and accurate results.

Credit: www.bosterbio.com
Preparation And Setup
Proper preparation and setup are crucial for successful Elisa troubleshooting. Ensuring you have the right tools and a well-organized workspace can make the process smoother and more efficient. This section will guide you through the essentials needed for setting up your Elisa troubleshooting environment.
Essential Tools And Materials
Before beginning the troubleshooting process, gather all necessary tools and materials. This includes Elisa kits, pipettes, tips, and microplates. Make sure you have a timer, a microplate reader, and a waste container. Don’t forget gloves, lab coats, and safety goggles to protect yourself. Having everything within reach saves time and reduces errors.
Workspace Organization Tips
An organized workspace enhances efficiency. Keep your tools and materials in designated areas. Label everything clearly to avoid confusion. Ensure your workspace is clean and free of clutter. This reduces the risk of contamination. Arrange your tools in the order you will use them. This helps maintain a smooth workflow.
Ensure you have enough space to work comfortably. A well-lit workspace is crucial for accuracy. Use a bench or table that is sturdy and at a comfortable height. Proper ventilation is also important to maintain a safe working environment.
Analyzing Sample Quality
Ensuring the quality of your samples is essential for accurate ELISA results. Faulty samples can lead to incorrect data, which affects research validity. This section covers key aspects of analyzing sample quality.
Identifying Contaminated Samples
Contaminated samples can skew your results. Identifying them early is crucial. Look for these common signs:
- Cloudiness: Clear samples should not appear cloudy.
- Strange Odor: Samples should not have an unusual smell.
- Color Change: Any change in color can indicate contamination.
Use a microscope to check for microbial growth. If you see any, discard the sample. Always use sterile equipment to avoid contamination.
Ensuring Proper Sample Storage
Proper storage is key to maintaining sample integrity. Here are the best practices:
- Temperature Control: Store samples at recommended temperatures. Usually, this means refrigeration or freezing.
- Avoid Freeze-Thaw Cycles: Repeated freezing and thawing can degrade the sample.
- Use Proper Containers: Seal samples in airtight, labeled containers.
- Minimize Light Exposure: Keep samples away from direct light to prevent degradation.
Always label your samples with collection date and type. This helps in tracking and ensures timely usage.
Credit: www.abyntek.com
Optimizing Reagent Performance
Ensuring optimal reagent performance is crucial for accurate ELISA results. Poor reagent performance can lead to unreliable data. This section will cover key aspects to optimize your reagents. Follow these steps to maintain high performance in your ELISA assays.
Checking Reagent Expiry Dates
Always check the expiry dates on all reagents. Expired reagents can produce inconsistent results. Use a first-in, first-out system. This ensures older reagents are used first. Keeping track of expiry dates helps maintain reagent quality.
Proper Reagent Handling
Handle reagents with care. Store them according to the manufacturer’s instructions. Improper storage can degrade reagent quality. Avoid repeated freeze-thaw cycles. This can damage the reagents. Use aliquots to prevent contamination.
Mix reagents gently. Do not vortex unless specified. Vortexing can cause bubbles. Bubbles can interfere with the assay. Always use clean pipettes and tips. Contaminated tools can affect your results.
Addressing Calibration Problems
Addressing calibration problems in ELISA tests ensures accurate and reliable results. Calibration involves setting a standard curve. This curve helps in interpreting the test results correctly. Mistakes in calibration lead to inaccurate readings and flawed data.
Ensuring Accurate Calibration
Start with quality standards. Ensure the reagents and standards are fresh and properly stored. Follow the manufacturer’s instructions precisely. This includes the right temperatures and durations for each step.
Use calibrated equipment. Check that all pipettes and readers are calibrated before starting. Regular maintenance of equipment prevents errors. Document each step to track any deviations or mistakes.
Troubleshooting Calibration Failures
Check the reagents first. Expired or contaminated reagents cause calibration issues. Replace any suspect reagents immediately.
Re-evaluate your equipment. Ensure all devices are functioning correctly. Even a slight malfunction leads to errors. Run a control test to identify problems with the machinery.
Review your process. Small mistakes accumulate and lead to big errors. Double-check each step and ensure adherence to the protocol. Proper training for all personnel is crucial.
Interpreting Unexpected Results
Getting unexpected results in your Elisa test can be frustrating. It happens often and can be due to various reasons. Understanding these reasons can help improve your test outcomes. This section will guide you through interpreting unexpected results.
Identifying Causes Of High Background
High background in an Elisa test means that non-specific signals are being detected. This can obscure your true results. One common cause is improper washing. Ensure thorough washing between steps to reduce this issue.
Another cause is using expired or contaminated reagents. Always check the expiration dates and handle reagents carefully. Additionally, blocking buffers might be insufficient. Use a blocking buffer that effectively covers all non-specific binding sites.
Dealing With Low Signal Issues
Low signal issues can result from inadequate antigen or antibody concentration. Ensure you are using optimal concentrations for your assay. Poor incubation times can also lead to low signals. Verify that each step is given enough time for reactions to occur.
Another reason could be incorrect storage of reagents. Store all components as recommended. Also, check the sensitivity of your detection method. Sometimes, using a more sensitive detection system can improve signal strength.
Maintaining Equipment
Maintaining equipment is vital for successful Elisa troubleshooting. Proper maintenance ensures accurate and reliable results. It also extends the lifespan of your equipment. This section covers essential practices to keep your equipment in top shape.
Regular Equipment Calibration
Calibration is crucial for accurate measurements. It ensures your equipment performs as expected. Regular calibration helps avoid errors in your results. Follow the manufacturer’s guidelines for calibration frequency. Use standard calibration solutions to check your equipment. Document each calibration event for reference.
Routine Maintenance Practices
Routine maintenance keeps your equipment in good condition. Clean your equipment after each use. Prevent dust and debris from accumulating. Inspect for wear and tear regularly. Replace damaged parts immediately. Lubricate moving parts as needed. Store equipment in a clean, dry place. Follow the manufacturer’s maintenance schedule.
Advanced Troubleshooting Tips
Advanced troubleshooting tips can save time and improve the accuracy of ELISA assays. Having a few effective strategies can help identify and solve common problems. This section covers two essential tips: using control samples effectively and consulting with experts.
Using Control Samples Effectively
Control samples are crucial for validating ELISA results. Positive and negative controls help verify the assay’s performance. They ensure that the test conditions are correct and consistent. Always include both types of controls in each run. This helps identify any deviations that might affect the results.
Compare the control sample results with your test samples. Significant differences may indicate an issue with the assay. Check the reagents and protocols if the controls do not perform as expected. It’s essential to maintain consistency in sample handling and preparation.
Consulting With Experts
Sometimes, troubleshooting requires more expertise. Consulting with experienced colleagues can provide valuable insights. They might have encountered similar issues before. Their advice can help pinpoint the problem quickly.
Join forums and online communities dedicated to ELISA. These platforms offer a wealth of knowledge and support. Asking questions and sharing experiences can lead to practical solutions. Don’t hesitate to seek help when needed.
Professional consultations with experienced technicians can also be beneficial. They can provide tailored advice based on your specific assay conditions. This can be a valuable investment in improving your ELISA results.
Conclusion And Best Practices
Effective Elisa troubleshooting involves verifying reagent quality, ensuring proper incubation times, and maintaining consistent laboratory conditions. Following these best practices can help achieve accurate and reliable results.
When troubleshooting an ELISA assay, it is crucial to follow specific steps. Properly addressing issues ensures reliable and accurate results. In this section, we will summarize key points and provide best practices for effective troubleshooting.Summarizing Key Points
First, identify the issue with your ELISA assay. Common problems include high background, low signal, and inconsistent results. Next, check the reagents and their expiration dates. Ensure all equipment is calibrated correctly. Verify that all protocols are followed precisely. Document every step taken during the troubleshooting process.Implementing A Troubleshooting Protocol
Establish a clear troubleshooting protocol. Start by repeating the test with fresh reagents. If the problem persists, examine each step of the process. Check for any deviations from the standard procedure. Ensure proper washing techniques and incubation times are followed. Use controls to identify if the problem is with the sample or the assay. Regularly train staff to maintain consistency and accuracy. Record all findings to help with future troubleshooting efforts. “`
Credit: www.mabtech.com
Frequently Asked Questions
What Is Elisa Troubleshooting?
Elisa troubleshooting is the process of identifying and solving issues with Elisa systems or software.
How Can I Reset My Elisa Device?
To reset your Elisa device, press and hold the reset button for 10 seconds.
Why Is My Elisa Connection Slow?
Your Elisa connection may be slow due to network congestion or hardware issues. Check your device and network.
How Do I Update Elisa Firmware?
To update Elisa firmware, go to the settings menu on your device and select “Firmware Update. “
What Should I Do If Elisa Is Not Working?
If Elisa is not working, restart your device. Check cables and connections. Contact support if the issue persists.
Conclusion
Proper Elisa troubleshooting ensures accurate and reliable results. Follow the steps carefully. Regularly check your equipment and reagents. Consistency is key in all tests. Stay patient and methodical in your approach. Mistakes happen; learn from them. Always document your procedures and findings.
This helps track any issues. Practice improves your skills over time. Keep learning and stay updated with new techniques. Happy troubleshooting!
")