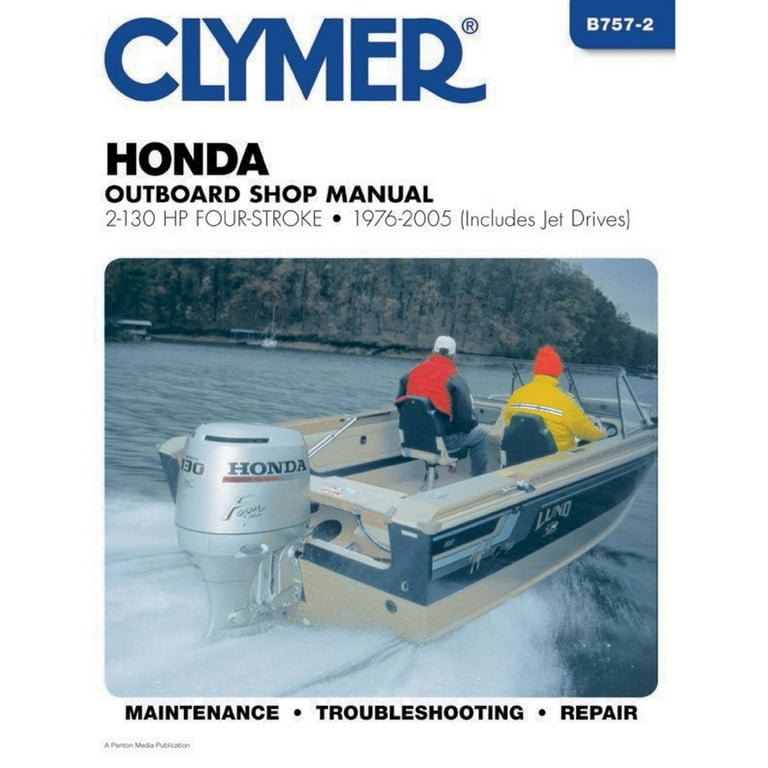
Honda Outboard Troubleshooting Manual: Quick Fixes
The Honda Outboard Troubleshooting Manual provides detailed guidance for diagnosing and addressing common issues with Honda outboard engines in Austin, Texas, United States. Whether encountering beeping sounds, overheat indicators, or rough engine performance, this manual offers step-by-step instructions for resolving these problems.
Additionally, it includes essential information on resetting the hour counter and troubleshooting the charging system, fuel system, and other critical components. With a focus on practical solutions, this manual serves as a valuable resource for maintaining and optimizing the performance of Honda outboard engines.
Accessing this comprehensive troubleshooting guide equips boaters with the knowledge and expertise necessary to address a wide range of outboard engine issues effectively.
Credit: www.walmart.com
Identifying Common Issues
Symptoms Of Overheating
- Overheat indicator turns on
- Buzzer sounds
- Engine cooling circuit fault
- Engine speed slows down
Signs Of Charging System Failure
- ACG indicator turns on
- Buzzer sounds
- Charging system fault
When the overheat indicator turns on and the buzzer sounds, it indicates a fault in the engine cooling circuit, causing the engine speed to slow down. Conversely, if the ACG indicator turns on along with the buzzer, it signifies a problem with the charging system. Recognizing these common issues is crucial for timely troubleshooting and maintenance.
Hour Counter Reset
To reset the hour counter on your Honda outboard after maintenance, follow these steps: Turn off the engine, shift to “F” or “R”, then switch the ignition on. For troubleshooting, a rough-running outboard may indicate fuel system issues or faulty spark plugs.
Always refer to the Honda Outboard Troubleshooting Manual for guidance.
Introductory Paragraph:
Resetting the hour counter on your Honda outboard is an essential task that ensures accurate tracking of the engine’s running hours. The process is not complicated, but it requires following specific steps to avoid any potential issues. In this blog post, we will guide you through the preparation steps and reset procedure for the hour counter reset, as mentioned in the Honda Outboard Troubleshooting Manual.
H3: Preparation Steps
Before starting the hour counter reset procedure, make sure to follow these preparation steps:
1. Turn off the engine: Ensure that the engine is turned off before beginning the reset process. This step is crucial to avoid any safety hazards.
2. Shift the lever to Forward or Reverse: Put the shift lever in either “F” (Forward) or “R” (Reverse) position.
3. Turn on the ignition switch: Turn the ignition switch on to start the process.
H3: Reset Procedure
Once you have completed the preparation steps, follow these steps to reset the hour counter on your Honda outboard:
1. Press and hold the SELECT and RESET buttons simultaneously on the tachometer for three seconds.
2. Release the buttons when the hour counter starts flashing.
3. Press the SELECT button to set the hour counter to zero.
4. Press the RESET button to save the changes and exit the reset mode.
5. Turn off the ignition switch to complete the process.
In case you encounter any issues while resetting the hour counter, refer to the Honda Outboard Troubleshooting Manual for further assistance.
Conclusion:
By following the above preparation steps and reset procedure, you can easily reset the hour counter on your Honda outboard. This task is crucial as it helps you keep track of the engine’s running hours, ensuring timely maintenance and better performance. If you face any difficulties, don’t hesitate to refer to the Honda Outboard Troubleshooting Manual for further guidance.
Fuel System Troubles
When it comes to troubleshooting your Honda outboard, issues with the fuel system can cause significant problems. Identifying fuel contamination, checking for clogged filters and lines, and ensuring proper fuel flow are essential steps in diagnosing and resolving fuel system troubles.
Identifying Fuel Contamination
Fuel contamination is a common issue that can affect the performance of your Honda outboard engine. Contaminants such as water, dirt, or debris can enter the fuel system, leading to issues such as engine stalling, rough idling, or poor acceleration. To identify fuel contamination, visually inspect the fuel for any signs of discoloration, separation, or foreign particles. Additionally, using a fuel testing kit can help determine if water or other impurities are present in the fuel.
Checking For Clogged Filters And Lines
Clogged filters and fuel lines can restrict the flow of fuel to the engine, causing performance issues and potential damage to the outboard motor. Regularly inspect and replace fuel filters as recommended by the manufacturer to prevent clogs. Visually inspect fuel lines for any signs of blockages, kinks, or damage. Use a fuel pressure gauge to check for proper fuel flow and pressure, ensuring that the fuel system is delivering fuel to the engine as intended.
Engine Performance
When it comes to the performance of your Honda outboard engine, it’s crucial to be able to diagnose and troubleshoot any issues that may arise. Whether you’re experiencing rough operation or issues at mid to full throttle, addressing these problems promptly is essential to ensure optimal performance and longevity of your outboard engine.
Diagnosing Rough Operation
If you’re noticing that your Honda outboard engine is running roughly, it could be attributed to various factors. One potential issue could be a dirty or clogged fuel system, including the fuel filter or fuel pump. Additionally, the carburetor or fuel injectors might be dirty or clogged, disrupting the proper fuel-air mixture. Another culprit could be faulty or damaged spark plugs. Identifying and addressing these issues promptly is crucial in maintaining the smooth operation of your outboard engine.
Mid To Full Throttle Issues
Experiencing issues with your Honda outboard engine at mid to full throttle can be concerning. It’s important to consider factors such as fuel system cleanliness, carburetor condition, and spark plug health. These components play a significant role in ensuring smooth and consistent performance at higher throttle levels. Additionally, checking for any blockages or fuel-related issues is essential in troubleshooting and resolving performance issues at mid to full throttle.
Ignition System Checks
When troubleshooting your Honda outboard motor, conducting thorough ignition system checks is crucial to ensure optimal performance and reliability. Ignition system issues can lead to poor engine operation and must be addressed promptly. Below are essential steps for inspecting and testing key components of the ignition system.
Inspecting Spark Plugs
Regular inspection of spark plugs is vital for maintaining efficient engine combustion and overall performance. Follow these steps to inspect the spark plugs:
- Disconnect the spark plug cap and remove the spark plugs using a spark plug wrench.
- Check the condition of each spark plug for signs of wear, carbon deposits, or damage.
- Measure the spark plug gap using a feeler gauge and adjust if necessary.
- If any spark plug shows excessive wear or damage, replace it with a genuine Honda spark plug.
Testing Ignition Coils
Ignition coils play a crucial role in generating high-voltage electrical pulses for the spark plugs. To ensure proper functioning of the ignition coils, perform the following tests:
- Use a multimeter to measure the resistance across the primary and secondary windings of each ignition coil.
- Compare the measured resistance values with the specifications provided in the Honda outboard troubleshooting manual.
- If any ignition coil exhibits resistance outside of the specified range, replace it with a genuine Honda replacement part.
Preventive Maintenance Tips
Proper preventive maintenance is essential for keeping your Honda outboard in top condition. By following these preventive maintenance tips, you can ensure that your outboard engine runs smoothly and efficiently for years to come.
Winterizing Your Outboard
Winterizing your outboard is crucial to protect it from the harsh effects of cold weather. Here’s a simple checklist to follow:
- Flush the cooling system to remove any salt, dirt, or debris.
- Change the engine oil and replace the oil filter.
- Stabilize the fuel to prevent it from breaking down during storage.
- Remove the propeller and apply a rust inhibitor to the shaft.
- Fog the cylinders to prevent corrosion.
- Store the outboard in a dry, well-ventilated area.
Routine Check-ups
Regular check-ups are essential to catch any potential issues before they become major problems. Here are some routine check-ups to perform:
- Inspect the fuel system for any leaks or blockages.
- Check the spark plugs and replace them if necessary.
- Examine the propeller for damage or signs of wear.
- Inspect the battery and ensure it is properly charged.
- Test the ignition system for proper operation.
Electrical System Diagnostics
For efficient troubleshooting of the electrical system in your Honda outboard, refer to the comprehensive Honda Outboard Troubleshooting Manual. This manual provides detailed guidance on diagnosing and resolving issues related to the engine’s electrical components.
Electrical System Diagnostics is an important aspect of troubleshooting any Honda Outboard engine. When it comes to diagnosing issues related to the electrical system, it is important to follow a systematic approach to ensure that all possible causes of the problem are identified and addressed. This section will cover some important areas that need to be inspected when troubleshooting issues related to the electrical system of your Honda Outboard engine.
Battery Inspection
The first step in diagnosing issues related to the electrical system of your Honda Outboard engine is to inspect the battery. A dead or weak battery can cause a range of issues, such as difficulty starting the engine, dimming lights, or erratic behavior of the engine. To inspect the battery, you can use a voltmeter to measure the voltage across the terminals. If the voltage is below 12 volts, it may be time to replace the battery. Additionally, you should check the battery terminals for corrosion and ensure they are tight and secure.
Electrical Connections Review
Another important aspect of diagnosing issues related to the electrical system of your Honda Outboard engine is to review the electrical connections. Over time, electrical connections can become loose or corroded, leading to issues such as intermittent power loss or erratic behavior of the engine. To review the electrical connections, you can start by visually inspecting them for any signs of corrosion or damage. You should also check that all connections are tight and secure. A loose connection can cause a range of problems, such as voltage drops or intermittent loss of power.
Summary
In conclusion, Electrical System Diagnostics is an important aspect of troubleshooting any Honda Outboard engine. By following a systematic approach and inspecting important areas such as the battery and electrical connections, you can identify and address any issues related to the electrical system of your engine. If you need further guidance, you can refer to the Honda Outboard Troubleshooting Manual, which provides detailed information on how to diagnose and fix issues related to the electrical system and other components of your Honda Outboard engine.
Professional Resources
When it comes to troubleshooting your Honda outboard motor, having access to professional resources can be a game-changer. Whether you are a seasoned boat mechanic or a novice boat owner, utilizing owner’s manuals and service and repair manuals can help you diagnose and fix issues efficiently.
Utilizing Owner’s Manuals
Owner’s manuals are invaluable resources that provide detailed information about your Honda outboard motor. They offer step-by-step instructions on how to operate, maintain, and troubleshoot common problems. By referring to the owner’s manual, you can quickly identify issues and take the necessary steps to resolve them.
Service And Repair Manuals
Service and repair manuals go beyond basic maintenance tasks and delve into more complex troubleshooting procedures. These manuals contain in-depth technical information, wiring diagrams, and troubleshooting guides that can help you diagnose and repair even the most challenging issues with your Honda outboard motor.
Frequently Asked Questions
Why Is My Honda Outboard Beeping?
Your Honda outboard may beep due to an overheat indicator or a faulty charging system. The engine cooling circuit issue triggers the overheat indicator and slows down the engine speed. The ACG indicator and buzzer sound when the charging system is faulty.
How To Reset Honda Outboard?
To reset a Honda outboard, follow these steps after maintenance: Turn off the engine. Put the shift lever in “F” or “R”. Turn the ignition switch on. Press and hold the hour reset button. Release the button when the hour counter resets to zero.
What Causes An Outboard Motor To Run Rough?
A rough-running outboard motor can be caused by dirty fuel system components, such as the filter, pump, carburetor, or injectors. Additionally, dirty or faulty spark plugs may disrupt the fuel-air mixture, leading to rough engine performance.
Why Is My Outboard Motor Not Working?
Your outboard motor may not be working due to fuel system issues, such as old fuel causing blockages. Dirt may also be clogging the filter, lines, or carburetor, hindering engine performance. Regular maintenance can help prevent these problems.
Conclusion
Troubleshooting your Honda outboard is crucial for maintaining optimal performance. Regular maintenance and addressing issues promptly can prevent costly repairs. By following the troubleshooting manual and seeking professional help when needed, you can keep your Honda outboard running smoothly for years to come.