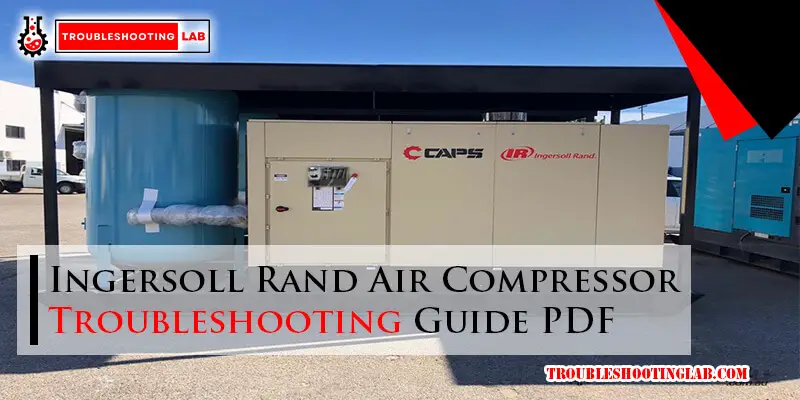
If your Ingersoll Rand air compressor is not building pressure or not turning on, troubleshooting common issues such as a defective reed valve or low oil levels can help diagnose and resolve the problem. Additionally, checking the power button, breakers, and air pressure levels are important steps in troubleshooting an air compressor failure.
It’s also essential to ensure proper ventilation and the use of the correct type of oil. In this troubleshooting guide for Ingersoll Rand air compressors, we will explore various issues and provide step-by-step instructions on how to address them effectively.
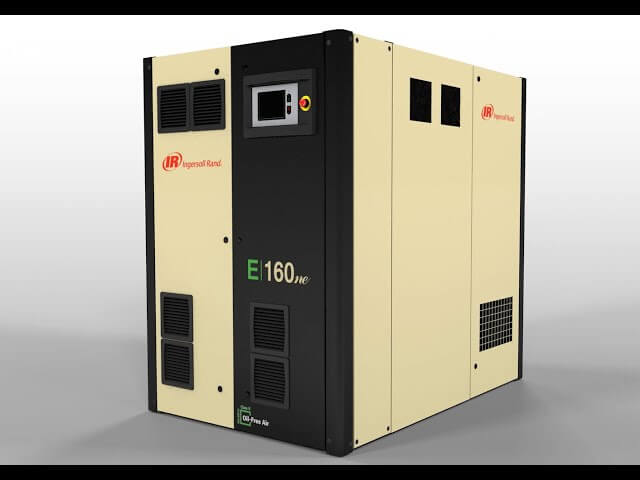
Common Problems And Internal Issues
Tools Needed
Before troubleshooting common problems and internal issues with your Ingersoll Rand air compressor, it’s important to make sure you have the right tools on hand. Having the necessary tools will ensure that you can efficiently and effectively diagnose and fix any issues that may arise. Here are a few tools you’ll need:
- Screwdrivers
- Wrenches
- Multimeter
- Pressure gauge
- Tubing cutter
Compressors Without A Magnetic Starter
If your Ingersoll Rand air compressor does not have a magnetic starter, there are a few troubleshooting steps you can take to identify and resolve the issue.
Check The Overload
The overload protects the motor from overheating. If the compressor fails to start, check the overload for any faults or damage. Reset it if necessary.
Check The Pressure Switch
The pressure switch controls the compressor’s on/off operation based on the desired pressure settings. Ensure that the pressure switch is set correctly and is functioning properly. Test it using a multimeter to check for continuity.
Inspect And Test The Motor
If the compressor still does not start, inspect the motor for any visible signs of damage or overheating. Use a multimeter to test the motor windings for continuity. If there is no continuity, the motor may need to be replaced.
Replacing The Pressure Switch
If the pressure switch is faulty, it may need to be replaced. Before replacing it, make sure to turn off the power to the compressor. Disconnect the wiring from the old pressure switch and remove it from the compressor. Install the new pressure switch and reconnect the wiring, following the manufacturer’s instructions.
Installing A New Pressure Switch
When installing a new pressure switch, it’s important to ensure proper installation to prevent any future issues. Follow these steps:
- Turn off the power to the compressor.
- Disconnect the wiring from the old pressure switch.
- Remove the old pressure switch from the compressor.
- Install the new pressure switch, making sure it is securely tightened.
- Reconnect the wiring following the manufacturer’s instructions.
- Turn on the power and test the compressor to ensure it is working properly.
Compressors are not building pressure.
Introduction
When your Ingersoll Rand air compressor fails to build pressure, it can be quite frustrating. This issue can lead to reduced productivity and delays in completing your projects. However, with the help of this troubleshooting guide, you can easily identify and resolve the problem. In this section, we will discuss the various steps you can take to diagnose and fix a compressor that is not building pressure.
Tools Needed
Before you begin troubleshooting, make sure you have the following tools on hand:
- Pressure gauge
- Screwdriver or wrench
- Replacement belt (if necessary)
Symptoms Of A Compressor Not Building Pressure
To determine if your air compressor is not building pressure, look out for the following symptoms:
- Noise or vibration: If you hear unusual noises or experience excessive vibration when the compressor is running, it could indicate a problem with pressure buildup.
- Slow or weak airflow: If the airflow from the compressor is weak or takes longer than usual to build up pressure, it is a sign of a problem.
- Air leaks: If you notice air leaks around the compressor, it can signify a failure to build pressure.
Air Inlet Filter Check
The air inlet filter plays a crucial role in maintaining the performance of your air compressor. A clogged or dirty filter can hinder the airflow, causing the compressor to struggle to build pressure. Here’s how you can check the air inlet filter:
- Locate the air inlet filter on your compressor.
- Inspect the filter for any dirt, dust, or debris.
- If the filter is dirty, clean it using compressed air or replace it if necessary. Make sure to follow the manufacturer’s instructions for proper maintenance.
Check Service Valve Or Drain Valve
Another potential cause of a compressor not building pressure is a faulty service valve or drain valve. These valves are responsible for controlling the flow of air in and out of the compressor. To check these valves:
- Inspect the service valve and drain valve for any signs of damage or blockage.
- If you notice any issues, such as leaks or obstructions, try tightening the valve or cleaning it to restore proper function.
- If the valves are severely damaged, you may need to replace them.
Replace Or Tighten The Belt
A worn-out or loose belt can cause the compressor to lose power and fail to build pressure effectively. To check the belt:
- Inspect the belt for any signs of wear and tear. If it appears cracked, frayed, or damaged, it may need to be replaced.
- If the belt is loose, use a wrench or screwdriver to tighten it according to the manufacturer’s specifications.
- Ensure that the belt is properly aligned and tensioned for optimal performance.
Belt Tensioning
Maintaining the right tension in the compressor belt is essential for optimal performance. Improper tension can result in reduced pressure buildup. Here’s how you can check and adjust the belt tension:
- Carefully examine the belt tension. It should be neither too loose nor too tight.
- If the belt is too loose, adjust the tension by moving the motor or compressor assembly accordingly. Consult the manufacturer’s instructions for specific guidance.
- Ensure that the tension is evenly distributed along the length of the belt.
Remove The Heads
Sometimes, a compressor not building pressure can be caused by issues with the heads. The heads are responsible for compressing air during the compression cycle. Follow these steps to remove the heads:
- Disconnect the power supply to the compressor.
- Identify the heads and locate the bolts or screws securing them to the compressor unit.
- Using a wrench or screwdriver, carefully remove the bolts or screws to detach the heads from the compressor.
- Inspect the heads for any signs of damage or wear. Clean them if necessary.
- Reinstall the heads securely, ensuring proper alignment and tightening of the bolts or screws.
Side-by-side Cylinders
If your compressor has side-by-side cylinders, it is important to ensure that both cylinders are functioning properly. A malfunctioning cylinder can result in insufficient pressure buildup. Here’s what you can do:
- Inspect both cylinders for any signs of damage or wear.
- If one cylinder appears to be malfunctioning, check the valves, pistons, and rings for any issues.
- Clean or replace any damaged components as needed.
- Ensure that both cylinders are properly lubricated and aligned for smooth operation.
Electrical Inspection
Finally, an electrical issue can also prevent an air compressor from building pressure. Conduct a thorough inspection of the electrical components to identify and resolve any potential problems. Here are some steps to follow:
- Check the power supply to ensure that it is properly connected and functioning.
- Inspect the pressure switch and motor for any loose connections or damaged wires.
- If you find any faulty electrical components, either repair or replace them as necessary.
By following these troubleshooting steps, you can effectively diagnose and resolve the issue of a compressor not building pressure. Remember to always prioritize safety and refer to the manufacturer’s instructions for specific guidance.
Replacing the check valve
Tools Needed
To replace the check valve on your Ingersoll Rand air compressor, you’ll need the following tools:
- Adjustable wrench
- Screwdriver set
- Ratchet and socket set
- Thread seal tape
Check Valve Location
The check valve is an essential component in the air compressor system, preventing air from flowing back into the compressor tank. It is usually located near the tank’s outlet connection, where the compressed air exits the compressor. Before replacing the check valve, make sure to turn off and unplug the compressor to avoid any accidents.
Check Valve Troubleshooting
If you suspect that the check valve is malfunctioning, there are a few signs to look out for. These may include:
- A sudden drop in tank pressure occurs when the compressor is not in use.
- A continuous air leak from the tank’s outlet connection.
- Excessive or unusual noise coming from the check valve area.
If you notice any of these symptoms, it is a good indication that the check valve needs to be replaced.
Draining Air Tank
Before removing the check valve, it is crucial to drain the air tank completely. This helps prevent any accidental release of pressurized air during the replacement process. Locate the drain valve at the bottom of the tank and attach a hose if necessary. Open the valve and let all the air escape until there is no more pressure in the tank.
Removing The Check Valve
Once the tank is drained, use an adjustable wrench or a ratchet and socket set to loosen and remove the check valve from its position. Some models may have additional fittings or fasteners that need to be loosened before the check valve can be fully removed. Take note of the valve’s orientation and any O-rings or gaskets that may be present.
Installing A New Check Valve
Before installing a new check valve, wrap the threads with thread seal tape to ensure a tight and leak-free connection. Insert the new check valve into the appropriate port, making sure it is oriented correctly. Use a wrench or socket set to tighten the valve securely, but avoid over-tightening, as it may damage the valve or the fittings.
Check Fittings
After installing the new check valve, it is essential to check all the fittings and connections surrounding the valve. Use a wrench or socket set to ensure they are tight and secure. Inspect for any visible leaks or signs of damage. If necessary, apply additional thread seal tape or tighten the fittings to eliminate any potential air leaks.
By following these steps and using the appropriate tools, you can easily replace the check valve on your Ingersoll Rand air compressor. Regular maintenance and troubleshooting can help ensure the efficient operation of your compressor and extend its lifespan.
Troubleshooting For Air Compressor Not Building Pressure
Defective Reed Valve
One of the most common reasons for an air compressor not building pressure is a defective reed valve. In single-stage models, the defective reed valve can exhaust air out from the air inlet, while in two-stage piston compressors, it can lead to air escaping through the intercooler safety valve. This can significantly affect the compressor’s ability to reach sufficient pressure.
Exhausting Air Out From The Air Inlet
In the case of single-stage models, an air compressor not building pressure can be due to air exhausting out of the air inlet. This can occur when the reed valve is defective, allowing air to escape instead of being compressed. It is important to inspect the reed valve for any signs of damage or wear and replace it if necessary.
Intercooler Safety Valve
For two-stage piston compressors, a defective reed valve can cause air to escape through the intercooler safety valve. This valve is designed to release excess pressure and protect the compressor from damage. If the reed valve is faulty, it can lead to air being released prematurely, preventing the compressor from building pressure effectively.
In order to troubleshoot an air compressor that is not building pressure, it is essential to identify and address these potential issues. Defective reed valves should be replaced, and the intercooler safety valve should be inspected for any signs of malfunction. By addressing these problems, you can ensure that your air compressor operates efficiently and effectively.
What To Do When Your Air Compressor Won’t Build Pressure
low oil level, overheating, moto overload, or a malfunctioning pressure switch. In this troubleshooting guide, we will specifically focus on what to do when your air compressor won’t build pressure. By following these steps, you can diagnose the issue and potentially fix it yourself, saving time and money on unnecessary repairs.
Steps To Diagnose The Issue
When your air compressor fails to build pressure, it’s important to systematically identify the problem. Follow these steps to diagnose the issue and determine the appropriate solution:
1. Check For Air Leaks
Air leaks are a common culprit when an air compressor fails to build pressure. Use a soapy solution or a handheld leak detector to check for any leaks around fittings, hoses, and connections. If you find any leaks, tighten the connections or replace faulty parts to eliminate the air leakage.
2. Inspect The Reed Valve
The reed valve is responsible for controlling the flow of air in and out of the compressor’s cylinders. A defective reed valve can cause air to escape instead of building pressure. Inspect the reed valve for any signs of damage or wear. Replace the valve if necessary to restore proper functionality.
3. Clean Or Replace the air filter.
A clogged or dirty air filter can restrict the airflow to the compressor, making it difficult for the unit to build pressure. Remove the air filter and clean it using compressed air, or wash it with water and mild detergent. If the filter is damaged or cannot be cleaned effectively, replace it with a new one.
4. Check For Proper Belt Tension
If your compressor has a belt-driven system, ensure that the belt is properly tensioned. A loose or worn-out belt may not transfer sufficient power to the compressor, failing to build pressure. Adjust the belt tension or replace the belt if necessary.
5. Verify Pressure Switch Settings
The pressure switch controls when the compressor turns on and off based on the desired pressure settings. Check the pressure switch settings to ensure they are correctly adjusted according to your needs. Make any necessary adjustments to ensure the switch is set to the appropriate cut-in and cut-out pressures.
6. Check The Motor And Electrical Connections
Faulty motors or electrical connections can prevent the compressor from building pressure. Inspect the motor for any signs of damage or overheating. Check all electrical connections to ensure they are secure and free from corrosion. If you notice any issues, repair or replace the motor or connections as needed.
By systematically checking these potential problem areas, you can troubleshoot air compressor issues related to a failure to build pressure. Remember to always follow proper safety procedures and consult the manufacturer’s manual for specific instructions and recommendations.
Keep your air compressor running smoothly by regularly performing maintenance tasks such as checking for leaks, cleaning or replacing filters, and ensuring proper belt tension. With these troubleshooting tips, you’ll be able to identify the issues causing your air compressor to fail building pressure and take the necessary steps to fix them.
Frequently Asked Questions
Why Does Air Compressor Not Build Pressure?
A possible reason why an air compressor does not build pressure is a defective reed valve. This can cause air to escape from the air inlet instead of building up pressure. To troubleshoot, check the reed valve and replace it if necessary.
What Is The First Step In Troubleshooting An Air Compressor Failure?
The first step in troubleshooting an air compressor failure is to check the power button and switch, as well as the breakers. Additionally, ensure that the compressor has sufficient air pressure about the cut-in pressure.
Why Does My Ingersoll Rand Air Compressor Keep Shutting Off?
Possible short answer for the FAQ: “Your Ingersoll Rand air compressor may be shutting off due to high ambient temperature, lack of ventilation, low oil levels, or using the wrong type of oil. Check these factors to troubleshoot the issue.
” (26 words)
How Do You Troubleshoot An Electric Air Compressor?
To troubleshoot an electric air compressor, follow these steps:1. Check for electrical power and turn it on. 2. Press the reset button. 3. Verify the oil level and add oil if necessary. 4. Adjust the pressure switch if it’s not making contact.
5. Ensure the tank pressure is above the cut-in pressure. (Source: https://www. portlandcompressor. com/compressor/troubleshooting-guide-ingersol-rand-compressor)
Why Is My Ingersoll Rand air compressor not building pressure?
The most common reason behind a compressor’s inability to build pressure is a defective reed valve.
Conclusion
To troubleshoot your Ingersoll Rand air compressor effectively, it’s important to check common problems like the pressure switch, motor, belts, and valves. By following the step-by-step troubleshooting guide provided in the Ingersoll Rand Air Compressor Troubleshooting Guide PDF, you’ll be able to identify and fix any issues that may be impacting the performance of your compressor.
Remember, proper maintenance and regular inspections are key to ensuring your air compressor works efficiently and lasts for a long time.
