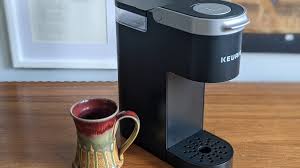
If your Keurig K Mini isn't working, try descaling and checking for clogs. Ensure the water reservoir is filled properly.The Keurig K Mini is a popular single-serve coffee maker known for its compact size and convenience. Its simplicity makes it a favorite among coffee enthusiasts. However, like any appliance, it can face issues that disrupt its performance. Common problems include clogs, descaling needs, and water reservoir issues.
Regular maintenance can prevent most of these problems. Understanding how to troubleshoot your Keurig K Mini ensures you enjoy a perfect cup every time. This guide offers easy steps to fix common issues, ensuring your coffee maker runs smoothly. Save time and avoid frustration by keeping your Keurig K Mini in top condition.
Power Issues
Keurig K Mini is an amazing coffee maker. Sometimes, it faces power issues. These can disrupt your coffee routine. Understanding these power issues helps in quick troubleshooting. Let’s explore common problems and solutions.
Machine Not Turning On
If your Keurig K Mini is not turning on, check the power source. Ensure the machine is plugged in securely. Try a different outlet if needed. Sometimes, the outlet may be faulty.
Next, inspect the power cord. Any visible damage? A damaged cord needs replacement. Also, ensure the power button is pressed firmly.
Tip: Unplug your Keurig for 10 minutes. Then, plug it back in. This can reset the machine.
Inconsistent Power
Inconsistent power can cause brewing problems. First, ensure the machine is not plugged into a power strip. Plug directly into the wall outlet. Power strips can cause issues.
Check for any loose connections. Make sure the power cord is fully inserted. Inspect the plug for any damage.
Tip: Avoid using an extension cord. It can cause inconsistent power supply.
| Issue | Possible Cause | Solution |
|---|---|---|
| Machine Not Turning On | Loose Plug | Ensure Plug is Secure |
| Machine Not Turning On | Damaged Cord | Inspect and Replace Cord |
| Inconsistent Power | Power Strip Usage | Plug Directly into Outlet |
| Inconsistent Power | Loose Connection | Check and Secure Connections |
Brewing Problems
Brewing problems with your Keurig K Mini can be frustrating. From weak coffee to no coffee dispensed, these issues can disrupt your morning routine. Let’s dive into common brewing problems and their solutions.
Weak Coffee
If your Keurig K Mini is producing weak coffee, there could be several reasons. A common cause is a clogged needle. The needle punctures the K-Cup, allowing water to flow through. Over time, coffee grounds and debris can clog the needle.
To fix this, follow these steps:
- Unplug your Keurig.
- Remove the K-Cup holder.
- Use a paperclip to clear the needle.
- Rinse the needle with warm water.
- Reassemble your Keurig and brew a test cup.
Another cause could be using a low-quality K-Cup. Ensure you are using fresh, high-quality K-Cups for the best taste.
No Coffee Dispensed
If no coffee is dispensed, your Keurig may have a water flow issue. This can be due to a clogged water line or a malfunctioning pump.
To troubleshoot, perform the following steps:
- Check the water reservoir and ensure it’s full.
- Remove and clean the water reservoir.
- Run a water-only brew cycle to clear any clogs.
- Descale your Keurig with a descaling solution or vinegar.
- Restart your Keurig and try brewing again.
If these steps do not resolve the issue, you may need to contact Keurig customer support for further assistance.
Here’s a quick reference table for common problems and solutions:
| Problem | Possible Cause | Solution |
|---|---|---|
| Weak Coffee | Clogged needle | Clear needle with paperclip |
| No Coffee Dispensed | Clogged water line | Run water-only brew cycle |
| No Coffee Dispensed | Malfunctioning pump | Descale Keurig |
Water Reservoir Issues
The water reservoir is a vital part of your Keurig K Mini. It stores the water that brews your coffee. Sometimes, you may encounter issues. Here are some common problems and solutions.
Leaking Reservoir
A leaking reservoir can be frustrating. To fix it, follow these steps:
- Remove the water reservoir from the machine.
- Check for visible cracks or damage.
- If you find any, replace the reservoir.
- Ensure the reservoir is properly seated.
If the issue persists, clean the reservoir’s seal. Dirt or debris can cause leaks. Use a damp cloth to wipe the seal. Make sure it’s clean and dry before reattaching.
Water Not Dispensing
If your Keurig K Mini is not dispensing water, try these steps:
- Check the water level in the reservoir.
- Ensure it’s filled above the minimum line.
- Inspect the water inlet for blockages.
- Clean the inlet with a soft brush.
Sometimes, air bubbles cause the issue. Tap the side of the reservoir gently. This should release any trapped air.
If these steps don’t work, descale your machine. Mineral buildup can block water flow. Use a descaling solution for best results. Follow the instructions on the product label.
Descaling Process
Descaling your Keurig K Mini is essential for maintaining its performance. Over time, mineral deposits build up inside your coffee maker. This affects the taste and quality of your coffee. Let’s dive into why descaling is important and how you can do it yourself.
Why Descaling Is Important
Descaling removes mineral buildup from your coffee maker. These minerals come from the water you use. This buildup can affect the taste of your coffee. It can also slow down your machine.
A clean machine works better and lasts longer. Descaling keeps your Keurig K Mini in top shape. It ensures every cup of coffee tastes great.
Step-by-step Guide
Follow these steps to descale your Keurig K Mini:
- Prepare the Machine: Turn off your Keurig. Empty any water in the reservoir.
- Mix the Solution: Mix a descaling solution. You can use a special descaling solution or vinegar.
- Add the Solution: Pour the solution into the water reservoir.
- Run the Machine: Place a mug on the drip tray. Run a brew cycle without a K-Cup.
- Repeat: Repeat the process until the reservoir is empty.
- Rinse: Fill the reservoir with clean water. Run several brew cycles to rinse.
Here’s a quick overview in table form for easy reference:
| Step | Action |
|---|---|
| 1 | Turn off and empty the reservoir |
| 2 | Mix and add descaling solution |
| 3 | Run a brew cycle without K-Cup |
| 4 | Repeat until the reservoir is empty |
| 5 | Rinse with clean water |
Descaling is simple but very important. Your Keurig K Mini will thank you. Happy brewing!
Needle Maintenance
Maintaining the needles of your Keurig K Mini is essential. This ensures a smooth coffee brewing experience. Over time, needles can get clogged or dirty. Regular maintenance helps in preventing potential issues.
Clogged Needles
Clogged needles can stop your Keurig from working properly. This issue often leads to slow brewing or no coffee at all. The needles can get clogged with coffee grounds or mineral deposits.
- Use a paper clip to remove clogs.
- Check for visible blockages around the needle area.
Cleaning Needles
Cleaning the needles regularly is important. This helps in maintaining the efficiency of your Keurig K Mini. Follow these simple steps for effective cleaning:
- Turn off and unplug the machine.
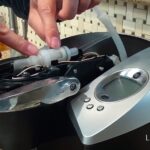
- Remove the pod holder from the machine.
- Disassemble the pod holder for easy cleaning.
- Use a paper clip to clean the entrance needle.
- Rinse all parts with warm water.
- Reassemble and insert the pod holder back.
Make sure all parts are dry before reassembling. This prevents any electrical issues or rust. Regular maintenance of the needles ensures a longer lifespan for your Keurig K Mini.
Pod Issues
Experiencing issues with your Keurig K Mini pods? You are not alone. Many users face problems with pods not working properly. This section will guide you through common pod issues and how to resolve them.
Unrecognized Pods
Does your Keurig K Mini fail to recognize the pod? This is a common problem.
- Check the Pod Placement: Ensure the pod is correctly placed in the holder.
- Inspect the Pod Lid: The lid should be fully closed and sealed.
- Clean the Needle: Residue can block the needle. Use a paperclip to clean it.
If these steps don’t work, try a different pod. Some pods may be defective.
Pod Compatibility
Not all pods work with the Keurig K Mini. Using the wrong pod can cause issues.
| Pod Type | Compatible? |
|---|---|
| K-Cup Pods | Yes |
| Non-Keurig Pods | No |
| Reusable Pods | Yes, if Keurig-branded |
Always use Keurig-approved pods. This ensures your machine works correctly.
If you use a reusable pod, make sure it’s Keurig-branded. Non-Keurig pods might not work and could damage your machine.
Frequently Asked Questions
How Do You Reset A Keurig Mini?
To reset a Keurig Mini, unplug it for 30 seconds. Plug it back in and press the power button.
How Do I Unclog A Keurig Mini Coffee Maker?
Unplug the Keurig mini. Empty the reservoir. Use a paperclip to clear the needle. Run a descaling solution through the machine. Rinse thoroughly.
Why Won’t My Keurig Mini Turn On?
Your Keurig Mini might not turn on due to a disconnected power cord, faulty outlet, or internal electrical issue. Ensure the water reservoir is properly seated and the machine is plugged in securely. If problems persist, contact Keurig customer service.
Why Won’t The Water Come Out Of My Keurig?
Your Keurig might be clogged or have a dirty needle. Try descaling and cleaning the needle to fix it.
Why Is My Keurig K Mini Not Brewing?
Check the water reservoir and make sure it’s filled. Also, ensure the machine is properly plugged in.
Conclusion
Addressing Keurig K Mini issues can enhance your coffee experience. Regular maintenance and quick fixes ensure reliable performance. Troubleshooting common problems saves time and money. Enjoy a seamless coffee-making process with these simple steps. Keep your Keurig K Mini in top shape for the perfect brew every time.


