Dealing with a My Touch Smart Timer can be frustrating when issues arise. You want it to work smoothly, but sometimes it doesn’t.
My Touch Smart Timer troubleshooting can help you fix common problems and get back on track. This guide will walk you through the most frequent issues and their solutions. Whether your timer isn’t turning on, the display is malfunctioning, or the settings are incorrect, you’ll find step-by-step instructions here.
Understanding these troubleshooting tips ensures your timer works efficiently, saving you time and hassle. Let’s dive into solving those pesky problems and restoring your timer’s functionality.
Timer Not Turning On
Having trouble with your My Touch Smart Timer not turning on? It can be frustrating. But don’t worry, there are simple steps to troubleshoot and fix the issue. Below, we will guide you through two essential checks to get your timer working again.
Check Power Source
First, ensure your timer is properly plugged in. Check the outlet by plugging in another device to see if it works. If the outlet is functioning, inspect the power cord for any visible damage. A damaged cord may prevent the timer from receiving power. Replace it if necessary.
Reset The Timer
Sometimes, a simple reset can solve the problem. Locate the reset button on your timer. Press and hold it for a few seconds. This action will restore the timer to its default settings. After resetting, reprogram the timer to your desired settings. This step can often resolve minor technical issues.
Timer Display Issues
Timer display issues can be frustrating. They often disrupt your schedule and cause unnecessary stress. In this section, we will address two common problems: dim or blank screens and unresponsive buttons. Follow these troubleshooting steps to get your My Touch Smart Timer back on track.
Dim Or Blank Screen
A dim or blank screen can make it hard to read your timer. Here are some steps to fix this issue:
- Check the Power Source: Ensure the timer is plugged in properly. Sometimes, a loose connection can cause display issues.
- Replace Batteries: If your timer uses batteries, they might be low. Replace them with fresh ones.
- Inspect the Display: Look closely at the display. Is it cracked or damaged? If so, you might need a replacement timer.
- Reset the Timer: Unplug the timer for a few minutes, then plug it back in. This can sometimes reset the display.
Unresponsive Buttons
Unresponsive buttons can prevent you from setting your timer. Try these steps:
- Clean the Buttons: Dirt and debris can block the buttons. Use a soft cloth to clean them.
- Check for Lock Mode: Some timers have a lock mode. Refer to your manual to see if this is the case. Disable the lock mode if it is on.
- Replace the Batteries: Weak batteries can cause unresponsive buttons. Replace them to ensure they have enough power.
- Inspect for Damage: Look for any visible damage around the buttons. Physical damage might require professional repair or a new timer.
Fixing display issues can extend the life of your timer. Follow these steps to troubleshoot and resolve common problems.
Timer Not Keeping Time
Experiencing issues with your My Touch Smart Timer not keeping time? Troubleshoot common problems to ensure accurate timing. Simple steps can help resolve syncing issues effectively.
Is your My Touch Smart Timer not keeping the correct time? This issue can be frustrating. Understanding the root causes can help you fix it quickly. Two common problems are battery issues and internal clock malfunctions.
Battery Problems
Your timer may not keep time due to battery problems. Ensure the batteries are fresh and properly installed. Weak or dead batteries can cause the timer to reset. Replace old batteries with new ones. Check the battery contacts for dirt or corrosion. Clean them gently with a dry cloth.
Internal Clock Issues
Internal clock issues can also cause timekeeping problems. The internal clock may drift over time. Reset the timer to the correct time. Refer to the user manual for resetting instructions. If the problem persists, the internal clock might be faulty. Contact customer support for further assistance.
“`
Timer Not Activating Devices
Is your My Touch Smart Timer not activating devices as expected? This issue can be frustrating, but it’s often easy to fix. We’ll guide you through some troubleshooting steps to ensure your timer works perfectly.
Check Device Connection
First, make sure your device is properly connected. Check the power outlet. Ensure the device plugs in securely. Loose connections can prevent the timer from working. Also, verify the device itself is functional. Plug it directly into the outlet to see if it powers on.
Verify Timer Settings
Next, review the timer settings. Ensure the current time on the timer is correct. An incorrect time can cause the timer to activate at the wrong times. Check the program settings. Confirm they match your desired on and off times. Sometimes, a simple setting adjustment can resolve the issue.
Timer Randomly Turns On/off
Experiencing issues with your My Touch Smart Timer? One common problem is the timer randomly turning on or off. This can be frustrating. Understanding the causes can help you fix the issue. Let’s explore some common reasons and solutions.
Interference Issues
Electronic devices near your timer might cause interference. This interference can lead to random on/off cycles. Try moving other electronics away from the timer. Also, ensure the timer is not near large metal objects. These can disrupt its signals.
Another cause can be wireless signals. Wi-Fi routers or cordless phones can interfere. Keep the timer away from these devices. If the problem persists, consider using a different outlet.
Faulty Timer Mechanism
Sometimes, the timer itself might be faulty. Check if the timer is old or damaged. Wear and tear can affect its performance. If it’s new, it could still be defective. Test the timer on different appliances. If it behaves the same, the timer might be the problem.
You can also reset the timer. Often, resetting can solve minor glitches. Refer to the user manual for reset instructions. If resetting doesn’t work, consider replacing the timer. Always use timers from reputable brands.
Programming Difficulties
Programming difficulties can often make using the My Touch Smart Timer frustrating. Many users face challenges in setting up the timer correctly. Understanding the timer’s modes and following a step-by-step guide can help overcome these issues.
Understanding Timer Modes
The My Touch Smart Timer offers various modes for different needs. These include manual, automatic, and random modes. Knowing which mode suits your requirement is crucial. Manual mode allows you to control the timer directly. Automatic mode follows a set schedule. Random mode varies the schedule to give an impression of occupancy.
Step-by-step Programming
Start by resetting the timer to clear any previous settings. Press and hold the reset button for a few seconds. Next, set the current time and date accurately. This ensures the timer functions correctly.
Now, proceed to set your desired on and off times. Use the “Program” button to enter the programming mode. Select the day or days for the schedule. Set the “On” time by adjusting the hour and minute buttons. Confirm the settings by pressing “Enter”. Repeat the process for the “Off” time.
Finally, save and exit the programming mode. Review your settings to ensure accuracy. Your My Touch Smart Timer should now operate as programmed.
When To Seek Professional Help
Troubleshooting your My Touch Smart Timer can sometimes be straightforward. But there are moments when you should seek professional help. Knowing when to call in an expert can save time and prevent further damage. Here are some key instances when professional assistance is crucial.
Complex Electrical Problems
If your timer issues involve complex electrical problems, it’s best to contact a professional. Electrical systems can be dangerous. For example, if you notice burnt smells or sparks, turn off the power and call an electrician.
Other signs of complex issues include:
- Frequent power surges
- Tripped circuit breakers
- Flickering lights
Professionals have the tools and knowledge to safely address these issues. They can also ensure your home’s electrical system remains safe and functional.
Warranty And Support
Sometimes, your timer may still be under warranty. If this is the case, it’s advisable to reach out to the manufacturer. They often provide free repairs or replacements. To check your warranty status, you can:
- Review your purchase receipt
- Visit the manufacturer’s website
- Contact customer support
Additionally, manufacturers offer support services to help with troubleshooting. They can guide you through common fixes or escalate your issue to technical support.
Here’s a quick table summarizing when to seek professional help:
| Issue | Action |
|---|---|
| Burnt smells or sparks | Call an electrician |
| Power surges or tripped breakers | Contact a professional |
| Warranty coverage | Reach out to manufacturer |
By knowing when to seek professional help, you can ensure your My Touch Smart Timer works efficiently and safely.
Maintenance Tips
Maintaining your My Touch Smart Timer ensures its longevity and optimal performance. By following these simple maintenance tips, you can keep your device in excellent condition. Here are some essential pointers for regular cleaning and proper storage of your smart timer.
Regular Cleaning
Regular cleaning is vital to keep your timer functioning well. Dust and grime can accumulate over time, affecting its performance. Follow these steps to clean your device:
- Unplug the timer before cleaning.
- Use a soft, dry cloth to wipe the exterior.
- Avoid using water or liquid cleaners.
- For stubborn dirt, use a slightly damp cloth.
- Ensure the device is completely dry before plugging it back in.
Proper Storage
Proper storage of your My Touch Smart Timer is essential when not in use. Here’s how to store it correctly:
- Unplug the timer from the power source.
- Wrap the cord neatly to avoid tangles.
- Store the timer in a cool, dry place.
- Keep it away from direct sunlight and heat sources.
- Place it in a protective case or a box to prevent dust buildup.
By following these maintenance tips, you can ensure your My Touch Smart Timer remains in top condition. Regular cleaning and proper storage are simple yet effective ways to maintain your device. Keep it clean and stored well to enjoy its benefits for a long time.
Frequently Asked Questions
How Do I Reset My Touch Smart Timer?
To reset your Touch Smart Timer, press the reset button. This will clear all settings.
Why Is My Touch Smart Timer Screen Blank?
A blank screen may indicate dead batteries. Replace the batteries to see if the screen turns on.
How Can I Set The Current Time On My Touch Smart Timer?
Press the “Set” button, then use the arrow buttons to adjust the time. Press “Enter” to save.
Why Isn’t My Touch Smart Timer Turning On/off Devices?
Check if the timer is properly plugged in and the settings are correct. Also, ensure the device is functional.
Can I Use My Touch Smart Timer Outdoors?
Touch Smart Timers are typically for indoor use. Verify your model’s specifications to confirm if it’s suitable for outdoor use.
Conclusion
Fixing your My Touch Smart Timer can be simple. Check the power source first. Next, reset the timer to its default settings. Ensure the timer is programmed correctly. Double-check the wiring connections. These steps should solve most issues. If problems persist, consult the user manual.
You might also contact customer support. With patience, your timer will work well again. Happy troubleshooting!
")


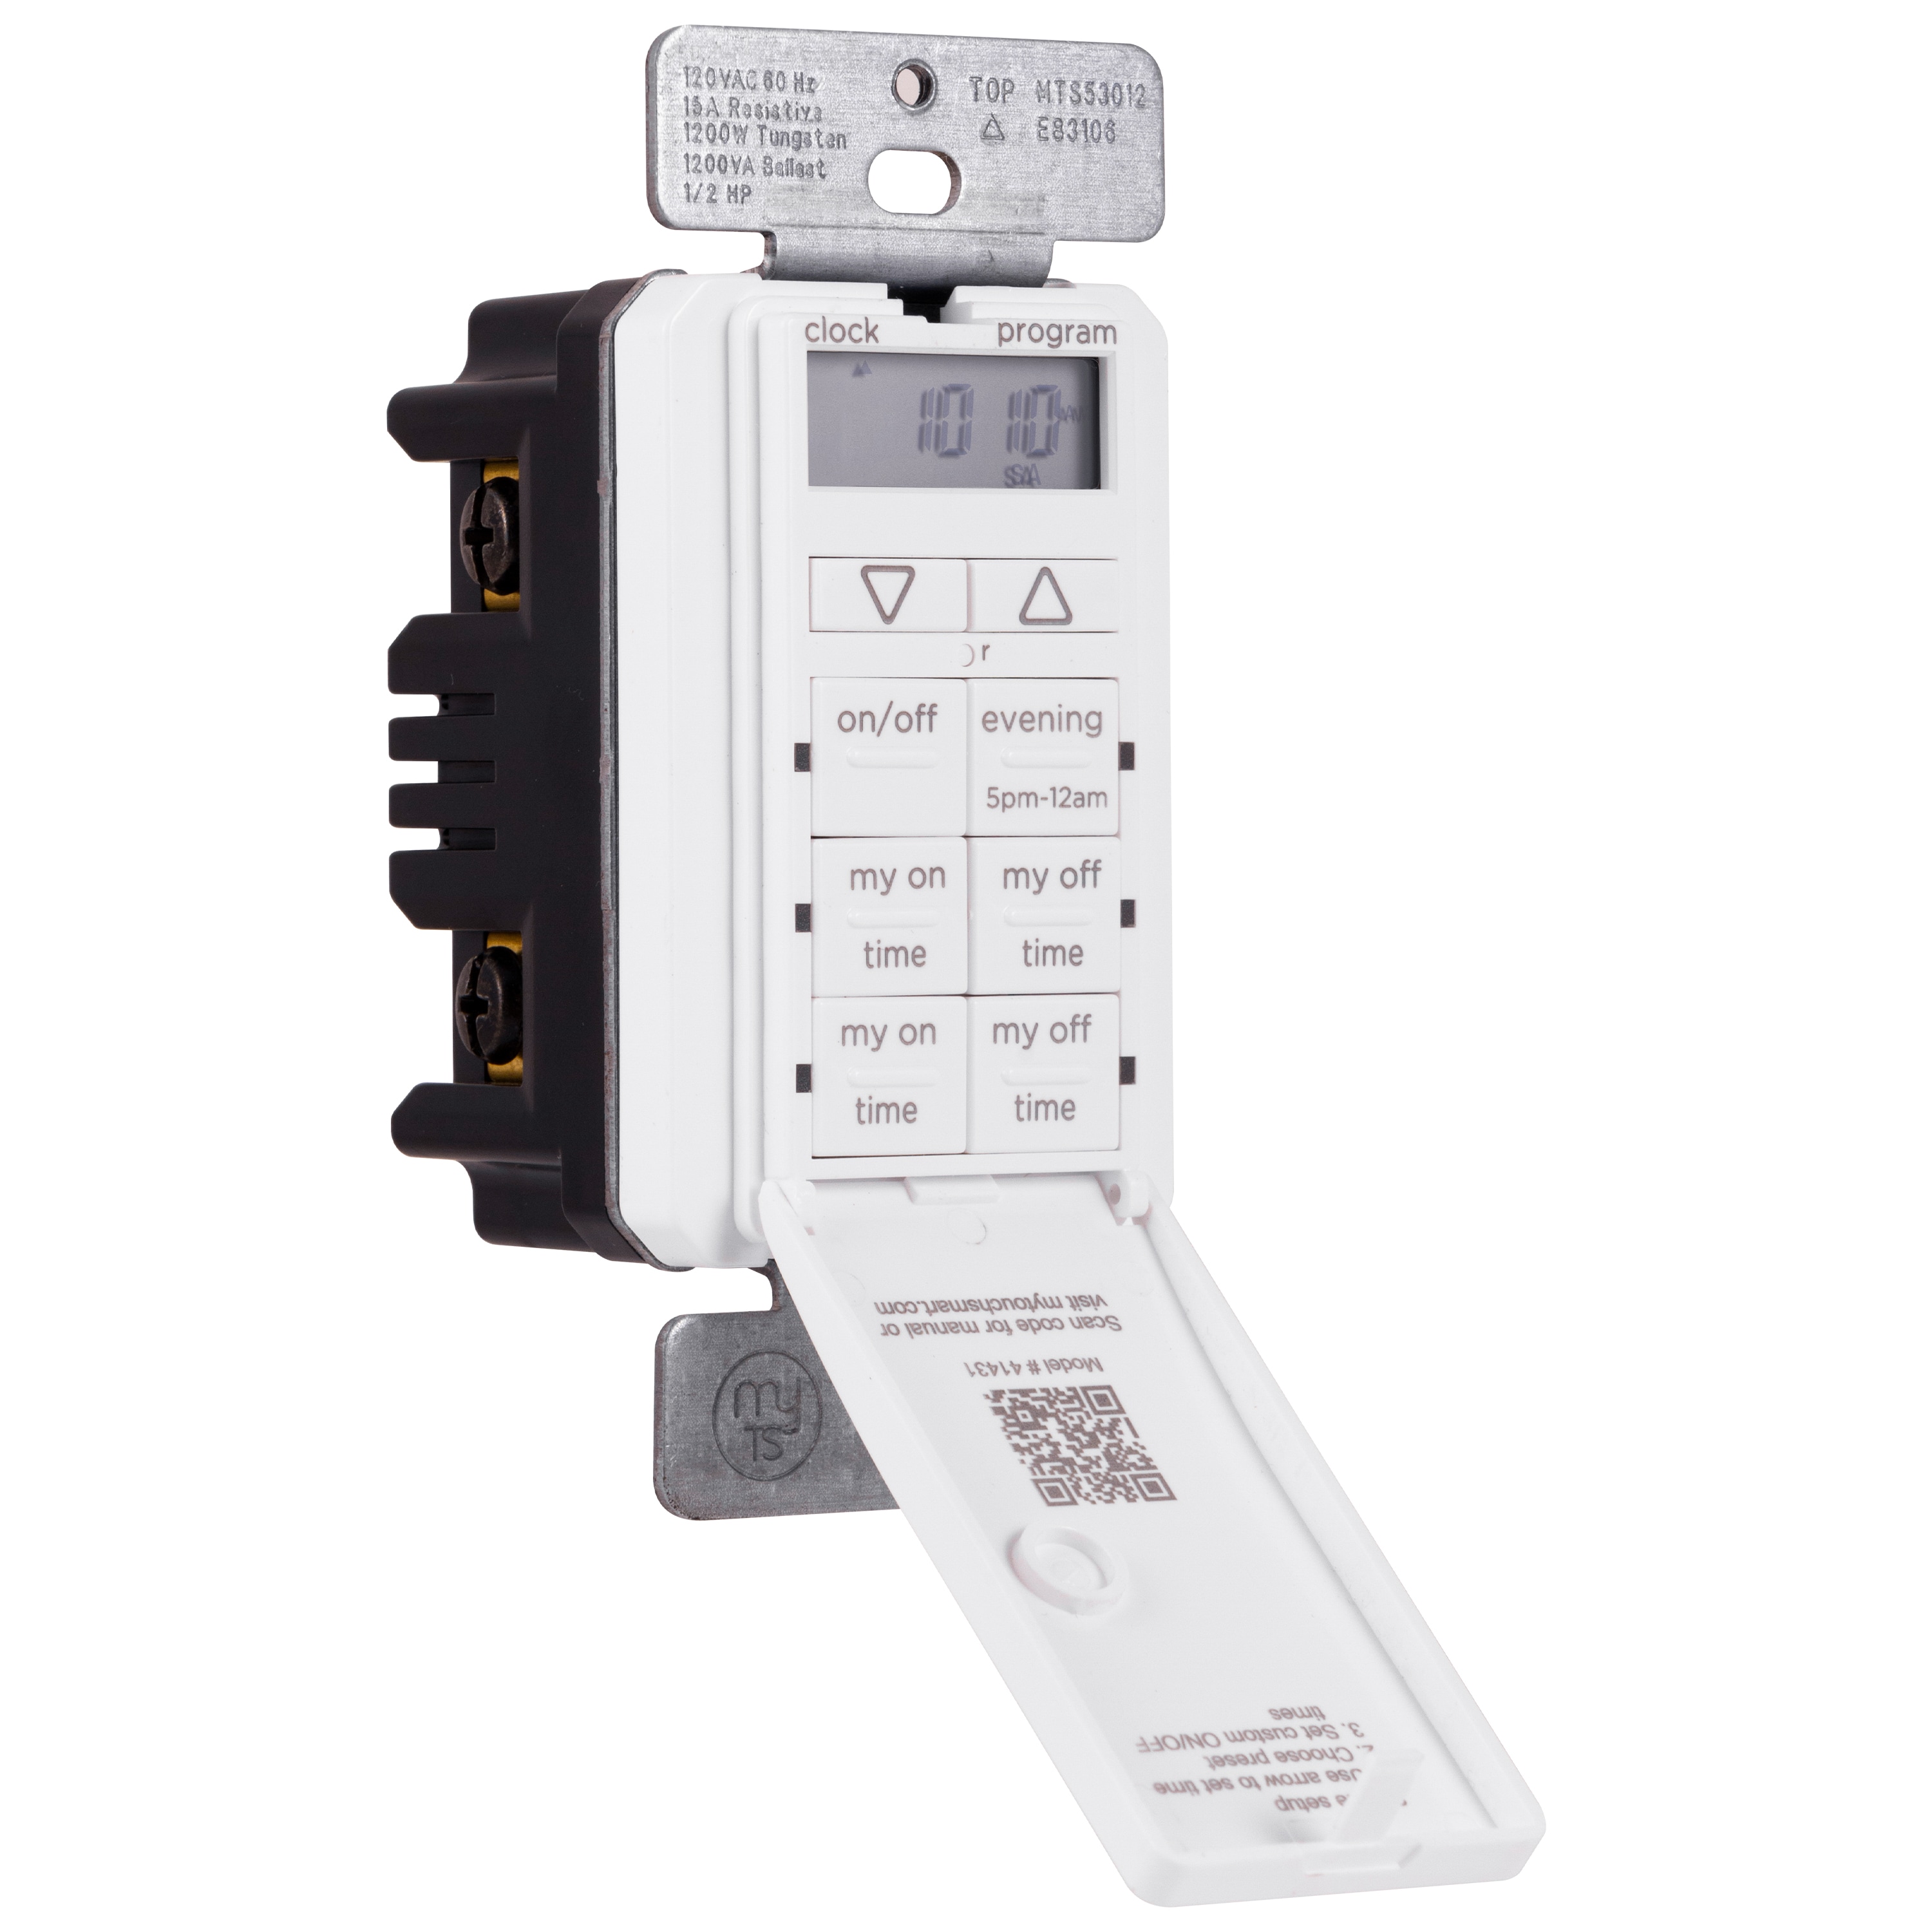
I have an In-Wall “My TouchSmart timer.
After reset and setting the time of day, I have no “Enter” buttion to set the time! Which buttons do I press to “Enter” the time so I can proceed to set the “On” and “Off” settings?
Hi there, thank you for reaching out!
On the My TouchSmart in-wall timer, once you’ve reset the device and set the time of day, the “Enter” button isn’t explicitly labeled. Instead, you can use the “On/Off” button to confirm or save your selections. After setting the correct time, press the “On/Off” button to proceed to the programming mode for setting your “On” and “Off” times.
If the timer doesn’t respond, ensure that the reset was successful by holding down the reset button for at least 5 seconds until the screen fully clears. Then, start the setup process again. Remember to press buttons firmly and wait for the display to update between steps, as there can sometimes be a slight delay.
If the issue persists and no buttons appear to register as “Enter,” it could be a sign of a button malfunction or a firmware glitch. In such cases, a full reset or consulting the user manual for model-specific button functions is recommended. You may also consider contacting the manufacturer if your unit is still under warranty.
Hope this helps you get your timer set up properly!