Craftsman Garage Door Openers Troubleshooting: If your Craftsman garage door opener is not working, it could be due to issues with either the remote or the door controls. Start by checking the power supply, and try plugging in a different device to see if there is power to the opener.
If the safety sensors are blocked, not aligned, or experiencing issues with the wires, it can trigger an error. Another common problem is when the garage door does not close and the lights flash, indicating an issue with the safety sensor.
Troubleshooting these common problems can help you get your Craftsman garage door opener up and running smoothly again.
Common Issues With Craftsman Garage Door Openers
Craftsman garage door openers are known for their reliability and durability, but like any other electronic device, they can sometimes encounter problems. In this section, we will discuss some common issues that you may encounter with your Craftsman garage door opener and how to troubleshoot them.
Garage Door Opener Lights Blinking Twice When Pressing The Remote
If you notice that the lights on your Craftsman garage door opener are blinking twice when you press the remote, this could indicate an issue with the lock feature. To solve this problem, you need to check the wall control and see if the lock feature is enabled. If it is, simply disable the lock feature and test the remote again.
RF Interference Affecting Garage Door Opener Performance
RF (radio frequency) interference can sometimes interfere with the performance of your Craftsman garage door opener and cause it to malfunction. To troubleshoot this issue, start by checking for any nearby devices that may be interfering with the signal, such as wireless routers, cordless phones, or baby monitors. Try moving these devices away from the garage door opener to see if it improves the performance.
Battery-related Issues With The Garage Door Opener
The battery in your Craftsman garage door opener can sometimes cause issues if it is low or needs to be replaced. To check the battery, locate the battery compartment on the opener and inspect the battery. If it is low or corroded, replace it with a new one. Make sure to use the correct type of battery recommended by Craftsman for optimal performance.
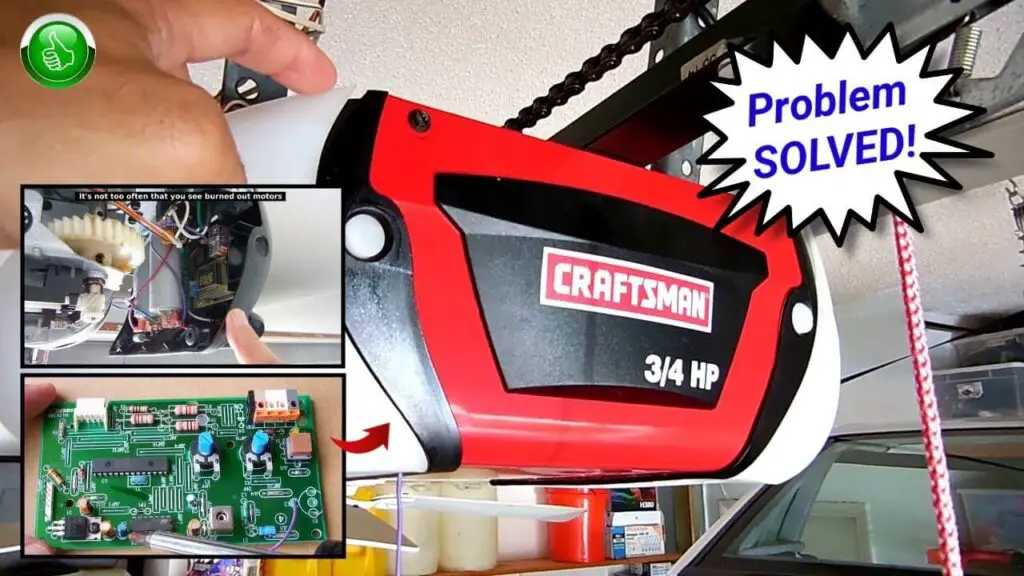
Defective Logic Board Causing Problems
In some cases, a defective logic board can be the root cause of problems with your Craftsman garage door opener. The logic board is responsible for controlling the operation of the opener. If you suspect a faulty logic board, it is best to contact a professional technician to diagnose and replace the board if necessary. Attempting to fix it yourself without proper knowledge may cause further damage.
By addressing these common issues, you can ensure that your Craftsman garage door opener continues to provide reliable performance. If you encounter any other problems with your garage door opener or require professional assistance, do not hesitate to reach out to a trusted technician to get the issue resolved promptly.
Resolving Garage Door Opener Lights Blinking Twice
If you’ve noticed your Craftsman garage door opener lights blinking twice when you press the remote, it’s important to troubleshoot the issue promptly. This blinking pattern indicates that there may be an underlying problem with your garage door opener. Fortunately, there are a few common causes for this issue that you can easily address.
Checking If The Lock Feature Is Enabled On The Wall Control
The first step in resolving the issue is to check if the lock feature is enabled on the wall control of your Craftsman garage door opener. To do this, locate the wall control unit and look for a small lock icon on it. If the lock feature is enabled, it may prevent the garage door from opening and cause the lights to blink twice. To disable the lock feature, press and hold the lock button for a few seconds until the lock icon disappears.
Looking For Rf Interference And Addressing It
Another possible cause of the blinking lights on your Craftsman garage door opener is RF interference. This interference can disrupt the signal between your remote and the garage door opener, causing the lights to blink twice. To address this issue, start by checking for any devices in your garage or nearby that may be emitting RF signals, such as baby monitors or wireless routers. If you find any such devices, try moving them further away from your garage door opener to minimize interference.
Verifying The Condition Of The Batteries In The Garage Door Opener Remote
The batteries in your garage door opener remote may also be the culprit behind the blinking lights. Over time, batteries can become weak or may need to be replaced. To verify the condition of the batteries, open the remote and inspect them for signs of corrosion or low power. If the batteries appear to be in good condition, try removing them and reinserting them to ensure a proper connection.
Replacing The Batteries If Necessary
If the batteries in your garage door opener remote are found to be weak or corroded, it is recommended to replace them with fresh ones. When replacing the batteries, make sure to use the correct type and follow the manufacturer’s instructions. After replacing the batteries, test the remote to see if the blinking light issue is resolved.
By checking if the lock feature is enabled, addressing RF interference, verifying the condition of the batteries in the remote, and replacing batteries if necessary, you can troubleshoot and resolve the issue of your Craftsman garage door opener lights blinking twice. These simple steps will help ensure that your garage door opener functions properly and provides you with convenient access to your garage.
Addressing Rf Interference With Craftsman Garage Door Openers
If you’re experiencing issues with your Craftsman garage door opener, one possible culprit could be RF interference. RF interference can disrupt the signals between your remote control and the opener, causing frustrating problems such as the door not opening or closing properly.
Identifying Potential Sources Of Rf Interference
There are several common sources of RF interference that can affect your Craftsman garage door opener. By identifying and addressing these sources, you can improve the performance and reliability of your opener.
- Wireless devices: Keep an eye out for any wireless devices in close proximity to your garage door opener. These devices can include routers, cordless phones, baby monitors, and even microwave ovens.
- Electrical wiring: Faulty electrical wiring can cause RF interference. Check the wiring near your garage door opener and ensure it is properly grounded.
- Neighboring openers: If you live in a densely populated area, there may be multiple garage door openers operating on the same frequency. This can lead to interference. Check with your neighbors to see if they’re experiencing any issues as well.
Taking Steps To Minimize Or Eliminate Rf Interference
Fortunately, there are steps you can take to minimize or eliminate RF interference with your Craftsman garage door opener. Follow these tips to improve the performance of your opener:
- Relocate wireless devices: If you have any wireless devices near your opener, try moving them to a different location. This can help reduce interference.
- Check for wiring issues: Inspect the electrical wiring near your opener for any potential issues. Ensure that it is properly grounded and that there are no loose connections.
- Change the opener’s frequency: Some Craftsman garage door openers allow you to change the operating frequency. Consult your owner’s manual to see if this option is available and adjust the frequency if necessary.
- Consider upgrading to a dual-frequency opener. Dual-frequency openers use both 315 MHz and 390 MHz frequencies, which can help reduce interference. If you’re experiencing persistent RF interference, it may be worth considering an upgrade.
Testing The Garage Door Opener For Improved Performance
Once you’ve implemented the above steps to address RF interference, it’s important to test your Craftsman garage door opener for improved performance. Try the following to ensure your opener is functioning properly:
- Test the remote control: Press the remote control button from various distances and angles to see if the opener responds consistently.
- Check the wall control panel: Test the wall control panel to make sure it is functioning correctly and there are no delays or response issues.
- Inspect the safety sensors: Ensure that the safety sensors are aligned properly and there are no obstructions that could be interfering with their operation.
- Monitor the garage door’s movement: Open and close the garage door multiple times to confirm that it is operating smoothly and without any interruptions.
By following these troubleshooting steps and addressing RF interference, you can optimize the performance of your Craftsman garage door opener and enjoy hassle-free operation.
Dealing With Battery Issues In Craftsman Garage Door Openers
Checking The Power Supply To The Garage Door Opener
If you find your Craftsman garage door opener not working, it could be due to issues with either the remote or the door controls. Start by examining the socket to ensure there is power supply to the opener. If there is power, but the opener still does not function properly, try plugging in a different device to confirm the functionality of the socket.
Inspecting The Battery Compartment For Corrosion Or Damage
In some cases, battery issues in Craftsman garage door openers are caused by corrosion or damage in the battery compartment. Inspect the battery compartment carefully for any signs of corrosion or physical damage. Corroded or damaged terminals inside the battery compartment can prevent the batteries from making proper contact, resulting in power supply issues. If corrosion or damage is evident, clean or replace the affected parts accordingly.
Replacing The Batteries With New Ones If Needed
If checking the power supply and inspecting the battery compartment does not resolve the issue, it is likely time to replace the batteries. Ensure you use new batteries specifically designed for your Craftsman garage door opener model. Carefully remove the old batteries and insert the new ones, making sure they are correctly aligned. Properly functioning batteries will ensure a consistent power supply to your garage door opener, allowing it to operate smoothly.
important phrases and sentences
Dealing with Battery Issues in Craftsman Garage Door Openers
Checking the power supply to the garage door opener
Inspecting the battery compartment for corrosion or damage
Replacing the batteries with new ones if needed
If you find your Craftsman garage door opener not working, it could be due to issues with either the remote or the door controls.
Start by examining the socket to ensure there is a power supply to the opener.
If there is power but the opener still does not function properly, try plugging in a different device to confirm the functionality of the socket.
In some cases, battery issues in Craftsman garage door openers are caused by corrosion or damage in the battery compartment.
Inspect the battery compartment carefully for any signs of corrosion or physical damage.
Corroded or damaged terminals inside the battery compartment can prevent the batteries from making proper contact, resulting in power supply issues.
If corrosion or damage is evident, clean or replace the affected parts accordingly.
If checking the power supply and inspecting the battery compartment does not resolve the issue, it is likely time to replace the batteries.
Ensure you use new batteries specifically designed for your Craftsman garage door opener model. Carefully remove the old batteries and insert the new ones, making sure they are correctly aligned.
Properly functioning batteries will ensure a consistent power supply to your garage door opener, allowing it to operate smoothly.
Fixing A Defective Logic Board In Craftsman Garage Door Openers
When it comes to troubleshooting Craftsman garage door openers, one common issue that homeowners may encounter is a defective logic board. The logic board, also known as the circuit board, is the brain of the garage door opener system. It controls the opening and closing of the garage door, as well as other functionalities such as the remote control operation and safety features.
Diagnosing A Defective Logic Board
If your Craftsman garage door opener is not functioning properly and you suspect a defective logic board, there are a few signs to look out for. These include:
- The garage door opener not responding to remote control commands
- The garage door not opening or closing as it should
- Flashing LED lights or error codes displayed on the garage door opener
- Unusual or erratic behavior from the garage door opener
If you notice any of these symptoms, it is likely that the logic board in your Craftsman garage door opener needs to be replaced.
Replacing The Logic Board With A Compatible Replacement
When replacing a defective logic board in a Craftsman garage door opener, it is important to ensure that you choose a compatible replacement. A compatible logic board will have the same specifications and features as the original one.
Here is a step-by-step guide on how to replace the logic board:
- Disconnect the power to the garage door opener by unplugging it from the electrical outlet or turning off the circuit breaker.
- Locate the logic board on the garage door opener unit. It is usually housed in a plastic casing and can be accessed by removing a cover or panel.
- Take note of the connections and wiring attached to the logic board. It may be helpful to take pictures or label the wires to ensure proper reinstallation.
- Remove the defective logic board by unscrewing it from the unit and gently disconnecting the wiring.
- Insert the compatible replacement logic board into the housing and reconnect the wiring in the same configuration as before.
- Secure the replacement logic board in place by tightening the screws.
- Reattach the cover or panel to the garage door opener unit.
- Restore power to the garage door opener by plugging it back in or turning on the circuit breaker.
With the new logic board in place, test the garage door opener to ensure that it is functioning correctly. Press the remote control button and observe the door’s movement. If all is well, you have successfully fixed the defective logic board in your Craftsman garage door opener.
Remember, if you are unsure about replacing the logic board or if you want to ensure a proper installation, it is always advisable to seek professional assistance from a qualified garage door technician.
Additional Resources For Craftsman Garage Door Opener Troubleshooting
If you’re experiencing issues with your Craftsman garage door opener and in need of troubleshooting, don’t worry! There are several additional resources available to help you identify and resolve the problem. Understanding the different parts and components, troubleshooting the garage door opener wall control, using a keypad, and finding and purchasing Craftsman garage door opener parts are important steps in troubleshooting. Let’s take a closer look at each of these areas.
Understanding The Different Parts And Components Of Craftsman Garage Door Openers
Before you start troubleshooting your Craftsman garage door opener, it’s essential to have a good understanding of its different parts and components. This knowledge will help you identify any issues that may arise. Here’s a quick overview:
| Garage Door Opener Parts | Gear Sprocket Kit | Door-open mechanism |
| Garage Door Opener Wall Control | Craftsman Premium Control Console | |
| Garage Door Opener Keypad | Craftsman Garage Door Opener Wireless Keypad |
Troubleshooting The Garage Door Opener Wall Control
If you’re experiencing issues with your Craftsman garage door opener’s wall control, there are a few steps you can take to troubleshoot the problem:
- Check for RF interference. Ensure there are no nearby devices causing radio frequency interference with your garage door opener.
- Inspect the batteries. Replace the batteries in the wall control if they are old or depleted.
- Examine the logic board. If the wall control is still not functioning properly, there may be a defective logic board that needs to be replaced.
Using A Keypad For Craftsman Garage Door Opener Troubleshooting
If you’re using a keypad with your Craftsman garage door opener and encountering issues, there are a few troubleshooting steps you can follow:
- Ensure the keypad is properly programmed and synced with your garage door opener.
- Check the batteries in the keypad and replace them if necessary.
- If the keypad is still not working, try resetting it by following the manufacturer’s instructions.
Finding And Purchasing Craftsman Garage Door Opener Parts
If you’ve identified a specific part that needs to be replaced in your Craftsman garage door opener, you’ll need to find and purchase the right part. Here are a few options:
- Visit the official Craftsman website and look for authorized dealers or parts suppliers.
- Search for Craftsman garage door opener parts on reputable online marketplaces.
- Contact local garage door repair shops or hardware stores that carry Craftsman products.
By following these troubleshooting steps and utilizing the additional resources available to you, you can ensure that your Craftsman garage door opener operates smoothly and efficiently.
Frequently Asked Questions
What Does 2 Blinks Mean On Craftsman Garage Door Opener?
If your Craftsman garage door opener blinks twice, it may mean that the wall control lock feature is enabled. Check the wall control for this setting and disable it if necessary.
What Does 5 Blinks Mean On Craftsman Garage Door Opener?
The 5 blinks on a Craftsman garage door opener indicate a problem with the safety sensors. These sensors may be blocked, misaligned, or have wiring issues. Check and resolve any issues with the sensors to fix the problem.
What Is Error Code 1 1 On Craftsman Garage Door Opener?
Error code 1 1 on a Craftsman garage door opener means there is an issue with the safety sensors. Check if the sensors are blocked, misaligned, or have wiring problems.
What Is Error Code 1 2 On Craftsman Garage Door Opener?
Error code 1 on the Craftsman garage door opener indicates an issue with the safety sensors. Check if they are blocked, misaligned, or have wiring problems.
Why Is My Craftsman Garage Door Opener Not Working?
Here are some possible reasons why your Craftsman garage door opener may not be working: power supply issues, faulty remote or door controls.
Conclusion
If you’re experiencing issues with your Craftsman Garage Door Opener, troubleshooting can help you identify and resolve the problem. Start by checking the wall control and RF interference, as well as the batteries and logic board. Additionally, make sure the safety sensors are aligned and free from any blockages.
By following these steps, you can fix common problems and get your garage door opener working smoothly again. Remember to consult the Craftsman Garage Door Opener manual for more specific instructions. Happy troubleshooting!
")


