A Dig Water Timer can make garden watering easy. But, issues can arise.
Understanding how to troubleshoot your Dig Water Timer can save you time and frustration. Often, the problems are simple and can be fixed with minimal effort. This guide will walk you through the most common issues and their solutions. Whether your timer isn’t turning on, not shutting off, or has programming issues, we have you covered.
By the end, you’ll be able to resolve most problems yourself and keep your garden healthy and green. Let’s dive into the common issues and how to fix them.
Introduction To Dig Water Timers
Dig Water Timers are essential tools for efficient garden watering. They help automate watering schedules, saving both time and water. This guide will help you understand Dig Water Timers and troubleshoot common issues.
What Is A Dig Water Timer?
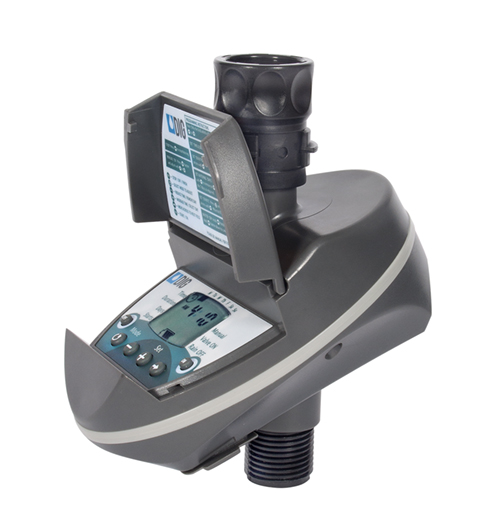
A Dig Water Timer is a device that attaches to your garden hose. It controls the timing and duration of water flow. You can set specific schedules to water your garden at optimal times.
These timers come with various features. Some have digital displays, while others use manual dials. They are easy to install and use. Dig Water Timers are designed to make garden care simple and efficient.
Importance Of Water Timers
Water timers play a crucial role in garden maintenance. They help conserve water by ensuring plants get the right amount of water. This prevents over-watering and under-watering.
Using water timers can also save you time. You don’t need to manually water your garden every day. Set the timer once, and it will take care of the rest.
- Saves Water: Prevents wastage by controlling water flow.
- Saves Time: Automates watering schedules.
- Healthier Plants: Ensures consistent watering.
In summary, Dig Water Timers are valuable for any gardener. They make watering more efficient and effective.
Dig Water Timer Troubleshooting For Common Problems

Experiencing issues with your Dig Water Timer can be frustrating. Understanding the common problems can help you fix them quickly. This guide will walk you through some of the typical issues you might face.
Dig Water Timer Not Turning On
If your timer is not turning on, there could be several reasons. Here are the most common causes:
- Dead batteries: Check and replace the batteries. Ensure they are properly inserted.
- Corroded terminals: Inspect the battery terminals for corrosion. Clean them with a soft cloth.
- Faulty timer: If the timer is old, it might be time for a replacement.
Regular maintenance can prevent these issues. Keep your timer in a dry, cool place.
Dig Water Timer Water Not Flowing
When the water is not flowing as it should, consider these potential problems:
- Clogged filter: Check the filter for debris. Clean or replace it if necessary.
- Low water pressure: Ensure that your water supply has enough pressure. Low pressure can prevent the timer from working.
- Damaged valve: Inspect the valve for any damage. A damaged valve will need replacement.
Keeping your water lines clean and free of debris will help maintain proper flow. Regularly inspect your timer system for any signs of wear and tear.
Dig Water Timer Battery Problems
Battery issues can disrupt the functionality of your Dig Water Timer. Addressing these issues promptly ensures your garden remains watered efficiently. Here, we will discuss how to check battery life and replace the batteries.
Checking Battery Life
First, inspect the battery compartment. Look for corrosion or leakage. Corroded terminals can affect battery performance. Use a multimeter to check the battery voltage. If the voltage is below the recommended level, it’s time to replace them. A low battery can cause the timer to malfunction.
Replacing The Batteries
To replace the batteries, open the battery compartment. Remove the old batteries carefully. Clean the terminals with a dry cloth. Insert new batteries, ensuring correct polarity. Close the compartment securely. Check the timer’s display to confirm it powers on. Test the timer by running a short cycle.
Dig Water Timer Programming Errors
Programming errors with your Dig Water Timer can lead to improper watering schedules. Understanding these issues and fixing them is crucial. This section will help you troubleshoot common programming errors.
Resetting The Timer
Sometimes, the best way to resolve programming errors is to reset the timer. This will clear any incorrect settings and allow you to start fresh.
- Locate the reset button on your timer.
- Press and hold the reset button for 5-10 seconds.
- Wait until the display resets and shows the default settings.
After resetting, you will need to reprogram your timer. Follow the steps below to ensure correct programming.
Correct Programming Steps
Proper programming is essential for the timer to work correctly. Follow these steps to avoid common errors:
- Set the current time: Use the clock button to set the current time. Ensure AM/PM settings are correct.
- Select watering days: Choose the days you want the system to water your plants.
- Set start times: Input the times you want the watering cycles to begin.
- Adjust watering duration: Set how long each watering cycle should last.
- Save your settings: Confirm and save all the programming settings.
Double-check each step to ensure all settings are correct. Incorrect settings can lead to improper watering schedules.
Dig Water Timer Valve And Solenoid Problems
Having issues with your Dig Water Timer? Often, the problem lies in the valve or solenoid. These components are crucial for proper functioning. Let’s explore how to troubleshoot these common issues.
Cleaning The Valve
The valve can become clogged with debris. This prevents water flow. Follow these steps to clean the valve:
- Turn off the water supply.
- Remove the valve cover.
- Check for debris or dirt.
- Use a soft brush to clean the inside.
- Rinse with clean water.
- Reassemble the valve cover.
Regular cleaning keeps the valve in good condition. It ensures smooth operation of your water timer.
Testing The Solenoid
The solenoid controls the opening and closing of the valve. If the solenoid is faulty, the valve will not work properly. Here is how to test the solenoid:
- Turn off the water and power supply.
- Locate the solenoid on the valve.
- Disconnect the wires.
- Use a multimeter to test resistance.
- Place the probes on the solenoid terminals.
- Check the multimeter reading.
Normal resistance ranges from 20 to 60 ohms. A reading outside this range means the solenoid is faulty. Replace it with a new one.
By addressing these valve and solenoid issues, you can ensure your Dig Water Timer works efficiently. Regular maintenance can prevent many problems. Keep your system running smoothly with these tips.
Dig Water Timer Water Pressure Problems
Water pressure problems can affect the performance of your Dig Water Timer. Low or high water pressure can lead to inefficient watering. Regular maintenance can help identify and fix these issues. This section covers how to adjust water pressure and inspect for leaks.
Adjusting Water Pressure
Start by checking the water pressure in your system. Use a pressure gauge to measure the current pressure. If the pressure is too high, it can damage the timer. If it’s too low, the water flow might be insufficient.
- Locate the pressure regulator on your water supply line.
- Turn the adjustment screw to increase or decrease the pressure.
- Check the pressure gauge again to ensure it’s within the recommended range (typically 40-60 psi).
Maintaining the right water pressure ensures optimal performance.
Inspecting For Leaks
Leaks can also cause water pressure problems. Inspecting for leaks helps maintain the timer’s efficiency.
- Turn off the water supply to the timer.
- Check all connections and hoses for any signs of water leakage.
- Look for wet spots or dripping water around the timer and hose fittings.
If you find a leak, tighten the fittings or replace damaged parts.
Use thread seal tape on connections to prevent future leaks.
Regularly checking your water pressure and inspecting for leaks can ensure your Dig Water Timer works efficiently. Proper maintenance can prolong the life of your timer and conserve water.
Seasonal Maintenance
Troubleshooting a Dig water timer ensures your irrigation system works efficiently. Regular checks can prevent common issues like leaks and timing errors. Simple fixes can save water and keep your garden healthy.
Maintaining your Dig Water Timer is essential for optimal performance. Each season requires specific steps to ensure your timer works efficiently. This section provides seasonal maintenance tips, focusing on winterizing and spring startup.
Winterizing The Timer
Before the first frost, remove your Dig Water Timer. Store it indoors to prevent freezing damage. Detach the timer from the faucet and remove batteries. Clean the unit with a damp cloth to remove dirt. Dry thoroughly to avoid moisture buildup. Inspect for any cracks or worn parts. Replace any damaged components.
Spring Startup Tips
After winter, prepare your Dig Water Timer for use. Reinstall fresh batteries in the timer. Attach the timer to the faucet securely. Run a manual test to check functionality. Ensure the timer settings are correct. Inspect hoses and connections for any leaks. Replace any damaged hoses or fittings. Clean the timer screen if necessary.
Following these seasonal maintenance steps will prolong the life of your Dig Water Timer. Regular care ensures efficient and reliable operation year-round.“
When To Seek Professional Help
Troubleshooting a Dig water timer can be straightforward. But there are times when you need professional help. Understanding when to call an expert can save time and money. Let’s explore some major issues and how to choose the right repair service.
Identifying Major Issues
Some problems are too complex for a DIY fix. Here are a few signs:
- Consistent Leaks: If your timer leaks even after tightening connections, it may need professional repair.
- Electrical Failures: If the display is blank or buttons are unresponsive, there could be an internal electrical issue.
- Valve Malfunctions: If water flow is irregular or won’t stop, the valve may be faulty.
- Programming Errors: If your timer doesn’t follow set schedules, it might need expert troubleshooting.
Choosing A Repair Service
Finding the right service can be daunting. Here are some tips:
- Research: Look for services with good reviews and ratings.
- Experience: Choose technicians experienced with Dig water timers.
- Certifications: Ensure they have relevant certifications.
- Warranty: Check if they offer a service warranty.
- Cost: Compare prices but don’t compromise on quality.
A well-maintained water timer ensures your garden thrives. Sometimes, professional help is the best solution.
Frequently Asked Questions
How Do I Reset My Dig Water Timer?
To reset, hold down the reset button for 5 seconds. It will restart.
Why Is My Dig Water Timer Not Working?
Check the batteries. Ensure they are fresh and correctly installed.
How Do I Program My Dig Water Timer?
Refer to the manual. Use the buttons to set start time, duration, and frequency.
My Dig Water Timer Is Leaking. What Should I Do?
Check for loose connections. Tighten fittings. Replace worn-out washers or seals if needed.
How Can I Check If My Dig Water Timer Is Working?
Turn on manually. Ensure water flows correctly. Check programmed schedules.
Conclusion
Troubleshooting your Dig Water Timer can be simple with the right steps. Regular maintenance helps prevent common issues. Always check batteries and connections first. Clean the timer regularly to avoid debris build-up. Follow the manual for specific problems. Seek professional help if needed.
Understanding your timer ensures efficient watering. This saves water and keeps your garden healthy. Happy gardening!
")